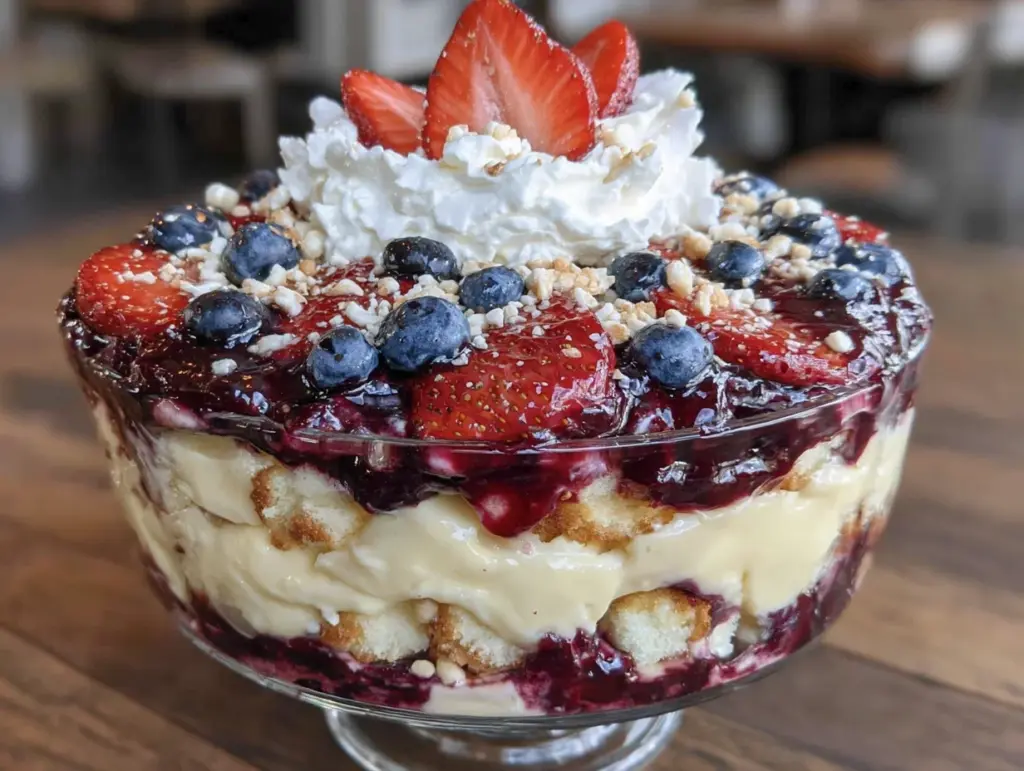
I figured a layered trifle was just a fancy way to show off — something that looked harder than it actually was. It took about fifteen minutes of staring at a beautiful, perfectly layered glass bowl in my own kitchen for that assumption to fall apart completely, but not for the reason you’d think. The thing is, I almost didn’t make it at all that afternoon. I had bought the berries, the cream, the pound cake, and then I just stood there, second-guessing myself. Why bother with something so showy for a Tuesday? But I had friends coming over for a casual barbecue, and I wanted something that felt like a celebration without spending the whole day in the kitchen. So I took a deep breath, grabbed the glass bowl, and just started layering.
Honestly, the first time I made this Perfect Red White and Blue Layered Berry Trifle, I was convinced I had messed it up. The cream was a little too loose, the berries were sliding around, and I thought for sure it would be a soupy mess. But I stuck it in the fridge anyway, hoping for the best. When I pulled it out a few hours later, it had set into this gorgeous, striated masterpiece that looked like it belonged on a magazine cover. And the taste? Let’s just say there were no leftovers, and my friend asked for the recipe before she even finished her plate. That’s when I realized this wasn’t just a pretty dessert — it was a genuinely foolproof one.
This Perfect Red White and Blue Layered Berry Trifle has become my go-to for every summer gathering, from the big Fourth of July bash to a quiet Sunday cookout. It’s the kind of dessert that makes people think you spent hours on it, when really, it’s just a matter of smart assembly and a little patience. There’s a quiet confidence that comes from knowing you can pull this together in under thirty minutes and still get all the “wows.” And honestly, that’s the best kind of recipe to have in your back pocket.
Why You’ll Love This Layered Berry Trifle
Let me tell you why this recipe has earned a permanent spot in my summer rotation. It’s not just about the stunning red, white, and blue stripes — though those are pretty great. It’s about how effortlessly it comes together, and how it always, always delivers.
- Quick & Easy: You can have this assembled in about 20 minutes flat. No baking, no complicated techniques, just simple layering. It’s perfect for those last-minute gatherings where you want to impress without the stress.
- Simple Ingredients: Everything on the list is something you can find at any grocery store. No fancy extracts or hard-to-find spices. You probably already have the vanilla and sugar in your pantry.
- Perfect for the 4th of July: This is the ultimate patriotic dessert. The red strawberries, white cream, and blueberries create a natural American flag vibe that’s perfect for your holiday table. Pair it with our stars and stripes sugar cookies for an extra festive touch.
- Crowd-Pleaser: I’ve served this to kids, adults, picky eaters, and dessert snobs. Every single person goes back for seconds. It’s light, refreshing, and not too heavy, which is exactly what you want after a big barbecue meal.
- Unbelievably Delicious: The combination of creamy vanilla pudding, tender pound cake, and juicy, tart berries is pure comfort food magic. It’s like summer in a glass.
What makes this version different from all the other trifle recipes out there is the technique. Instead of using a standard whipped cream that can deflate and get weepy, I use a stabilized vanilla pudding mixture that holds its shape for days. This means your trifle will look just as perfect on day two as it did when you first assembled it. It’s a small tweak that makes a huge difference, especially if you’re making it ahead of time for a party.
This isn’t just a good dessert — it’s the kind that makes you close your eyes after the first bite. The creamy layers melt into the sweet cake, and the burst of fresh berries cuts through it all. It’s comfort food reimagined for summer: lighter, faster, but with the same soul-soothing satisfaction. Perfect for impressing guests without stress, or turning a simple Tuesday dinner into something memorable.
What Ingredients You Will Need
This recipe uses simple, wholesome ingredients to deliver bold flavor and satisfying texture without any fuss. Most of these are pantry staples or easy to find at your local market.
- For the Pudding Layer:
- 2 (3.4 oz) boxes of instant vanilla pudding mix (I prefer Jell-O brand for the most consistent texture)
- 3 cups cold whole milk (do not use skim milk; the fat is crucial for a creamy, stable pudding)
- 1 teaspoon vanilla extract (adds a warm, rich depth)
- For the Whipped Cream:
- 2 cups heavy whipping cream, very cold (this is non-negotiable for stiff peaks)
- ¼ cup powdered sugar (dissolves more easily than granulated sugar)
- ½ teaspoon vanilla extract
- For the Cake Layer:
- 1 (16 oz) store-bought pound cake, cut into 1-inch cubes (Sara Lee or Entenmann’s work great, but a good bakery pound cake is even better)
- Optional: ¼ cup of berry juice or simple syrup for moistening the cake (if you want extra moisture)
- For the Berry Layer:
- 2 cups fresh strawberries, hulled and sliced (look for bright red, fragrant berries for the best flavor)
- 2 cups fresh blueberries (small, firm berries hold up best in the layers)
- 1 tablespoon granulated sugar (to macerate the berries and draw out their juices)
- 1 teaspoon lemon juice (brightens the berry flavor and helps balance the sweetness)
- For Garnish:
- Fresh mint sprigs
- Extra sliced strawberries and whole blueberries
- White chocolate shavings (optional, but adds a lovely touch)
Ingredient Tips: For the best texture, make sure your heavy cream is very cold. I like to pop it in the freezer for 10 minutes before whipping. For the berries, use the freshest you can find. If strawberries are out of season, you can use frozen, but thaw and drain them well first to avoid a watery trifle. For a dairy-free option, you can use full-fat canned coconut milk for the whipped cream and a dairy-free pudding mix, but the texture will be slightly different. I’ve tested this with oat milk, and honestly, it just doesn’t set up the same way.
Equipment Needed
You don’t need a ton of fancy gear for this recipe, which is part of why I love it. Here’s what you’ll need:
- Large Glass Trifle Bowl or a Clear Glass Dish: The star of the show. A 4-quart capacity bowl works perfectly. You want something clear so you can see those gorgeous layers. A large glass salad bowl works in a pinch.
- Electric Hand Mixer or Stand Mixer: You can whip the cream by hand with a whisk, but your arm will get a serious workout. I recommend an electric mixer for stable, stiff peaks in under 5 minutes.
- Medium Mixing Bowls: You’ll need separate bowls for the pudding, the whipped cream, and the berries. I like using glass or stainless steel bowls.
- Rubber Spatula: For folding the whipped cream into the pudding and for spreading the layers evenly. A good silicone spatula makes all the difference.
- Sharp Knife and Cutting Board: For slicing the strawberries and cubing the pound cake. A serrated knife works best for the cake to avoid squishing it.
- Measuring Cups and Spoons: Accuracy matters, especially for the milk and cream.
Budget-Friendly Alternatives: If you don’t have a trifle bowl, use a large glass measuring cup or even individual mason jars for single-serving trifles. They’re actually really cute and make for perfect portion control. I’ve also used a clear plastic punch bowl for a big party, and it worked great.
Preparation Method
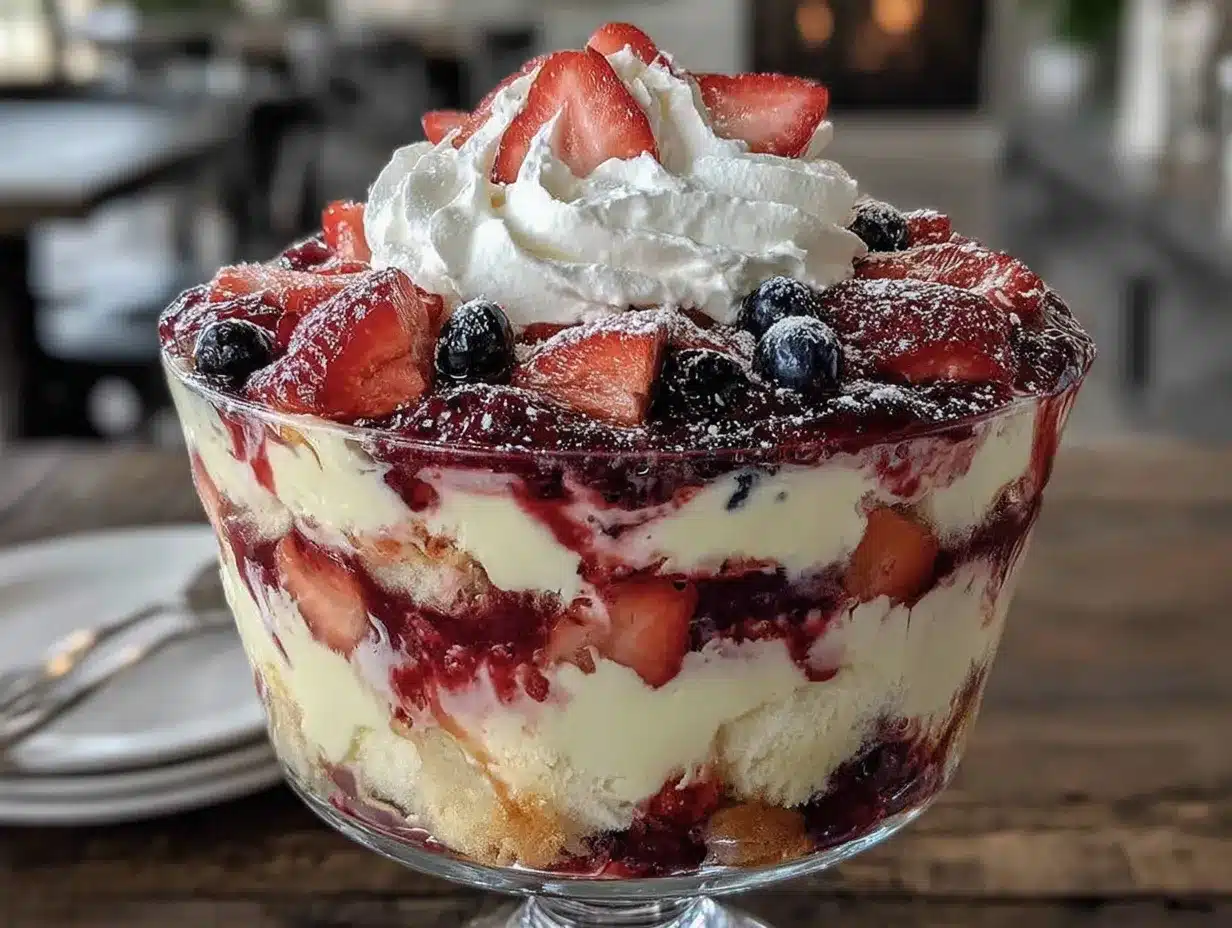
Alright, let’s get to the fun part. I’m going to walk you through this step-by-step, just like I’m standing right there in your kitchen with you.
- Prepare the Berries: Start by washing and drying your berries thoroughly. In a medium bowl, combine the sliced strawberries and blueberries. Sprinkle with 1 tablespoon of granulated sugar and 1 teaspoon of lemon juice. Gently toss to coat. Let them sit for about 10-15 minutes. This draws out their natural juices, creating a light syrup that will soak into the cake layers. Don’t skip this step — it’s what makes the fruit so flavorful.
- Make the Pudding Base: In a large mixing bowl, whisk together the two boxes of instant vanilla pudding mix and the 3 cups of cold whole milk. Whisk vigorously for about 2 minutes until the mixture thickens. It will be quite thick at this point. Set it aside for 5 minutes to fully set. This is your “white” layer, and it needs to be sturdy.
- Whip the Cream: In a separate, large chilled bowl, pour in the 2 cups of heavy whipping cream. Using an electric mixer on medium-high speed, beat the cream until soft peaks form. This usually takes about 3-4 minutes. Add the ¼ cup of powdered sugar and ½ teaspoon of vanilla extract. Continue beating until stiff peaks form. Be careful not to over-whip, or you’ll end up with butter. You want it to be thick and billowy.
- Fold it Together: Take about one-third of the whipped cream and gently fold it into the thickened pudding mixture using a rubber spatula. This lightens the pudding. Then, gently fold in the remaining whipped cream. Fold until just combined — you don’t want to deflate all that air. The mixture should be smooth, creamy, and incredibly luscious.
- Cube the Cake: If you haven’t already, cut the pound cake into 1-inch cubes. If you want a boozy kick, you can brush the cubes with a little berry juice or even a splash of prosecco. I sometimes use a bit of the juice from the macerated berries.
- Assemble the First Layer: Now for the fun part. Spoon about one-third of the creamy pudding mixture into the bottom of your trifle bowl. Spread it evenly. This is your base layer.
- Add the Cake Layer: Scatter half of the pound cake cubes evenly over the pudding layer. Press them down gently so they sit in the cream. This helps them absorb some moisture and stay soft.
- Add the Berry Layer: Spoon half of the macerated berries (with their juices) over the cake cubes. Try to distribute them evenly so every spoonful gets some fruit.
- Repeat the Layers: Add another third of the pudding mixture, spreading it carefully over the berries. Then add the remaining cake cubes, followed by the remaining berries.
- Top it Off: Finish with the last third of the creamy pudding mixture. Spread it all the way to the edges of the bowl. This creates a beautiful, clean white top that contrasts with the colorful layers below.
- Chill: This is the most important step. Cover the trifle tightly with plastic wrap and refrigerate for at least 4 hours, but overnight is even better. The flavors meld together, the cake softens perfectly, and the layers set into a sliceable, scoopable masterpiece.
- Garnish and Serve: Just before serving, garnish the top with fresh mint sprigs, a few extra sliced strawberries, and a handful of whole blueberries. You can also sprinkle white chocolate shavings over the top for a little extra flair.
Sensory Cues: When you fold the cream into the pudding, it should look like soft, billowy clouds. When you press the cake cubes into the cream, they should feel slightly springy. And when you pull the finished trifle out of the fridge, the top should be smooth and set, not runny. If it jiggles slightly, it’s perfect.
Cooking Tips & Techniques
I’ve made this trifle more times than I can count, and I’ve learned a few things the hard way. Here are my best tips to make sure yours turns out perfectly every time.
Don’t Skip the Maceration: I know it’s tempting to just toss the berries in as-is, but macerating them with sugar and lemon juice is a game-changer. It creates a natural syrup that soaks into the cake and keeps everything moist. Without it, your trifle can be a little dry and the berries can be bland. Trust me on this one.
Use Cold Ingredients: For the whipped cream to reach stiff peaks, everything needs to be cold. I chill my bowl and beaters in the freezer for about 10 minutes before I start. It makes a noticeable difference. If your cream is even slightly warm, it won’t whip up properly.
Patience is Key: The hardest part of this recipe is waiting for it to chill. I once tried to serve it after only an hour, and it was a soupy, layered mess. The cake hadn’t absorbed any moisture, and the cream was too loose. Give it at least 4 hours, but overnight is truly the sweet spot. The flavors meld together in a way that’s just magical.
Layer Evenly: Take your time when spreading each layer. Use the back of a spoon or a small offset spatula to spread the cream to the edges. This ensures that every spoonful has a perfect cross-section of all the layers. It’s a small detail, but it makes a big visual impact.
Avoid Over-Mixing: When you fold the whipped cream into the pudding, use a gentle hand. Over-mixing will deflate the cream and make your trifle dense instead of light and airy. Fold just until you see no more streaks of white.
My Biggest Failure: I once tried to use a low-fat whipped topping to save calories, and it was a disaster. It completely deflated overnight, and the next day, the trifle looked like a sad, watery soup. Stick with real heavy cream. It’s worth every calorie.
Variations & Adaptations
This recipe is incredibly forgiving and adaptable. Here are some of my favorite ways to switch it up.
- Berry Swap: Not a fan of strawberries? Use raspberries or blackberries instead. For a mixed berry version, use a combination of all three. Just keep the red, white, and blue theme in mind for the 4th of July.
- Citrus Twist: Add a teaspoon of lemon or orange zest to the pudding mixture for a bright, citrusy kick. It pairs beautifully with the berries and cuts through the richness of the cream.
- Boozy Version: For an adults-only dessert, brush the pound cake cubes with a little limoncello, prosecco, or even a berry liqueur before layering. It adds a sophisticated depth of flavor.
- Gluten-Free Option: Use a gluten-free pound cake or even gluten-free angel food cake. The texture will be a little different, but it works beautifully. I’ve tested this with a store-bought gluten-free vanilla cake, and it was a hit.
- Vegan/Dairy-Free: Use a high-quality vegan pound cake, a dairy-free vanilla pudding mix made with coconut milk, and a full-fat canned coconut cream for the whipped topping. The coconut flavor adds a lovely tropical note that pairs well with the berries.
- Individual Servings: Instead of a large trifle bowl, layer everything into small mason jars or clear plastic cups. These are perfect for parties and barbecues — everyone gets their own little piece of the masterpiece. Plus, they’re easier to serve and transport.
I personally love making a champagne berry trifle by brushing the cake with prosecco and adding a splash to the berry maceration. It’s a little extra, but it’s perfect for a New Year’s Eve party or a bridal shower.
Serving & Storage Suggestions
This trifle is best served cold, straight from the fridge. The contrast between the cool, creamy layers and the soft, soaked cake is pure perfection.
Serving: Use a large spoon or a small ladle to scoop out generous portions. Make sure you get all the way to the bottom of the bowl so each serving has a bit of every layer. I like to garnish each plate with a fresh mint sprig and a few extra berries for a pop of color.
What to Serve With It: This trifle is a showstopper on its own, but it pairs beautifully with a scoop of vanilla ice cream or a dollop of extra whipped cream. For a complete 4th of July spread, serve it alongside our American flag fruit kabobs and some grilled corn on the cob with chili lime butter for a balanced, festive meal.
Storage: Cover the trifle tightly with plastic wrap and store it in the refrigerator. It will keep well for up to 3 days. In fact, the flavors actually get better on day two as the cake absorbs more of the berry juices and cream. Just be aware that the berries on top may start to weep a little after 24 hours, so it’s best to add the final garnish just before serving.
Freezing: I don’t recommend freezing this trifle. The dairy-based cream can separate and become grainy when thawed, and the texture of the cake will be compromised. If you need to make it ahead, assemble it up to 24 hours in advance and keep it chilled.
Reheating: This is a cold dessert, so no reheating is needed. Just pull it out of the fridge about 10 minutes before serving to take the chill off slightly.
Nutritional Information & Benefits
While this is definitely a treat, it does have some redeeming qualities. Here’s a rough estimate per serving (based on 12 servings):
| Nutrient | Amount per Serving |
|---|---|
| Calories | 380 |
| Total Fat | 22g |
| Saturated Fat | 13g |
| Carbohydrates | 42g |
| Sugar | 28g |
| Protein | 5g |
| Fiber | 2g |
| Vitamin C | 35% DV |
Health Benefits: The fresh berries are the star here. Strawberries and blueberries are packed with antioxidants, vitamin C, and fiber. They’re great for your immune system and skin health. The milk and cream provide calcium and protein, which are important for bone health. Of course, this is still a dessert, so enjoy it in moderation. But I feel a little better knowing there’s some fruit in there!
Dietary Considerations: This recipe contains dairy and gluten (from the pound cake). It can be made gluten-free and dairy-free with the substitutions mentioned above. It’s also vegetarian-friendly. If you’re watching your sugar intake, you can use a sugar-free pudding mix and reduce the sugar in the berries, but the texture will be slightly different.
Conclusion
This Perfect Red White and Blue Layered Berry Trifle is more than just a dessert — it’s a centerpiece, a conversation starter, and a memory-maker. It’s the kind of recipe that makes you look like a rockstar without any of the stress. Whether you’re celebrating Independence Day, a summer birthday, or just a beautiful Tuesday, this trifle delivers every single time.
I love this recipe because it’s so forgiving. You can swap out fruits, change the cake, or even use a different pudding flavor, and it will still be gorgeous and delicious. It’s a canvas for your creativity. So don’t be afraid to make it your own. Add a little extra lemon zest. Use angel food cake instead of pound cake. Go wild with the garnishes.
I’d love to hear how yours turns out! Did you try a fun variation? Did you serve it at a big party? Drop a comment below and let me know. And if you loved this recipe, please share it with your friends and family. Happy cooking, and happy celebrating!
Frequently Asked Questions
Can I make this trifle a day ahead?
Absolutely! In fact, I recommend it. Making it a day ahead allows the flavors to meld together beautifully. Just wait to add the final garnish until right before serving to keep it looking fresh and vibrant.
Can I use frozen berries instead of fresh?
Yes, you can, but you’ll need to thaw and drain them thoroughly first. Frozen berries release a lot of water when they thaw, which can make your trifle watery if you don’t drain them well. I also recommend macerating them with a little extra sugar to help draw out the excess liquid.
What if I don’t have a trifle bowl?
No problem! You can use any large, clear glass bowl or even a 9×13-inch baking dish. For individual servings, layer everything into mason jars or small glasses. They’re actually really charming and perfect for parties.
How long will this trifle last in the fridge?
It will keep well for up to 3 days when tightly covered. The texture is best on days one and two. After that, the cake can become a bit too soft, and the berries may start to break down.
Can I use a different type of cake?
Absolutely! Angel food cake, sponge cake, ladyfingers, or even leftover vanilla cake work beautifully. Each will give a slightly different texture. Angel food cake will be lighter and airier, while pound cake gives a denser, more decadent result.
Pin This Recipe!
Perfect Red White and Blue Layered Berry Trifle: Easy 4th of July Dessert

This stunning layered berry trifle is the ultimate patriotic dessert, featuring fresh strawberries, blueberries, creamy vanilla pudding, and tender pound cake. It’s quick to assemble, foolproof, and perfect for summer gatherings.
- Prep Time: 20 minutes
- Cook Time: 0 minutes
- Total Time: 4 hours 20 minutes (includes chilling time)
- Yield: 12 servings 1x
- Category: Dessert
- Cuisine: American
Ingredients
- 2 (3.4 oz) boxes instant vanilla pudding mix
- 3 cups cold whole milk
- 1 teaspoon vanilla extract
- 2 cups heavy whipping cream, very cold
- 1/4 cup powdered sugar
- 1/2 teaspoon vanilla extract
- 1 (16 oz) store-bought pound cake, cut into 1-inch cubes
- 2 cups fresh strawberries, hulled and sliced
- 2 cups fresh blueberries
- 1 tablespoon granulated sugar
- 1 teaspoon lemon juice
- Fresh mint sprigs for garnish
- Extra sliced strawberries and whole blueberries for garnish
- White chocolate shavings (optional)
Instructions
- Prepare the berries: Wash and dry berries thoroughly. In a medium bowl, combine sliced strawberries and blueberries. Sprinkle with 1 tablespoon granulated sugar and 1 teaspoon lemon juice. Gently toss to coat. Let sit for 10-15 minutes to macerate.
- Make the pudding base: In a large mixing bowl, whisk together the two boxes of instant vanilla pudding mix and 3 cups cold whole milk. Whisk vigorously for about 2 minutes until thickened. Set aside for 5 minutes to fully set.
- Whip the cream: In a separate large chilled bowl, pour in 2 cups heavy whipping cream. Using an electric mixer on medium-high speed, beat until soft peaks form (about 3-4 minutes). Add 1/4 cup powdered sugar and 1/2 teaspoon vanilla extract. Continue beating until stiff peaks form.
- Fold it together: Take about one-third of the whipped cream and gently fold it into the thickened pudding mixture using a rubber spatula. Then gently fold in the remaining whipped cream until just combined.
- Cube the cake: Cut the pound cake into 1-inch cubes if not already done.
- Assemble the first layer: Spoon about one-third of the creamy pudding mixture into the bottom of a trifle bowl. Spread evenly.
- Add the cake layer: Scatter half of the pound cake cubes evenly over the pudding layer. Press down gently.
- Add the berry layer: Spoon half of the macerated berries (with their juices) over the cake cubes.
- Repeat the layers: Add another third of the pudding mixture, then the remaining cake cubes, then the remaining berries.
- Top it off: Finish with the last third of the creamy pudding mixture. Spread to the edges of the bowl.
- Chill: Cover tightly with plastic wrap and refrigerate for at least 4 hours, preferably overnight.
- Garnish and serve: Just before serving, garnish with fresh mint sprigs, extra sliced strawberries, whole blueberries, and white chocolate shavings if desired.
Notes
For best results, use cold heavy cream and chill the bowl and beaters before whipping. Macerating the berries is essential for flavor and moisture. The trifle needs at least 4 hours to chill, but overnight is ideal. Avoid using low-fat whipped toppings as they may deflate. For a gluten-free version, use gluten-free pound cake. For a dairy-free version, use full-fat canned coconut milk for whipped cream and dairy-free pudding mix.
Nutrition
- Serving Size: 1 serving (1/12 of r
- Calories: 380
- Sugar: 28
- Fat: 22
- Saturated Fat: 13
- Carbohydrates: 42
- Fiber: 2
- Protein: 5
Keywords: berry trifle, 4th of July dessert, patriotic dessert, layered dessert, no-bake dessert, summer dessert, red white and blue dessert