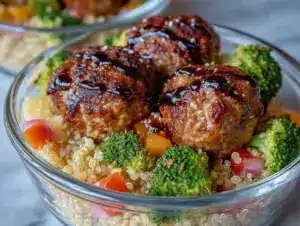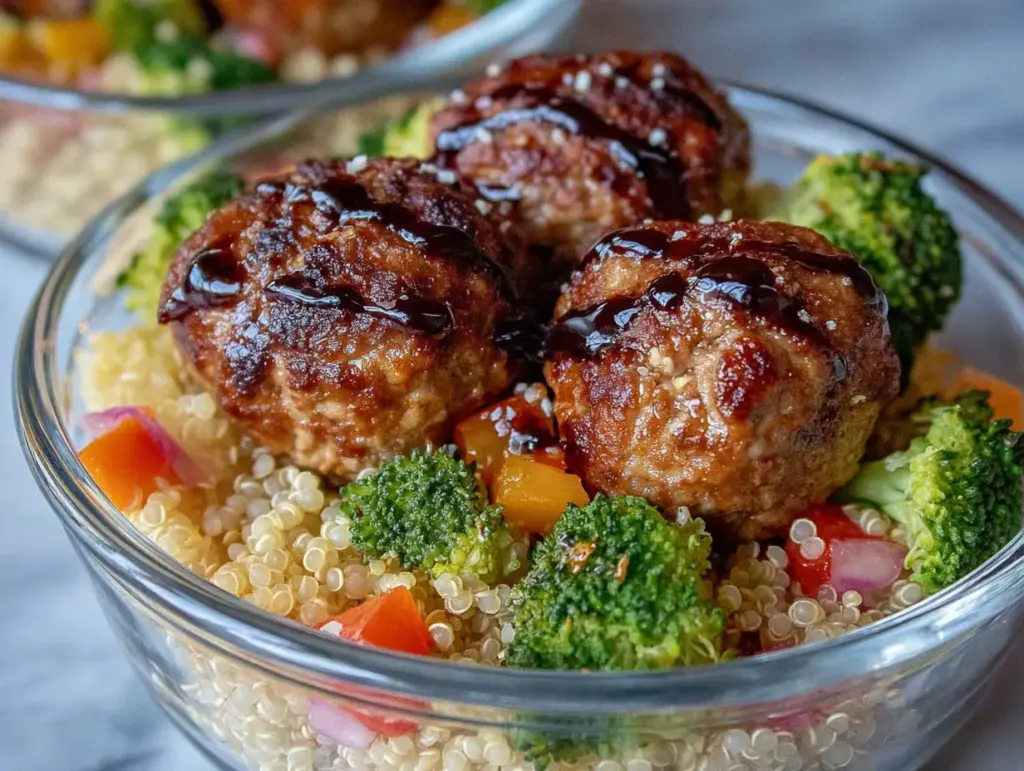
The last mini muffin tin of these meatball cups disappeared from the lunchbox before I’d even finished packing the fruit. My four-year-old, who has a PhD in hiding vegetables, had actually asked for more. That never happens. I mean, honestly, I’d made them out of desperation one Sunday night—ground turkey was on sale, I had a block of mozzarella staring at me from the fridge, and the lunchbox rotation was starting to feel like a culinary crime scene of sad sandwiches and half-eaten yogurt tubes.
I wasn’t trying to create a masterpiece. I was just trying to get through the week without a lunchbox mutiny. But something clicked when I pressed that seasoned turkey mixture into the greased mini muffin cups. The edges got all crispy and golden, the centers stayed tender and juicy, and the melted cheese on top formed this little cap of goodness that made them look like tiny, edible presents.
These Easy Mini Turkey Meatball Lunchbox Cups are the kind of recipe that feels like a secret weapon. They’re packed with protein, sneak in a little grated zucchini (which my kids still haven’t detected, and I’m taking that secret to my grave), and they freeze like a dream. You make a batch on Sunday, and suddenly weekday mornings feel a little less chaotic. It’s not about being a perfect parent—it’s about having something in the freezer that makes you look like you have your act together.
Why You’ll Love This Recipe
I’ve tested this recipe about six times to get the texture just right. The first batch was too dry (rookie mistake, I overbaked them), the second was too greasy (too much cheese, if that’s even possible), but the third? That was the sweet spot. These little cups have become a staple in our house, and here’s why you’ll love them too:
- Quick & Easy: From start to finish, you’re looking at about 30 minutes. That’s less time than it takes to argue with a toddler about wearing shoes.
- Simple Ingredients: Ground turkey, breadcrumbs, an egg, some cheese, and a few pantry spices. No fancy grocery store scavenger hunts.
- Perfect for Meal Prep: Make a double batch on Sunday, and you’ve got lunches sorted for the week. They’re also great for after-school snacks or a quick protein boost.
- Crowd-Pleaser: I brought these to a playdate, and the moms were asking for the recipe while the kids were asking for seconds. It’s a win-win.
- Unbelievably Delicious: The edges get this almost caramelized crust from the pan, while the inside stays moist and flavorful. It’s comfort food that feels light.
What makes this recipe different from the dozens of other meatball recipes out there? It’s the technique. Pressing the mixture into a mini muffin tin creates these perfectly portioned, grab-and-go cups that are way more fun than a regular meatball. Plus, the higher surface area means more of those crispy, golden-brown edges. And honestly, isn’t that the best part of any meatball?
This isn’t just another lunch idea. This is the recipe that will make your kid the envy of the lunch table. It’s the recipe that will save you on those mornings when you haven’t had coffee yet and your brain is still booting up. It’s reliable, it’s forgiving, and it tastes like you spent way more effort than you actually did.
What Ingredients You Will Need
This recipe uses simple, wholesome ingredients that come together to create something surprisingly flavorful. No weird stuff, no long list of things you’ll never use again. Just real food that works.
- Ground Turkey (1 lb / 450g): I prefer 93/7 lean ground turkey. It has enough fat to keep the meatballs moist without making them greasy. If you use 99% lean, the cups might turn out a bit dry, so add an extra tablespoon of olive oil.
- Breadcrumbs (½ cup / 60g): Plain panko breadcrumbs work best here. They give the meatballs a light, tender texture. Regular breadcrumbs will work too, but panko creates that slightly airier bite. I’ve used gluten-free panko in a pinch, and it worked great.
- Egg (1 large): The binder. It holds everything together so the cups don’t crumble when you pop them out of the tin. Let it come to room temperature for better mixing.
- Mozzarella Cheese (¾ cup / 85g, shredded): This is the secret to the melty, gooey top. I use whole-milk mozzarella for the best flavor and melt. Pre-shredded cheese works fine, but freshly shredded melts more smoothly because it doesn’t have the anti-caking coating.
- Parmesan Cheese (¼ cup / 25g, grated): Adds a salty, nutty depth that balances the mildness of the turkey. I recommend the real stuff in a wedge, but the green can will do in a pinch.
- Zucchini (½ cup / 75g, grated and squeezed dry): The stealth veggie. It adds moisture without any noticeable flavor. Make sure you squeeze out as much water as possible with a clean kitchen towel, or your meatballs will be soggy.
- Garlic (2 cloves, minced): Fresh garlic is non-negotiable here. The jarred stuff has a different, slightly metallic flavor. Trust me on this one.
- Dried Italian Seasoning (1 teaspoon): A blend of oregano, basil, rosemary, and thyme. It gives the meatballs that classic Italian-American flavor. If you don’t have it, use ½ teaspoon oregano and ½ teaspoon basil.
- Salt (½ teaspoon): I use fine sea salt. If you’re using kosher salt, you might need a bit more.
- Black Pepper (¼ teaspoon): Freshly ground, always. It makes a difference.
- Olive Oil (1 tablespoon): For greasing the muffin tin and adding a touch of richness. You could also use avocado oil or cooking spray.
- Marinara Sauce (for serving, optional): A little bowl of warm marinara for dipping takes these to another level. I love a good jarred Rao’s or a quick homemade version.
Ingredient Selection Tips: When buying ground turkey, look for packages that feel cold and have no tears. The meat should be a pale pink color with no gray spots. For the zucchini, choose ones that are firm and small to medium-sized—they have fewer seeds and more flesh. If you’re using frozen zucchini, thaw it completely and squeeze out every drop of water before adding it to the mixture.
Equipment Needed
You don’t need a professional kitchen to make these. Here’s what you’ll need:
- Mini Muffin Tin (24-cup): This is the star of the show. A standard 12-cup mini muffin tin will work; you’ll just need to bake in batches. I got mine for $12 at Target, and it’s one of the most-used pans in my kitchen. If you don’t have one, you can shape the mixture into regular meatballs and bake them on a sheet pan, but the “cup” shape is part of the magic.
- Large Mixing Bowl: For combining all the ingredients. Any bowl will do, but a wide one makes mixing easier.
- Box Grater or Food Processor: For grating the zucchini and cheese. A box grater is cheap and effective. If you’re using a food processor, use the shredding disc.
- Clean Kitchen Towel or Cheesecloth: For squeezing the water out of the grated zucchini. A nut milk bag works too if you have one.
- Measuring Cups and Spoons: For accuracy. I’ve eyeballed this recipe before, and the texture was off. Measure your ingredients, especially the breadcrumbs and cheese.
- Cookie Scoop (1 tablespoon size): This is optional, but it makes filling the muffin cups so much faster and less messy. I use a #60 scoop, which is about 1 tablespoon.
- Spatula or Spoon: For mixing and pressing the meat mixture into the cups.
Budget-Friendly Tip: If you don’t have a mini muffin tin, check your local thrift store. I’ve found perfectly good ones for $2. You can also use silicone baking cups in a regular muffin tin, though the cooking time will need to be adjusted (add about 5-7 minutes).
Preparation Method
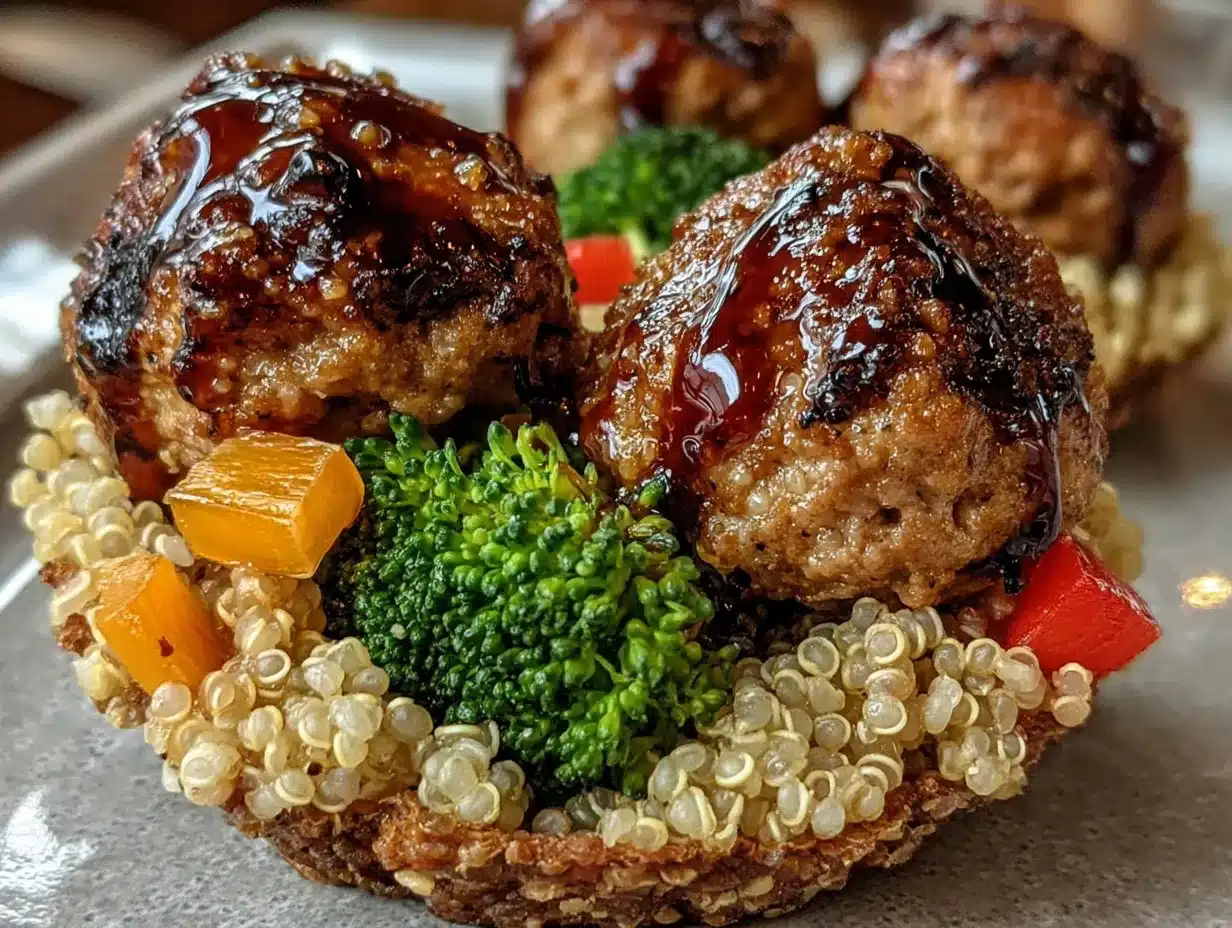
Alright, let’s get cooking. This is the fun part. The whole process takes about 30 minutes, and most of that is hands-off baking time.
- Preheat and Prep (5 minutes): Preheat your oven to 375°F (190°C). Lightly grease a 24-cup mini muffin tin with olive oil or cooking spray. Make sure you get into the crevices of each cup—this is crucial for easy release later. I learned this the hard way after prying my first batch out with a butter knife.
- Grate and Squeeze the Zucchini (5 minutes): Grate the zucchini using the large holes of a box grater. You should end up with about ½ cup of grated zucchini. Place the grated zucchini in the center of a clean kitchen towel, gather the corners, and twist firmly over the sink. Squeeze out as much liquid as you can. You’ll be shocked at how much water comes out. This step is non-negotiable—wet zucchini will steam the meatballs instead of letting them get crispy edges.
- Mix the Ingredients (5 minutes): In a large mixing bowl, combine the ground turkey, breadcrumbs, egg, shredded mozzarella (reserve about ¼ cup for the tops), grated Parmesan, the squeezed-dry zucchini, minced garlic, Italian seasoning, salt, and pepper. Use your hands to mix everything together. I know it’s a little messy, but your hands are the best tool for this job. A spoon won’t incorporate the ingredients as evenly. Mix just until everything is combined—overmixing will make the meatballs tough.
- Fill the Muffin Cups (5 minutes): Using a 1-tablespoon cookie scoop or a spoon, portion the meat mixture into the prepared mini muffin cups. Each cup should be filled to the top and slightly mounded. Don’t press it down yet. Once all cups are filled, use your fingers or the back of a spoon to gently press the mixture down and smooth the tops. This ensures they bake into neat, uniform cups.
- Top with Cheese (2 minutes): Sprinkle the reserved shredded mozzarella over the top of each meatball cup. Don’t be shy—a generous pinch per cup will create that irresistible golden cheese cap. If you want extra crispy edges, you can sprinkle a tiny bit of Parmesan on top of the mozzarella.
- Bake (18-20 minutes): Place the muffin tin on the middle rack of your preheated oven. Bake for 18-20 minutes, or until the internal temperature of the meatballs reaches 165°F (74°C) when tested with an instant-read thermometer. The edges should be deep golden brown and crispy, and the cheese on top should be bubbly and lightly browned. If you want extra crispy edges, you can turn on the broiler for the last 1-2 minutes, but watch them closely—they can burn fast.
- Cool and Release (5 minutes): Remove the muffin tin from the oven and let it cool in the pan for exactly 5 minutes. This is important—the meatballs need this time to set and firm up. After 5 minutes, run a small, thin spatula or a butter knife around the edges of each cup to loosen them. They should pop right out. If any stick, let them cool another minute or two.
- Serve or Store: Serve warm with a side of marinara sauce for dipping, or let them cool completely before packing for lunches or freezing.
Sensory Cues: When the meatballs are done, your kitchen will smell like a cozy Italian restaurant. The tops should be a deep, appetizing golden brown, and the edges will look almost caramelized. If you press one gently with your finger, it should feel firm but still have a little give. The cheese should be melted and slightly crispy at the edges.
Troubleshooting Tip: If your meatball cups are sticking to the pan, it’s usually because the pan wasn’t greased well enough, or you didn’t let them cool long enough. Next time, use a little more oil and be patient with the cooling step. If the bottoms are soggy, your zucchini probably had too much water—squeeze it harder next time.
Cooking Tips & Techniques
I’ve made this recipe enough times to know where things can go sideways. Here are some hard-earned lessons from my kitchen to yours.
Don’t Overmix the Meat: This is the number one mistake people make with meatballs. When you overmix ground meat, you develop the proteins too much, and the result is dense, tough meatballs. Mix just until you don’t see any more streaks of raw egg or breadcrumbs. A few lumps are totally fine.
Use a Cookie Scoop for Even Portions: I cannot stress this enough. Using a cookie scoop ensures every meatball cup is the same size, which means they’ll all cook evenly. If you’re scooping by eye, some will be bigger and some smaller, and you’ll end up with some overcooked and some undercooked. A #60 scoop (1 tablespoon) is perfect for mini muffin cups.
The Zucchini Squeeze is Everything: I know it’s a pain, but please don’t skip this step. Zucchini is mostly water, and if you don’t squeeze it out, that water will release into the meatballs as they bake, making them steam instead of brown. You want those crispy edges, right? Squeeze hard. You should get at least a tablespoon of liquid out of half a cup of grated zucchini.
Let Them Rest in the Pan: I ruined my first batch because I tried to pop them out of the pan immediately. They fell apart into a sad, crumbly mess. The meatballs need those 5 minutes in the pan to set and firm up. The residual heat continues to cook them slightly, and the fats and proteins solidify just enough to hold their shape. Patience, my friend.
Double Batch for the Freezer: This recipe freezes beautifully, so I always make a double batch. Bake them, let them cool completely, then arrange them in a single layer on a baking sheet and freeze for about an hour. Once they’re frozen solid, transfer them to a freezer-safe bag or container. They’ll keep for up to 3 months. To reheat, just pop them in a 350°F (175°C) oven for 10 minutes, or microwave for 30-45 seconds.
My Biggest Failure: The time I forgot to grease the muffin tin. I thought I could get away with a non-stick pan and no oil. I was wrong. I spent 20 minutes chiseling those poor meatballs out of the tin with a fork. They were delicious, but they looked like a crime scene. Grease the pan. Every. Single. Time.
Variations & Adaptations
This recipe is a great base, and you can tweak it in so many ways. Here are some of my favorite variations.
- Cheesy Herb Explosion: Swap the Italian seasoning for 1 tablespoon of fresh chopped basil and 1 tablespoon of fresh chopped parsley. Add ¼ cup of crumbled feta cheese along with the mozzarella. The feta adds a tangy, salty punch that’s incredible.
- Spicy Southwest Style: Replace the Italian seasoning with 1 teaspoon of chili powder, ½ teaspoon of cumin, and ¼ teaspoon of smoked paprika. Add ¼ cup of canned, drained, and rinsed black beans and 2 tablespoons of chopped cilantro. Serve with a dollop of sour cream or avocado crema. These are perfect for a taco-themed lunch.
- Hidden Veggie Boost: In addition to the zucchini, add ¼ cup of finely grated carrot and ¼ cup of finely chopped spinach (frozen and thawed, squeezed dry). The extra veggies add moisture and nutrients without changing the flavor. My kids have never noticed.
- Gluten-Free Option: Use gluten-free panko breadcrumbs or crushed pork rinds (for a low-carb version). The texture will be slightly different—pork rinds make them a bit denser—but they’re still delicious. I’ve also used almond flour, and it works, but the texture is a little more crumbly.
- Dairy-Free Adaptation: Replace the mozzarella and Parmesan with dairy-free shredded cheese (I like Violife or Miyoko’s) and nutritional yeast (for the Parmesan flavor). The texture will be slightly less gooey, but the flavor is still great. Just be aware that dairy-free cheese doesn’t melt the same way, so the tops might not be as golden.
- Air Fryer Method: If you don’t want to heat up your oven, you can make these in an air fryer. Preheat the air fryer to 375°F (190°C). Lightly grease the air fryer basket or use silicone mini muffin cups. Cook for 10-12 minutes, or until the internal temperature reaches 165°F (74°C). The edges get extra crispy in the air fryer—it’s honestly my preferred method now when I’m making a small batch.
Serving & Storage Suggestions
These little cups are versatile. Here’s how to serve and store them like a pro.
Serving Temperature: They’re best served warm, right out of the oven, when the cheese is still melty and the edges are at their crispiest. But honestly? They’re also delicious at room temperature, which makes them perfect for lunchboxes. Cold, they’re a bit firmer, but still tasty—almost like a meatball-flavored snack bar.
Presentation Ideas: For a fun lunchbox presentation, arrange 4-5 meatball cups in a bento box alongside some cherry tomatoes, cucumber slices, and a small container of marinara sauce for dipping. For a party appetizer, arrange them on a platter with toothpicks and a bowl of warm marinara. They’re also great on a bed of pasta with extra sauce for a quick dinner.
Complementary Dishes: These pair beautifully with a simple green salad, roasted vegetables, or a side of creamy loaded potato salad for a heartier meal. For a brunch spread, they’re unexpected but welcome alongside spinach and feta croissant bake. And if you’re serving them as an appetizer, a batch of crispy bacon-wrapped jalapeño poppers would make for an unforgettable game day spread.
Storage Instructions: Store leftover meatball cups in an airtight container in the refrigerator for up to 5 days. To freeze, arrange them in a single layer on a baking sheet and freeze until solid (about 1 hour), then transfer to a freezer-safe bag or container. They’ll keep for up to 3 months. Label the bag with the date—I’ve found forgotten bags of meatballs in my freezer before, and it’s always a sad guessing game.
Reheating Methods: For the best texture, reheat in a 350°F (175°C) oven for 8-10 minutes. This restores the crispy edges. In a pinch, the microwave works—30-45 seconds on high for a single serving. The edges won’t be as crispy, but they’ll still be delicious. You can also reheat them in an air fryer at 350°F (175°C) for 3-4 minutes.
How Flavors Develop: These meatball cups actually taste even better the next day. The flavors have time to meld together, and the texture firms up nicely. I often make them a day ahead of time on purpose. They’re one of those rare recipes that improve with a little rest.
Nutritional Information & Benefits
Per serving (about 4 meatball cups, based on a recipe yield of 24 cups):
- Calories: 220
- Protein: 24g
- Fat: 12g
- Saturated Fat: 5g
- Carbohydrates: 6g
- Fiber: 1g
- Sugar: 2g
- Sodium: 480mg
Health Benefits: Ground turkey is a lean source of high-quality protein, which is essential for muscle repair and keeping you full and satisfied. Zucchini is packed with vitamin C, vitamin A, and antioxidants, and it adds moisture without extra calories. Mozzarella provides calcium for strong bones, and the garlic offers anti-inflammatory properties. This recipe is naturally lower in carbs than traditional meatballs made with more breadcrumbs, and it’s a great option for those following a balanced, high-protein diet.
Dietary Considerations: This recipe can be made gluten-free and dairy-free with the substitutions listed above. It’s naturally nut-free (unless you use almond flour as a substitute). For a lower-sodium version, reduce the salt to ¼ teaspoon and use low-sodium cheese. Always check your ingredient labels for hidden allergens.
Personal Wellness Perspective: I love that this recipe lets me feel good about what I’m feeding my family. It’s not a “health food” that tastes like cardboard—it’s real, satisfying food that happens to be packed with good stuff. For me, that’s the sweet spot. Food should nourish you and make you happy, and these meatball cups do both.
Conclusion
These Easy Mini Turkey Meatball Lunchbox Cups are proof that you don’t need complicated techniques or fancy ingredients to make something genuinely good. They’re simple, they’re forgiving, and they’ve saved me on more chaotic weekday mornings than I can count. The first time I made them, I was just trying to use up ground turkey. Now, I make them on purpose, and I always double the batch.
What I love most about this recipe is how adaptable it is. You can change up the herbs, swap the cheese, or sneak in extra veggies, and it still works. It’s a recipe that grows with you and your family. My kids are older now than when I first started making these, and they still ask for them in their lunchboxes. That’s a win in my book.
I’d love to hear how these turn out for you. Did you try a variation? Did your kids love them? Did you find a new favorite dipping sauce? Drop a comment below and let me know. And if you make a batch, tag me on social media—I love seeing your creations. Happy cooking, friends. You’ve got this.
Frequently Asked Questions (FAQs)
Can I use ground chicken instead of turkey?
Absolutely. Ground chicken has a very similar fat content and texture, so it’s a perfect 1:1 swap. Just make sure you’re using ground chicken thigh or a mix of breast and thigh for the best moisture. Ground chicken breast alone can be a bit dry.
How do I prevent the meatball cups from sticking to the pan?
Grease the pan well with olive oil or cooking spray, making sure to get into the crevices of each cup. Let the meatballs cool in the pan for exactly 5 minutes after baking—this allows them to set and release more easily. If they still stick, run a thin spatula around the edges gently.
Can I make these ahead of time and freeze them?
Yes, and I highly recommend it. Bake the meatball cups, let them cool completely, then freeze them in a single layer on a baking sheet. Once frozen, transfer them to a freezer-safe bag or container. They’ll keep for up to 3 months. Reheat directly from frozen in a 350°F (175°C) oven for 10-12 minutes.
What can I use instead of breadcrumbs?
You can use crushed pork rinds for a low-carb option, gluten-free panko for a GF version, or even rolled oats pulsed in a food processor. Each will change the texture slightly—pork rinds make them denser, oats make them a bit heartier—but they all work well as binders.
How do I know when the meatball cups are fully cooked?
The safest way is to use an instant-read thermometer. Insert it into the center of a meatball cup; it should read 165°F (74°C). If you don’t have a thermometer, look for visual cues: the edges should be deep golden brown and crispy, the cheese on top should be bubbly and lightly browned, and the meat should be firm to the touch with no pinkness in the center.
Pin This Recipe!
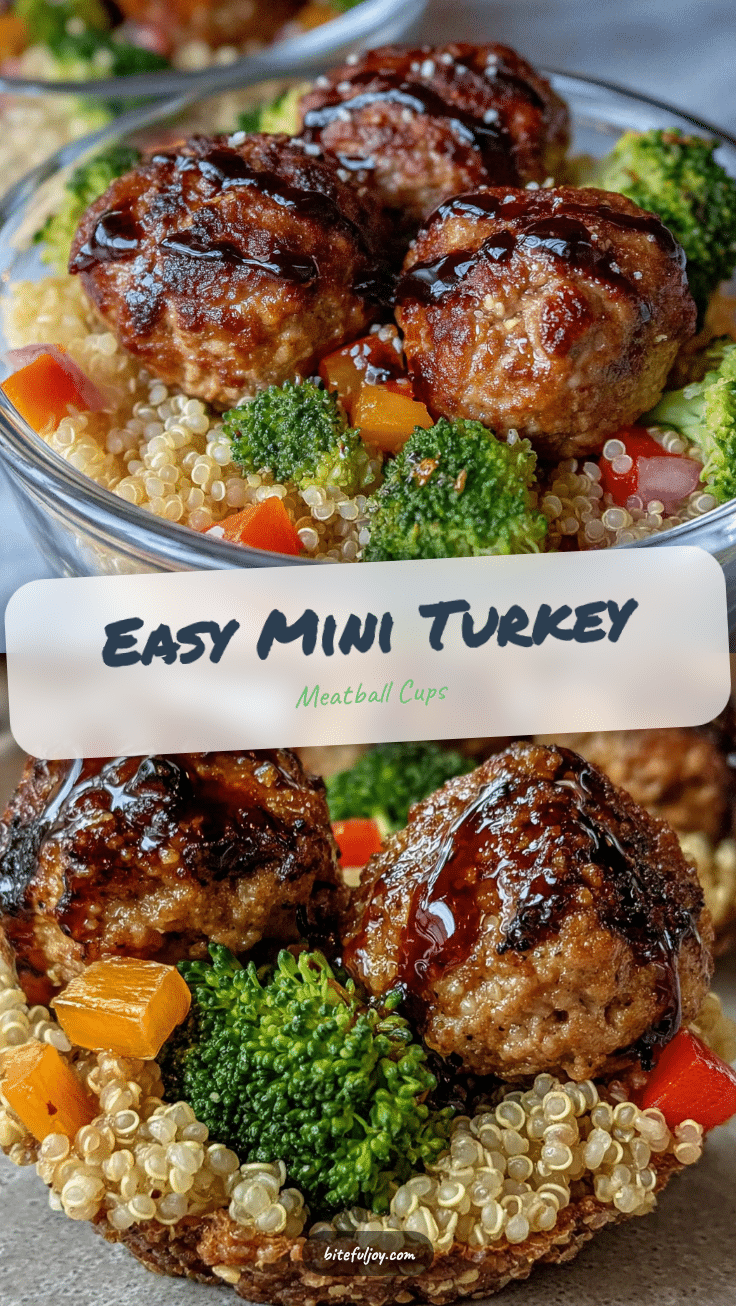
Easy Mini Turkey Meatball Lunchbox Cups

These Easy Mini Turkey Meatball Lunchbox Cups are packed with protein, sneak in a little grated zucchini, and freeze like a dream. They’re the perfect make-ahead lunch or snack that kids and adults love.
- Prep Time: 15 minutes
- Cook Time: 20 minutes
- Total Time: 35 minutes
- Yield: 24 cups (6 servings of 4 cups each) 1x
- Category: Appetizer / Lunch
- Cuisine: Italian-American
Ingredients
- 1 lb (450g) ground turkey (93/7 lean)
- ½ cup (60g) panko breadcrumbs
- 1 large egg, room temperature
- ¾ cup (85g) shredded mozzarella cheese, divided
- ¼ cup (25g) grated Parmesan cheese
- ½ cup (75g) grated zucchini, squeezed dry
- 2 cloves garlic, minced
- 1 teaspoon dried Italian seasoning
- ½ teaspoon fine sea salt
- ¼ teaspoon freshly ground black pepper
- 1 tablespoon olive oil (for greasing)
- Marinara sauce for serving (optional)
Instructions
- Preheat oven to 375°F (190°C). Lightly grease a 24-cup mini muffin tin with olive oil or cooking spray, making sure to get into the crevices.
- Grate the zucchini using the large holes of a box grater. Place the grated zucchini in a clean kitchen towel, gather the corners, and twist firmly over the sink to squeeze out as much liquid as possible.
- In a large mixing bowl, combine the ground turkey, breadcrumbs, egg, ½ cup of the shredded mozzarella (reserve ¼ cup for tops), grated Parmesan, squeezed-dry zucchini, minced garlic, Italian seasoning, salt, and pepper. Use your hands to mix just until combined—do not overmix.
- Using a 1-tablespoon cookie scoop or spoon, portion the meat mixture into the prepared mini muffin cups, filling each to the top and slightly mounded. Gently press the mixture down and smooth the tops with your fingers or the back of a spoon.
- Sprinkle the reserved ¼ cup shredded mozzarella over the top of each meatball cup.
- Bake on the middle rack for 18-20 minutes, or until the internal temperature reaches 165°F (74°C) and the edges are deep golden brown and crispy. For extra crispy edges, broil for the last 1-2 minutes, watching closely.
- Remove from the oven and let cool in the pan for exactly 5 minutes. Run a small, thin spatula or butter knife around the edges of each cup to loosen, then pop them out.
- Serve warm with marinara sauce for dipping, or let cool completely before packing for lunches or freezing.
Notes
Don’t overmix the meat mixture to avoid tough meatballs. Squeeze the zucchini very dry to prevent soggy meatballs. Let the meatballs rest in the pan for 5 minutes after baking for easy release. This recipe freezes beautifully—make a double batch. For the air fryer, cook at 375°F (190°C) for 10-12 minutes.
Nutrition
- Serving Size: 4 meatball cups
- Calories: 220
- Sugar: 2
- Sodium: 480
- Fat: 12
- Saturated Fat: 5
- Carbohydrates: 6
- Fiber: 1
- Protein: 24
Keywords: mini turkey meatball cups, lunchbox meatballs, turkey meatball muffins, kid-friendly meatballs, meal prep meatballs, healthy lunch ideas, freezer-friendly meatballs