“Did you ever find yourself rummaging through your pantry after a long day, just hoping to whip up something sweet and simple? That was me last summer, when a sudden craving for beach vibes hit hard. The thing is, I wasn’t planning a beach party or anything – no sandy toes or salty air in sight. What I did have, though, was a box of sugar cookie mix and a handful of seashell-shaped cookie cutters I’d picked up on a whim during a vacation.
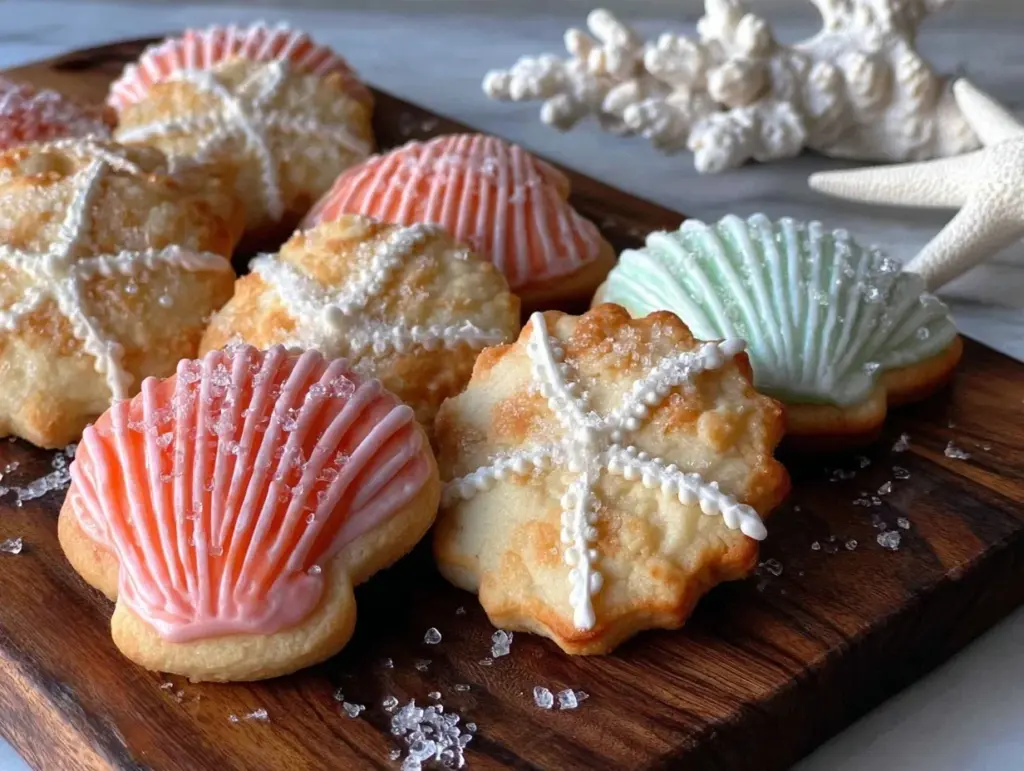
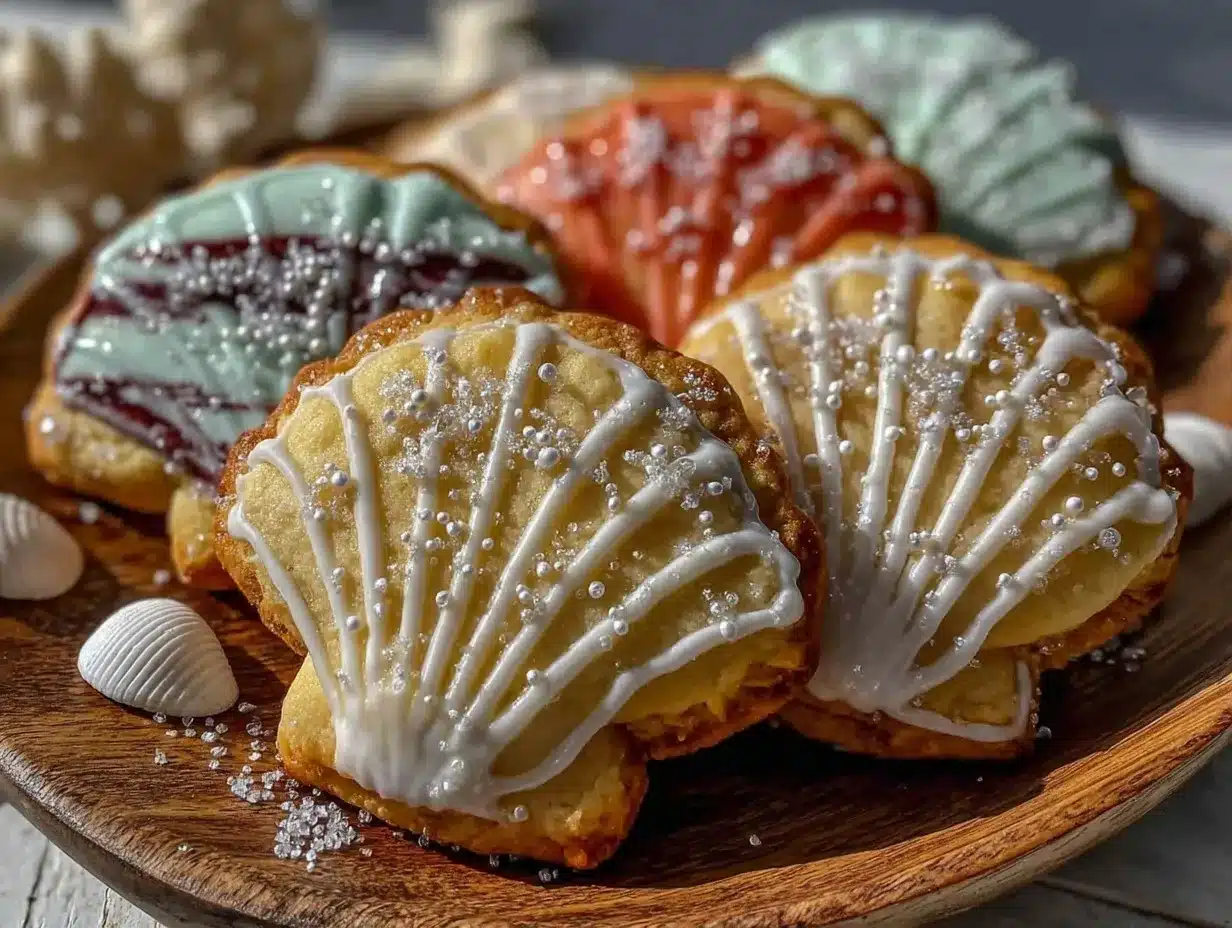
I was honestly skeptical at first. Sugar cookies can be tricky – too soft, too hard, or just bland. But something about shaping them like seashells felt fun, almost like catching a tiny piece of the coast indoors. I tossed together the dough, rolled it out, and as the cookies baked, the whole kitchen smelled like vanilla and buttery goodness. Decorating them with pastel icing and a sprinkle of edible shimmer? That was the easy part.
After the first bite, I realized these perfect decorated beach theme sugar cookies with seashells weren’t just cute; they were seriously delicious. It’s funny how a simple idea, born from a random pantry raid, turned into a recipe I kept coming back to. There’s something comforting about the sweet crunch paired with the nostalgic beach feel — even when you’re nowhere near the ocean. That quiet little treat, shaped like a tiny shell, somehow made the whole day feel lighter.
Why You’ll Love This Recipe
From my many kitchen tests (and a few happy accidents), these perfect decorated beach theme sugar cookies with seashells have earned their spot in my recipe box. Here’s why they stand out:
- Quick & Easy: The dough comes together in under 20 minutes, making it ideal for busy afternoons or last-minute celebrations.
- Simple Ingredients: No need for fancy or hard-to-find items – just pantry staples like flour, sugar, butter, and eggs.
- Perfect for Parties: Whether you’re hosting a summer bash or a kid’s birthday party, these cookies bring a playful, beachy vibe everyone loves.
- Crowd-Pleaser: I’ve shared these at family gatherings and even my picky niece asked for seconds, which says a lot!
- Unbelievably Delicious: The balance of buttery richness and light sweetness with that crisp edge is just right.
What sets this recipe apart? It’s the way the dough holds its shape perfectly for detailed seashell impressions, plus the icing technique that gives them that “just-picked-up-from-the-surf” shimmer. Honestly, I’ve tried other sugar cookie recipes before, but this one nails the texture and flavor every single time. It’s like comfort food with a creative twist — a sweet escape you can bite into whenever you want.
And if you’re wondering, these cookies pair beautifully with a cup of tea—something like the Earl Grey tea cake I baked last spring. It’s a little ritual I’ve come to enjoy, especially when the weather outside isn’t quite beach-worthy.
What Ingredients You Will Need
This recipe uses simple, wholesome ingredients to deliver bold flavor and satisfying texture without the fuss. Most are probably already in your pantry, which is a win when you’re baking on a whim.
- All-purpose flour (2 ½ cups / 315 g) – provides structure and holds the seashell shapes beautifully.
- Baking powder (1 tsp) – a small lift to keep cookies tender, not flat.
- Salt (½ tsp) – enhances all the flavors without overpowering.
- Unsalted butter, softened (1 cup / 226 g) – the backbone of that rich, buttery flavor. I like to use Land O’Lakes for consistency.
- Granulated sugar (1 cup / 200 g) – sweet but not cloying.
- Large eggs (2, room temperature) – bind everything and add moisture.
- Pure vanilla extract (2 tsp) – trust me, quality vanilla makes a huge difference here.
- Almond extract (optional, ½ tsp) – adds a subtle nutty note that’s lovely with the beach theme.
- Royal icing ingredients for decorating:
– Powdered sugar (4 cups / 480 g)
– Meringue powder (3 tbsp)
– Water (5-6 tbsp)
– Food coloring gels (pastel shades like seafoam green, sandy beige, light coral)
– Edible shimmer dust or pearl dust for that beachy sparkle
For variation, you can swap the all-purpose flour with a gluten-free blend or use dairy-free butter and egg replacers to fit dietary needs. Seasonal twists like adding tiny crushed freeze-dried berries to the icing can bring a fresh pop of flavor too.
Equipment Needed
- Mixing bowls: At least two – one for the dough, one for the icing.
- Electric mixer: Handheld or stand mixer to cream butter and sugar smoothly.
- Rolling pin: Essential for evenly rolling out the dough to about ¼ inch thickness.
- Seashell-shaped cookie cutters: These create the signature beachy shapes. If you don’t have them, a simple round cutter and a fork can mimic shell patterns.
- Baking sheets: Lined with parchment paper to prevent sticking.
- Cooling racks: For letting the cookies cool completely before decorating.
- Piping bags and tips: For detailed royal icing work. I find that a #2 round tip offers great control for outlining and filling.
- Small paintbrush: Useful for applying shimmer dust delicately.
You don’t need fancy or expensive tools here. I’ve used budget-friendly silicone mats instead of parchment paper with great results, and the cookie cutters from a local craft store worked just as well as pricier sets. Keeping your rolling pin and baking sheets clean and well-maintained will save you headaches down the line.
Preparation Method
- Mix dry ingredients: In a medium bowl, whisk together 2 ½ cups (315 g) all-purpose flour, 1 tsp baking powder, and ½ tsp salt. Set aside. This ensures even distribution and prevents lumps.
- Cream butter and sugar: Using an electric mixer, beat 1 cup (226 g) softened unsalted butter with 1 cup (200 g) granulated sugar on medium speed for 2-3 minutes until light and fluffy. This step is key for tender cookies.
- Add eggs and extracts: Beat in 2 large eggs, one at a time, then stir in 2 tsp pure vanilla extract and optional ½ tsp almond extract. The dough will start to come together.
- Combine wet and dry: Gradually add the flour mixture to the butter mixture, mixing on low until just incorporated. Avoid overmixing to keep cookies tender.
- Chill the dough: Wrap dough in plastic wrap and refrigerate for at least 1 hour. This firms up the dough for better cutting and shape retention.
- Preheat oven to 350°F (175°C): Line baking sheets with parchment paper or silicone mats.
- Roll and cut shapes: On a lightly floured surface, roll dough to about ¼ inch (6 mm) thickness. Use seashell cookie cutters to cut out shapes, then transfer carefully to baking sheets.
- Bake cookies: Bake for 9-11 minutes or until edges are just lightly golden. Watch closely to avoid overbaking (cookies should still be pale).
- Cool completely: Move cookies to wire racks to cool fully before decorating. Warm cookies can cause icing to melt.
- Prepare royal icing: Mix 4 cups (480 g) powdered sugar, 3 tbsp meringue powder, and 5-6 tbsp water until stiff peaks form. Divide and tint with food coloring gels to desired beachy hues.
- Decorate: Use piping bags to outline and flood cookies with icing. Add texture and shimmer dust with a small brush while icing is still wet for a glossy, sandy effect.
- Dry and serve: Let decorated cookies dry for at least 4 hours or overnight for best results.
Pro tip: If edges crack during rolling, chill the dough a bit more. And when piping icing, a steady hand helps but don’t stress—imperfections add charm!
Cooking Tips & Techniques
Getting that perfect sugar cookie texture and flawless decoration takes a few tricks I’ve picked up the hard way. First off, always soften your butter—not melt it! Melted butter turns dough greasy and hard to shape. I learned this after one sad batch that turned out more like flat crackers.
Chilling the dough is non-negotiable for crisp shapes. I’ve found 1-2 hours is ideal, but if you’re short on time, 30 minutes in the freezer works too. Just don’t skip it.
When rolling out, flour your surface lightly but avoid over-flouring the dough or cookies get dry. Using parchment paper or silicone mats underneath helps prevent sticking without extra flour.
For icing, consistency is everything. Thicker icing holds outlines; thinner floods the center smoothly. I keep a little water handy to adjust as needed. Also, work in small batches of icing so colors don’t dry out before use.
Lastly, patience is your friend. Let cookies dry fully before stacking or packaging. I once rushed this step, and my beautiful beach shells stuck together in a sad clump.
Variations & Adaptations
Want to mix things up? Here are a few ways I’ve played with this recipe:
- Gluten-Free Option: Swap all-purpose flour with a 1:1 gluten-free blend like Bob’s Red Mill. The texture changes slightly but still holds shape well.
- Flavor Twists: Add lemon zest to the dough for a bright citrus note that pairs beautifully with the beach theme.
- Vegan Version: Use dairy-free butter and substitute eggs with flax eggs (1 tbsp ground flaxseed + 3 tbsp water per egg). Slightly denser but still tasty.
- Alternative Shapes: While seashell cutters are charming, starfish or sand dollar shapes work great too. You could even create a whole ocean scene with different cutters.
- Decorating Styles: Try a watercolor effect on icing by blending colors with a damp brush for a more artistic look.
Personally, I once made these with a sprinkle of edible gold flakes instead of shimmer dust for a luxe beach party feel. It was a hit and made the cookies feel extra special.
Serving & Storage Suggestions
These sugar cookies are best served at room temperature, allowing the buttery flavor and delicate icing to shine. I like arranging them on a platter with some fresh fruit or alongside a refreshing iced tea for a casual summer gathering. They also pair nicely with lighter desserts like the creamy passion fruit mousse cups, creating a dessert spread that’s both elegant and fun.
To store, keep cookies in an airtight container at room temperature for up to 4 days. If you want them longer, freezing works well—just layer parchment paper between cookies and thaw at room temperature before serving.
Reheating isn’t necessary; these cookies hold their charm cold or warm. That said, a quick 10-second zap in the microwave can soften the edges for a freshly baked feel.
Over time, the icing hardens and gains a subtle crunch that contrasts nicely with the cookie’s tender crumb. Honestly, sometimes I prefer them a day or two old because the flavors meld together better.
Nutritional Information & Benefits
Each cookie (based on 24 servings) contains approximately 150 calories, 7 g fat, 20 g carbohydrates, and 2 g protein. While these aren’t health food, using real butter and fresh eggs gives a wholesome base compared to store-bought sweets loaded with preservatives.
Key ingredients like butter provide fat-soluble vitamins, and eggs add protein and essential nutrients. For those watching gluten or dairy, the suggested substitutions help fit dietary needs without sacrificing flavor.
From a wellness perspective, baking at home means you control the sugar levels and avoid artificial additives. Plus, the joy of sharing homemade treats brings its own kind of nourishment—comfort and connection.
Conclusion
The perfect decorated beach theme sugar cookies with seashells have become one of those recipes I come back to when I want a little sunshine in my kitchen. They’re charming, satisfying, and not overly complicated, which makes them a keeper in my book. Whether you’re planning a beach-themed party or just want a sweet reminder of summer, these cookies deliver.
Feel free to tweak the colors, flavors, or shapes to match your mood or occasion. For me, it’s the simple joy of holding a little sugar shell that makes all the difference. I hope these cookies bring a slice of that same joy to you and yours.
If you’ve experimented with decorating or tried a different twist, I’d love to hear about it in the comments. Sharing these sweet moments always makes baking even better.
FAQs
- Can I make the dough ahead of time?
Yes, the dough can be refrigerated up to 3 days or frozen for up to 1 month. Just thaw before rolling and cutting. - What if I don’t have seashell cookie cutters?
You can use simple round cutters and create shell patterns with a fork or knife, or try star-shaped cutters for a beachy vibe. - How do I fix runny royal icing?
Add more powdered sugar a tablespoon at a time until it thickens to the right consistency for piping or flooding. - Can I use regular food coloring instead of gel?
Gel colors are best because they don’t thin the icing. If using liquid, add sparingly to avoid softening the icing. - How long do decorated sugar cookies last?
Stored airtight at room temperature, they last about 4-5 days. Beyond that, they may dry out or the icing can become brittle.
Pin This Recipe!
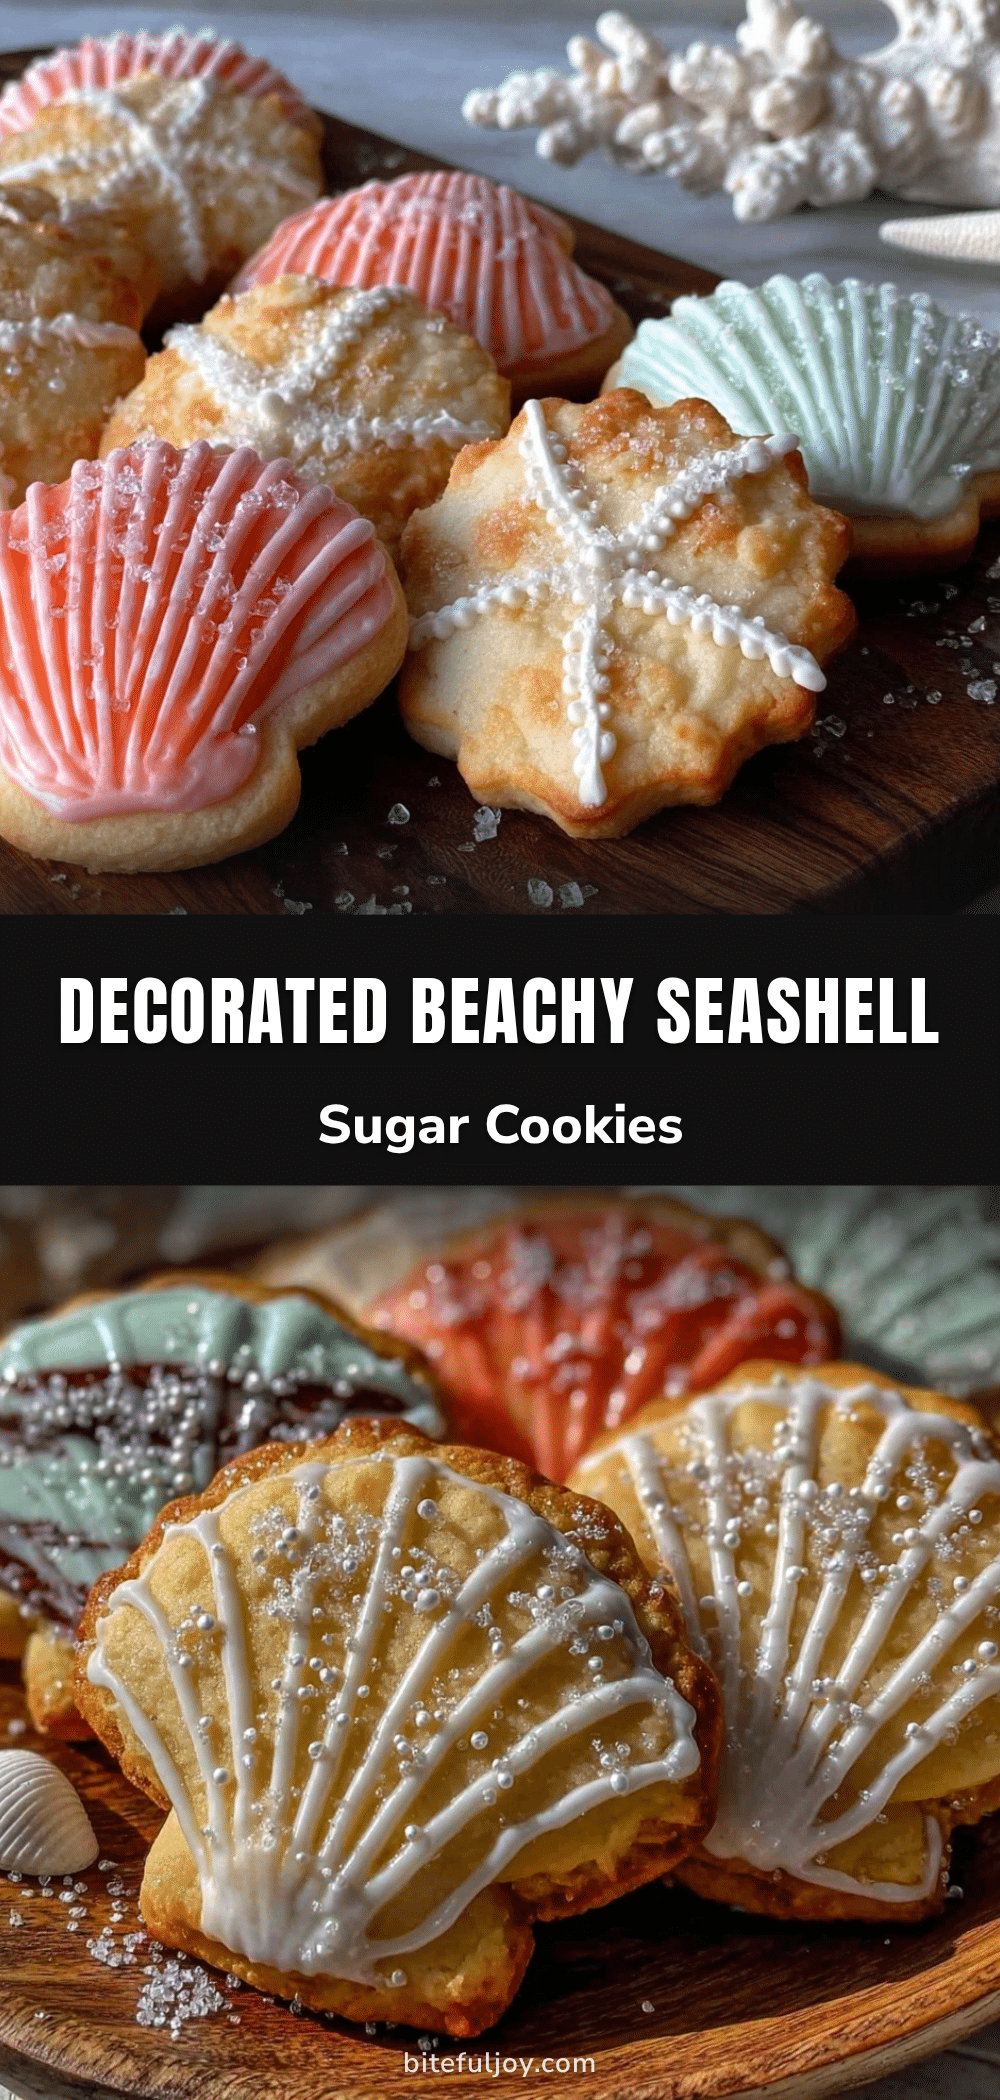
Perfect Decorated Beach Theme Sugar Cookies Easy Homemade Seashell Recipe

These charming beach-themed sugar cookies shaped like seashells are quick and easy to make, featuring a buttery, tender texture and decorated with pastel royal icing and edible shimmer for a delightful coastal vibe.
- Prep Time: 20 minutes
- Cook Time: 10 minutes
- Total Time: 1 hour 30 minutes
- Yield: 24 servings 1x
- Category: Dessert
- Cuisine: American
Ingredients
- 2 ½ cups (315 g) all-purpose flour
- 1 tsp baking powder
- ½ tsp salt
- 1 cup (226 g) unsalted butter, softened
- 1 cup (200 g) granulated sugar
- 2 large eggs, room temperature
- 2 tsp pure vanilla extract
- ½ tsp almond extract (optional)
- Royal icing ingredients:
- 4 cups (480 g) powdered sugar
- 3 tbsp meringue powder
- 5–6 tbsp water
- Food coloring gels (pastel shades like seafoam green, sandy beige, light coral)
- Edible shimmer dust or pearl dust
Instructions
- Mix dry ingredients: In a medium bowl, whisk together 2 ½ cups (315 g) all-purpose flour, 1 tsp baking powder, and ½ tsp salt. Set aside.
- Cream butter and sugar: Using an electric mixer, beat 1 cup (226 g) softened unsalted butter with 1 cup (200 g) granulated sugar on medium speed for 2-3 minutes until light and fluffy.
- Add eggs and extracts: Beat in 2 large eggs, one at a time, then stir in 2 tsp pure vanilla extract and optional ½ tsp almond extract.
- Combine wet and dry: Gradually add the flour mixture to the butter mixture, mixing on low until just incorporated. Avoid overmixing.
- Chill the dough: Wrap dough in plastic wrap and refrigerate for at least 1 hour.
- Preheat oven to 350°F (175°C). Line baking sheets with parchment paper or silicone mats.
- Roll and cut shapes: On a lightly floured surface, roll dough to about ¼ inch (6 mm) thickness. Use seashell cookie cutters to cut out shapes and transfer to baking sheets.
- Bake cookies: Bake for 9-11 minutes or until edges are just lightly golden. Watch closely to avoid overbaking.
- Cool completely: Move cookies to wire racks to cool fully before decorating.
- Prepare royal icing: Mix 4 cups (480 g) powdered sugar, 3 tbsp meringue powder, and 5-6 tbsp water until stiff peaks form. Divide and tint with food coloring gels.
- Decorate: Use piping bags to outline and flood cookies with icing. Add texture and shimmer dust with a small brush while icing is still wet.
- Dry and serve: Let decorated cookies dry for at least 4 hours or overnight for best results.
Notes
Always soften butter, not melt it. Chill dough for at least 1 hour for best shape retention. Use parchment paper or silicone mats to prevent sticking. Adjust royal icing consistency by adding powdered sugar or water as needed. Let decorated cookies dry fully before stacking or packaging.
Nutrition
- Serving Size: 1 cookie
- Calories: 150
- Fat: 7
- Carbohydrates: 20
- Protein: 2
Keywords: sugar cookies, beach theme cookies, seashell cookies, decorated cookies, royal icing, easy sugar cookies, homemade cookies, party cookies


