“Mom, can we decorate cookies again?” That simple question came just as I was wrapping up a hectic morning juggling work calls and breakfast chaos. Honestly, I wasn’t sure I had the energy for a full baking project, but I remembered the Easy Lunchbox Notes Cookie Decorating Kit for Kids tucked in the pantry. It wasn’t just about cookies; it was that little spark of joy that turned a rushed day upside down. The kids dove in with their usual enthusiastic mess—tiny fingers smearing colorful icing and sprinkles everywhere. What started as a quick distraction became this quiet moment of laughter, creativity, and surprise. Turns out, these kits aren’t just snacks; they’re little pockets of connection, a chance to sneak in some fun and sweetness during a busy day.
Every time I pull out this kit, I’m reminded how such a simple idea can brighten a lunchbox and a day. The best part? It’s easy to prep and keeps the kids excited about what’s waiting for them at school. If you’re looking for a way to make lunch a little more special without the fuss, this cookie decorating kit might just become your secret weapon. It’s not about perfect decorating—it’s about the smiles and stories that come with it. So, let’s get into why this Easy Lunchbox Notes Cookie Decorating Kit for Kids has stuck around in my kitchen and heart.
Why You’ll Love This Recipe
From my experience juggling picky eaters and busy schedules, this Easy Lunchbox Notes Cookie Decorating Kit for Kids is a winner for so many reasons. It’s not just a cookie; it’s a mini creative project that kids actually enjoy, and parents don’t dread prepping.
- Quick & Easy: Comes together in under 20 minutes, making it perfect for last-minute lunchbox ideas or spontaneous afternoon fun.
- Simple Ingredients: No need for fancy or hard-to-find items; everything is approachable and pantry-friendly.
- Perfect for School Lunches & Parties: Kids love the interactive element, and it’s great for birthday parties or casual get-togethers.
- Crowd-Pleaser: The combination of sweet, fun shapes and bright colors always gets rave reviews from kids and even adults sneaking a bite.
- Unbelievably Delicious: The cookies are soft with just the right amount of sweetness, and the decorating adds that extra magic touch.
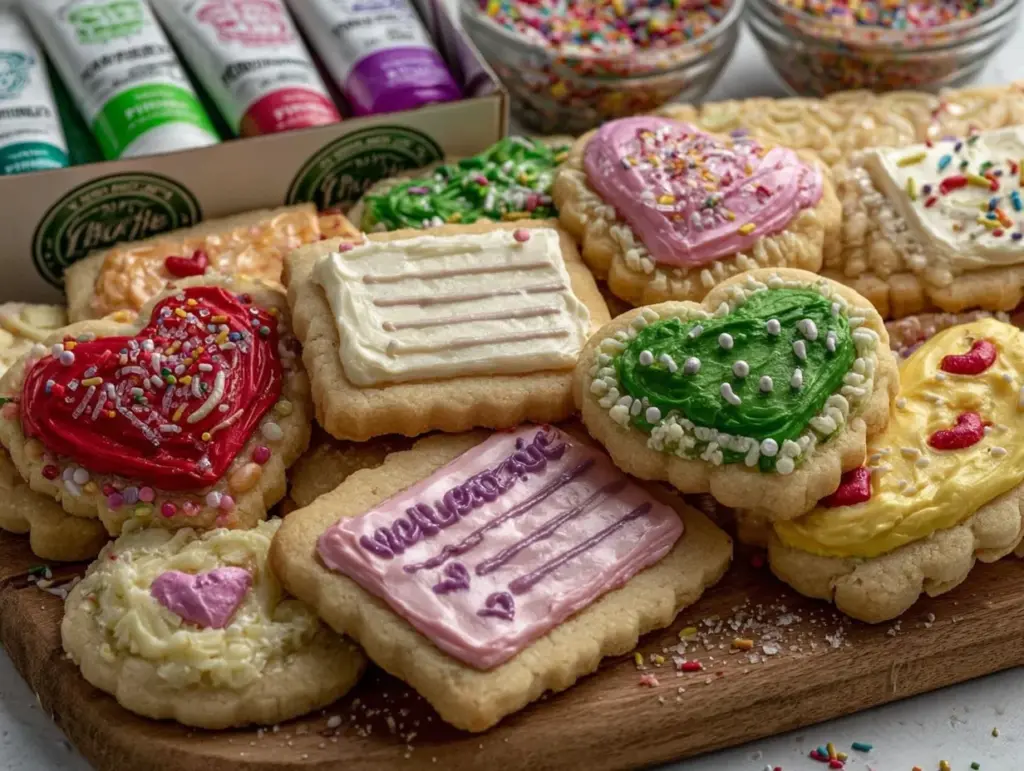
What really sets this decorating kit apart is the balance between ease and creativity. You’re not stuck with complicated piping or advanced baking skills—just the joy of personalizing cookies, which kids adore. I love how the notes and shapes add a thoughtful twist, turning a cookie into a little message packed with love. Plus, if you want a break from traditional lunchbox treats, this recipe is a fun way to mix things up. Honestly, it’s like the fluffy lemon blueberry scones of lunch snacks—comforting, familiar, but with a playful spin!
What Ingredients You Will Need
This recipe uses simple, wholesome ingredients to deliver a soft, flavorful cookie base that’s perfect for decorating. Most are pantry staples, and the decorating supplies are easy to customize or substitute based on what you have on hand.
- For the Cookies:
- All-purpose flour – 2 ½ cups (315 g)
- Baking powder – 1 teaspoon
- Salt – ¼ teaspoon
- Unsalted butter, softened – ¾ cup (170 g)
- Granulated sugar – 1 cup (200 g)
- Large egg – 1, room temperature
- Pure vanilla extract – 1 teaspoon
- Milk – 2 tablespoons (30 ml) (adds softness, use any milk variant)
- For Decorating:
- Store-bought royal icing or homemade icing (powdered sugar + meringue powder + water)
- Food coloring gels (various colors)
- Assorted sprinkles and edible decorations (stars, hearts, letters)
- Mini edible markers (optional, for writing little lunchbox notes)
For best texture, I recommend using a trusted butter brand like Kerrygold or Plugrá, which gives that rich flavor and smooth dough. If you want a gluten-free option, swap the all-purpose flour with a 1:1 gluten-free baking blend—just watch the dough, it might need a bit more milk to get the same softness. When it comes to colors, I personally like gel food colors for their vibrancy and ease of use—they don’t thin the icing out like liquid ones do.
Equipment Needed
- Mixing bowls – one large for dough and smaller ones for icing colors
- Electric mixer or stand mixer with paddle attachment (hand mixers work fine too)
- Measuring cups and spoons (accuracy matters for the best cookie texture)
- Rolling pin – a lightweight one is easier for little hands if kids help
- Cookie cutters – fun shapes like stars, hearts, or letters to make those lunchbox notes
- Baking sheets lined with parchment paper or silicone mats
- Spatula and bench scraper for handling dough
- Small piping bags or resealable plastic bags with a corner snipped off for decorating
If you don’t have cookie cutters, a simple glass rim or freehand shapes work just fine—kids love the imperfections anyway. I once used an old plastic lid as a makeshift cutter when I was in a pinch, and it added a quirky charm to the batch. For icing, if you don’t have piping bags, those resealable bags are a budget-friendly alternative that still lets the kids get creative without fuss.
Preparation Method
- Preheat your oven to 350°F (175°C) and line baking sheets with parchment paper or silicone mats. This sets you up for even baking and easy cleanup.
- Mix dry ingredients: In a medium bowl, whisk together 2 ½ cups (315 g) all-purpose flour, 1 teaspoon baking powder, and ¼ teaspoon salt. Set aside.
- Cream butter and sugar: Using an electric mixer, beat ¾ cup (170 g) softened unsalted butter and 1 cup (200 g) granulated sugar on medium speed until light and fluffy, about 3-4 minutes. This step is key for tender cookies.
- Add egg and vanilla: Beat in 1 large room-temperature egg and 1 teaspoon pure vanilla extract until fully incorporated.
- Combine wet and dry: Gradually add the flour mixture to the butter mixture, alternating with 2 tablespoons (30 ml) milk. Mix on low speed just until the dough comes together. Overmixing will make cookies tough.
- Chill the dough: Wrap the dough in plastic and refrigerate for at least 30 minutes. This helps keep the cookies from spreading too much while baking.
- Roll and cut shapes: On a lightly floured surface, roll the dough to about ¼ inch (6 mm) thickness. Use cookie cutters to cut out shapes and place them about 2 inches (5 cm) apart on the baking sheets.
- Bake: Bake in the preheated oven for 8-10 minutes or until edges are just beginning to turn golden. The centers should look set but slightly soft.
- Cool completely: Let cookies cool on baking sheets for 5 minutes, then transfer to wire racks to cool fully before decorating. Decorating warm cookies can cause icing to melt and run.
- Prepare icing: Divide royal icing into small bowls and tint each with different food coloring gels. Transfer to piping bags or resealable bags for decorating.
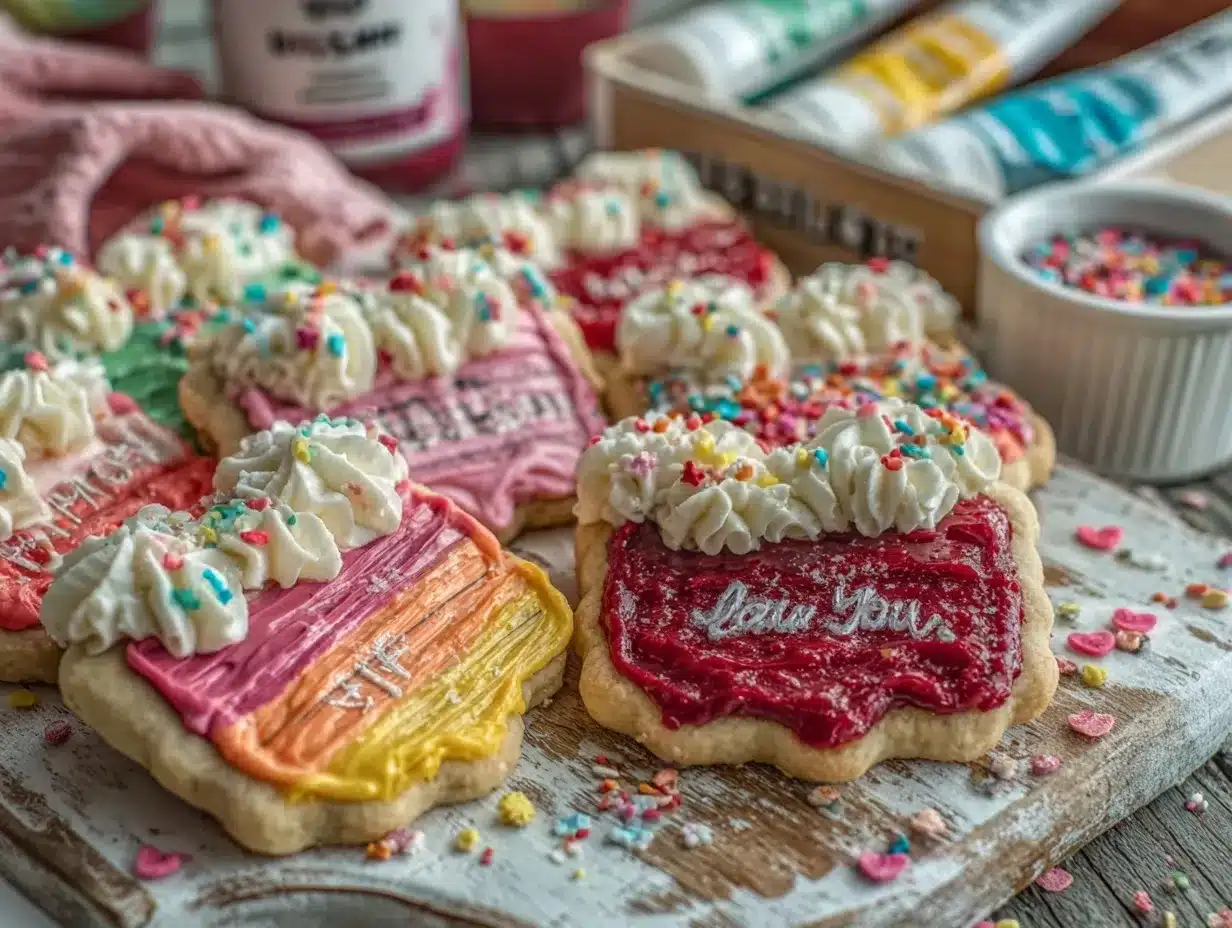
- Decorate: Let the kids go wild! Use piping techniques, sprinkles, and edible markers to add lunchbox notes, smiley faces, or silly shapes. Dry for at least an hour before packing.
Pro tip: If your dough feels sticky, sprinkle a little more flour but don’t overdo it. Also, rotating baking sheets halfway through baking helps cookies brown evenly. When decorating, start with outlining shapes and then flood the center for a smooth look. It’s easier than it sounds and fun to watch kids experiment.
Cooking Tips & Techniques
Making the Easy Lunchbox Notes Cookie Decorating Kit work smoothly comes down to a few simple but effective tips. First, chilling the dough is a game-changer. I learned the hard way that skipping this step results in cookies spreading into unrecognizable blobs. A quick chill firms the dough so your shapes come out crisp and fun.
When mixing, be gentle once you add the flour. Overmixing develops gluten and makes the cookies chewy, which is not the goal here. You want tender, melt-in-your-mouth bites kids will love.
For decorating, having the right icing consistency is key. If it’s too runny, it’ll look messy and won’t hold decorations well. Too thick, and it’s tough to pipe. I usually aim for a texture like toothpaste—easy to squeeze but holds shape.
Another trick: prep all decorating supplies before the cookies cool completely. That way, once the cookies are ready, you can jump straight into decorating without losing momentum or interest. I also recommend keeping decorating sessions short and sweet to keep the kids engaged but not overwhelmed.
Finally, multitasking helps—while cookies bake, mix your icing colors and set up your decorating station. It turns the whole process into a smooth flow rather than a scramble.
Variations & Adaptations
One of the reasons this kit stays in my rotation is how easy it is to tweak for different occasions and dietary needs. Here are a few ideas I’ve tried or thought about:
- Gluten-Free Version: Replace the all-purpose flour with a gluten-free blend and add a teaspoon of xanthan gum if your mix doesn’t already include it. The dough might be a little more delicate, so chill it well.
- Vegan Adaptation: Swap butter for vegan margarine and use a flax egg (1 tablespoon ground flaxseed + 3 tablespoons water) instead of a regular egg. Use plant-based milk for softness.
- Seasonal Themes: Change up your cookie cutters and decorating colors to match holidays or seasons—think pumpkins for fall or flowers for spring, similar to the vibe of the Earl Grey Tea Cake.
- Flavor Twists: Add a teaspoon of almond extract or lemon zest to the dough for a subtle flavor boost. Kids loved the lemon zest version paired with bright yellow icing—it felt like sunshine in their lunchbox.
- Healthier Sweeteners: Try substituting half the sugar with coconut sugar or maple syrup (reduce milk slightly to balance wet ingredients). It changes the texture a bit but adds a nice depth of flavor.
Serving & Storage Suggestions
These decorated cookies are best enjoyed fresh but keep surprisingly well if you want to prep ahead. I like packing them in airtight containers layered with parchment paper to avoid smudging the icing. Stored at room temperature, they stay good for about 3-4 days.
If you want to make them in advance, freeze undecorated cookies in a single layer, then thaw and decorate on the day you need them. This helps keep the icing crisp and fresh-looking.
For reheating, though cookies are often eaten cold, warming them slightly (about 10 seconds in the microwave) can bring back that fresh-baked softness, especially if they’ve been stored a while.
Pair these fun cookies with a glass of milk or a fruity smoothie for a balanced lunchbox combo. If you’re packing a themed lunch, these cookies work really well alongside savory bites like smoked salmon cucumber tea sandwiches, adding a sweet, playful finish.
Nutritional Information & Benefits
Each cookie (depending on size) contains approximately 120-150 calories, with moderate sugar content typical of a sweet treat. The recipe includes wholesome butter and eggs, providing a bit of protein and fat to help keep kids satisfied.
Using real butter and eggs means you get natural ingredients without artificial additives, which makes this kit a better choice than many prepackaged snacks. For kids with allergies, the recipe can be adapted to be gluten-free or dairy-free with simple swaps.
The decorating process also encourages creativity and fine motor skills, turning snack time into a little learning moment. From a wellness perspective, it’s a nice balance of indulgence and homemade care, which feels good for both parents and kids.
Conclusion
The Easy Lunchbox Notes Cookie Decorating Kit for Kids is more than just a recipe; it’s a small but meaningful way to add fun, connection, and sweetness to everyday moments. Whether you’re facing a busy morning or planning a special treat, this kit offers a simple, joyful experience that kids look forward to and parents appreciate for its ease.
I’ve found that the real magic happens not in perfect icing lines but in shared smiles and little hands covered in color. You can customize it endlessly, making it fit your family’s tastes and needs perfectly. So, if you want to turn a regular lunchbox into a mini celebration, this cookie decorating kit is a must-try.
If you experiment with flavors or decoration ideas, I’d love to hear about your creations—drop a comment or share your personal twists! Here’s to sweet moments and happy kids with every bite.
FAQs
Can I prepare the cookies ahead of time?
Yes, you can bake the cookies a few days in advance and store them in an airtight container at room temperature. For longer storage, freeze the undecorated cookies and decorate after thawing.
What if my kids don’t like the icing texture?
Try adjusting the icing consistency by adding small amounts of powdered sugar to thicken or a few drops of water to thin it. You can also offer edible markers as a decorating alternative.
Are there egg-free versions of this cookie dough?
Absolutely! Flax eggs or store-bought egg replacers work well in this recipe without sacrificing texture.
How do I keep the decorated cookies from smudging in lunchboxes?
Allow the icing to dry completely—at least an hour—before packing. Use parchment paper between cookies and pack them tightly to prevent movement.
Can I make this kit for a large group or party?
Definitely! Just scale up the ingredients and set up multiple decorating stations. It’s a fantastic activity for birthdays or holiday gatherings.
Pin This Recipe!
Easy Lunchbox Notes Cookie Decorating Kit with 5 Fun Ideas for Kids

A quick and easy cookie decorating kit recipe perfect for kids, offering a fun and creative lunchbox treat that requires simple ingredients and minimal prep.
- Prep Time: 15 minutes
- Cook Time: 10 minutes
- Total Time: 45 minutes
- Yield: 24 cookies 1x
- Category: Dessert
- Cuisine: American
Ingredients
- 2 ½ cups (315 g) all-purpose flour
- 1 teaspoon baking powder
- ¼ teaspoon salt
- ¾ cup (170 g) unsalted butter, softened
- 1 cup (200 g) granulated sugar
- 1 large egg, room temperature
- 1 teaspoon pure vanilla extract
- 2 tablespoons (30 ml) milk (any variant)
- Store-bought royal icing or homemade icing (powdered sugar + meringue powder + water)
- Food coloring gels (various colors)
- Assorted sprinkles and edible decorations (stars, hearts, letters)
- Mini edible markers (optional)
Instructions
- Preheat your oven to 350°F (175°C) and line baking sheets with parchment paper or silicone mats.
- In a medium bowl, whisk together 2 ½ cups (315 g) all-purpose flour, 1 teaspoon baking powder, and ¼ teaspoon salt. Set aside.
- Using an electric mixer, beat ¾ cup (170 g) softened unsalted butter and 1 cup (200 g) granulated sugar on medium speed until light and fluffy, about 3-4 minutes.
- Beat in 1 large room-temperature egg and 1 teaspoon pure vanilla extract until fully incorporated.
- Gradually add the flour mixture to the butter mixture, alternating with 2 tablespoons (30 ml) milk. Mix on low speed just until the dough comes together. Avoid overmixing.
- Wrap the dough in plastic and refrigerate for at least 30 minutes.
- On a lightly floured surface, roll the dough to about ¼ inch (6 mm) thickness. Use cookie cutters to cut out shapes and place them about 2 inches (5 cm) apart on the baking sheets.
- Bake in the preheated oven for 8-10 minutes or until edges are just beginning to turn golden. The centers should look set but slightly soft.
- Let cookies cool on baking sheets for 5 minutes, then transfer to wire racks to cool fully before decorating.
- Divide royal icing into small bowls and tint each with different food coloring gels. Transfer to piping bags or resealable bags for decorating.
- Decorate cookies using piping techniques, sprinkles, and edible markers. Let dry for at least an hour before packing.
Notes
Chill dough for at least 30 minutes to prevent spreading. Avoid overmixing flour to keep cookies tender. Use gel food coloring for vibrant icing without thinning. Let icing dry completely before packing to avoid smudging. Rotate baking sheets halfway through baking for even browning. If dough is sticky, sprinkle a little more flour. Decorating sessions should be short to keep kids engaged.
Nutrition
- Serving Size: 1 cookie
- Calories: 135
- Sugar: 11
- Sodium: 90
- Fat: 6
- Saturated Fat: 4
- Carbohydrates: 19
- Fiber: 0.5
- Protein: 2
Keywords: cookie decorating, kids recipe, lunchbox treats, easy cookies, fun baking, royal icing, sprinkles, creative snacks


