“Hey, did you bring the cookies for graduation?” That text popped up right when I was scrambling to finish a last-minute gift for my niece’s big day. Honestly, baking isn’t always my go-to under pressure, but I had this idea to make sugar cookies shaped like little graduation caps and diplomas. I figured, how hard could it be?
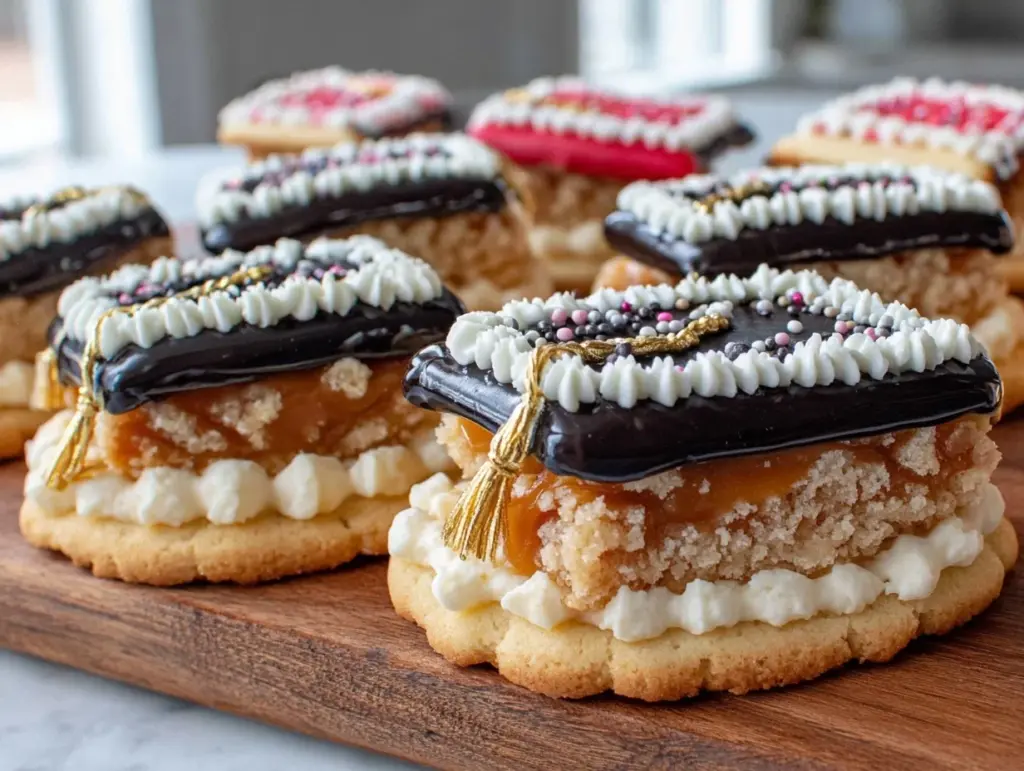
Turns out, it was a bit of a juggling act—rolling dough, cutting shapes, and getting the icing just right when I barely had time to breathe. But there was this quiet moment after the first batch came out of the oven, the smell filling the kitchen, and suddenly it hit me: these cookies aren’t just treats. They’re little celebrations you can hold, bite into, and share. The caps even had tiny tassels, and the diplomas were rolled with icing ribbons. Seeing those cookies lined up on the table, I realized they might just become a graduation tradition around here. They’re easy enough for a solo late-night baking spree but special enough to make the day feel meaningful.
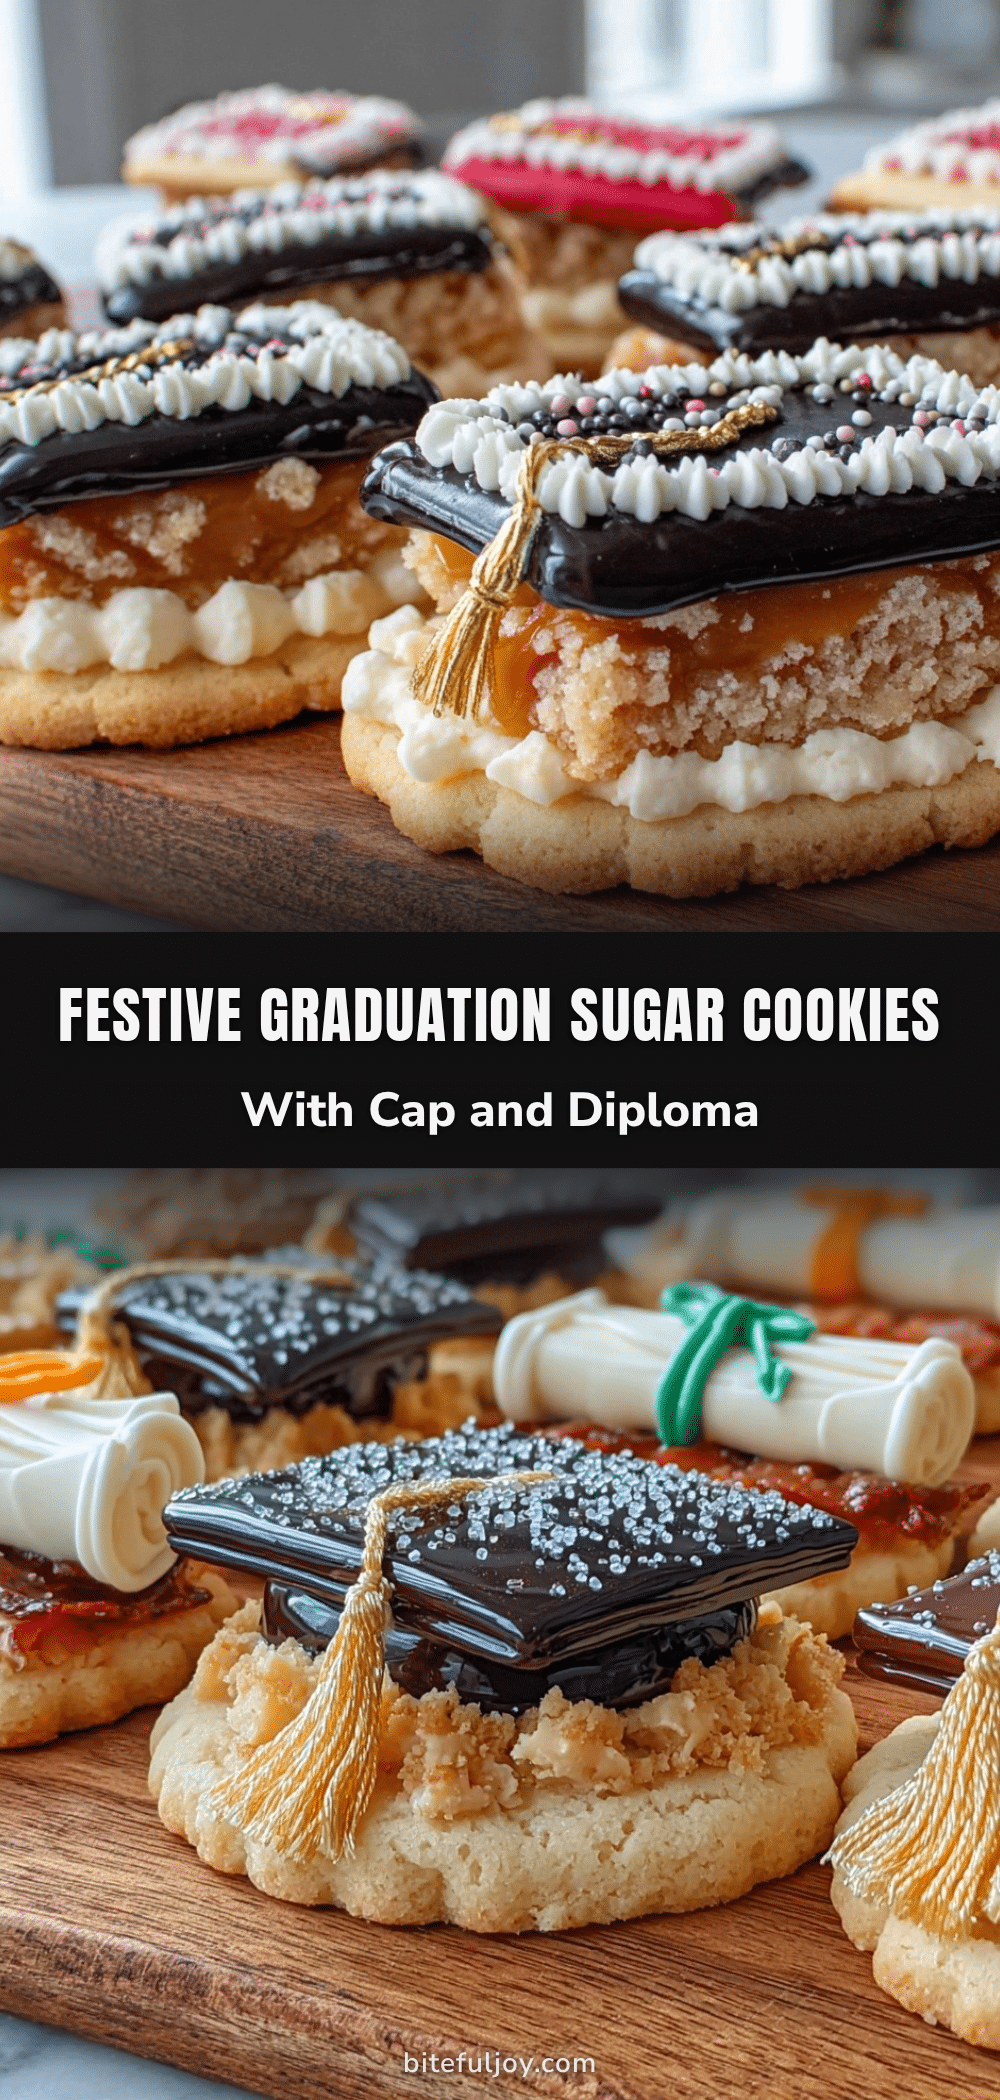
So, if you’re looking for a sweet way to mark that milestone, these Perfect Graduation Sugar Cookies with Cap and Diploma Designs might just be your new secret weapon for parties, gifts, or cozy congratulations. They’ve got that homemade charm without the fuss, and trust me, once you try them, you’ll get why they stuck around my kitchen this graduation season.
Why You’ll Love This Recipe
When making these Perfect Graduation Sugar Cookies, I tested countless batches to find that sweet spot between soft and crisp, decorated but not intimidating. Here’s what makes them stand out:
- Quick & Easy: From mixing to decorating, it takes about 45 minutes tops. Perfect if you’re juggling last-minute party prep or just want a fun baking break.
- Simple Ingredients: No need for fancy stuff—mostly pantry staples you likely already have. I usually keep my favorite King Arthur Flour handy for the best cookie texture.
- Perfect for Celebrations: Whether it’s a graduation brunch or a casual get-together, these cookies bring that festive vibe without stress.
- Crowd-Pleaser: Kids and adults alike love them, and the designs add that extra “wow” factor that gets everyone talking.
- Unbelievably Delicious: The buttery dough balanced with just the right sweetness gives you that classic sugar cookie comfort—nothing too sugary, just right.
What sets this recipe apart? The dough holds its shape beautifully, so your caps and diplomas look crisp and clean after baking. Plus, the royal icing I use dries with a smooth finish, making decorating almost meditative (if you’re into that kind of thing!). Unlike some sugar cookies that feel dry or crumbly, these stay soft inside but firm enough to stack and display.
Honestly, this recipe isn’t just a cookie—it’s a little edible memory maker. It’s the kind of treat that invites you to pause, smile, and savor a milestone in a way that’s simple but meaningful. And if you want a sweet companion for your celebration, they pair beautifully with a cup of tea or coffee—kind of like those Earl Grey tea cake moments, but in cookie form.
What Ingredients You Will Need
This recipe uses straightforward, wholesome ingredients to deliver sugar cookies that are tender, flavorful, and perfect for decorating. Here’s what you’ll gather:
- All-Purpose Flour – 2 ¾ cups (345g). Look for a trusted brand like King Arthur Flour for consistent results.
- Baking Powder – 1 teaspoon. Helps the cookies rise just enough without puffing up too much.
- Salt – ½ teaspoon. Balances the sweetness and enhances flavor.
- Unsalted Butter – 1 cup (226g), softened. Butter quality matters here; I prefer Plugrá for richness.
- Granulated Sugar – 1 cup (200g). Classic sweetness, nothing fancy needed.
- Large Egg – 1, room temperature. Helps bind the dough.
- Pure Vanilla Extract – 1 teaspoon. Adds warm, aromatic depth.
- Almond Extract – ¼ teaspoon (optional). Just a tiny touch for a subtle nutty note that lifts the flavor.
For the Royal Icing:
- Powdered Sugar – 4 cups (480g), sifted.
- Meringue Powder – 3 tablespoons. Makes the icing dry hard and shiny without cracking.
- Water – About 6 tablespoons, adjust for consistency.
- Gel Food Coloring – Black for caps, white for diplomas, and any accent colors you like for tassels and ribbons.
Substitutions? For a gluten-free option, swap the all-purpose flour with a 1:1 gluten-free baking flour. You can also replace butter with dairy-free margarine if needed, but be aware the texture might shift slightly. If you’re short on meringue powder, fresh egg whites can be used, though it’s trickier to achieve the same dry-hard finish.
These ingredients are pantry-friendly, but if you’re in the mood to mix things up, try adding a pinch of ground cinnamon or lemon zest to the dough for a subtle twist. And for a softer cookie, you can chill the dough before rolling out—it makes handling easier and flavors deepen.
Equipment Needed
- Mixing Bowls: A large bowl for the dough and a medium one for the royal icing.
- Electric Mixer: Stand or hand mixer to cream butter and sugar smoothly.
- Rolling Pin: A classic wooden or silicone rolling pin works fine; silicone helps prevent sticking.
- Graduation Cap and Diploma Cookie Cutters: Essential for those iconic shapes, but if you don’t have them, a sharp knife and stencil can do the trick.
- Baking Sheets: Heavy-duty, rimmed sheets for even baking.
- Parchment Paper or Silicone Baking Mats: Keeps cookies from sticking and helps with cleanup.
- piping Bags and Tips: For decorating details; a fine round tip #1 or #2 is perfect for writing and outlines.
- Spatula: For lifting cookies carefully.
Personally, I find investing in a good set of cookie cutters pays off, but if you’re on a budget, crafting your own shapes with a knife isn’t too daunting. Maintenance-wise, wash your piping tips promptly to avoid clogging, and store cutters in a dry place to prevent rusting. For quick clean-ups, silicone mats are a lifesaver and reusable, which is nice for the planet and your wallet.
Preparation Method
- Prep Your Ingredients: Soften the butter to room temperature (about 20 minutes on the counter). Sift together the flour, baking powder, and salt in a bowl. This keeps the dry ingredients light and lump-free.
- Cream Butter and Sugar: Using your mixer, beat the softened butter and granulated sugar on medium speed for about 3-4 minutes until pale and fluffy. This step traps air, making cookies tender.
- Add Egg and Extracts: Beat in the egg, vanilla, and almond extract (if using) until fully incorporated and smooth.
- Gradually Mix Dry Ingredients: With the mixer on low, add the flour mixture little by little. Don’t overmix here—you want the dough just combined to avoid tough cookies.
- Chill the Dough: Form the dough into a disk, wrap in plastic, and chill for at least 1 hour. This firms it up and makes rolling easier.
- Roll and Cut Shapes: On a lightly floured surface, roll the dough out to about ¼ inch (6 mm) thickness. Use your graduation cap and diploma cutters to cut shapes. Transfer cookies with a spatula onto parchment-lined baking sheets, spacing them about 1 inch apart.
- Bake: Preheat your oven to 350°F (175°C). Bake cookies for 8-10 minutes or until edges just begin to turn golden. Keep an eye on them—they should stay mostly pale for that tender center.
- Cool Completely: Let cookies cool on the baking sheet for 5 minutes, then transfer to a wire rack to cool fully before decorating. Decorating warm cookies can cause icing to melt and run.
- Prepare Royal Icing: Mix powdered sugar, meringue powder, and water until stiff peaks form but icing is still pipeable. Divide and color as needed.
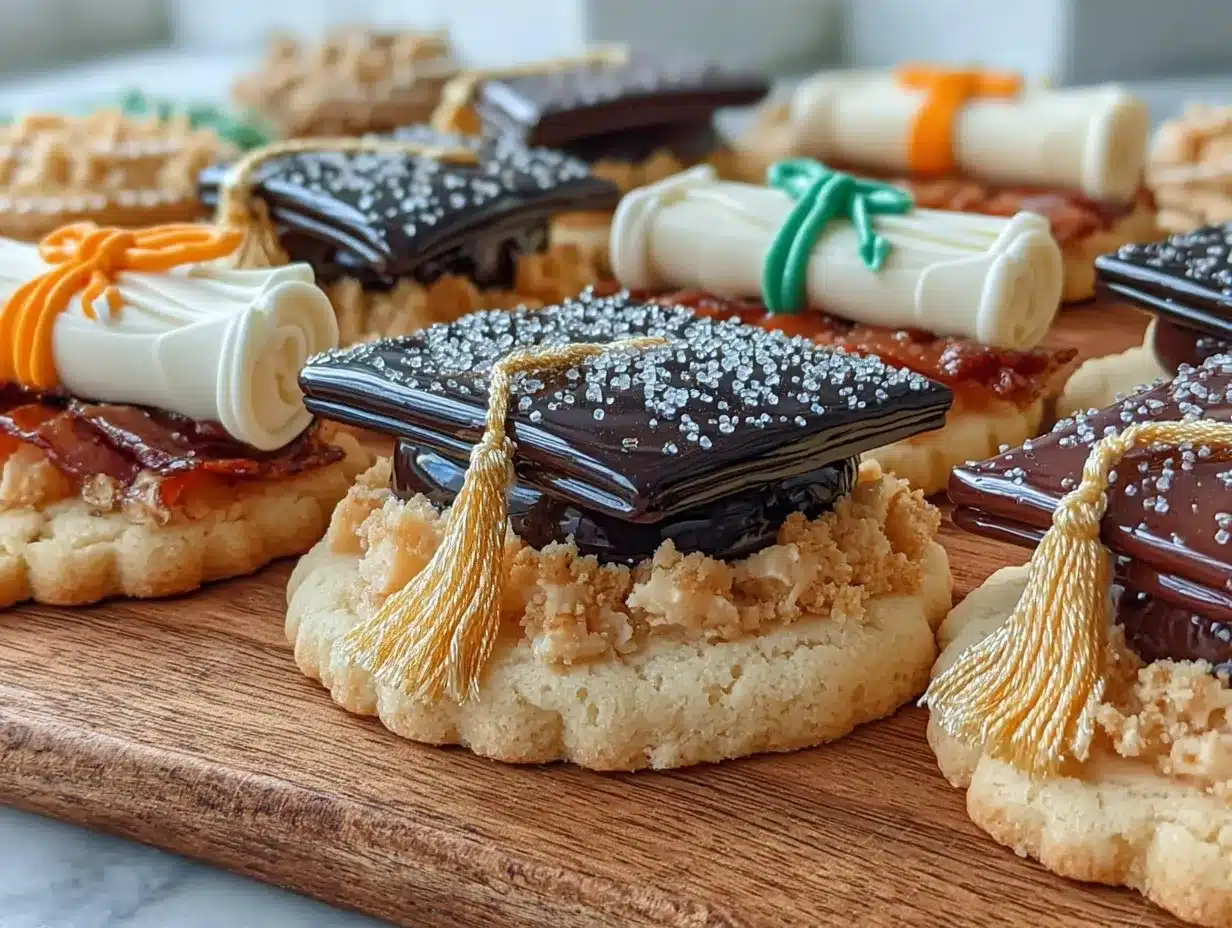
- Decorate: Outline the caps in black icing, fill with a flooded layer, and pipe tassels with a contrasting color. For diplomas, pipe a white scroll and add a small colored ribbon. Let icing dry overnight for best results.
Tip: If your dough gets too sticky while rolling, pop it back in the fridge for 15-20 minutes. The moment when you flip the cookies onto the baking sheet is always a little nerve-wracking—handle gently to keep the shapes crisp.
Cooking Tips & Techniques
Getting perfect sugar cookies with detailed designs can be a little fiddly, but these tips saved me more than once:
- Don’t Skip Chilling: That hour in the fridge isn’t just for convenience—it prevents spreading, so your caps and diplomas look sharp.
- Use Gel Food Coloring: It won’t thin your icing like liquid colors, so you keep that perfect piping consistency.
- Practice Piping on Parchment: Before decorating cookies, test your icing flow on parchment paper. This saved me from a few icing mishaps.
- Thin Icing for Flooding: Add water a drop at a time to get flooding consistency—smooth and spreadable but not runny.
- Keep Icing Covered: Royal icing dries fast—cover bowls with damp towels when not in use to prevent crusting.
- Timing: While cookies bake, prepping icing is a great multitasking move. Also, icing dries best in a cool, dry place—avoid humid kitchens.
- Handling Mistakes: If you mess up a design, gently scrape off the icing with a toothpick and try again once dry.
I learned the hard way that rushing the decorating leads to smudges. Taking a deep breath and steady hands (and maybe a little music) made all the difference. If you want to up your brunch or party game, pairing these cookies with an easy dish like the spinach and feta croissant bake makes for a pretty impressive spread.
Variations & Adaptations
While the classic sugar cookie with royal icing is a crowd-pleaser, here are some ways to switch things up:
- Flavor Twists: Add lemon or orange zest to the dough for a bright citrus note that pairs nicely with the sweet icing.
- Dietary Adjustments: For gluten-free, use a blend like Bob’s Red Mill 1-to-1 gluten-free flour. For dairy-free, swap butter for coconut oil or vegan margarine.
- Alternative Decorations: Instead of royal icing, try melted chocolate for a smooth finish or edible markers for quick details.
- Seasonal Themes: Swap the graduation cap with a star shape and decorate with school colors for a personalized touch.
- Personal Touch: I once made a batch where I piped tiny messages on the diplomas—little notes of encouragement that guests loved finding.
For a slightly different take, you can bake the dough as a crust for a no-bake cheesecake or fruit tart, using the same basic recipe for a sweet, buttery base. It’s a neat way to stretch the recipe into a whole dessert experience.
Serving & Storage Suggestions
Serve these sugar cookies at room temperature for the best flavor and texture. They look great arranged on a platter with some fresh berries or alongside a pot of tea or coffee. They’re perfect finger food for celebrations where guests are mingling and chatting.
If you have leftovers, store cookies in an airtight container at room temperature for up to 5 days. For longer storage, freeze undecorated cookies by wrapping them tightly in plastic wrap, then placing them in a freezer bag for up to 3 months. Decorated cookies freeze best after the icing has completely dried; thaw them gently at room temperature to avoid condensation ruining the icing.
Reheating isn’t really necessary, but if you want a warm cookie, a few seconds in the microwave (10-15 seconds) works, just be careful not to melt the icing. Over time, the flavors mellow and sometimes the icing develops a slight sheen, which just adds character.
Nutritional Information & Benefits
Each cookie (assuming about 24 cookies from the batch) contains roughly:
| Calories | 120-140 kcal |
|---|---|
| Total Fat | 6-7g |
| Saturated Fat | 3-4g |
| Carbohydrates | 18-20g |
| Sugars | 10-12g |
| Protein | 1-2g |
While these are treats, the use of real butter provides a richer mouthfeel and some fat-soluble vitamins. The simple ingredients keep it clean and familiar, with no artificial fillers. For those watching gluten, the recipe can be modified easily as noted. It’s a sweet indulgence best enjoyed in moderation, but honestly, they’re the kind of cookie that makes you savor every bite and smile.
Conclusion
These Perfect Graduation Sugar Cookies with Cap and Diploma Designs have become my go-to for marking big moments with a little homemade love. They balance ease and charm in a way that feels approachable but special. Whether you’re baking them for a party, gift, or just to celebrate quietly at home, they bring a touch of sweetness and celebration that sticks with you.
Feel free to tweak the flavors or decorations to fit your style—this recipe is a canvas for your creativity. I love how they turn simple ingredients into joyful memories, and I hope they do the same for you and your grads.
When you give these a try, I’d love to hear how your cookies came out and what personal touches you added. Sharing these moments makes the recipe even sweeter!
FAQs
Can I make the dough ahead of time?
Yes! You can prepare the dough and chill it for up to 3 days before rolling and baking. Just keep it tightly wrapped in plastic to prevent drying out.
What if I don’t have graduation-themed cookie cutters?
Use a sharp knife and printed templates as stencils to cut out shapes like caps and diplomas. Alternatively, star shapes or circles with piped details can work as festive substitutes.
How do I prevent the icing from cracking?
Make sure your cookies are completely cool before decorating. Also, avoid eating cookies immediately after icing dries; letting icing cure overnight helps prevent cracks.
Can I store decorated cookies for a long time?
Store them in an airtight container at room temperature for up to 5 days. For longer storage, freeze after the icing has dried completely.
Is royal icing necessary for decorating?
While royal icing gives a beautiful, hard finish perfect for detailed designs, you can use melted chocolate or edible markers for simpler decorations.
Pin This Recipe!
Perfect Graduation Sugar Cookies Recipe Easy Homemade Cap and Diploma Designs
These sugar cookies are shaped like graduation caps and diplomas, perfect for celebrating milestones with a sweet, homemade touch. They balance soft and crisp textures and are decorated with royal icing for a festive look.
- Prep Time: 20 minutes (plus 1 hour chilling)
- Cook Time: 8-10 minutes
- Total Time: 1 hour 30 minutes
- Yield: About 24 cookies 1x
- Category: Dessert
- Cuisine: American
Ingredients
- 2 ¾ cups (345g) all-purpose flour
- 1 teaspoon baking powder
- ½ teaspoon salt
- 1 cup (226g) unsalted butter, softened
- 1 cup (200g) granulated sugar
- 1 large egg, room temperature
- 1 teaspoon pure vanilla extract
- ¼ teaspoon almond extract (optional)
- For the Royal Icing:
- 4 cups (480g) powdered sugar, sifted
- 3 tablespoons meringue powder
- About 6 tablespoons water, adjust for consistency
- Gel food coloring (black for caps, white for diplomas, and accent colors for tassels and ribbons)
Instructions
- Soften the butter to room temperature (about 20 minutes on the counter). Sift together the flour, baking powder, and salt in a bowl.
- Using your mixer, beat the softened butter and granulated sugar on medium speed for about 3-4 minutes until pale and fluffy.
- Beat in the egg, vanilla, and almond extract (if using) until fully incorporated and smooth.
- With the mixer on low, gradually add the flour mixture little by little. Mix just until combined to avoid tough cookies.
- Form the dough into a disk, wrap in plastic, and chill for at least 1 hour.
- On a lightly floured surface, roll the dough out to about ¼ inch (6 mm) thickness. Use graduation cap and diploma cutters to cut shapes.
- Transfer cookies with a spatula onto parchment-lined baking sheets, spacing them about 1 inch apart.
- Preheat oven to 350°F (175°C). Bake cookies for 8-10 minutes or until edges just begin to turn golden.
- Let cookies cool on the baking sheet for 5 minutes, then transfer to a wire rack to cool completely before decorating.
- Mix powdered sugar, meringue powder, and water until stiff peaks form but icing is still pipeable. Divide and color as needed.
- Outline the caps in black icing, fill with a flooded layer, and pipe tassels with a contrasting color.
- For diplomas, pipe a white scroll and add a small colored ribbon. Let icing dry overnight for best results.
Notes
Chill dough for at least 1 hour to prevent spreading and keep shapes sharp. Use gel food coloring for best icing consistency. Practice piping on parchment paper before decorating cookies. Store decorated cookies in an airtight container for up to 5 days or freeze undecorated cookies for up to 3 months. Let icing dry overnight for best results.
Nutrition
- Serving Size: 1 cookie
- Calories: 130
- Sugar: 11
- Sodium: 0.1
- Fat: 6.5
- Saturated Fat: 3.5
- Carbohydrates: 19
- Protein: 1.5
Keywords: graduation cookies, sugar cookies, royal icing, homemade cookies, celebration treats, easy baking, cookie decorating


