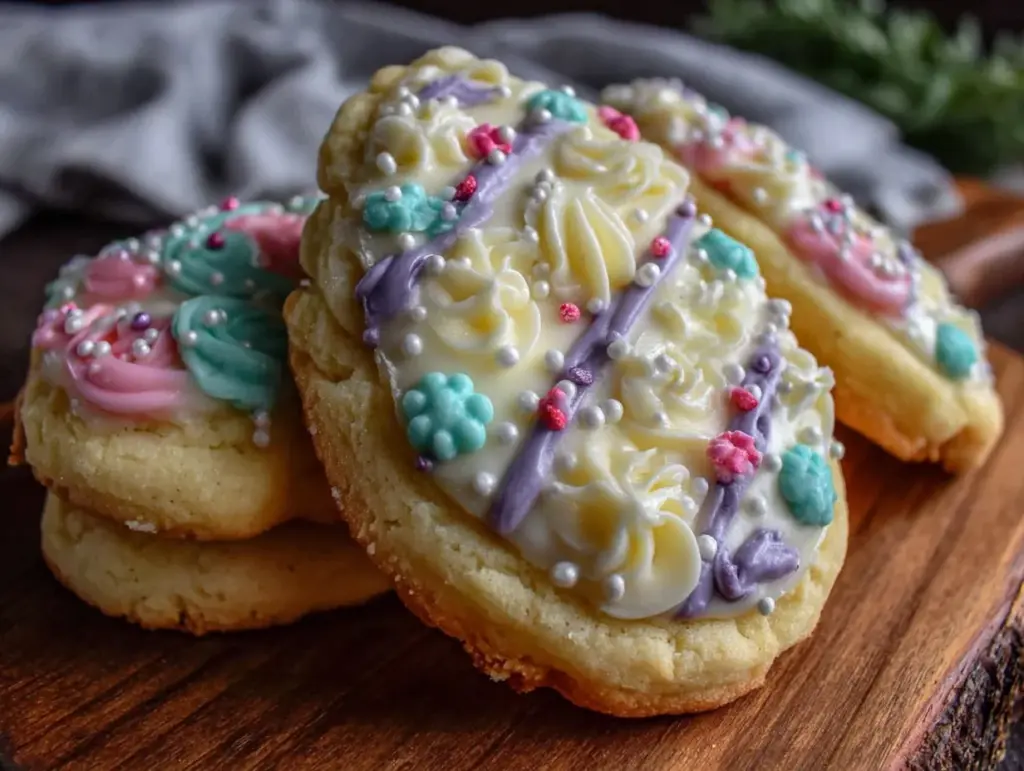
“Are you sure you want to make sugar cookies again?” my partner asked, raising an eyebrow as I pulled out the pastel food coloring from the cupboard. Honestly, I wasn’t planning to make a big deal out of it—just a quick batch of Easter egg sugar cookies to fill the kitchen with that nostalgic vanilla scent. But once I started mixing up the dough and whipping the royal icing to those soft pastel shades, it turned into one of those moments where you realize a simple thing becomes a tiny tradition.
It all started because I forgot to buy chocolates for Easter, and the grocery store was a madhouse. So, I figured I’d whip up something homemade instead—something that felt festive but not fussy. The pastel royal icing was a little experiment—I wasn’t convinced at first that it would hold up or look as charming as those fancy bakery cookies, but after a couple of tries, it clicked. The icing dried perfectly smooth, the colors stayed soft and light, and the cookies had that classic sugar cookie texture—crisp edges with a tender center that melts in your mouth.
Making these Perfect Easter Egg Sugar Cookies with Pastel Royal Icing has since become my go-to springtime treat. I love that they’re not just sweet but feel like a little art project you can eat. The quiet moments piping the icing, the gentle hum of the mixer, and the warm oven light all make the kitchen feel like a cozy corner of calm. These cookies have a way of making Easter morning feel just a bit more special—without the stress or mess of complicated baking.
Why You’ll Love This Recipe
After making these cookies over a dozen times (not kidding), I can say they’re worth every minute spent. They come together easily, with ingredients you probably already have on hand, and the pastel royal icing adds that perfect touch of spring charm.
- Quick & Easy: From mixing to decorating, you can have these ready in about 1.5 hours—great for last-minute Easter plans or a fun weekend activity.
- Simple Ingredients: No fancy or hard-to-find specialty items. I always recommend using a trusted brand of unsalted butter like Kerrygold for that rich flavor.
- Perfect for Easter Celebrations: These sugar cookies shine at brunches, egg hunts, or even just a cozy afternoon snack with tea—similar to the vibe from my Earl Grey Tea Cake.
- Crowd-Pleaser: Kids love decorating them, and adults always ask for the recipe (which is a nice confidence boost!).
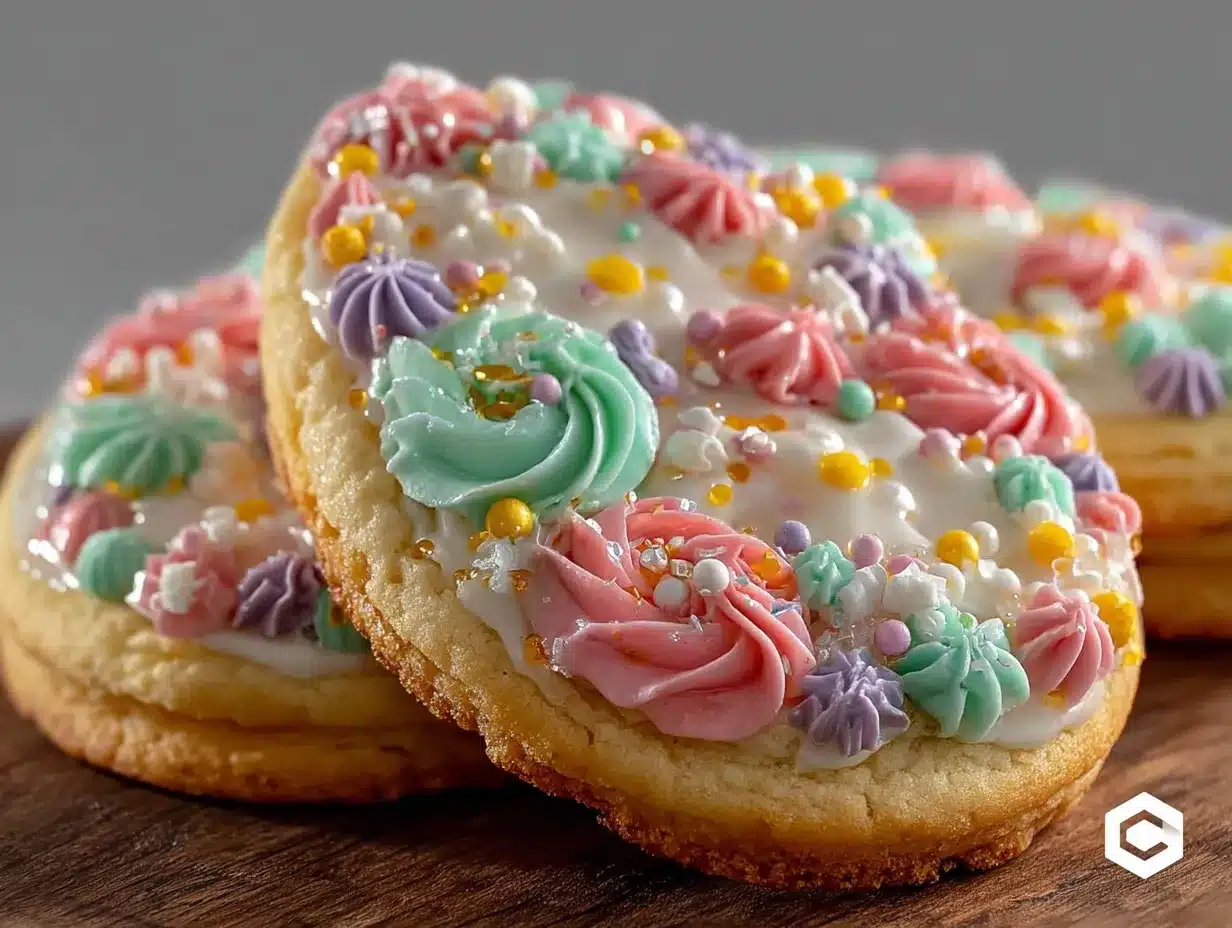
- Unbelievably Delicious: The texture is spot-on—crisp but tender, with a buttery vanilla taste that pairs beautifully with the smooth pastel royal icing.
What makes this recipe stand out? It’s the royal icing technique. I learned to get that silky finish by slowly adding meringue powder and carefully adjusting the consistency for piping and flooding. The colors stay soft and don’t crack or bleed, which honestly surprised me at first. Plus, the dough is chill-proof—meaning you can make it ahead and roll it out without it becoming stubborn or sticky.
Bottom line: these cookies aren’t just sweet treats; they’re little edible memories that make your Easter table feel joyful and inviting.
What Ingredients You Will Need
This recipe uses simple, wholesome ingredients to deliver bold flavor and a satisfying texture without fuss. Most are pantry staples, with a few easy-to-substitute options to keep things flexible.
- For the Sugar Cookie Dough:
- 2 ¾ cups (345 g) all-purpose flour, sifted
- 1 teaspoon baking powder
- ½ teaspoon salt
- 1 cup (227 g) unsalted butter, softened (Kerrygold is my favorite for flavor)
- 1 ½ cups (300 g) granulated sugar
- 1 large egg, room temperature
- 2 teaspoons vanilla extract (pure, not imitation)
- 1 tablespoon milk (whole or 2%)
- For the Pastel Royal Icing:
- 4 cups (480 g) powdered sugar, sifted
- 3 tablespoons meringue powder
- 5-6 tablespoons warm water (adjust for desired consistency)
- Food coloring gels in pastel shades (pale pink, baby blue, mint green, soft yellow, lavender)
- 1 teaspoon vanilla or almond extract (optional, for flavor)
If you want a gluten-free version, swap the all-purpose flour for a 1-to-1 gluten-free baking blend. For dairy-free, use a vegan buttery spread and substitute milk with almond or oat milk. I’ve tried both, and while the texture shifts slightly, the cookies still taste great.
Pro tip: For the royal icing, I prefer AmeriColor gels for their vibrant colors that don’t muddy when mixed. Also, look for small-curd cottage cheese if you want to experiment with a super-soft dough twist (though that’s not needed here).
Equipment Needed
Here’s what you’ll want handy before you get started—nothing too fancy, but a few tools make this easier:
- Stand mixer or hand mixer: A stand mixer speeds things up, but a sturdy hand mixer works fine.
- Mixing bowls: At least two—one for dough, one for icing.
- Measuring cups and spoons: Accuracy matters here, especially for flour and sugar.
- Rolling pin: A basic rolling pin is fine; I like the wooden one with handles for control.
- Easter egg-shaped cookie cutters: You can find these at most craft or kitchen stores around spring.
- Parchment paper or silicone baking mats: For baking without sticking.
- Piping bags and small round tips (size #2 or #3): Essential for outlining and flooding the icing.
- Toothpicks or scribe tools: Handy for smoothing icing edges or fixing small bubbles.
If you don’t have piping bags, zip-top bags with a tiny corner snipped off work just as well. For budget-friendly icing tools, disposable piping bags and metal tips are easy to clean and reuse.
Over the years, I learned that a good rolling pin and sharp cookie cutters make all the difference. Dull cutters can squish the dough and mess with the shape, so keep them clean and sharp (a quick dip in warm water helps sometimes).
Preparation Method
- Mix Dry Ingredients: In a medium bowl, whisk together 2 ¾ cups (345 g) sifted all-purpose flour, 1 teaspoon baking powder, and ½ teaspoon salt. Set aside. This keeps your dry mix even and prevents lumps.
- Cream Butter and Sugar: In your mixer bowl, beat 1 cup (227 g) softened unsalted butter with 1 ½ cups (300 g) granulated sugar on medium speed until light and fluffy—about 3-4 minutes. You’ll notice the color lighten and the texture become almost like whipped cream. This step is key to tender cookies.
- Add Egg, Vanilla, and Milk: Beat in 1 large room-temperature egg, 2 teaspoons pure vanilla extract, and 1 tablespoon milk until fully combined. The mixture will look glossy and smooth.
- Combine Wet and Dry: Gradually add the flour mixture to the wet ingredients, mixing on low speed until just combined. Avoid overmixing to keep cookies tender.
- Chill the Dough: Divide dough into two discs, wrap in plastic wrap, and refrigerate for at least 1 hour (or up to 24 hours). Chilling makes rolling easier and helps the cookies hold their shape while baking.
- Preheat Oven and Prepare Baking Sheets: Heat oven to 350°F (175°C). Line baking sheets with parchment paper or silicone mats.
- Roll and Cut: Lightly flour your work surface and rolling pin. Roll dough to about ¼-inch (6 mm) thickness. Use your Easter egg-shaped cookie cutter to cut shapes and place them about 2 inches (5 cm) apart on baking sheets.
- Bake: Bake for 10-12 minutes until edges are just starting to turn golden but centers remain pale. The smell of warm vanilla at this point is irresistible.
- Cool Completely: Let cookies cool on baking sheets for 5 minutes, then transfer to wire racks to cool fully before decorating. Decorating warm cookies can cause icing to melt or slide off.
- Prepare Royal Icing: In a clean bowl, combine 4 cups (480 g) sifted powdered sugar, 3 tablespoons meringue powder, and 5 tablespoons warm water. Beat on high for 7-10 minutes until stiff peaks form. Add extra water, 1 teaspoon at a time, to adjust consistency for piping (thicker) or flooding (thinner).
- Color Your Icing: Divide icing into small bowls and tint each with pastel food coloring gels. Stir gently until evenly combined.
- Decorate Cookies: Use piping bags fitted with small round tips to outline each cookie first. Let the outline dry for 10-15 minutes, then flood the inside with thinner icing for a smooth finish. Use toothpicks to spread or fix bubbles quickly.
- Let Icing Dry Completely: Allow cookies to dry at room temperature for at least 4 hours or overnight to harden the royal icing fully.
If you find the dough sticky, refrigerate it a bit longer. When piping, if the icing is too runny, add a little more powdered sugar. The first few cookies might be practice, but you’ll get the hang of it fast!
Cooking Tips & Techniques
One of the trickiest parts of sugar cookies is getting the dough thickness just right. Too thin, and they burn or crisp too much; too thick, and they might stay doughy inside. I stick with ¼ inch (6 mm) and have found that chilling the dough is non-negotiable for clean cookie edges.
For royal icing, patience is your best friend. Let the outline dry before flooding to prevent colors from blending unless you want a marbled effect. I once tried rushing this step and ended up with a messy swirl instead of crisp edges—lesson learned!
Also, when mixing the royal icing, beat it long enough to get stiff peaks, or it won’t hold shape well. Start with a thicker consistency for outlining, then thin it out with water for flooding.
Multitasking tip: While cookies bake and cool, prepare your icing and colors. This keeps you moving and avoids waiting around.
Finally, use a toothpick to pop air bubbles in the icing before it dries—no one likes little white spots on their pastel eggs!
Variations & Adaptations
Want to switch things up? Here are a few ways to make these sugar cookies your own:
- Flavor Variations: Add lemon or almond extract to the dough for a subtle twist. I once swapped vanilla for fresh orange zest and loved the bright, springtime feel.
- Dietary Adaptations: Use almond flour or a gluten-free blend for allergy-friendly cookies. For dairy-free, swap butter with coconut oil or vegan margarine, and milk with plant-based milk.
- Decoration Styles: Try marbled royal icing by swirling two pastel colors together before flooding. Or skip the royal icing and sprinkle colored sugar or edible glitter on a simple glaze.
- Alternate Shapes: If you don’t have an egg cutter, bunny or flower shapes work beautifully—perfect companions to the pastel palette.
- Baking Methods: These cookies bake well in convection ovens—just reduce temperature by 25°F (about 15°C) and watch closely.
One time, I made a batch with lemon royal icing and paired them with my passion fruit mousse cups for an Easter dessert table that got compliments all day long.
Serving & Storage Suggestions
Serve these sugar cookies at room temperature so the icing has its perfect texture—soft but firm. They make a charming addition to any Easter brunch or afternoon tea, pairing wonderfully with a light, floral tea like Earl Grey or a fresh fruit salad.
Store leftover cookies in an airtight container at room temperature for up to 5 days. If you want to keep them longer, freeze undecorated cookies wrapped tightly in plastic wrap, then freeze royal icing separately. Decorate after thawing for best results.
When reheating, avoid microwaves, as they can soften the icing. Instead, let frozen cookies thaw at room temp overnight. Over time, the flavors meld nicely, and the cookies soften just a bit without losing their charm.
For a festive Easter table, arrange cookies on a pastel-colored platter or nestle them in a basket with spring flowers. They’re as pretty to look at as they are to eat.
Nutritional Information & Benefits
Each cookie (assuming about 24 cookies from the recipe) contains roughly:
| Calories | 120 |
|---|---|
| Fat | 6 g |
| Carbohydrates | 16 g |
| Sugar | 9 g |
| Protein | 1 g |
While these sugar cookies are a treat, using real butter and pure vanilla adds quality flavor without artificial nasties. The pastel royal icing uses meringue powder, which is egg-white based and safe from salmonella risks often linked to raw eggs.
If you’re mindful of gluten or dairy, the recipe adapts well to alternatives, making it suitable for many diets. Just be aware of the sugar content if you’re limiting sweets.
Enjoy these cookies as an occasional indulgence that brings a bit of joy and creativity to your holiday table.
Conclusion
These Perfect Easter Egg Sugar Cookies with Pastel Royal Icing have become a small tradition I look forward to every spring. They’re approachable, fun, and flexible enough to make your own. Whether you’re decorating with kids or crafting a chic dessert spread, these cookies bring a simple kind of happiness.
Feel free to tweak the colors, shapes, or flavors to match your style. Baking is personal, after all. I love how this recipe balances sweet nostalgia with a fresh twist, making Easter feel just a little sweeter.
If you try this recipe, I’d love to hear how your cookies turned out or what creative spins you added—drop a comment or share your photos. Here’s to many cozy kitchen moments and joyful Easter celebrations ahead!
Frequently Asked Questions
Can I make the dough ahead of time?
Yes! You can prepare the dough up to 24 hours in advance and keep it wrapped in the fridge. It actually helps the flavors develop and makes rolling easier.
How do I prevent royal icing from cracking?
Make sure to use meringue powder and the right consistency. Let each layer dry fully before adding more icing, and avoid extremes in temperature or humidity.
Can I freeze decorated sugar cookies?
Freezing decorated cookies can cause the icing to crack or discolor. It’s best to freeze cookies undecorated and add royal icing after thawing.
What if I don’t have meringue powder?
Meringue powder stabilizes royal icing. If unavailable, you can try using pasteurized egg whites, but be cautious about food safety.
How do I get the pastel colors without them looking too bright?
Start with a very small amount of gel coloring and add gradually until you reach the soft pastel tone you want. Diluting with white icing can also soften hues.
Pin This Recipe!
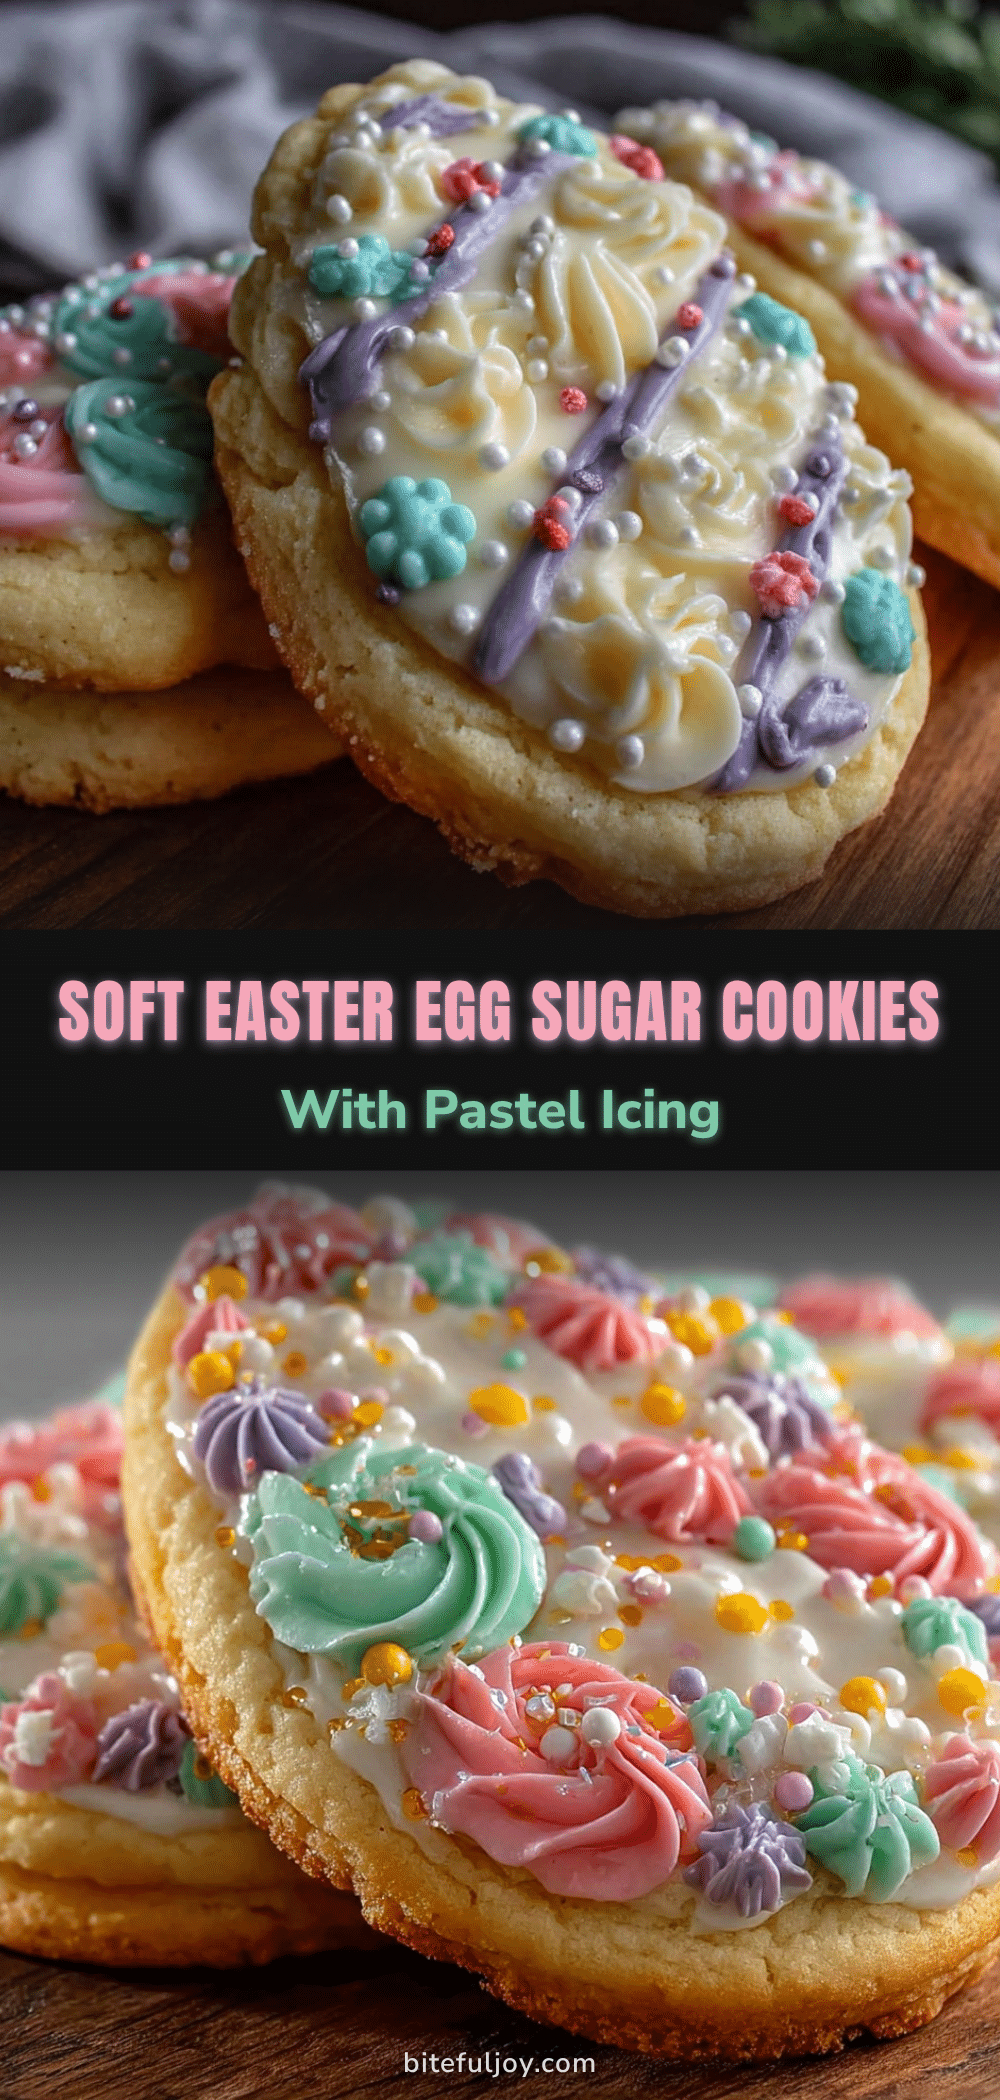
Perfect Easter Egg Sugar Cookies Easy Pastel Royal Icing Recipe

These sugar cookies feature a classic crisp edge and tender center, decorated with smooth pastel royal icing for a festive Easter treat that’s easy and fun to make.
- Prep Time: 20 minutes
- Cook Time: 12 minutes
- Total Time: 1 hour 30 minutes
- Yield: 24 cookies 1x
- Category: Dessert
- Cuisine: American
Ingredients
- 2 ¾ cups (345 g) all-purpose flour, sifted
- 1 teaspoon baking powder
- ½ teaspoon salt
- 1 cup (227 g) unsalted butter, softened (Kerrygold recommended)
- 1 ½ cups (300 g) granulated sugar
- 1 large egg, room temperature
- 2 teaspoons vanilla extract (pure, not imitation)
- 1 tablespoon milk (whole or 2%)
- 4 cups (480 g) powdered sugar, sifted
- 3 tablespoons meringue powder
- 5–6 tablespoons warm water (adjust for desired consistency)
- Food coloring gels in pastel shades (pale pink, baby blue, mint green, soft yellow, lavender)
- 1 teaspoon vanilla or almond extract (optional, for flavor)
Instructions
- Mix Dry Ingredients: In a medium bowl, whisk together 2 ¾ cups sifted all-purpose flour, 1 teaspoon baking powder, and ½ teaspoon salt. Set aside.
- Cream Butter and Sugar: In your mixer bowl, beat 1 cup softened unsalted butter with 1 ½ cups granulated sugar on medium speed until light and fluffy, about 3-4 minutes.
- Add Egg, Vanilla, and Milk: Beat in 1 large room-temperature egg, 2 teaspoons pure vanilla extract, and 1 tablespoon milk until fully combined.
- Combine Wet and Dry: Gradually add the flour mixture to the wet ingredients, mixing on low speed until just combined. Avoid overmixing.
- Chill the Dough: Divide dough into two discs, wrap in plastic wrap, and refrigerate for at least 1 hour or up to 24 hours.
- Preheat Oven and Prepare Baking Sheets: Heat oven to 350°F (175°C). Line baking sheets with parchment paper or silicone mats.
- Roll and Cut: Lightly flour work surface and rolling pin. Roll dough to about ¼-inch (6 mm) thickness. Use Easter egg-shaped cookie cutter to cut shapes and place 2 inches apart on baking sheets.
- Bake: Bake for 10-12 minutes until edges start to turn golden but centers remain pale.
- Cool Completely: Let cookies cool on baking sheets for 5 minutes, then transfer to wire racks to cool fully before decorating.
- Prepare Royal Icing: In a clean bowl, combine 4 cups sifted powdered sugar, 3 tablespoons meringue powder, and 5 tablespoons warm water. Beat on high for 7-10 minutes until stiff peaks form. Add extra water 1 teaspoon at a time to adjust consistency.
- Color Your Icing: Divide icing into small bowls and tint each with pastel food coloring gels. Stir gently until evenly combined.
- Decorate Cookies: Use piping bags with small round tips to outline each cookie first. Let outline dry 10-15 minutes, then flood inside with thinner icing. Use toothpicks to spread or fix bubbles.
- Let Icing Dry Completely: Allow cookies to dry at room temperature for at least 4 hours or overnight.
Notes
Chill dough for at least 1 hour for easier rolling and better shape retention. Let royal icing outline dry before flooding to prevent color bleeding. Use AmeriColor gels for vibrant pastel colors. If dough is sticky, refrigerate longer. Add powdered sugar if icing is too runny. Use toothpicks to pop air bubbles in icing before drying.
Nutrition
- Serving Size: 1 cookie
- Calories: 120
- Sugar: 9
- Fat: 6
- Carbohydrates: 16
- Protein: 1
Keywords: Easter sugar cookies, pastel royal icing, sugar cookies recipe, Easter cookies, holiday baking, royal icing cookies, easy sugar cookies


