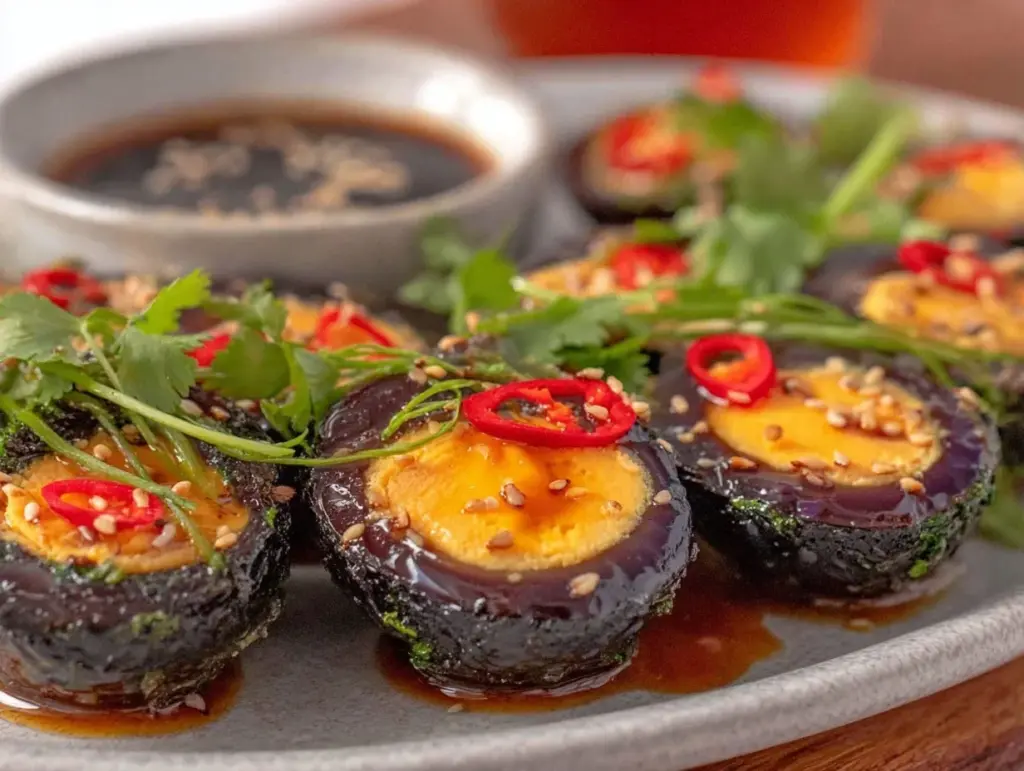
Let me tell you, the moment you crack open a century egg, the rich aroma and glossy, dark-green yolk instantly grab your attention. It’s unlike anything you’ve tasted before—creamy yet firm, with a flavor that’s both earthy and slightly tangy. The first time I tried these flavorful century eggs, I was honestly a bit hesitant. But that first bite? The kind of moment where you pause, take a deep breath, and just smile because you know you’re onto something truly special. It’s a unique texture that’s smooth, almost custard-like, and a taste that’s deeply satisfying.
Years ago, when I was knee-high to a grasshopper, my grandma would tell stories about how century eggs were a delicacy passed down through generations in our family. I stumbled upon this recipe during a rainy weekend when I wanted to recreate those nostalgic flavors of my childhood. My family couldn’t stop sneaking them off the plate (and I can’t really blame them). Honestly, this flavorful century eggs recipe is dangerously easy to make and brings pure, nostalgic comfort to your table.
Whether you’re looking to brighten up a dim sum spread, impress your friends with something different, or add a creamy, unique texture to your appetizer lineup, this recipe is perfect for you. I tested it more times than I can count—in the name of research, of course—and it’s now a staple for family gatherings and gifting. Trust me, you’re going to want to bookmark this one.
Why You’ll Love This Recipe
After countless trials in my kitchen and feedback from family and friends, I can confidently say this flavorful century eggs recipe is a keeper. Here’s why it stands out:
- Quick & Easy: The preparation is straightforward, letting you enjoy this delicacy with minimal fuss.
- Simple Ingredients: Most of what you need are pantry staples or easy-to-find items at any Asian market.
- Perfect for Entertaining: Great for potlucks, dinner parties, or just a special treat to share.
- Crowd-Pleaser: Both adventurous eaters and hesitant tasters have given it rave reviews.
- Unbelievably Delicious: The creamy, unique texture combined with the bold flavor profile is unlike anything else.
This isn’t just another century egg recipe. It involves a perfect balance of saltiness, umami, and that signature earthy undertone that makes each bite memorable. The creamy texture is achieved through careful aging and preparation, making it as smooth as butter but with a satisfying bite. Honestly, it’s comfort food reimagined—complex yet approachable, and guaranteed to impress without stress.
What Ingredients You Will Need
This recipe uses simple, wholesome ingredients to deliver bold flavor and that signature creamy, unique texture without the fuss. Most of these ingredients are pantry staples or easy to source.
- Duck eggs: Fresh, large (6-8 eggs) – the traditional base for century eggs.
- Wood ash: Finely ground – essential for the curing process to create that dark, glossy shell.
- Quicklime (calcium oxide): Food-grade, small amount – helps preserve and firm the eggs.
- Salt: Coarse or sea salt (adds preservation and flavor).
- Rice hulls or straw: For packing the eggs during curing (optional but traditional).
- Water: Clean, filtered – for mixing the curing paste.
- Black tea leaves: Adds a subtle earthy aroma (optional).
- Sugar: Small pinch – to balance the curing mix slightly.
Ingredient tips: I recommend sourcing fresh duck eggs from a trusted supplier for best texture. If you’re trying this at home, make sure to use food-grade quicklime and wood ash for safety. In summer, try adding some aromatic tea leaves for a nuanced flavor twist.
Substitutions: If you can’t find duck eggs, large chicken eggs can be used, though the texture and flavor will be a bit different. For a gluten-free option, all ingredients here are naturally gluten-free.
Equipment Needed
- Large mixing bowl: For combining the curing paste ingredients.
- Gloves: To protect your hands from quicklime and ash during mixing.
- Plastic wrap or airtight container: For storing eggs during the curing process.
- Thermometer: Optional, but helpful to monitor curing temperature.
- Kitchen scale: Useful for measuring ingredients precisely.
- Wire rack or drying tray: To dry eggs after curing.
If you don’t have a kitchen scale, measuring cups will work, but be mindful of ingredient accuracy for curing safety. Gloves are a must here; I learned the hard way that quicklime is no joke on skin! A budget-friendly plastic container with a tight lid is perfect for curing eggs without mess.
Preparation Method
- Prepare the curing paste: In a large bowl, mix 1 cup (120g) of wood ash with 1/2 cup (80g) of quicklime, 1/4 cup (60g) of coarse salt, a tablespoon of black tea leaves (if using), and a small pinch of sugar. Slowly add water (about 1 cup or 240ml), stirring continuously until you get a thick, spreadable paste. This should take about 10 minutes.
- Clean the eggs: Gently wash 6-8 fresh duck eggs with warm water, then dry them completely. This step should take about 5 minutes. Make sure no cracks are present—integrity is key!
- Coat the eggs: Wearing gloves, carefully roll each egg in the curing paste until fully covered. The paste layer should be about 1/4 inch (6mm) thick. This step takes around 15 minutes.
- Pack the eggs: Place the coated eggs on a wire rack or in a container lined with rice hulls or straw. Cover them completely to keep the moisture in and let them cure in a cool, dark place for 3 to 4 weeks. Temperature should be around 60-70°F (15-21°C).
- Check periodically: Every week, inspect eggs for any signs of mold or cracks. If you notice any, discard those eggs. This is a hands-off step but important for safety.
- Clean and dry: After curing, rinse off the paste under running water, then dry the eggs thoroughly. This should take 10 minutes.
- Refrigerate and serve: Once dried, store the eggs in the fridge. Slice open and enjoy with a sprinkle of salt, soy sauce, or chili oil. The creamy, unique texture should be firm but custardy, and the flavor rich and pungent.
Pro tip: If the eggs are too strong for your taste, try rinsing them with cold water before serving to mellow the flavor slightly. The smell might be intense at first, but the taste is surprisingly smooth and creamy.
Cooking Tips & Techniques
Century eggs require patience and precision, but here are some tips to help you nail it every time. First, make sure you use food-grade ingredients for curing—this isn’t the time to cut corners. Gloves are essential to protect your skin from the quicklime and ash mixture.
Common mistake? Not sealing the eggs well enough in the paste. If the coating is too thin, the eggs won’t cure properly and can spoil. Take your time to cover each egg evenly and thickly. Also, curing temperature matters; too warm and the eggs can ferment too quickly, leading to off flavors.
I once left eggs curing in a spot that was too warm, and let me tell you, the smell was overwhelming (not in a good way). Keep them in a cool, dark place to avoid this. Multitasking tip: while the eggs cure, prep your dipping sauces or side dishes—time flies during curing!
For consistent texture, choose fresh eggs with no cracks. After curing, the yolk should be creamy and dark green, while the white turns a translucent black. If you see gritty texture or chalkiness, it might mean under-curing. Trust your senses—it’s part of the fun!
Variations & Adaptations
If you want to mix things up, here are some variations to try. For a milder flavor, reduce the curing time to 2 weeks and add more black tea leaves to the paste for a gentler aroma. For a vegan-inspired twist, experiment with pickled tofu or fermented vegetables alongside the century eggs for a similar umami burst.
If you don’t have access to wood ash, some cooks experiment with finely ground charcoal mixed with lime and salt, though results vary. Another fun adaptation is slicing century eggs and serving them with tofu and soy sauce for a refreshing salad that balances creaminess and freshness.
For spice lovers, drizzle chili oil or sprinkle Sichuan pepper over the sliced eggs. I once tried adding a touch of smoked paprika to the curing paste—it gave a subtle smoky note that my family loved. If allergies are a concern, these eggs are naturally gluten-free and dairy-free but always check your curing ingredients.
Serving & Storage Suggestions
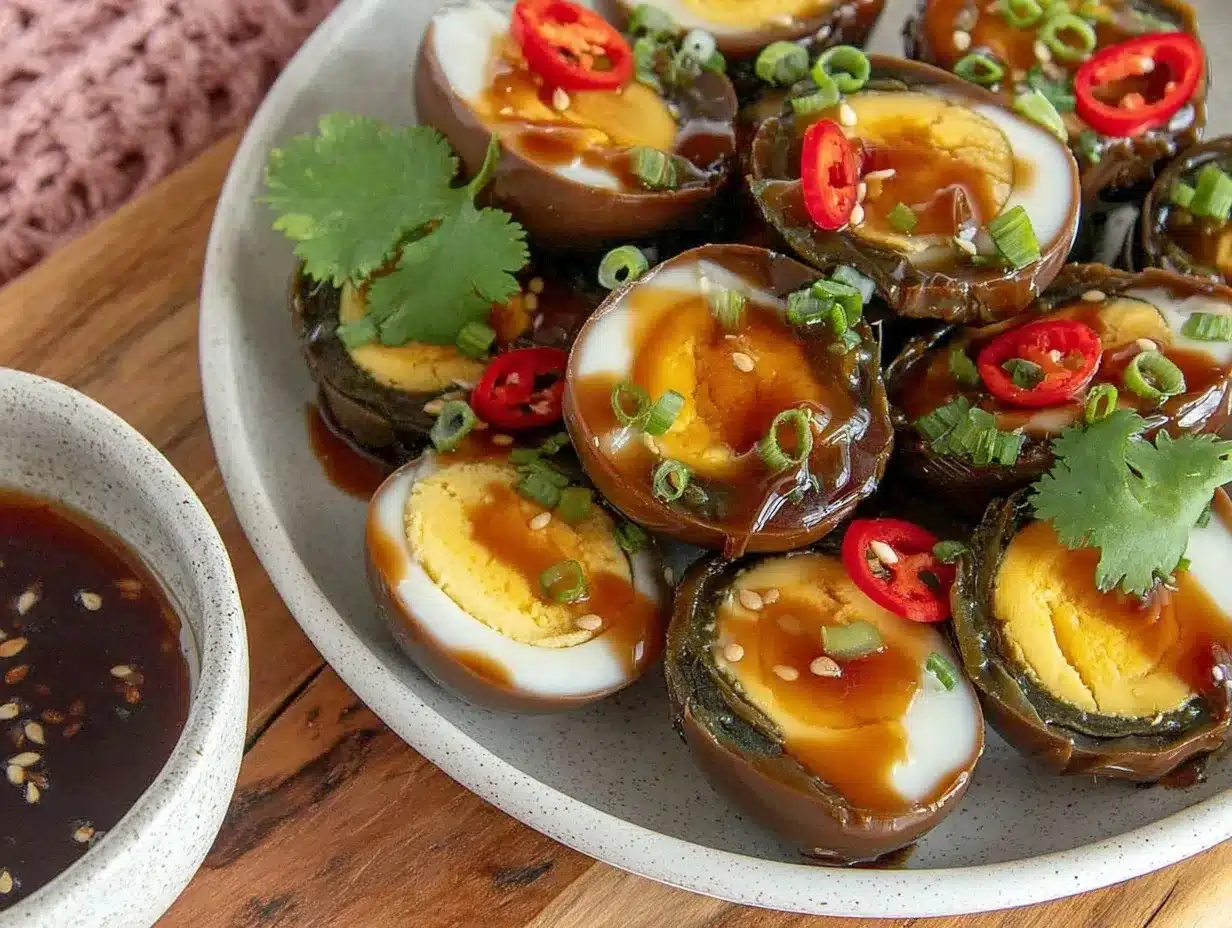
Century eggs are best served chilled or at room temperature. Slice them thinly and arrange on a plate with a drizzle of soy sauce, a sprinkle of chopped scallions, or a dash of chili oil. They pair beautifully with plain congee, steamed rice, or as part of a dim sum spread.
For storage, keep the eggs refrigerated wrapped tightly in plastic wrap or in an airtight container. They last for up to a month when stored properly. If you want to freeze them, wrap them well, though freezing can slightly alter the texture.
Reheat gently by placing sliced eggs over warm congee or steamed dishes—this brings out the creamy texture without overwhelming the palate. Flavors actually mellow and deepen the day after curing, making leftovers just as delightful, if not more.
Nutritional Information & Benefits
Century eggs are a low-calorie, protein-rich snack with minimal carbs. Each egg contains approximately 70-90 calories, 6 grams of protein, and trace fats. The curing process increases bioavailability of certain minerals like iron and calcium.
From a health perspective, these eggs are a good source of essential amino acids and probiotics due to fermentation. They’re naturally gluten-free and dairy-free, making them suitable for many dietary needs.
However, be mindful of sodium content, especially if you’re adding soy sauce or salt when serving. As with any fermented food, enjoy in moderation for best digestive comfort. Personally, I appreciate century eggs for adding variety and unique textures to my meals without heavy calories.
Conclusion
So, why should you give this flavorful century eggs recipe a shot? Because it’s a rare treat that combines history, culture, and a creamy, unique texture you won’t find in everyday dishes. Plus, it’s pretty straightforward to make once you get the hang of the curing process.
Feel free to customize with your favorite toppings or pairings—this recipe welcomes your personal touch! I love it because it connects me to my roots and always sparks lively conversation at the table. Give it a try and let me know how it goes. Don’t forget to share your own twists or questions in the comments below—let’s keep the tradition alive and delicious!
FAQs
What exactly is a century egg?
A century egg is a traditional Chinese preserved egg, typically made from duck eggs cured in a mixture of ash, lime, salt, and sometimes tea leaves for several weeks to months, resulting in a creamy, flavorful treat.
How long does it take to make century eggs at home?
The curing process generally takes 3 to 4 weeks, depending on temperature and desired flavor intensity.
Can I eat century eggs raw?
Yes, century eggs are safe to eat once fully cured. They’re often served sliced with condiments or in dishes like congee.
What do century eggs taste like?
They have a creamy, custard-like texture with earthy, salty, and slightly tangy flavors—definitely unique but delicious!
Are century eggs gluten-free?
Yes, traditional century eggs are naturally gluten-free, but be cautious with added sauces or seasonings, which may contain gluten.
Pin This Recipe!

Flavorful Century Eggs Recipe Easy Creamy Unique Texture Guide

A traditional Chinese preserved egg recipe that delivers a creamy, unique texture with earthy and slightly tangy flavors. This easy curing method brings nostalgic comfort and bold flavor to your table.
- Prep Time: 30 minutes
- Cook Time: 3 to 4 weeks (curing time)
- Total Time: 3 to 4 weeks and 30 minutes
- Yield: 6-8 eggs 1x
- Category: Appetizer
- Cuisine: Chinese
Ingredients
- 6–8 fresh large duck eggs
- 1 cup (120g) finely ground wood ash
- 1/2 cup (80g) food-grade quicklime (calcium oxide)
- 1/4 cup (60g) coarse or sea salt
- Rice hulls or straw (optional, for packing)
- About 1 cup (240ml) clean, filtered water
- 1 tablespoon black tea leaves (optional)
- Small pinch of sugar
Instructions
- Prepare the curing paste by mixing wood ash, quicklime, coarse salt, black tea leaves (if using), and sugar in a large bowl.
- Slowly add water while stirring continuously until a thick, spreadable paste forms (about 10 minutes).
- Gently wash the duck eggs with warm water and dry completely, ensuring no cracks are present (about 5 minutes).
- Wearing gloves, roll each egg in the curing paste until fully covered with a 1/4 inch (6mm) thick layer (about 15 minutes).
- Place the coated eggs on a wire rack or in a container lined with rice hulls or straw, cover completely, and cure in a cool, dark place at 60-70°F (15-21°C) for 3 to 4 weeks.
- Check eggs weekly for mold or cracks and discard any compromised eggs.
- After curing, rinse off the paste under running water and dry the eggs thoroughly (about 10 minutes).
- Refrigerate the eggs. Slice open and serve chilled or at room temperature with optional salt, soy sauce, or chili oil.
Notes
Use food-grade quicklime and wood ash for safety. Gloves are essential to protect skin. Cure eggs in a cool, dark place to avoid off flavors. If eggs taste too strong, rinse with cold water before serving. Store cured eggs refrigerated and consume within one month. Freezing is possible but may alter texture.
Nutrition
- Serving Size: 1 egg
- Calories: 7090
- Protein: 6
Keywords: century eggs, preserved eggs, duck eggs, Chinese recipe, creamy texture, fermented eggs, traditional Chinese food, easy century eggs


