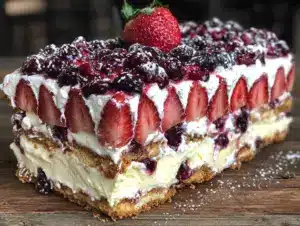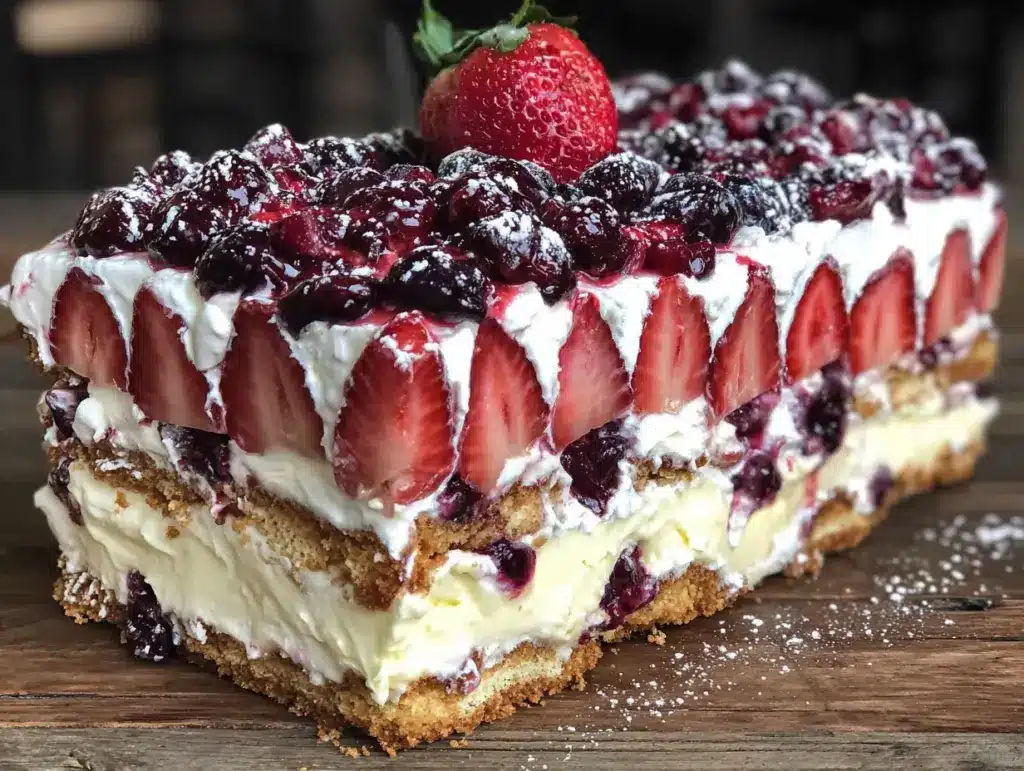
That first cold bite — the way the softened cream cheese and whipped cream just melt together against the crunch of graham cracker — still takes me straight to my aunt’s tiny kitchen in July. She wasn’t much for baking in the heat, and honestly, neither am I. We’d sit there, forks in hand, watching the layers of red, white, and blueberry goodness disappear from the glass dish. No oven involved. No stress. Just cold, creamy dessert and the sound of the window unit struggling to keep up.
I remember thinking, “This is the kind of dessert you make when you want to impress people without actually working for it.” And that’s stuck with me. Every Fourth of July since, I’ve made some version of this easy red, white, and blueberry icebox cake. Sometimes for a crowd, sometimes just for myself on a Tuesday. It’s forgiving. It’s flexible. And it looks like you tried way harder than you did.
That’s the beauty of a no-bake dessert, right? You get the wow factor without the sweat — literally. This recipe has become my go-to for summer gatherings because it delivers every single time. No oven required, no complicated steps, just layers of flavor that somehow taste like a celebration.
Why You’ll Love This Recipe
Let me tell you why this easy red, white, and blueberry icebox cake keeps showing up at my table year after year. First off, it’s a no-bake wonder. When the temperature hits 90 degrees, the last thing I want to do is turn on the oven. This dessert comes together on the countertop, chills in the fridge, and lets you enjoy your party instead of sweating over one.
Here’s what makes it stand out:
- Quick & Easy: You’ll spend about 20 minutes assembling it. That’s it. The fridge does the rest of the work overnight.
- Simple Ingredients: No fancy grocery store trips. You probably have most of this in your kitchen right now — graham crackers, cream cheese, whipped topping, and fresh berries.
- Perfect for Celebrations: Fourth of July, Memorial Day, Labor Day, or just a Tuesday that needs some color. The red, white, and blue theme makes it a natural fit for patriotic holidays.
- Crowd-Pleaser: I’ve served this to kids, adults, picky eaters, and dessert snobs. It disappears every single time. No leftovers. Ever.
- Unbelievably Delicious: The texture is what gets people. That creamy, slightly tangy filling against the softened graham crackers creates this almost cake-like consistency that nobody expects from a no-bake dessert.
What makes my version different? I use a cream cheese and whipped cream base that’s stabilized just enough to hold its shape but stays light and airy. The blueberries and strawberries aren’t just decoration — they add pops of tartness that cut through the sweetness. And the layering technique? I’ve learned through trial and error (and a few sad, soggy attempts) exactly how to build it so every slice comes out clean and beautiful.
Honestly, this isn’t just another icebox cake. It’s the one you’ll make when you want to show up with something impressive but still have time to actually enjoy the party. That’s the kind of dessert I can get behind.
What Ingredients You Will Need
This recipe uses simple, everyday ingredients that come together to create something surprisingly elegant. The magic is in how they layer and rest overnight, so each component matters more than you’d think.
- Graham crackers — One standard box (about 14-16 full sheets). You’ll need them for the base and the layers. I prefer the classic honey flavor, but cinnamon graham crackers work great if you want a warmer spice note. (Just don’t use chocolate — it overpowers the berries.)
- Cream cheese — 16 ounces, softened to room temperature. Full-fat is best here for that rich, creamy texture. Low-fat works in a pinch but the filling won’t be as luscious. Let it sit out for at least 30 minutes before you start.
- Powdered sugar — 1 cup. This sweetens the cream cheese mixture without the grittiness of granulated sugar. Sift it if you’re feeling fancy, but honestly, I rarely do and it turns out fine.
- Vanilla extract — 2 teaspoons. Pure vanilla makes a difference here since the flavor is front and center. I use Nielsen-Massey because I’m picky about my vanilla, but any good quality extract works.
- Heavy whipping cream — 2 cups. You’ll whip this into stiff peaks to fold into the cream cheese mixture. Cold cream whips better, so keep it chilled until you’re ready. (I’ve used Cool Whip in a pinch — about 8 ounces — and it works, but homemade whipped cream tastes noticeably better.)
- Fresh strawberries — 1 pound, hulled and sliced. Look for bright red berries that are firm but fragrant. If strawberries aren’t in season, you can swap in raspberries for the red layer — they hold up beautifully.
- Fresh blueberries — 6 ounces (about 1 cup). Small, firm blueberries work best. Giant ones can be watery and throw off the texture. Give them a quick rinse and pat them dry so they don’t make the cake soggy.
For the topping:
- Additional whipped cream — About 1 cup, for spreading on top. You can whip extra from the same batch or use store-bought if you’re short on time.
- Fresh berries for garnish — A handful of blueberries and sliced strawberries for that beautiful red, white, and blue finish.
Substitution notes: If you need a gluten-free version, use gluten-free graham crackers or even shortbread cookies. For a dairy-free option, use dairy-free cream cheese and coconut cream whipped topping — the texture will be slightly different but still delicious. And if you’re watching sugar, you can reduce the powdered sugar to 3/4 cup without major issues, though the filling won’t be quite as firm.
I’ve made this with frozen berries before, and honestly, don’t do it. They release too much liquid and the cake gets watery. Fresh berries are worth the extra trip to the store.
Equipment Needed
You don’t need much for this one, which is part of the appeal. Here’s what you’ll want to have on hand:
- 9×13-inch baking dish — Glass or ceramic works best. You want to see those beautiful layers through the sides. I use a Pyrex dish that’s been in my family for years.
- Electric mixer — Hand mixer or stand mixer works fine. You’ll be whipping cream and beating cream cheese, so a mixer saves your arm. If you’re feeling strong, a whisk and some elbow grease will get the job done, but I wouldn’t recommend it.
- Large mixing bowls — You’ll need at least two. One for the cream cheese mixture and one for whipping the cream.
- Spatula — A rubber spatula for folding the whipped cream into the cream cheese. Gentle folding is key here — you don’t want to deflate all that air.
- Sharp knife and cutting board — For slicing strawberries. A dull knife will squish them, and nobody wants that.
- Plastic wrap — To cover the dish while it chills overnight. Make sure it touches the surface of the top layer to prevent a skin from forming.
Budget-friendly tip: Don’t have a 9×13 dish? Use an 8×8 pan and halve the recipe, or even a loaf pan for a smaller version. The layering technique stays the same — just adjust the number of graham cracker layers.
I’ve made this in a disposable aluminum pan for picnics before, and it works fine. Just be careful moving it — those pans bend easily and you don’t want your beautiful layers sliding everywhere.
Preparation Method
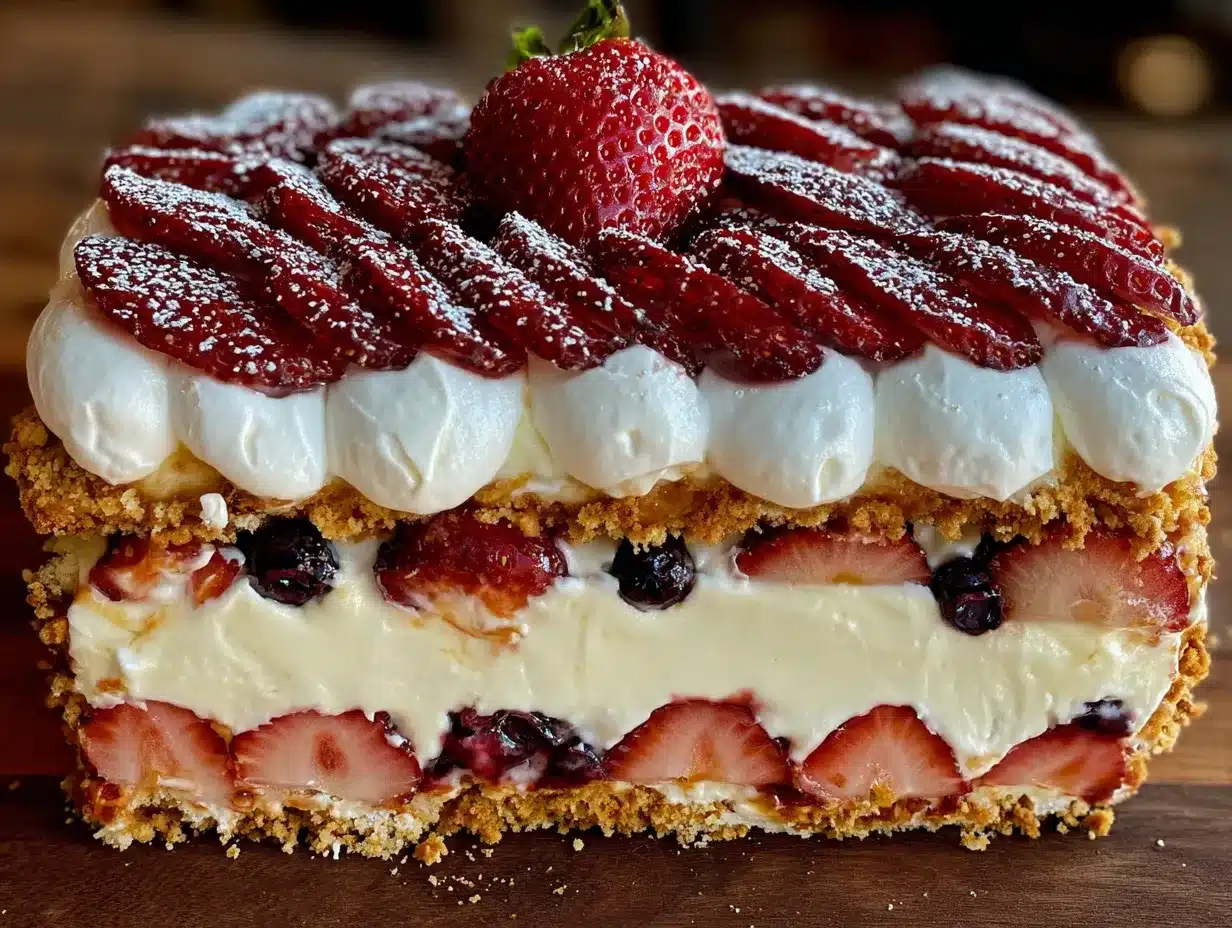
Let me walk you through this step by step. Trust me, it’s simpler than it looks.
Step 1: Prepare the cream cheese base. In a large mixing bowl, beat 16 ounces of softened cream cheese with an electric mixer on medium speed until smooth and fluffy — about 2 minutes. Scrape down the sides of the bowl halfway through. Add 1 cup of powdered sugar and 2 teaspoons of vanilla extract, then beat until combined. The mixture should be smooth with no lumps. Set this aside while you whip the cream.
Step 2: Whip the cream. In a separate cold bowl, pour in 2 cups of heavy whipping cream. Using clean beaters, whip on medium-high speed until stiff peaks form. You’ll know it’s ready when you lift the beaters and the cream holds its shape without drooping. Be careful not to over-whip — you’ll end up with butter, and that’s a different recipe entirely. (Yes, I’ve done it. No, it wasn’t salvageable.)
Step 3: Fold it together. Take about a third of the whipped cream and stir it into the cream cheese mixture to lighten it up. Then gently fold in the remaining whipped cream using a rubber spatula. Fold slowly and deliberately — cut through the center, scrape the bottom, and turn it over. Stop when you don’t see any white streaks. The mixture should be light, airy, and smooth.
Step 4: Prep your berries. Wash and dry 1 pound of strawberries, then hull and slice them into even pieces — about 1/4 inch thick. Rinse 6 ounces of blueberries and pat them dry with paper towels. Wet berries will make your cake soggy, so take the extra minute to dry them thoroughly.
Step 5: Start layering. Spread a thin layer of the cream mixture (about 1/2 cup) on the bottom of your 9×13 dish. This helps the graham crackers stick and prevents them from sliding around. Then arrange a single layer of graham crackers on top, breaking pieces as needed to fill gaps. You want full coverage — no empty spaces.
Step 6: Build the first layer. Spread about one-third of the remaining cream mixture evenly over the graham crackers. Use an offset spatula if you have one — it makes spreading so much easier. Scatter about one-third of the sliced strawberries and one-third of the blueberries over the cream. Press them in gently so they stay put.
Step 7: Repeat the layers. Add another layer of graham crackers on top of the berries. Repeat with another third of the cream mixture and another third of the berries. Add a third layer of graham crackers, the remaining cream mixture, and the remaining berries. You should have three layers of filling and berries total.
Step 8: Top it off. Add one final layer of graham crackers on top. Spread the remaining cream mixture (or extra whipped cream if you set some aside) over the top, covering the crackers completely. Smooth it out so it looks clean and even.
Step 9: Chill overnight. Cover the dish tightly with plastic wrap, making sure the wrap touches the surface of the cream to prevent a skin from forming. Refrigerate for at least 8 hours, but overnight is better. The graham crackers need time to soften into that cake-like texture. I’ve tried rushing this at 4 hours — the crackers were still crunchy in places. Patience pays off here.
Step 10: Garnish and serve. Before serving, arrange fresh berries on top in a patriotic pattern if you’re feeling festive — rows of blueberries and sliced strawberries work beautifully. Slice into squares and serve cold. Use a sharp knife and wipe it clean between cuts for the prettiest slices.
Cooking Tips & Techniques
After making this easy red, white, and blueberry icebox cake more times than I can count, I’ve picked up a few tricks that make a real difference.
Room temperature cream cheese is non-negotiable. I learned this the hard way when I tried to rush things with cold cream cheese. You get lumps that never fully smooth out, and nobody wants a lumpy filling. Let it sit on the counter for at least 30 minutes, or microwave it in 10-second bursts if you’re in a hurry. Just be careful not to melt it.
Don’t skip the bottom layer of cream. That thin spread on the bottom of the dish isn’t optional — it anchors the graham crackers so they don’t shift when you’re spreading the filling. I skipped it once and ended up with a sliding mess that looked like a dessert landslide.
Whip your cream to stiff peaks, not soft peaks. Soft peaks will deflate when you fold them into the cream cheese, leaving you with a runny filling. Stiff peaks hold their shape and give the cake structure. If you’re unsure, whip a little longer than you think you need — just stop before it turns grainy.
Press the berries in gently. Don’t just scatter them on top and hope for the best. Press each berry slightly into the cream so they stay put when you add the next layer of graham crackers. Otherwise, the crackers will slide around and your layers won’t be even.
Timing matters. This is a make-ahead dessert, so plan accordingly. I usually make it the night before a party, which means I can focus on other dishes the day of. The cake actually improves after 24 hours — the flavors meld together and the texture becomes perfectly tender.
One mistake I made: I once used a metal pan instead of glass, and the cake developed a slight metallic taste after sitting overnight. Glass or ceramic is the way to go. Trust me on this one.
Variations & Adaptations
This recipe is incredibly forgiving, so don’t be afraid to make it your own. Here are some variations I’ve tried and loved:
Berry swap: Not a fan of strawberries? Use raspberries instead. They’re tarter and hold up well. For a tropical twist, try diced mango and blueberries — the colors still pop and the flavor is unexpected but delicious. I made this for a luau-themed party and it was a hit.
Cookie swap: Graham crackers are classic, but vanilla wafers, shortbread cookies, or even thin ginger snaps work beautifully. Each gives a different flavor profile. Ginger snaps add a warm spice that pairs surprisingly well with the berries. (That crispy blueberry cobbler I love uses a similar flavor combo, so it makes sense.)
Dairy-free version: Use dairy-free cream cheese and coconut cream for the whipped topping. The coconut flavor adds a subtle tropical note that works with the berries. Just make sure the coconut cream is well-chilled before whipping.
Lower sugar option: Reduce the powdered sugar to 3/4 cup and use unsweetened whipped cream. The berries provide natural sweetness, so you won’t miss the extra sugar. I’ve made this for friends watching their sugar intake and nobody noticed the difference.
Individual servings: Make these in small mason jars or dessert cups for a grab-and-go option. Layer the ingredients in the same order, press down gently, and chill. They’re perfect for picnics or barbecues where you don’t want to deal with slicing and serving.
I once tried a chocolate version using chocolate graham crackers and adding cocoa powder to the cream mixture — it was good, but it didn’t have the same bright, fresh feel as the original. Stick with the classic for summer celebrations.
Serving & Storage Suggestions
This icebox cake is best served cold, straight from the refrigerator. The texture is perfectly set after an overnight chill — creamy, tender, and sliceable. Let it sit out for 5 minutes before cutting if you want cleaner slices, but don’t let it warm up too much or the layers will start to slide.
Presentation tips: Arrange fresh berries on top in a patriotic pattern for holidays — rows of blueberries and sliced strawberries create a flag effect that always gets compliments. For a more casual look, just scatter them artfully. A few mint leaves add a pop of green that looks beautiful against the red, white, and blue.
What to serve with it: This dessert is rich enough to stand alone, but a dollop of extra whipped cream never hurts. For a complete summer spread, pair it with grilled corn on the cob with chili lime butter and some American flag fruit kabobs for a festive, no-fuss menu. If you’re serving it after a heavier meal, keep the portions small — it’s rich enough that a little goes a long way.
Storage instructions: Cover the dish tightly with plastic wrap or transfer leftovers to an airtight container. It keeps in the refrigerator for up to 3 days. After that, the graham crackers start to break down too much and the texture gets mushy. I don’t recommend freezing this one — the cream separates when thawed and the texture becomes grainy.
Reheating: Don’t. This is a cold dessert through and through. If it’s been sitting out for more than 2 hours, just pop it back in the fridge to firm up.
One thing I’ve noticed — the flavors actually get better on the second day. The berries release their juices into the cream, and the graham crackers soften to the perfect consistency. So if you can resist eating it all on day one, you’re in for a treat on day two.
Nutritional Information & Benefits
Let’s be real — this is a dessert, not a health food. But it does have some redeeming qualities worth mentioning.
Per serving (based on 12 servings): Approximately 380 calories, 24g fat, 38g carbohydrates, 5g protein, 22g sugar. These are estimates and will vary based on your specific ingredients and portion sizes.
The good stuff: Blueberries are packed with antioxidants and vitamin C. Strawberries are rich in vitamin C and fiber. So while you’re enjoying that creamy, decadent dessert, you’re also getting a decent dose of fruit. That counts for something, right?
Dietary considerations: This recipe is vegetarian and can be made gluten-free or dairy-free with simple substitutions. It contains dairy and gluten in its standard form. If you’re serving a crowd with dietary restrictions, I recommend making the substitutions I mentioned earlier — they work well and still taste great.
My take: I believe in balance. This isn’t an everyday dessert, but for celebrations and special occasions, it’s absolutely worth the indulgence. The fresh berries add nutritional value that you don’t get from most cakes or pies, and the portion control is built in — one slice is satisfying enough that you won’t go back for seconds. (Usually.)
Conclusion
This easy red, white, and blueberry icebox cake has become my signature summer dessert for good reason. It’s simple enough for a beginner baker (or non-baker, really), impressive enough for a holiday table, and delicious enough that people ask for the recipe every single time. No oven, no stress, no complicated techniques — just layers of creamy, fruity goodness that come together in minutes.
I love that this recipe lets me enjoy the party instead of hiding in the kitchen. It’s the kind of dessert that makes you look like you put in way more effort than you actually did, and honestly, that’s my favorite kind of recipe. Whether you’re making it for a Fourth of July barbecue, a summer potluck, or just because you want something cold and sweet, this cake delivers every time.
If you try this recipe, I’d love to hear about it. Leave a comment below and let me know how it turned out — did you make any substitutions? Did your family love it? Share your photos and tag me so I can see your beautiful creations. And if you’re looking for more no-bake summer desserts, check out my creamy frozen strawberry margarita pie — it’s another warm-weather favorite that never lasts long.
Happy summer, friends. Go make something delicious — and don’t forget to save me a slice.
Frequently Asked Questions
Can I make this icebox cake ahead of time?
Absolutely. In fact, I recommend it. Make it the night before you plan to serve it — the flavors meld together and the texture becomes perfectly tender after 8-12 hours in the fridge. Just keep it covered and add the garnish right before serving.
Can I use frozen berries instead of fresh?
I don’t recommend it. Frozen berries release too much liquid as they thaw, which makes the cake watery and the graham crackers soggy. Fresh berries are worth the extra trip to the store. If fresh berries aren’t available, try using freeze-dried berries for a different texture.
How do I get clean slices?
Use a sharp knife and wipe it clean between each cut. For the cleanest slices, chill the cake for the full recommended time — at least 8 hours. If your knife is sticking, run it under hot water and dry it off before cutting. This trick works like magic.
Can I use Cool Whip instead of homemade whipped cream?
Yes, you can. Use about 8 ounces of thawed Cool Whip in place of the homemade whipped cream. The texture will be slightly different — a bit more stable and less airy — but it still tastes great. I’ve done it when I’m short on time or forgot to buy heavy cream.
How long does this cake last in the refrigerator?
It keeps well for up to 3 days when covered tightly. After that, the graham crackers start to break down and the texture becomes mushy. The flavor is still good, but the presentation suffers. I usually recommend eating it within 2 days for the best texture.
Pin This Recipe!
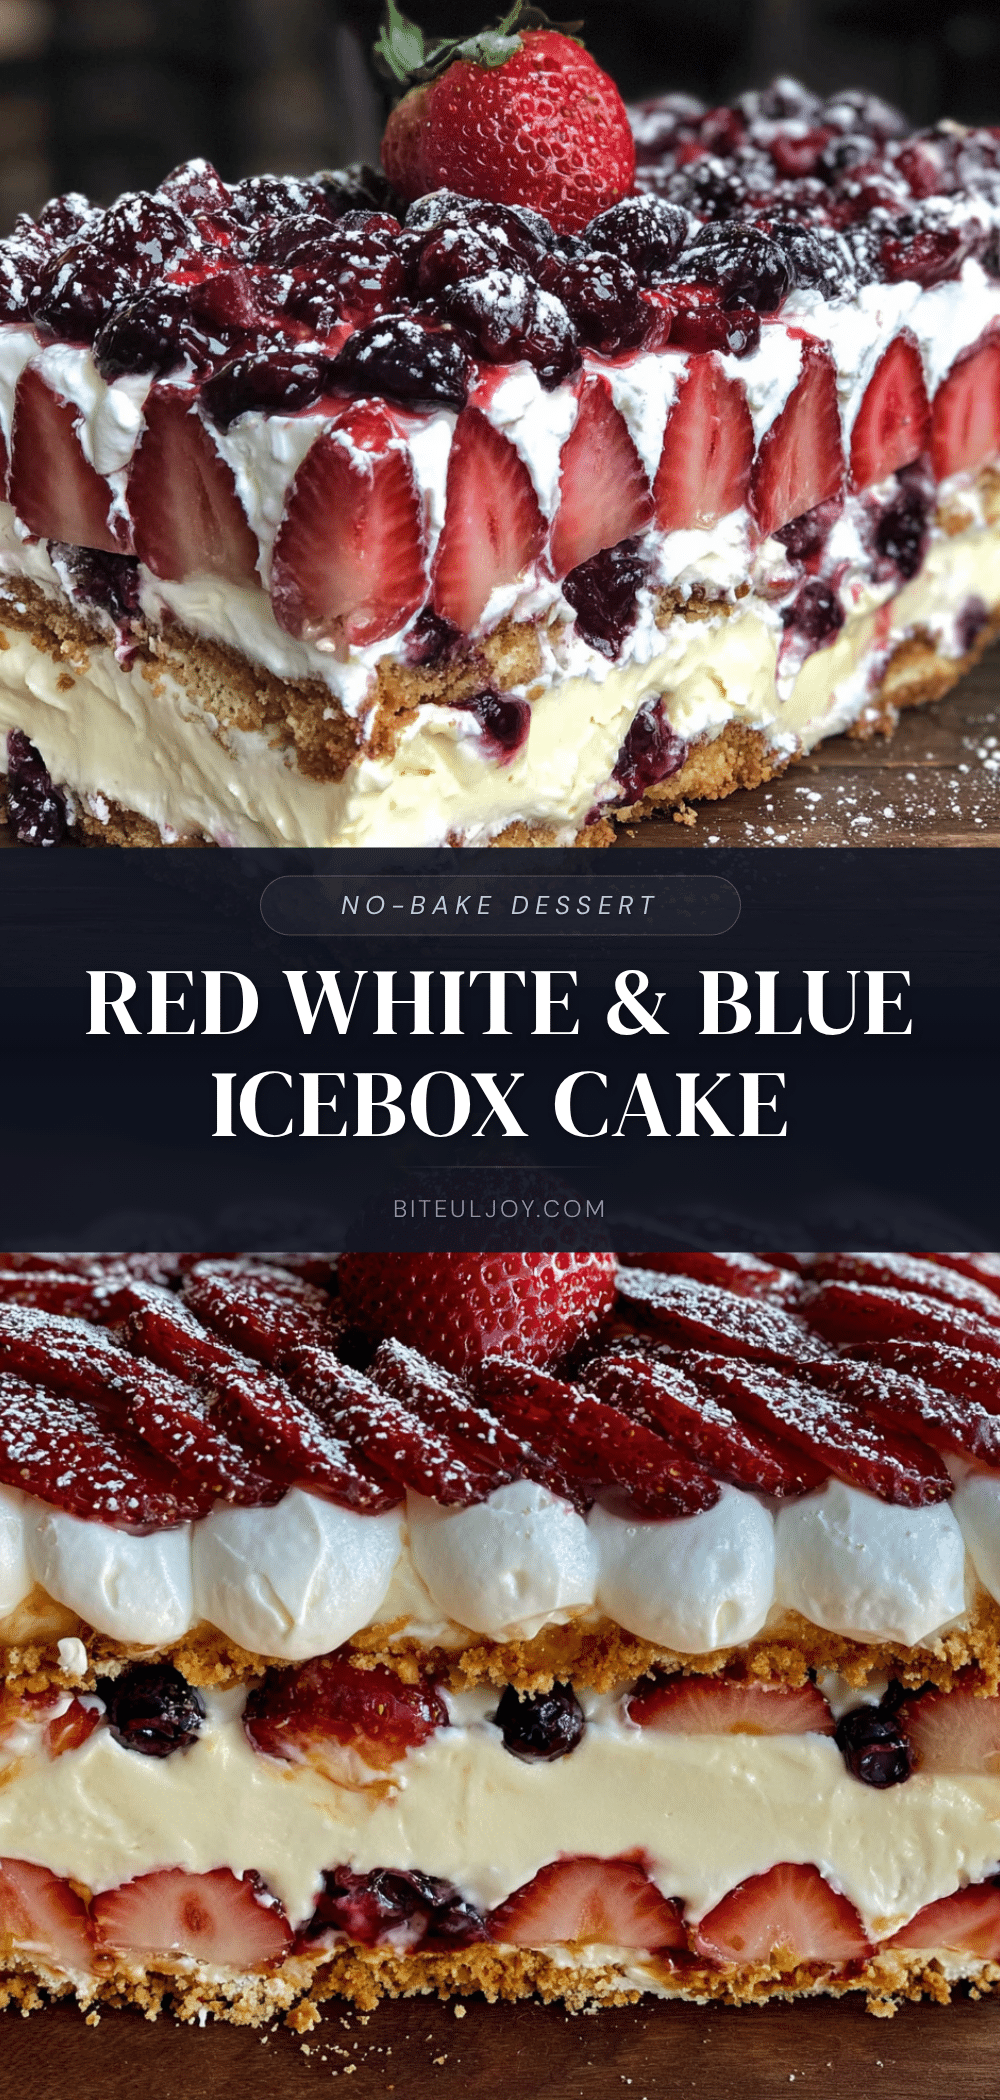
Easy Red, White & Blueberry Icebox Cake Recipe

A no-bake, creamy icebox cake layered with graham crackers, cream cheese filling, fresh strawberries, and blueberries. Perfect for summer celebrations like the Fourth of July.
- Prep Time: 20 minutes
- Cook Time: 0 minutes
- Total Time: 8 hours 20 minutes (includes chilling)
- Yield: 12 servings 1x
- Category: Dessert
- Cuisine: American
Ingredients
- 1 box (14-16 full sheets) graham crackers
- 16 ounces cream cheese, softened
- 1 cup powdered sugar
- 2 teaspoons vanilla extract
- 2 cups heavy whipping cream
- 1 pound fresh strawberries, hulled and sliced
- 6 ounces (about 1 cup) fresh blueberries
- 1 cup additional whipped cream (for topping)
- Fresh berries for garnish
Instructions
- In a large mixing bowl, beat 16 ounces of softened cream cheese with an electric mixer on medium speed until smooth and fluffy, about 2 minutes. Scrape down the sides halfway through. Add 1 cup powdered sugar and 2 teaspoons vanilla extract, then beat until combined. Set aside.
- In a separate cold bowl, pour in 2 cups of heavy whipping cream. Using clean beaters, whip on medium-high speed until stiff peaks form. Be careful not to over-whip.
- Take about a third of the whipped cream and stir it into the cream cheese mixture to lighten it. Then gently fold in the remaining whipped cream using a rubber spatula until no white streaks remain.
- Wash and dry 1 pound of strawberries, then hull and slice into even pieces (about 1/4 inch thick). Rinse 6 ounces of blueberries and pat dry with paper towels.
- Spread a thin layer of the cream mixture (about 1/2 cup) on the bottom of a 9×13-inch dish. Arrange a single layer of graham crackers on top, breaking pieces as needed to fill gaps.
- Spread about one-third of the remaining cream mixture evenly over the graham crackers. Scatter about one-third of the sliced strawberries and one-third of the blueberries over the cream. Press them in gently.
- Add another layer of graham crackers on top of the berries. Repeat with another third of the cream mixture and another third of the berries. Add a third layer of graham crackers, the remaining cream mixture, and the remaining berries.
- Add one final layer of graham crackers on top. Spread the remaining cream mixture (or extra whipped cream) over the top, covering the crackers completely. Smooth it out.
- Cover the dish tightly with plastic wrap, making sure the wrap touches the surface of the cream. Refrigerate for at least 8 hours, preferably overnight.
- Before serving, arrange fresh berries on top in a patriotic pattern if desired. Slice into squares and serve cold.
Notes
Room temperature cream cheese is essential for a smooth filling. Whip cream to stiff peaks for best structure. Press berries gently into cream to prevent sliding. For clean slices, use a sharp knife and wipe it clean between cuts. The cake improves after 24 hours. Do not freeze.
Nutrition
- Serving Size: 1 slice (1/12 of cak
- Calories: 380
- Sugar: 22
- Sodium: 280
- Fat: 24
- Saturated Fat: 14
- Carbohydrates: 38
- Fiber: 2
- Protein: 5
Keywords: icebox cake, no-bake dessert, Fourth of July, red white and blue, summer dessert, berry dessert, graham cracker cake