Third time in as many weeks and I’m still finding rogue bits of cream cheese under my fingernails. The first batch looked less like footballs and more like sad, lumpy potatoes. The second batch? I got cocky with the rolling and ended up with cheese balls that were practically cubes. But the third time—the third time I finally figured out the trick to getting those little laces just right, and I stood there in my kitchen, holding a perfect tiny football-shaped cheese ball in my palm, and honestly? I felt a little ridiculous about how proud I was.
It started because I was tired of the same old game day platters. You know the ones—store-bought veggie trays, a sad brick of cheddar, and those crackers that taste like cardboard. I wanted something that felt special but didn’t require me to spend all day in the kitchen. Something that would make people actually stop and say “wait, you made these?” before they devoured the whole plate. And these mini football cheese ball bites? They’re exactly that.
They’re stupidly simple, which is probably why I kept making them until I got them right. Just a handful of ingredients, some chilling time, and a little patience with the shaping. But there’s something about that first bite—the creamy, herby center against the crunch of the coating—that makes you forget they took maybe twenty minutes of actual hands-on work. I keep coming back to them because they’re the kind of recipe that looks like you tried way harder than you actually did. And isn’t that the best kind of party trick?
Why You’ll Love This Recipe
These mini football cheese ball bites aren’t just cute—they’re genuinely delicious and practically foolproof. I’ve tested this recipe enough times to know exactly what works and what doesn’t, so you can skip straight to the good part.
- Quick & Easy: You’ll spend about 20 minutes mixing and shaping, then just let them chill. That’s it. No complicated techniques or fancy equipment required.
- Simple Ingredients: Cream cheese, cheddar, a few seasonings, and some nuts or herbs for coating. You probably have most of this in your fridge right now.
- Perfect for Game Day: These are made for parties. They’re portable, they’re finger food, and they disappear faster than anything else on the table. Pair them with crispy bacon-wrapped jalapeño poppers for the ultimate spread.
- Crowd-Pleaser: I’ve brought these to tailgates, Super Bowl parties, and casual get-togethers. Kids love the mini size, adults love the flavor, and everyone loves the football shape.
- Unbelievably Delicious: The combination of creamy, tangy cheese with a crunchy, savory coating is just perfect. It’s comfort food that looks impressive.
This isn’t just another cheese ball recipe—it’s the one that’ll have people asking for the recipe before the first quarter ends. The key is in the seasoning blend and the technique for getting that football shape just right. I’ve learned through trial and error (and trust me, there were errors) exactly how to make these look like actual footballs instead of weird cheese blobs.
What Ingredients You Will Need
This recipe relies on simple, everyday ingredients to create something that tastes way more complex than it is. The magic is in the balance of flavors and textures—creamy, tangy, salty, and a little bit crunchy.
- Cream cheese (16 oz, softened): Use full-fat for the best texture and flavor. Let it sit out for at least 30 minutes before mixing so it blends smoothly. I prefer Philadelphia brand for consistent results, but any block-style cream cheese works.
- Sharp cheddar cheese (1 ½ cups, finely shredded): The sharper the better—it gives the cheese balls a bold flavor that stands up to the cream cheese. Pre-shredded cheese works in a pinch, but freshly shredded melts and blends better. Look for a block of aged cheddar for maximum flavor punch.
- Green onions (3-4, finely chopped): They add a mild oniony bite and a pop of color. Use both the white and light green parts for the best flavor. If you’re not a fan, you can substitute with chives or shallots.
- Worcestershire sauce (1 teaspoon): This adds that subtle umami depth that makes people wonder what your secret ingredient is. Don’t skip it—it really rounds out the flavor.
- Garlic powder (½ teaspoon): Not too much—you want a hint of garlic, not a punch in the face. Fresh garlic can be too harsh here, so stick with the powder.
- Onion powder (½ teaspoon): Works with the garlic powder to build a savory base. It’s subtle but important.
- Salt (¼ teaspoon): Go easy here since the cheese and Worcestershire sauce already bring saltiness. You can always add more after tasting.
- Black pepper (¼ teaspoon, freshly ground): A little bit of heat and earthiness. Freshly ground makes a difference, I promise.
- For the coating—choose one or mix and match:
- Finely chopped pecans or walnuts (½ cup): Classic choice—adds a buttery crunch. Toast them lightly first for extra flavor.
- Fresh parsley (¼ cup, finely chopped): For a green, herbaceous coating that looks beautiful.
- Everything bagel seasoning (3 tablespoons): My personal favorite. The sesame seeds, poppy seeds, garlic, and onion create an incredible crust.
- Crushed pretzels (½ cup): For a salty, crunchy coating that screams game day snack.
- For the football laces (optional but recommended):
- Thin strips of chive or green onion tops: The classic, natural-looking option.
- Small pieces of black olive or sun-dried tomato: For a more defined, contrasting lace look.
Ingredient Swaps & Notes: For a milder flavor, use Monterey Jack or Colby cheese instead of cheddar. Want a little heat? Add a pinch of cayenne pepper or some finely diced jalapeño to the cheese mixture. If you’re dairy-sensitive, there are decent dairy-free cream cheese alternatives, though the texture will be slightly different. And if you can’t find everything bagel seasoning, just mix sesame seeds, poppy seeds, dried garlic, and dried onion flakes yourself—it’s easy and cheaper.
Equipment Needed
You don’t need much for this recipe, which is part of the beauty. Here’s what I use:
- Mixing bowl: A medium-sized bowl works perfectly for combining the cheese mixture. Nothing fancy needed.
- Electric hand mixer or stand mixer: While you can mix by hand with some serious elbow grease, a mixer makes the cream cheese silky smooth in about 30 seconds. I’ve done it both ways, and the mixer is just easier.
- Rubber spatula: For scraping down the sides of the bowl and getting every last bit of cheese mixture.
- Parchment paper or wax paper: Line a baking sheet or large plate with this for easy cleanup and for chilling the cheese balls without sticking.
- Baking sheet or large plate: To hold the cheese balls while they chill in the fridge.
- Plastic wrap: To cover the cheese balls during chilling so they don’t pick up any weird fridge odors.
- Small cookie scoop or tablespoon: For portioning the cheese mixture evenly. A cookie scoop makes them all the same size, which is key for uniform football shapes.
- Sharp knife: For cutting the chive or olive laces. A dull knife will just squish them.
If you don’t have a cookie scoop, just use a tablespoon and try to make each portion roughly the same size. I’ve also used my hands to estimate, and while it works, the results are a little less uniform. The parchment paper is non-negotiable though—trust me on this one. I once skipped it and spent way too long scraping cold cheese off a metal pan.
Preparation Method
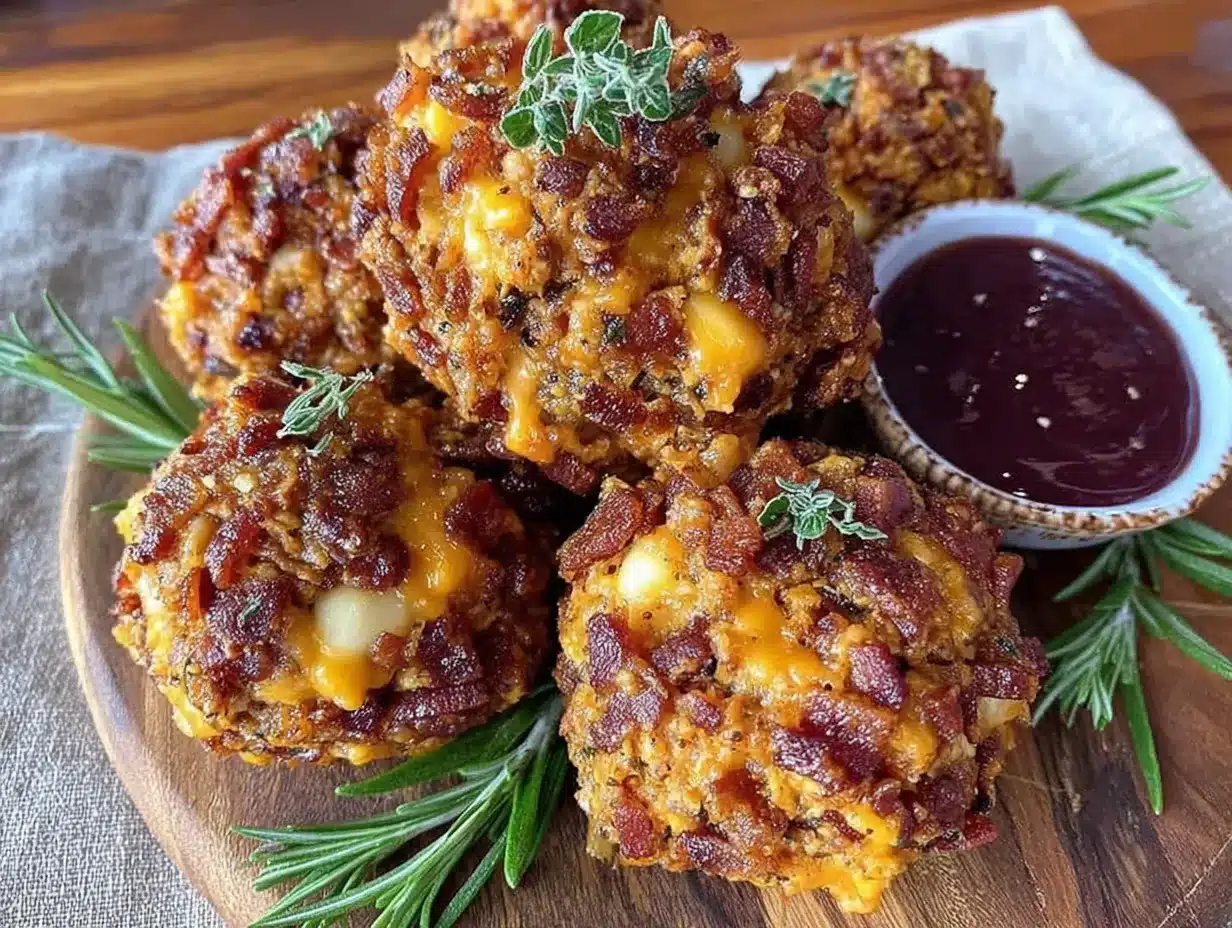
Let’s get to the good part. Here’s how to make these little footballs of deliciousness.
Step 1: Soften the Cream Cheese
Take your cream cheese out of the fridge at least 30 minutes before you start. It should be room temperature—soft enough that you can easily press your finger into it. Cold cream cheese will give you lumpy cheese balls, and nobody wants that. If you’re in a hurry, you can microwave it in 10-second bursts, but be careful not to melt it. Just soften it.
Step 2: Mix the Cheese Base
In your mixing bowl, combine the softened cream cheese, shredded cheddar, chopped green onions, Worcestershire sauce, garlic powder, onion powder, salt, and pepper. Using your electric mixer on medium speed, beat everything together until it’s smooth and well combined. This should take about 1-2 minutes. Stop and scrape down the sides of the bowl with your rubber spatula halfway through. Taste the mixture—yes, raw—and adjust the seasoning if needed. It should be creamy, tangy, and savory with a little kick from the pepper and onions.
Step 3: Chill the Mixture
Cover the bowl with plastic wrap and pop it in the refrigerator for at least 30 minutes. This step is crucial—the mixture needs to firm up so you can shape it into footballs without it sticking to your hands like glue. I usually let it chill for an hour if I have the time. You can even make the mixture a day ahead and keep it covered in the fridge until you’re ready to shape.
Step 4: Prepare Your Coating
While the cheese mixture chills, get your coating ready. If you’re using nuts, chop them finely—you want them small enough to stick to the cheese but not so fine that they turn into dust. If you’re using fresh parsley, wash and dry it thoroughly, then chop it very fine. Spread your chosen coating on a small plate or shallow dish so you can easily roll the cheese balls in it.
Step 5: Shape the Footballs
Line your baking sheet or plate with parchment paper. Take the chilled cheese mixture out of the fridge. Using your cookie scoop or a tablespoon, portion out the mixture. Roll each portion into a ball between your palms. Then—here’s the football trick—gently shape each ball into an oval by pressing the sides slightly and tapering the ends. Think of a small egg shape, but a little more pointed at the ends. Don’t worry if they’re not perfect; the coating will hide minor imperfections. Place each shaped football on the parchment-lined sheet.
Step 6: Coat the Cheese Balls
Take one shaped football and roll it gently in your chosen coating. Press lightly so the coating sticks. Use your fingers to pat the coating onto any bare spots. Place the coated football back on the parchment sheet. Repeat with all the cheese balls. If you’re using multiple coatings, keep them separate so you know which is which—or just mix them all together for a fun, speckled look.
Step 7: Add the Laces
This is the step that makes them look like actual footballs. If you’re using chives or green onion tops, cut them into thin strips about 1-2 inches long. Gently press two or three strips onto the top of each cheese ball in a slight curve, mimicking the laces on a football. If you’re using black olive or sun-dried tomato pieces, cut them into tiny strips and arrange them the same way. Press gently so they stay in place.
Step 8: Final Chill
Cover the baking sheet with plastic wrap and refrigerate the cheese balls for at least another 30 minutes before serving. This helps them firm up completely and makes them easier to handle. You can make them up to 24 hours ahead—just keep them covered in the fridge.
Cooking Tips & Techniques
I’ve made these more times than I care to admit, and I’ve learned a few things along the way. Here are my best tips for perfect football cheese balls every time.
Don’t skip the chilling. I know it’s tempting to rush through, but the mixture needs to be cold to shape properly. Warm cheese mixture is a sticky, frustrating mess. Cold mixture rolls into perfect little footballs. Patience pays off here.
Wet your hands slightly. If the cheese mixture is still a little sticky, dampen your hands with cold water before rolling. The moisture helps prevent sticking without adding any flavor. Just don’t use too much water or you’ll make the cheese slippery.
Use a light touch with the coating. You want the coating to stick, not get pressed into the cheese so hard that it changes the shape. Gently roll and pat, don’t squeeze.
Make them uniform. Use a cookie scoop to portion the mixture so all your cheese balls are roughly the same size. This makes them look more professional and ensures they chill evenly. Nobody wants one giant football and a bunch of tiny ones.
Experiment with coatings. I’ve tried everything from crushed barbecue chips to toasted coconut (not recommended, by the way). The best coatings are savory and crunchy. My current favorite is a mix of everything bagel seasoning and finely chopped pecans—best of both worlds.
Don’t overmix. Once the ingredients are combined, stop mixing. Overworking the cream cheese can make it too soft and greasy. You want it smooth, not runny.
One mistake I made early on: I used pre-shredded cheese from a bag. It has anti-caking agents that prevent it from melting smoothly, so the texture was grainy. Freshly shredded cheese makes a world of difference. Take the extra two minutes to shred it yourself.
Variations & Adaptations
One of the best things about this recipe is how easy it is to change up. Here are some of my favorite variations.
Spicy Football Cheese Balls: Add 1-2 finely diced jalapeños (seeds removed if you want less heat) and a pinch of cayenne pepper to the cheese mixture. Coat with crushed tortilla chips or a mix of chopped pecans and chili powder. These are always a hit with the heat-seekers at the party.
Bacon Cheddar Footballs: Stir in ½ cup of cooked, crumbled bacon (about 6 strips) to the cheese mixture. Use a coating of crushed bacon bits mixed with chopped chives. The smoky, salty bacon flavor pairs perfectly with the creamy cheese. Pair these with savory pulled pork sliders for a full game day spread.
Herb & Garlic Version: Increase the fresh herbs—add 2 tablespoons each of chopped fresh dill, parsley, and chives to the mixture. Use a coating of finely chopped fresh parsley and a little lemon zest. This version is lighter and brighter, perfect for spring parties or bridal showers.
Blue Cheese & Walnut Footballs: Substitute ½ cup of the cheddar with crumbled blue cheese. The tangy, pungent blue cheese adds incredible depth. Coat with finely chopped walnuts for a classic combination. These are more sophisticated and pair beautifully with a glass of red wine.
Dairy-Free Adaptation: Use a high-quality dairy-free cream cheese and dairy-free shredded cheddar. The texture will be slightly softer, so chill the mixture longer before shaping. Nutritional yeast can add a cheesy flavor if needed. I’ve tested this with a few brands, and Kite Hill’s cream cheese alternative works best.
Make it a Dip Instead: Don’t want to shape them? Just mix the cheese base, transfer it to a serving bowl, and top with your coating. Serve with crackers and veggies. It’s the same flavor with way less effort.
Serving & Storage Suggestions
These mini football cheese balls are best served cold or at room temperature. Take them out of the fridge about 15-20 minutes before serving to let the flavors soften and come to life. Cold cheese can be a little muted, and room temperature lets the herbs and seasonings shine.
Presentation Ideas: Arrange the cheese balls on a large platter lined with parchment paper or a bed of fresh lettuce. Place them in a pattern that mimics a football formation or just scatter them casually. I like to serve them alongside a variety of crackers—butter crackers, wheat thins, and pretzel crisps all work well. Add some carrot sticks, celery, and bell pepper strips for color and crunch. For a truly game day vibe, serve them on a mini cutting board or a wooden platter with a small bowl of honey or hot honey for dipping.
What to Serve With Them: These cheese balls are perfect on their own, but they also pair wonderfully with other appetizers. Try them with grilled shrimp skewers for a surf-and-turf party platter. They also go great with a simple charcuterie board featuring cured meats, olives, and dried fruits.
Storage: Store any leftover cheese balls in an airtight container in the refrigerator for up to 5 days. They’ll stay fresh and creamy. If you’ve used a fresh herb coating, the color might fade a little after a day or two, but the flavor will still be great.
Freezing: You can freeze these! Place the shaped, coated cheese balls on a baking sheet and freeze until solid (about 2 hours). Then transfer them to a freezer-safe bag or container. They’ll keep for up to 3 months. To serve, thaw them in the refrigerator overnight. The texture might be slightly softer after freezing, but they’re still delicious.
Reheating: These are served cold, so no reheating needed. Just let them sit at room temperature for a few minutes before serving.
Flavor Development: Honestly, these taste even better the next day. The flavors meld together overnight, and the herbs and seasonings become more pronounced. If you can, make them a day ahead—your future self will thank you.
Nutritional Information & Benefits
Let’s be real—these are cheese balls, not health food. But they’re made with real ingredients, and there are a few nutritional perks worth noting.
Estimated Nutritional Values (per cheese ball, based on 20 servings):
- Calories: 85-100
- Fat: 7-9g
- Saturated Fat: 4-5g
- Cholesterol: 20-25mg
- Sodium: 120-150mg
- Carbohydrates: 1-2g
- Protein: 3-4g
Health Benefits: Cream cheese and cheddar provide calcium and protein, which are important for bone health and muscle function. Green onions are packed with vitamin K and antioxidants. If you use a nut coating, you’ll get healthy fats and a little extra protein. The Worcestershire sauce adds iron and B vitamins. So while these aren’t exactly a superfood, they’re not empty calories either.
Dietary Considerations: This recipe is naturally low-carb and gluten-free (just check your Worcestershire sauce label—some brands contain gluten). It’s not suitable for vegans or those with dairy sensitivities, but the dairy-free adaptation I mentioned earlier works well. If you’re watching your sodium, use low-sodium cheddar and go easy on the salt in the mixture. The everything bagel seasoning also adds sodium, so keep that in mind.
Potential Allergens: Dairy (cream cheese, cheddar), tree nuts (if using pecan or walnut coating), and gluten (if using pretzel coating or certain Worcestershire sauces). Always check labels if you’re serving guests with allergies.
Personal Wellness Perspective: I believe in balance. These cheese balls are a treat, and that’s okay. They’re made from real food, they bring people together, and they make game day more fun. Enjoy them in moderation, pair them with veggie sticks, and don’t stress about the numbers.
Conclusion
These easy mini football-shaped cheese ball bites are the kind of recipe that makes you look like a hero with minimal effort. They’re cute, they’re delicious, and they’re guaranteed to be the first thing to disappear from your game day spread. I’ve made them for Super Bowl parties, tailgates, and casual Friday night hangouts, and they’ve never let me down.
The best part? You can customize them to fit your crowd. Spicy, herby, smoky, or classic—there’s a version for everyone. And once you get the hang of shaping those little footballs, you’ll find yourself making them for every party you host. They’re just that fun.
I’d love to hear how yours turn out. Did you try a different coating? Add some extra spice? Serve them with something unexpected? Drop a comment below and let me know—I’m always looking for new ideas. And if you’re planning a big game day menu, don’t forget to check out my classic American cheeseburger recipe for the main event. Happy snacking, friends!
Frequently Asked Questions
Can I make these mini football cheese balls ahead of time?
Absolutely! These are perfect for making ahead. You can prepare the cheese mixture up to 24 hours in advance and keep it covered in the fridge. Shape and coat them up to 8 hours before serving. They actually taste better the next day as the flavors meld together.
How do I get the football shape to hold?
The key is a good chill. Make sure the cheese mixture is thoroughly chilled before shaping—at least 30 minutes, but an hour is better. Wet your hands slightly with cold water to prevent sticking, and use a gentle touch. Shape them into ovals with slightly tapered ends, like a small egg. If they start to soften, pop them back in the fridge for a few minutes.
What’s the best coating for these cheese balls?
My personal favorite is everything bagel seasoning—it’s savory, crunchy, and incredibly flavorful. But finely chopped pecans or walnuts are a classic choice, and fresh parsley makes them look beautiful. You can also mix coatings for a fun, speckled look. Crushed pretzels add a salty crunch that’s perfect for game day.
Can I use low-fat cream cheese?
You can, but I don’t recommend it. Low-fat cream cheese has a higher water content, which makes the mixture softer and harder to shape. It also doesn’t have the same rich, creamy texture. If you’re watching calories, use full-fat but make smaller cheese balls. The flavor and texture will be much better.
How long do these last in the fridge?
Stored in an airtight container, these cheese balls will stay fresh for up to 5 days. The coating might soften a little over time, especially if you used fresh herbs, but the flavor will still be great. You can also freeze them for up to 3 months—just thaw in the refrigerator overnight before serving.
Pin This Recipe!

Easy Mini Football Cheese Ball Bites: Best Game Day Appetizer

These adorable mini football-shaped cheese ball bites are creamy, savory, and perfect for game day. Made with simple ingredients and a few clever tricks, they look impressive but are surprisingly easy to make.
- Prep Time: 20 minutes
- Cook Time: 0 minutes
- Total Time: 1 hour 20 minutes (includes chilling time)
- Yield: 20 servings 1x
- Category: Appetizer
- Cuisine: American
Ingredients
- 16 oz cream cheese, softened
- 1 ½ cups sharp cheddar cheese, finely shredded
- 3–4 green onions, finely chopped
- 1 teaspoon Worcestershire sauce
- ½ teaspoon garlic powder
- ½ teaspoon onion powder
- ¼ teaspoon salt
- ¼ teaspoon black pepper, freshly ground
- For the coating (choose one or mix): ½ cup finely chopped pecans or walnuts, ¼ cup finely chopped fresh parsley, 3 tablespoons everything bagel seasoning, or ½ cup crushed pretzels
- For the football laces (optional): thin strips of chive or green onion tops, or small pieces of black olive or sun-dried tomato
Instructions
- Soften the cream cheese: Take cream cheese out of fridge at least 30 minutes before starting. It should be room temperature and soft enough to press a finger into easily.
- Mix the cheese base: In a mixing bowl, combine softened cream cheese, shredded cheddar, chopped green onions, Worcestershire sauce, garlic powder, onion powder, salt, and pepper. Beat with an electric mixer on medium speed until smooth and well combined, about 1-2 minutes. Scrape down sides halfway through. Taste and adjust seasoning if needed.
- Chill the mixture: Cover bowl with plastic wrap and refrigerate for at least 30 minutes (1 hour is better) until firm enough to shape.
- Prepare your coating: While mixture chills, prepare coating. If using nuts, chop finely. If using parsley, wash, dry, and chop very fine. Spread coating on a small plate or shallow dish.
- Shape the footballs: Line a baking sheet or plate with parchment paper. Using a cookie scoop or tablespoon, portion out the chilled mixture. Roll each portion into a ball, then shape into an oval by pressing sides slightly and tapering ends to resemble a football. Place on parchment-lined sheet.
- Coat the cheese balls: Roll each shaped football gently in chosen coating, pressing lightly so it sticks. Pat coating onto any bare spots. Place back on parchment. Repeat with all.
- Add the laces: If using chives or green onion tops, cut into thin strips 1-2 inches long. Gently press 2-3 strips onto top of each cheese ball in a slight curve to mimic football laces. If using olive or sun-dried tomato, cut into tiny strips and arrange similarly.
- Final chill: Cover baking sheet with plastic wrap and refrigerate for at least another 30 minutes before serving. Can be made up to 24 hours ahead.
Notes
Don’t skip the chilling steps—they’re crucial for shaping. Wet your hands slightly with cold water if mixture is sticky. Use a light touch with coating. For uniform size, use a cookie scoop. Freshly shredded cheese works better than pre-shredded. These taste even better the next day as flavors meld.
Nutrition
- Serving Size: 1 cheese ball
- Calories: 85100
- Sodium: 120150
- Fat: 79
- Saturated Fat: 45
- Carbohydrates: 12
- Protein: 34
Keywords: mini football cheese ball bites, game day appetizer, easy cheese ball recipe, football shaped cheese ball, party appetizer, cream cheese bites, Super Bowl snack