
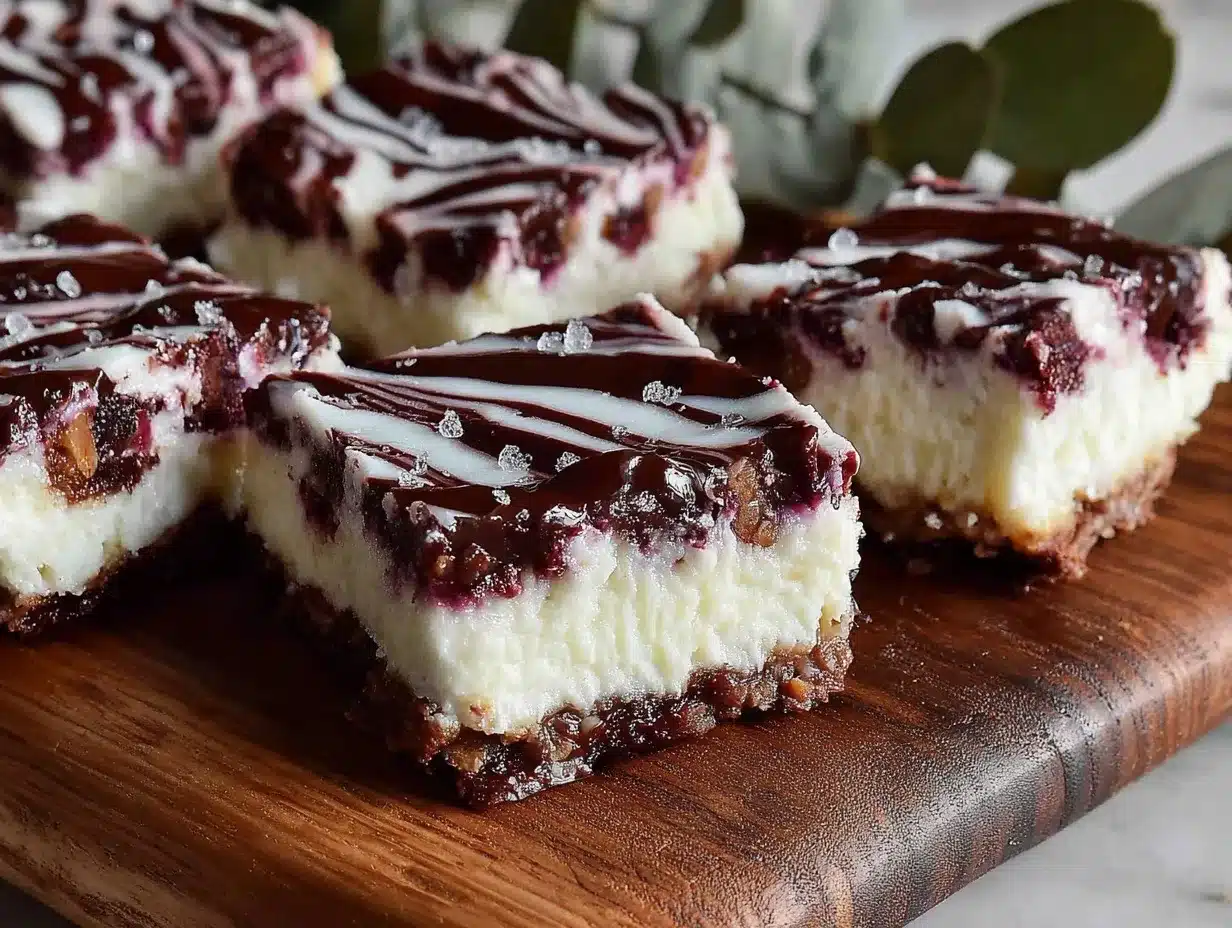
“Why does the chocolate run like that?” my friend asked, peering over my shoulder as I drizzled the last stripe on what would soon become my go-to treat: Easy No-Bake Zebra Cake Copycat Bars with Chocolate Stripes. Honestly, I hadn’t planned on making anything elaborate that afternoon—just a quick snack for when life felt a bit too hectic. But somehow, this simple mix of creamy, crunchy, and chocolaty goodness turned into a bit of magic right in my kitchen.
I remember the moment clearly: a rainy Saturday with nothing much planned, and a craving for something sweet but fuss-free. I was skeptical at first about replicating that iconic zebra cake look and taste without an oven or hours of effort. But as I layered crushed cookies with sweetened cream and those perfect chocolate stripes, it hit me how this recipe could be a true lifesaver for anyone needing a quick, no-fail dessert. No fancy tools, no waiting around, just a cool, refreshing bar that looks as fun as it tastes.
What stuck with me was how effortlessly these bars came together and how that subtle contrast of textures and flavors kept me sneaking bites long after I promised myself just one. This recipe isn’t about showy techniques or complicated steps—it’s about that comforting, nostalgic hit of a zebra cake, reimagined for busy days and late-night cravings. And if you’re anything like me, a quick fix with a wow factor is exactly the kind of treat that earns a permanent spot in your recipe box.
Why You’ll Love This Recipe
After making these Easy No-Bake Zebra Cake Copycat Bars with Chocolate Stripes multiple times in one week (no joke!), I can say with confidence this recipe ticks a lot of boxes. Here’s why it might just become your new favorite:
- Quick & Easy: It comes together in under 20 minutes – perfect for whipping up when you need a last-minute dessert or snack.
- Simple Ingredients: No exotic stuff needed. Most of these are pantry staples or easy to find at any grocery store.
- Perfect for Any Occasion: Whether it’s a casual gathering, a holiday treat, or just your afternoon pick-me-up, these bars fit right in.
- Crowd-Pleaser: Kids and adults alike go crazy for the creamy layers and those striking chocolate stripes.
- Unbelievably Delicious: The interplay of smooth, crunchy, and sweet textures reminds me of classic zebra cakes but with a fresh twist.
What sets this recipe apart is the way the chocolate stripes aren’t just for show—they add a rich depth of flavor and a little surprise in every bite. I like to think of it as comfort food without the oven hassle, something that feels homemade and special but doesn’t demand hours in the kitchen. It’s also a blank canvas for creativity, which you’ll see in the variations below.
Honestly, this recipe has been a quiet little secret weapon for me when I needed to impress friends without breaking a sweat. It’s the kind of treat that makes you pause and savor, the kind that sticks around in your memory long after the last bite.
What Ingredients You Will Need
This recipe uses simple, wholesome ingredients to deliver bold flavor and satisfying texture without the fuss. Most are pantry staples, and substitutions are easy if you want to tweak the bars to your liking.
- For the Base:
- Chocolate sandwich cookies (about 20 cookies, crushed) – I prefer Oreos for that classic chocolate crunch.
- Unsalted butter, melted (6 tablespoons / 85 grams) – adds richness and helps bind the base.
- For the Creamy Layer:
- Cream cheese, softened (8 ounces / 225 grams) – the creamy backbone of the bars.
- Powdered sugar (1 cup / 120 grams) – for sweetness without graininess.
- Vanilla extract (1 teaspoon) – balances the flavors with a warm note.
- Heavy cream (1/2 cup / 120 ml), whipped to soft peaks – for that light, fluffy texture.
- For the Chocolate Stripes:
- Semisweet chocolate chips (3/4 cup / 130 grams) – melt gently for perfect drizzling.
- Heavy cream (2 tablespoons / 30 ml) – to make a smooth, glossy ganache-like drizzle.
Feel free to swap the cream cheese for a dairy-free alternative or use almond flour crumbs for a gluten-free base. In summer, I sometimes add a handful of fresh raspberries to the creamy layer for a little zing. Also, if you want an extra touch of elegance, a sprinkle of flaky sea salt over the chocolate stripes is a game-changer.
Equipment Needed
One of the things I love about this recipe is how little equipment you actually need.
- A medium mixing bowl for the base and creamy layers.
- A hand mixer or stand mixer to whip the cream and cream cheese smoothly.
- A food processor or a sturdy zip-top bag with a rolling pin to crush the cookies evenly.
- A microwave-safe bowl or double boiler for melting the chocolate chips gently.
- An 8×8-inch (20×20 cm) square baking pan – lined with parchment paper for easy removal.
- A piping bag or a small spoon for drizzling the chocolate stripes precisely.
If you don’t have a food processor, crushing cookies in a sealed bag with a rolling pin works just fine—just be patient and keep the crumbs roughly even. I’ve also used a fork when a mixer wasn’t handy, though it takes a bit more elbow grease. For melting chocolate, a double boiler keeps the heat gentle and prevents burning, but a microwave in short bursts works well too.
Preparation Method
- Crush the Cookies: Place about 20 chocolate sandwich cookies into a food processor and pulse until you get fine crumbs. If you don’t have a processor, seal the cookies in a large zip-top bag and crush them with a rolling pin until mostly fine with some small chunks for texture. This should take about 3-5 minutes.
- Make the Base: Transfer the cookie crumbs to a medium bowl. Pour in 6 tablespoons (85 grams) of melted unsalted butter and stir well until the crumbs are evenly coated and hold together when pressed. Press this mixture firmly into the bottom of an 8×8-inch (20×20 cm) pan lined with parchment paper. Use the back of a spoon or your fingers for even pressing. Chill in the fridge while you prepare the creamy layer (about 10 minutes).
- Prepare the Creamy Layer: In a mixing bowl, beat 8 ounces (225 grams) of softened cream cheese with 1 cup (120 grams) powdered sugar and 1 teaspoon vanilla extract until smooth and fluffy. In a separate bowl, whip 1/2 cup (120 ml) heavy cream to soft peaks. Gently fold the whipped cream into the cream cheese mixture, taking care not to deflate the airiness. Spread this creamy mixture evenly over the chilled cookie base. Return to the fridge to set slightly while you make the chocolate drizzle (about 15 minutes).
- Make the Chocolate Stripes: In a microwave-safe bowl, combine 3/4 cup (130 grams) semisweet chocolate chips and 2 tablespoons (30 ml) heavy cream. Microwave in 20-second bursts, stirring between, until smooth and glossy. Let the chocolate cool slightly but remain pourable.
- Drizzle the Chocolate: Transfer the melted chocolate to a piping bag or a small resealable plastic bag with a tiny corner snipped off. Starting at one edge, drizzle thin stripes of chocolate back and forth across the creamy layer, mimicking the zebra pattern. For a more rustic look, you can also use a spoon to create swirls. Chill the bars for at least 2 hours to firm up before slicing.
- Serve and Enjoy: Once set, lift the bars out of the pan using the parchment paper edges. Slice into squares with a sharp knife, wiping the blade between cuts for clean edges. Serve chilled or at room temperature.
Pro tip: When pressing the base, don’t skimp on firmness; it keeps the bars from crumbling. Also, letting the chocolate drizzle cool before applying prevents it from melting into the creamy layer, preserving the signature stripes. If the cream cheese isn’t softened enough, the mixture can be lumpy—so plan ahead for that step.
Cooking Tips & Techniques
Making these no-bake zebra cake bars feel like second nature after a few tries, but here are some tips I picked up along the way to keep them perfect:
- Softening the Cream Cheese: This is key. I sometimes zap it in the microwave for 10 seconds or leave it out for about 30 minutes before mixing. Otherwise, you get those pesky lumps.
- Crushing Cookies: Aim for mostly fine crumbs but leave a few small chunks for texture contrast. Too fine and the base feels dense; too chunky and it falls apart.
- Whipping the Cream: Watch closely—whip to soft peaks only. Overwhipping can turn it grainy or buttery, which messes with the creamy texture.
- Chocolate Drizzle: If your kitchen is warm, chill the melted chocolate briefly before piping. It helps keep the stripes sharp and prevents bleeding into the creamy layer.
- Multitasking: While the base chills, whip your cream and cream cheese. Efficiency helps keep everything cold and fresh, which is crucial for the bars’ structure.
One time, I rushed the chilling and ended up with a gooey mess—lesson learned: patience pays off. Also, when slicing, a warm knife makes cleaner cuts, so I dip mine in hot water and dry it before each slice.
Variations & Adaptations
These bars are a perfect blank canvas for all kinds of twists. Here are some ideas I’ve tried or thought up:
- Fruit Infusion: Fold in finely chopped strawberries or raspberries into the creamy layer for a fresh burst of flavor.
- Nutty Crunch: Add toasted chopped pecans or walnuts to the base for an extra layer of texture and flavor.
- Peanut Butter Swirl: Mix a few tablespoons of peanut butter into the cream cheese for a rich, nutty twist that pairs beautifully with the chocolate stripes.
- Dairy-Free Option: Substitute cream cheese with a plant-based cream cheese and heavy cream with coconut cream whipped to soft peaks.
- Different Chocolate: Use white chocolate or a mix of dark and semisweet for a more dramatic zebra pattern.
Personally, I once made a batch with a touch of espresso powder in the creamy layer—talk about a grown-up crowd-pleaser! And if you want to make these bars into a no-bake passion fruit mousse cups style dessert, simply serve the creamy layer in small glasses topped with the chocolate stripes for a cute presentation.
Serving & Storage Suggestions
These zebra cake copycat bars are best served chilled, straight from the fridge, but I sometimes let them sit at room temperature for 10-15 minutes to soften slightly before serving. This way, the creamy layer is silky and melts beautifully on the tongue.
For a fun presentation, cut into small squares and serve on a platter with fresh berries or a dusting of cocoa powder. They pair nicely with a cup of tea or coffee, making a balanced treat that’s not too heavy.
Store leftover bars in an airtight container in the refrigerator for up to 4 days. They also freeze well—just wrap tightly and thaw overnight in the fridge before serving. Reheating isn’t recommended, but letting them warm a bit at room temp works wonders.
Over time, the flavors meld together more deeply, and the chocolate stripes soften slightly, making the bars even more indulgent. If you’re planning a party, you can prepare these a day ahead to save time and enjoy the benefits of well-set layers.
Nutritional Information & Benefits
While these Easy No-Bake Zebra Cake Bars are definitely a treat, they bring some perks thanks to their ingredient choices. Per serving (assuming 16 bars), here’s a rough estimate:
| Calories | Fat | Carbohydrates | Protein | Sugar |
|---|---|---|---|---|
| 180 kcal | 12 g | 15 g | 3 g | 10 g |
The cream cheese provides calcium and protein, while the butter and chocolate contribute satisfying fats that help curb cravings. Choosing high-quality chocolate with a good cocoa percentage can add antioxidants. For those mindful of gluten, swapping the cookie base for gluten-free sandwich cookies is an easy fix.
As someone who balances indulgence with wellness, I appreciate that this recipe doesn’t rely on artificial flavors or fillers. It feels like a real homemade treat that hits the sweet spot without being overwhelming.
Conclusion
Easy No-Bake Zebra Cake Copycat Bars with Chocolate Stripes have quietly become my favorite quick dessert to make when I want something impressive without the oven drama. The layers of creamy sweetness, crunchy chocolate base, and those perfect stripes make every bite a little celebration. You can easily customize and adapt these bars to fit your taste or dietary needs, which means they’re not only delicious but flexible.
Whether you’re planning a casual snack or a special occasion, these bars hold their own and always get a smile. Personally, I love how simple ingredients come together to create something that feels a bit fancy but is totally doable on any day. If you’re curious for more fuss-free sweets, you might enjoy my creamy white chocolate raspberry cheesecake bars—another no-bake favorite that brings the wow factor with minimal effort.
Give this recipe a try, play around with the flavors, and let me know how your zebra cake bars turn out. It’s fun, it’s forgiving, and honestly, it’s one of those recipes you’ll find yourself making again and again.
FAQs
- Can I use a different type of cookie for the base?
Yes! Chocolate sandwich cookies work best for flavor, but you can use graham crackers or gluten-free cookies if preferred. Just crush them finely. - How long do these bars keep in the fridge?
Stored in an airtight container, they stay fresh for about 4 days in the refrigerator. - Is it possible to make these bars vegan?
You can swap cream cheese and heavy cream for plant-based alternatives and use dairy-free chocolate to make a vegan version. - Can I prepare these bars ahead of time?
Absolutely! They actually taste better when chilled overnight as the flavors meld and layers set. - What’s the best way to slice the bars without them crumbling?
Use a sharp knife dipped in hot water and wiped dry between cuts for clean slices.
Pin This Recipe!
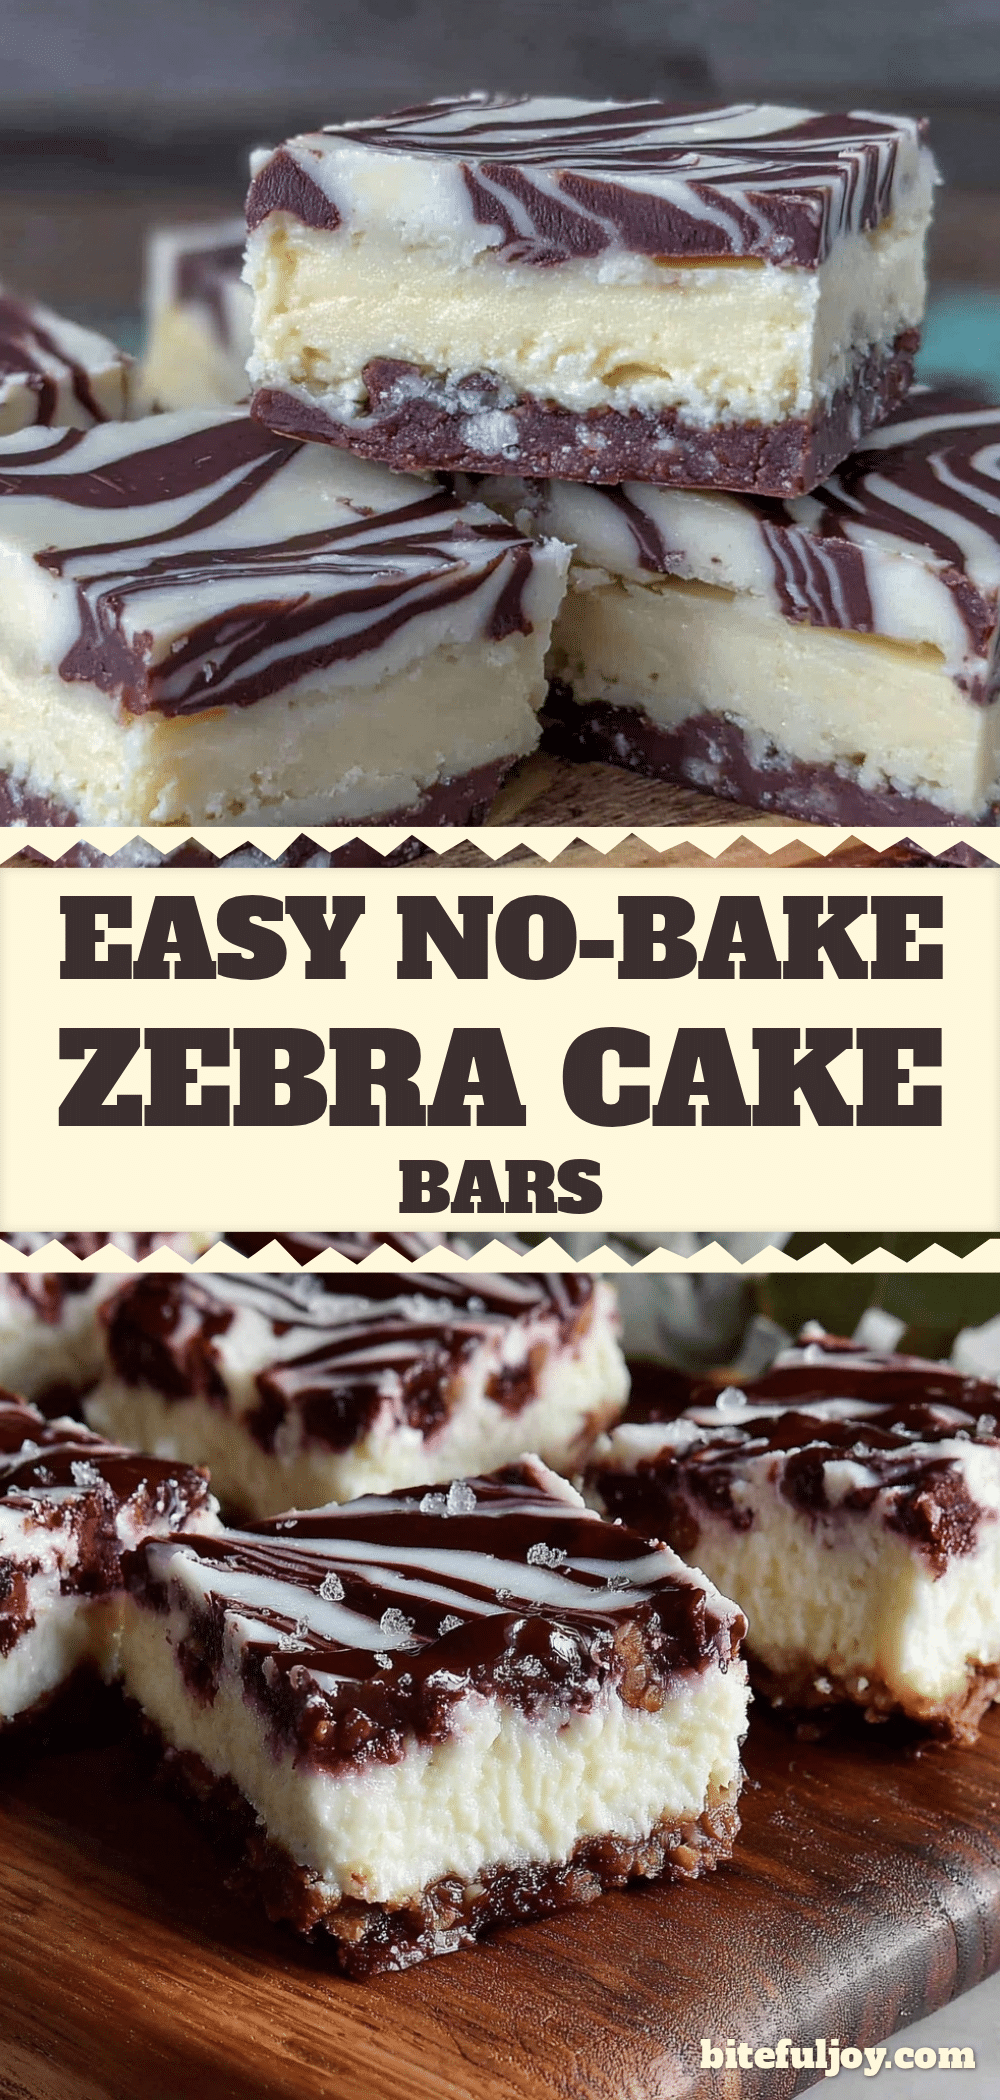
Easy No-Bake Zebra Cake Bars Recipe with Perfect Chocolate Stripes

A quick and easy no-bake dessert featuring a crunchy chocolate cookie base, creamy layer, and striking chocolate stripes that mimic the classic zebra cake.
- Prep Time: 15 minutes
- Cook Time: 0 minutes
- Total Time: 2 hours 15 minutes
- Yield: 16 bars 1x
- Category: Dessert
- Cuisine: American
Ingredients
- 20 chocolate sandwich cookies (crushed, about 20 cookies)
- 6 tablespoons unsalted butter, melted (85 grams)
- 8 ounces cream cheese, softened (225 grams)
- 1 cup powdered sugar (120 grams)
- 1 teaspoon vanilla extract
- 1/2 cup heavy cream (120 ml), whipped to soft peaks
- 3/4 cup semisweet chocolate chips (130 grams)
- 2 tablespoons heavy cream (30 ml)
Instructions
- Crush the cookies into fine crumbs with some small chunks remaining using a food processor or a rolling pin in a sealed bag (3-5 minutes).
- Mix cookie crumbs with melted butter until evenly coated and press firmly into the bottom of an 8×8-inch pan lined with parchment paper. Chill for 10 minutes.
- Beat softened cream cheese with powdered sugar and vanilla extract until smooth and fluffy. Whip heavy cream to soft peaks and gently fold into the cream cheese mixture.
- Spread the creamy mixture evenly over the chilled cookie base and refrigerate for about 15 minutes.
- Melt semisweet chocolate chips with heavy cream in 20-second microwave bursts until smooth and glossy. Let cool slightly but remain pourable.
- Drizzle the melted chocolate over the creamy layer in thin stripes using a piping bag or spoon to mimic zebra stripes.
- Chill the bars for at least 2 hours to set before slicing into squares and serving chilled or at room temperature.
Notes
Press the base firmly to prevent crumbling. Let the chocolate drizzle cool before applying to keep stripes sharp. Soften cream cheese well to avoid lumps. Use a sharp knife dipped in hot water for clean slicing.
Nutrition
- Serving Size: 1 bar
- Calories: 180
- Sugar: 10
- Fat: 12
- Carbohydrates: 15
- Protein: 3
Keywords: no-bake dessert, zebra cake bars, chocolate stripes, easy dessert, quick snack, creamy bars, chocolate cookie base


