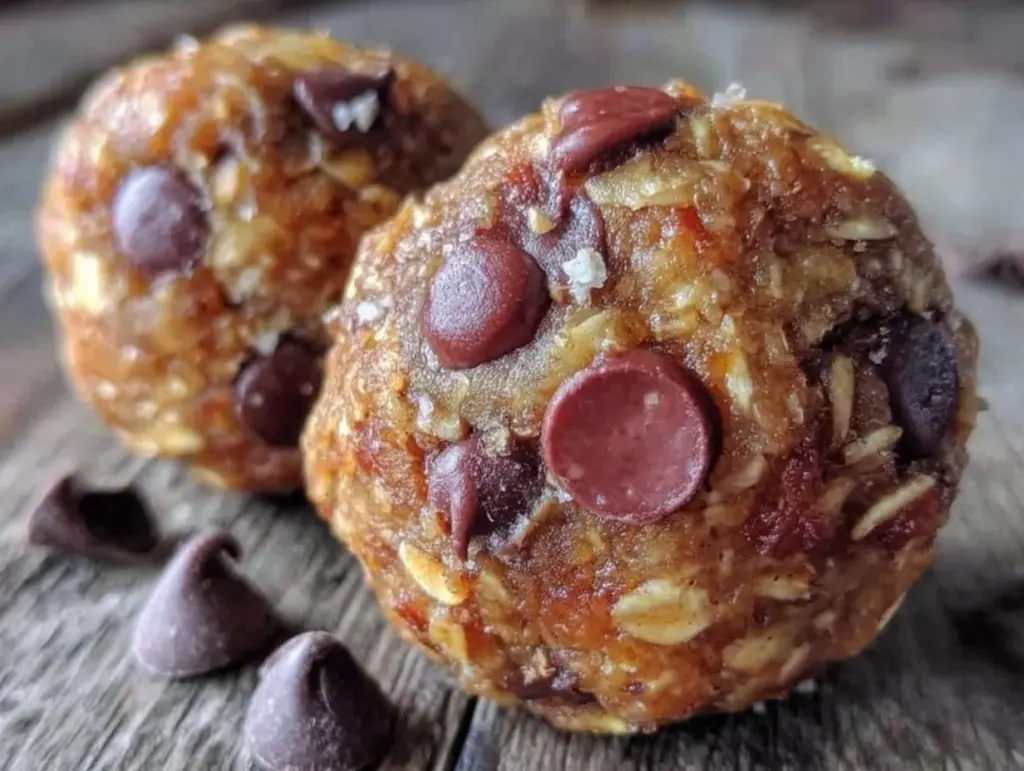
“You’ve got five minutes before the meeting, and nothing in the kitchen? Yeah, that was me last Tuesday,” I muttered, staring at a sad half-empty peanut butter jar. Honestly, mornings around here are a whirlwind, and I needed a quick, no-fuss snack that packed a punch without making me run to the store. So, I grabbed what I had—peanut butter, oats, a handful of chocolate chips—and threw together what’s now my go-to Easy No-Bake Peanut Butter Protein Balls with Chocolate Chips.
At first, I wasn’t sure if this little mix would hold up or taste like a soggy mess. But after a quick chill in the fridge, the texture was just right—chewy with that sweet hint of chocolate that sneaks up on you. My skeptical morning mood flipped to a quiet confidence that stuck with me all day. It’s funny how a simple, unplanned recipe can become a kind of personal anthem for busy mornings or whenever I need a quick energy boost without the crash.
These protein balls aren’t just snacks; they’re a small comfort that fits in your palm, perfect for packing in lunchboxes or grabbing between errands. The balance of nutty, sweet, and a bit of chocolatey indulgence makes it a little moment of joy, even when the day feels like it’s spinning fast. I guess the reason this recipe stuck is simple: it’s honest, quick, and tastes like a tiny reward I can count on.
Why You’ll Love This Recipe
After testing countless variations and tweaking ratios, this Easy No-Bake Peanut Butter Protein Balls with Chocolate Chips recipe became a staple for more reasons than one. It’s an honest-to-goodness lifesaver when time is tight but you want a snack that delivers.
- Quick & Easy : Whips up in under 15 minutes—no oven, no hassle, just mix and chill.
- Simple Ingredients : You probably already have everything in your pantry—peanut butter, oats, and chocolate chips. No exotic trips needed.
- Perfect for On-the-Go : Whether you’re rushing off to work, packing a kid’s lunchbox, or need a quick hike snack, these balls fit right in.
- Crowd-Pleaser : I’ve shared these at potlucks and they always disappear fast, even with picky chocolate lovers around.
- Unbelievably Delicious : That blend of creamy peanut butter with the bursts of chocolate chips? It’s like a secret indulgence that’s actually good for you.
What sets this recipe apart is the way it balances texture and flavor without complicated steps. The oats give a hearty chew, while a touch of honey keeps it just sweet enough. Plus, I’ve found that using natural peanut butter (with a little oil separation) gives the best creamy texture without being too sticky or dry. Honestly, once you try it, you’ll see why it’s become my quick energy boost go-to.
What Ingredients You Will Need
This recipe sticks to straightforward, wholesome ingredients that come together effortlessly. Each one plays a role in making these protein balls both tasty and satisfying.
- Natural Peanut Butter (1 cup / 240 ml) – The star ingredient; creamy texture works best. I like Smucker’s Natural for its rich flavor.
- Old-Fashioned Rolled Oats (1 1/2 cups / 135 g) – Provides chewiness and bulk. Quick oats can work but might make it mushier.
- Honey (1/4 cup / 85 g) – Adds natural sweetness and binds the mixture. Substitute with maple syrup if vegan.
- Mini Chocolate Chips (1/3 cup / 60 g) – For those sweet chocolate bursts. Semi-sweet is my favorite balance.
- Vanilla Extract (1 tsp / 5 ml) – Just a touch to boost flavor depth.
- Chia Seeds (2 tbsp / 20 g) – Optional but adds a nice nutritional boost and texture.
- Salt (1/4 tsp) – Enhances all the flavors; don’t skip it.
Feel free to experiment with peanut butter brands – some are sweeter or saltier, which can subtly change the flavor. I recommend using natural peanut butter with oil separation for the best consistency. If you want a gluten-free option, make sure your oats are certified gluten-free. The honey and chia seeds not only add sweetness and nutrition but also help hold everything together nicely.
Equipment Needed
Thankfully, the equipment list for these protein balls is minimal, which is part of why I love making them.
- Mixing Bowl – A medium to large bowl to combine ingredients comfortably.
- Spoon or Spatula – For mixing everything together. A sturdy spatula helps scrape the sides well.
- Measuring Cups and Spoons – For accuracy, especially with honey and vanilla extract.
- Baking Sheet or Plate – To place the balls on before chilling. Lining it with parchment paper can prevent sticking.
- Refrigerator – For chilling the balls to firm up.
If you want to speed things up, rolling the mixture with slightly damp hands makes a big difference. I’ve tried making these in a food processor to chop the oats finer, but honestly, mixing by hand gives a better texture. No fancy gadgets needed, which makes these perfect for any kitchen setup.
Preparation Method

- Combine the Dry Ingredients: In your mixing bowl, stir together the rolled oats, mini chocolate chips, chia seeds (if using), and salt. This usually takes about 2 minutes. Mixing these first helps distribute everything evenly.
- Add the Wet Ingredients: Pour in the natural peanut butter, honey, and vanilla extract. Use your spatula or spoon to mix everything together until fully combined. The mixture should be thick but sticky. This step takes 5 minutes max.
- Adjust Consistency: If the mixture feels too dry and crumbly, add a teaspoon of water or a bit more honey. If it’s too sticky, sprinkle in a few extra oats. The goal is a dough that holds together when pressed.
- Form the Balls: Using your hands, scoop out about one tablespoon (15 g) of mixture and roll it between your palms to form a ball. Place each ball on the parchment-lined baking sheet or plate. This step usually takes 8-10 minutes, depending on how fast you roll.
- Chill to Set: Pop the tray into the refrigerator for at least 30 minutes to firm up. This helps the balls hold their shape and meld flavors.
- Serve or Store: After chilling, the protein balls are ready to enjoy! Store any extras in an airtight container in the fridge for up to a week, or freeze for longer storage.
Pro tip: If your hands get sticky while rolling, dampen them slightly with cold water. It keeps the process less messy. Also, don’t skip the chilling step—it makes all the difference in texture and flavor melding.
Cooking Tips & Techniques
Though this recipe is all about simplicity, a few learned tricks can really make the difference between a so-so snack and something you’ll crave repeatedly.
- Use Natural Peanut Butter: The oil in natural peanut butter helps bind the balls better and keeps them creamy. Avoid overly processed peanut butter with added sugar or hydrogenated oils for best flavor and texture.
- Don’t Overmix: Stir just until combined. Overmixing can make the oats too soft or the chocolate chips start to melt, which changes the texture.
- Chilling is Crucial: I’ve skipped chilling before (impatient, guilty!) and the balls just fall apart. Give them at least 30 minutes to firm up in the fridge.
- Rolling Technique: Wet your hands lightly to keep the mixture from sticking. Also, press firmly but gently to keep the balls compact yet soft.
- Multitasking Tip: While your protein balls chill, you can prep other meals or even grab a cup of tea. These little bites pair well with an Earl Grey, much like the Earl Grey Tea Cake I love for a relaxed afternoon.
One time I added too much honey in a rush, and the balls got sticky and hard to shape. Lesson learned: measure carefully, and if you accidentally go heavy, toss in more oats to balance. It’s a forgiving recipe once you get the hang of it.
Variations & Adaptations
After making these protein balls a dozen times, I’ve played around with flavors and ingredients to suit different tastes and dietary needs.
- Vegan Version: Swap honey with maple syrup or agave nectar. Use dairy-free chocolate chips to keep it fully plant-based.
- Nut-Free Option: Replace peanut butter with sunflower seed butter or tahini. These keep the nutty flavor without risking allergies.
- Seasonal Twist: Add dried cranberries or chopped dried apricots for a fruity punch, especially nice in fall or winter.
- Extra Protein Boost: Stir in a scoop of your favorite protein powder (vanilla or chocolate) before mixing. Just add a splash of almond milk if it gets too dry.
- Spiced Version: Add a pinch of cinnamon or a dash of cayenne for a subtle kick that pairs great with the chocolate.
Personally, I once tried adding shredded coconut and it gave a lovely tropical hint that made them feel like a mini escape during a hectic week. You can also bake these lightly for a firmer texture, but honestly, the no-bake charm is part of their appeal.
Serving & Storage Suggestions
These peanut butter protein balls are best served chilled or at room temperature. They make a perfect quick snack to grab between meetings or before a workout.
- Serving: Pair with a glass of cold milk, coffee, or even the creamy passion fruit mousse cups from this no-bake dessert recipe for a sweet and satisfying treat.
- Storage: Store in an airtight container in the refrigerator for up to one week. If you want to keep them longer, freezing works well—just thaw at room temperature for 10-15 minutes before eating.
- Reheating: These don’t need reheating, but if you prefer them softer, a few seconds in the microwave (10-15 seconds) can make them gooey.
- Flavor Development: Leaving them overnight in the fridge actually improves the flavors as the oats soften and the chocolate melds with the peanut butter.
Nutritional Information & Benefits
Each protein ball (about 1 tablespoon / 15 grams) provides roughly:
| Calories | 90-110 kcal |
|---|---|
| Protein | 4-5 grams |
| Fat | 6-7 grams (mostly healthy fats) |
| Carbohydrates | 8-10 grams |
| Fiber | 1-2 grams |
With natural peanut butter and oats as key ingredients, these protein balls provide a solid dose of plant-based protein and fiber, which helps keep energy steady. The chia seeds add omega-3 fatty acids and antioxidants, while the dark chocolate chips offer a bit of indulgence with some health benefits too.
They fit nicely into gluten-free diets if you use certified gluten-free oats and are naturally low in added sugars compared to many store-bought snacks. Just watch out if you have nut allergies.
Conclusion
This Easy No-Bake Peanut Butter Protein Balls with Chocolate Chips recipe is one I keep coming back to because it’s reliable, tasty, and requires almost zero prep stress. Whether you’re rushing out the door or craving a quick pick-me-up, these little power bites fit the bill perfectly.
Feel free to tweak the sweetness or add your favorite mix-ins to make them truly yours. I love how this recipe balances comfort and nutrition, making it a snack that satisfies both hunger and that little craving for chocolate.
Next time you want a quick energy boost that tastes like a treat, give these a try—and if you have your own spin on it, please share! It’s always fun to see how others bring their flavors into the mix. Here’s to quick snacks that don’t feel like compromises.
Frequently Asked Questions
Can I use crunchy peanut butter instead of smooth?
Yes, you can! Crunchy peanut butter will add a bit more texture to your protein balls, which some people really enjoy. Just mix well to distribute the peanut pieces evenly.
How long do these protein balls last in the fridge?
Stored in an airtight container, they last about one week. For longer storage, freezing is a great option.
Can I substitute the oats with another grain?
Rolled oats work best for texture, but you can try quinoa flakes or crushed puffed rice for a different feel. Just adjust liquid amounts as needed.
Are these suitable for kids’ lunchboxes?
Absolutely! They’re bite-sized, not too sweet, and pack protein and fiber, making them a great kid-friendly snack.
What if I don’t have honey on hand?
Maple syrup or agave nectar are perfect substitutes to keep the sweetness and binding properties.
Pin This Recipe!
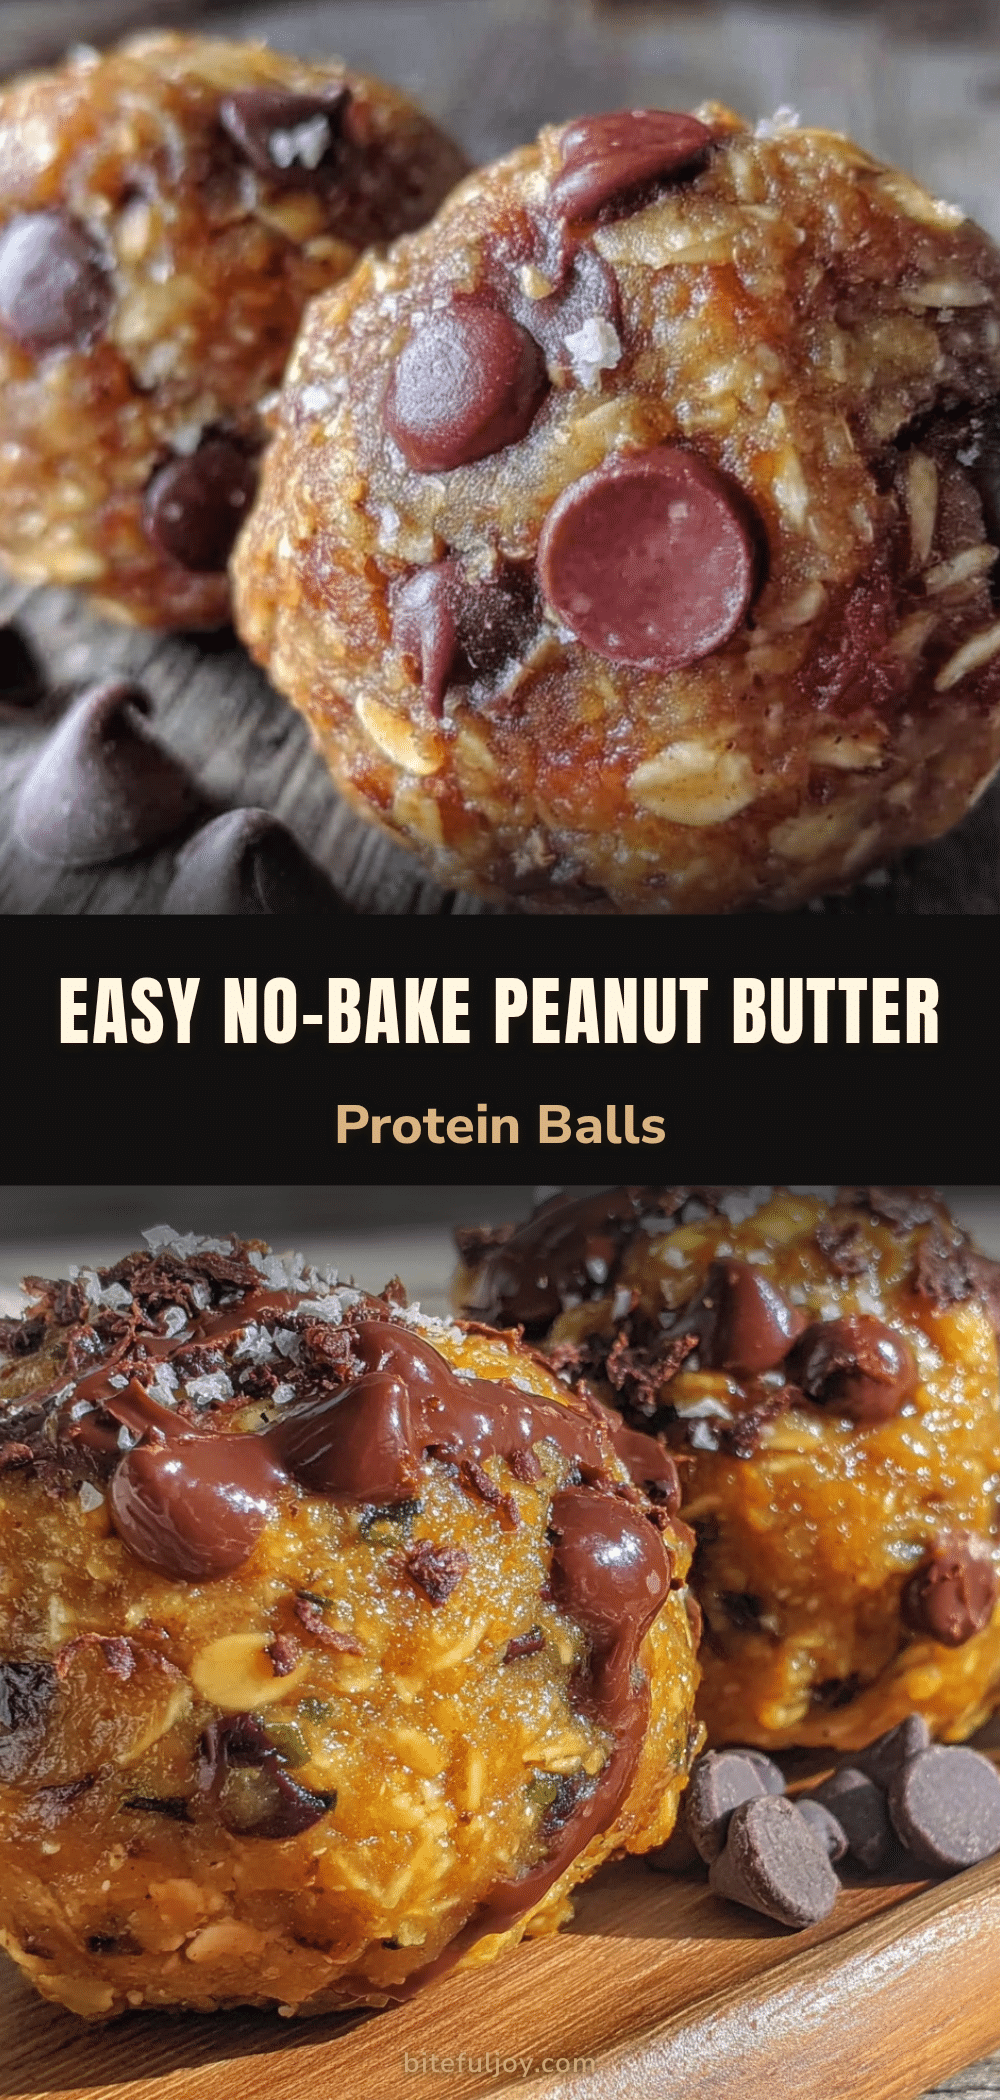
Easy No-Bake Peanut Butter Protein Balls with Chocolate Chips

Quick and easy no-bake peanut butter protein balls with chocolate chips, perfect for a fast energy boost and on-the-go snacking.
- Prep Time: 10 minutes
- Cook Time: 0 minutes
- Total Time: 40 minutes
- Yield: 20 servings 1x
- Category: Snack
- Cuisine: American
Ingredients
- 1 cup natural peanut butter (240 ml)
- 1 1/2 cups old-fashioned rolled oats (135 g)
- 1/4 cup honey (85 g) – substitute with maple syrup for vegan option
- 1/3 cup mini chocolate chips (60 g)
- 1 tsp vanilla extract (5 ml)
- 2 tbsp chia seeds (20 g) – optional
- 1/4 tsp salt
Instructions
- Combine the rolled oats, mini chocolate chips, chia seeds (if using), and salt in a mixing bowl.
- Add the natural peanut butter, honey, and vanilla extract to the dry ingredients and mix until fully combined and thick but sticky.
- Adjust consistency if needed: add a teaspoon of water or more honey if too dry, or sprinkle in extra oats if too sticky.
- Scoop about one tablespoon (15 g) of mixture and roll it between your palms to form a ball. Place on a parchment-lined baking sheet or plate.
- Chill the balls in the refrigerator for at least 30 minutes to firm up.
- Serve or store in an airtight container in the fridge for up to one week, or freeze for longer storage.
Notes
Use natural peanut butter with oil separation for best texture. Chill the balls for at least 30 minutes to firm up. Wet hands slightly when rolling to prevent sticking. Substitute honey with maple syrup or agave nectar for vegan version. Certified gluten-free oats recommended for gluten-free diet.
Nutrition
- Serving Size: 1 protein ball (abou
- Calories: 90110
- Sugar: 45
- Sodium: 50100
- Fat: 67
- Saturated Fat: 1
- Carbohydrates: 810
- Fiber: 12
- Protein: 45
Keywords: no-bake, peanut butter, protein balls, chocolate chips, quick snack, energy boost, healthy snack, easy recipe


