
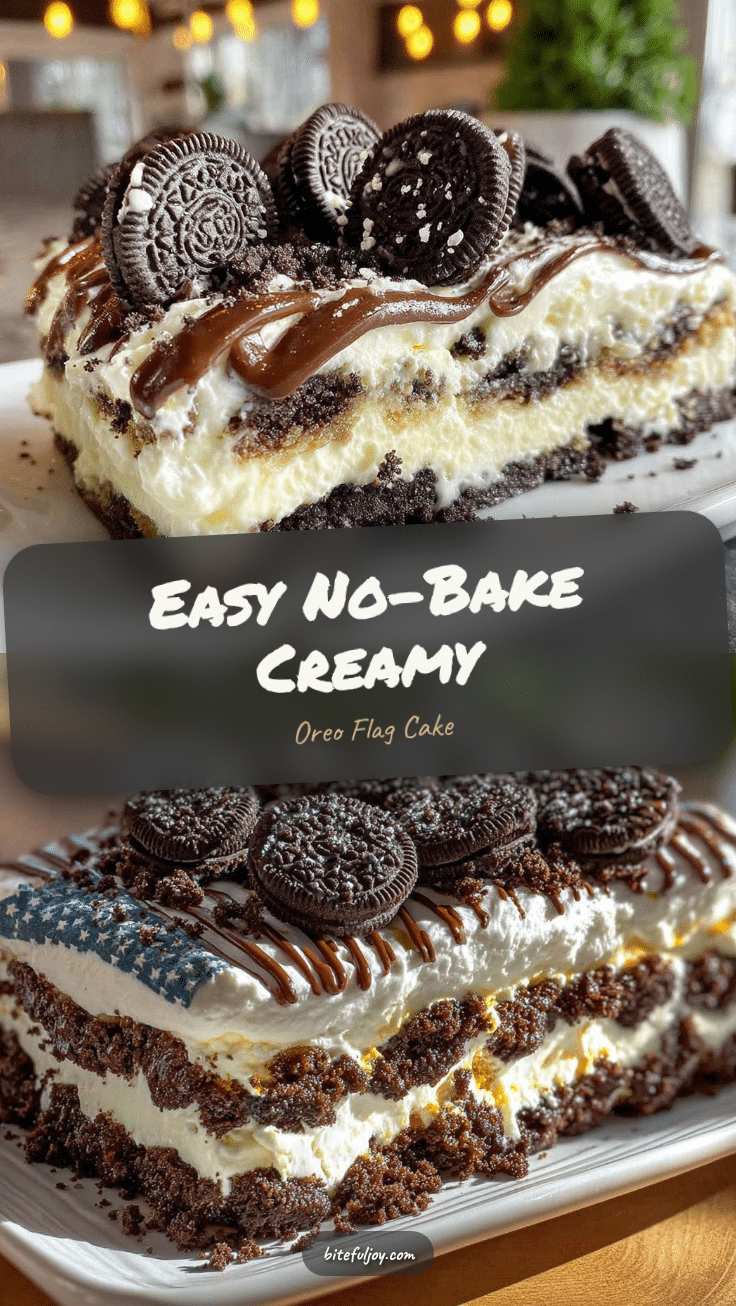
The platter was scraped clean before I even caught a breath. Third time that weekend someone nudged me, “Can you share that Oreo flag icebox cake recipe again?” Honestly, I wasn’t expecting such a fuss over a no-bake dessert that I whipped up on a whim one afternoon. But there it was, this simple, fun, and surprisingly impressive Easy No-Bake Oreo Flag Icebox Cake stealing the show at every barbecue and picnic.
It all began with a last-minute invite to a summer block party. No time for the usual oven marathon or fancy dessert prep. I rummaged through the pantry, spotted a pack of Oreos, some whipped cream, and berries, and thought — why not layer those into a festive flag design? The cake needed no baking, just chilling, and yet it looked like I’d slaved over it for hours. The crunch of cookies softened by the creamy layers, combined with bursts of juicy berries, made it a standout — and I could tell from the way folks kept going back for more.
I guess what caught me off guard was how this Easy No-Bake Oreo Flag Icebox Cake felt like summer itself — easy, playful, and a little bit nostalgic, but with a grown-up twist. It’s the kind of recipe that’s perfect for those “I forgot to bring dessert” moments but still delivers a big impression. Plus, it’s a little crowd-pleaser that even picky eaters smile at, which isn’t always easy to pull off.
Looking back, I realize this recipe stuck because it’s more than just a dessert. It’s a reminder that simple ingredients and a bit of creativity can bring people together, especially during those warm summer days when the last thing anyone wants is to be stuck inside baking. So, whether you’re making this for a Fourth of July bash or a casual weekend hangout, it promises a quiet kind of joy — the kind you don’t have to shout about but feel glad to share.
Why You’ll Love This Recipe
After trying and tweaking this Easy No-Bake Oreo Flag Icebox Cake several times, I can confidently say it hits a sweet spot for summer celebrations. Here’s why it’s worth keeping in your recipe box:
- Quick & Easy: Comes together in under 30 minutes — perfect when you’re juggling party prep and last-minute errands.
- Simple Ingredients: No fancy shopping trips needed. If you have Oreos, whipped cream, and fresh berries, you’re good to go.
- Perfect for Summer Parties: Its cool, creamy texture is a welcome relief on hot days, making it ideal for backyard barbecues or casual get-togethers.
- Crowd-Pleaser: Kids love the cookie layers, and adults appreciate the fresh fruit and light cream balance.
- Unbelievably Delicious: The contrast of crunchy Oreo cookies softened by chilled cream and juicy berries creates a texture and flavor combo that’s pure comfort food.
What sets this recipe apart is the flag design — a fun, patriotic twist that adds instant charm without extra fuss. The layering technique is straightforward, but the result looks like you put serious effort into presentation. Plus, I’ve found swapping in different berry combos (like blackberries or sliced strawberries) can make it feel fresh every time you make it.
Honestly, this isn’t just another dessert. It’s the kind of treat that makes you pause for a moment, eyes closed, savoring the creamy, crunchy, fruity goodness. It’s summer on a plate, easy to prep, and somehow still feels special enough to impress your guests without the stress.
What Ingredients You Will Need
This recipe uses simple, wholesome ingredients to deliver bold flavor and satisfying texture without the fuss. Most are pantry staples or easy to find fresh, perfect for last-minute celebrations or planned summer parties.
- Oreo Cookies: About 36 cookies (standard size) – the star crunch layer. I stick to classic Oreos for that familiar chocolate-vanilla punch. You can break some into halves for layering and leave others whole for the flag pattern.
- Heavy Whipping Cream: 2 cups (480 ml), chilled – whipped to soft peaks for the creamy layers. For a lighter option, you can blend with some Greek yogurt, but the heavy cream gives that rich mouthfeel.
- Powdered Sugar: 1/4 cup (30 g) – sweetens the whipped cream just right without overpowering the cookies.
- Vanilla Extract: 1 teaspoon – adds warmth and depth to the cream.
- Fresh Strawberries: 1 cup, sliced – for the red stripes and some natural sweetness. Look for ripe but firm berries to keep their shape.
- Blueberries: 1 cup – to create the blue section of the flag. Fresh is best, but frozen works if thawed and patted dry.
- Optional Garnish: A few mint leaves or edible flowers for a fresh look.
When picking your ingredients, I recommend using fresh berries in season to get the best flavor and color pop. If you’re making this during a colder month, frozen berries thawed and drained do the trick. For the cream, brands like Organic Valley or Horizon Organic tend to whip beautifully and taste fresh.
If you want a dairy-free version, coconut whipped cream is a solid substitute, and gluten-free Oreos (or similar chocolate sandwich cookies) work well too. Just keep an eye on moisture levels when layering to avoid sogginess.
Equipment Needed
- Mixing Bowl: A large, chilled bowl to whip the cream efficiently. Metal or glass bowls retain cold well.
- Electric Mixer or Stand Mixer: Whipping cream by hand is possible but takes a lot longer and requires patience.
- 9×13-inch (23×33 cm) Rectangular Baking Dish: Ideal for layering the cake and creating a flat surface for the flag design.
- Spatula: For folding in powdered sugar and vanilla, and spreading the cream evenly.
- Knife: To slice strawberries for the red stripes.
- Measuring Cups and Spoons: For precise ingredient amounts.
If you don’t have a 9×13-inch dish, any similarly sized shallow pan works. Glass or ceramic dishes show off the layers nicely, but plastic containers can work if you’re serving casually or taking it on the go.
Pro tip: Keep the mixing bowl and beaters in the fridge for 15 minutes before whipping the cream. It makes a noticeable difference in how quickly and easily the cream reaches soft peaks.
Preparation Method
- Whip the Cream: Pour 2 cups (480 ml) of chilled heavy whipping cream into your cold mixing bowl. Add 1/4 cup (30 g) powdered sugar and 1 teaspoon vanilla extract. Beat on medium-high speed for about 3-4 minutes until soft peaks form. The cream should hold gentle peaks but still be smooth and spreadable. Be careful not to overbeat or it’ll turn grainy.
- Prepare the Cookies: Separate the Oreo cookies into halves carefully to avoid crumbling. You’ll need about 18 halves for the base layer and more for layering and the flag design. Reserve some whole cookies for the star section of the flag.
- Layer the Cake Base: Spread a thin layer of whipped cream evenly on the bottom of your 9×13-inch (23×33 cm) dish. Arrange Oreo halves in a single layer on top, cream-side down if you want an extra chocolate kick. Spread another layer of whipped cream over the cookies, about 1/4 inch thick (about 60 ml). Repeat layering with Oreos and cream until you’ve used half the cookies and cream. Chill for 15 minutes to firm up.
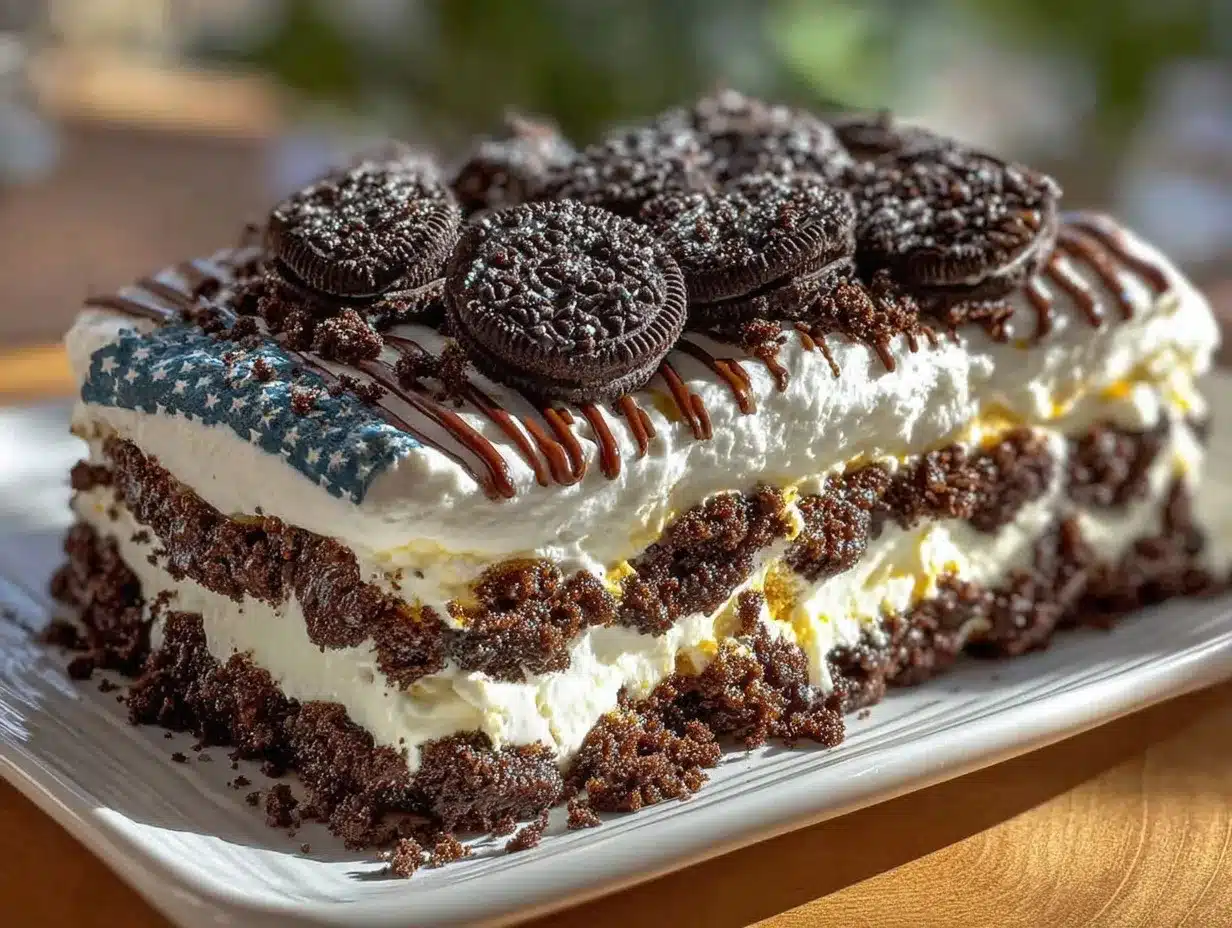
- Create the Flag Design: For the red stripes, layer sliced strawberries in neat rows. For the white stripes, use whipped cream dollops or smooth layers. Arrange blueberries in the top-left corner of the cake for the blue section. Finish the flag by placing whole Oreo cookies (halved if needed) over the blueberry section to mimic stars. This step takes patience — use a photo for reference and take your time placing berries and cookies carefully. Chill again for at least 2 hours or overnight to let the cookies soften and flavors meld.
- Final Touches: Just before serving, add a few mint leaves or edible flowers for a fresh pop of color and aroma. Slice with a sharp knife dipped in hot water for clean cuts.
Sometimes the cream softens the Oreos unevenly. If that happens, a quick 10-minute chill before serving helps firm everything back up. Also, if your whipped cream starts to separate during layering, a gentle fold with a spatula usually brings it back together smoothly.
Cooking Tips & Techniques
Making this Easy No-Bake Oreo Flag Icebox Cake is straightforward, but a few tricks make it foolproof:
- Keep Everything Cold: Chill your mixing bowl, beaters, and cream before whipping. It keeps the cream stable and fluffy longer.
- Whip to Soft Peaks: Stop whipping the cream as soon as it holds soft peaks. Overwhipping leads to butter-like texture and can ruin the smooth layering.
- Layer Gently: Don’t press down hard when layering cookies and cream. Let the cream settle naturally to keep the cake airy.
- Use Fresh Berries: They hold shape better and add juicy bursts. If you only have frozen berries, thaw and drain them thoroughly to avoid watery cream.
- Patience is Key: Chilling time lets the Oreos soften just enough to meld with the cream without becoming mushy. Overnight chilling works best.
- Knife Warm-Up: Run your knife under hot water and dry it before slicing the cake for clean, neat pieces.
For my first attempt, I didn’t chill the cream properly and ended up with a runny mess. Lesson learned: cold tools and ingredients are a no-brainer here. Also, I once tried to rush the flag assembly and the berries slid off — so take your time arranging the decoration for the best effect.
Variations & Adaptations
This recipe is flexible and lends itself well to different tweaks, depending on your taste or dietary needs:
- Fruit Variations: Swap strawberries and blueberries for raspberries, blackberries, or kiwi slices for a colorful twist. In summer, fresh peaches or mangoes also pair beautifully.
- Flavor Boost: Add a tablespoon of cocoa powder to the whipped cream for a chocolatey layer, or fold in some cream cheese for tanginess and extra richness.
- Gluten-Free Option: Use gluten-free chocolate sandwich cookies instead of Oreos to keep it safe for gluten-sensitive guests.
- Dairy-Free Version: Substitute the heavy cream with coconut whipped cream and check that your sandwich cookies are dairy-free.
- Mini Individual Cakes: Build the layers in mason jars or small cups for easy portion control and cute presentation.
One summer, I tried folding crushed peppermint candies into the cream for a festive holiday version — unexpected but surprisingly tasty! Also, if you want to mix things up, layering in some crushed pretzels adds a salty crunch that contrasts nicely with the sweet cream.
Serving & Storage Suggestions
This Easy No-Bake Oreo Flag Icebox Cake is best served chilled, straight from the fridge. The cream should be cool and firm, with the cookies softened but still holding their shape. Slice carefully and serve on colorful plates to play up the festive flag design.
It pairs wonderfully with light summer beverages like iced tea or lemonade. For a party, it’s a nice sweet contrast to savory bites like smoked salmon cucumber tea sandwiches — which also impress with minimal effort.
To store, cover the cake tightly with plastic wrap and keep refrigerated for up to 3 days. The flavors deepen as it rests, but the cookies will eventually soften more, so it’s best enjoyed within a couple of days.
If you want to freeze it, wrap it well and thaw overnight in the fridge before serving. The texture changes slightly but remains delicious.
Nutritional Information & Benefits
Per serving (about 1/12 of the cake), this dessert contains approximately:
| Calories | 280 |
|---|---|
| Fat | 16g |
| Carbohydrates | 32g |
| Protein | 3g |
| Fiber | 1g |
| Sugar | 25g |
The key ingredients offer some benefits: fresh berries provide antioxidants and vitamin C, while the whipped cream supplies calcium and fat for satiety. The Oreos add indulgence, so this cake is definitely a treat to enjoy in moderation.
For those watching carbs or dairy, swapping ingredients as mentioned earlier can tailor it to your needs without losing the festive vibe. It’s a dessert that balances indulgence with fresh fruit, making it a little lighter than some traditional cakes.
Conclusion
This Easy No-Bake Oreo Flag Icebox Cake has quietly become my go-to for summer celebrations. It’s proof that you don’t need complicated recipes or tons of time to create something memorable that gets people talking. The balance of crunchy cookies, fluffy cream, and fresh berries wrapped in a fun flag design makes it stand out in the best way — without any stress.
Feel free to tweak the fruit or try the dairy-free options to make it your own. I love this recipe because it fits right into busy summer days when you want something cool, delicious, and just a bit playful on the table.
If you try it, I’d love to hear how you made it yours! And if you’re planning a brunch spread, pairing it with something light like creamy passion fruit mousse cups or smoked salmon cucumber tea sandwiches can really round out a refreshing, crowd-pleasing menu.
Here’s to simple recipes that bring a little extra joy to summer gatherings!
FAQs About Easy No-Bake Oreo Flag Icebox Cake
Can I make this cake ahead of time?
Absolutely! This cake actually tastes better if chilled overnight. Just cover it well and keep it refrigerated until ready to serve.
What can I substitute if I don’t have Oreos?
Any chocolate sandwich cookies work well. For a twist, try gluten-free or dairy-free versions depending on your needs.
How do I keep the berries from making the cake soggy?
Choose firm, ripe berries and pat them dry before placing on the cake. Adding them just before serving also helps keep the layers intact.
Can I use whipped topping instead of fresh whipped cream?
Yes, whipped topping works in a pinch, but fresh whipped cream gives the best texture and flavor.
How do I store leftovers?
Keep the cake covered tightly in the fridge for up to 3 days. Freeze if needed, but thaw slowly to preserve texture.
Pin This Recipe!
Easy No-Bake Oreo Flag Icebox Cake Recipe Perfect for Summer Parties

A simple, fun, and impressive no-bake dessert featuring layers of Oreo cookies, whipped cream, and fresh berries arranged in a patriotic flag design. Perfect for summer parties and easy to prepare.
- Prep Time: 15 minutes
- Cook Time: 0 minutes
- Total Time: 2 hours 15 minutes
- Yield: 12 servings 1x
- Category: Dessert
- Cuisine: American
Ingredients
- 36 Oreo cookies (standard size)
- 2 cups (480 ml) heavy whipping cream, chilled
- 1/4 cup (30 g) powdered sugar
- 1 teaspoon vanilla extract
- 1 cup sliced fresh strawberries
- 1 cup fresh blueberries
- Optional garnish: mint leaves or edible flowers
Instructions
- Pour 2 cups (480 ml) of chilled heavy whipping cream into a cold mixing bowl. Add 1/4 cup (30 g) powdered sugar and 1 teaspoon vanilla extract. Beat on medium-high speed for about 3-4 minutes until soft peaks form.
- Separate Oreo cookies into halves carefully to avoid crumbling. Reserve some whole cookies for the star section of the flag.
- Spread a thin layer of whipped cream evenly on the bottom of a 9×13-inch (23×33 cm) dish. Arrange Oreo halves in a single layer on top, cream-side down if desired.
- Spread another layer of whipped cream over the cookies, about 1/4 inch thick (about 60 ml). Repeat layering with Oreos and cream until half the cookies and cream are used. Chill for 15 minutes to firm up.
- Create the flag design by layering sliced strawberries in neat rows for the red stripes, whipped cream dollops or smooth layers for the white stripes, and arrange blueberries in the top-left corner for the blue section.
- Place whole Oreo cookies (halved if needed) over the blueberry section to mimic stars. Chill again for at least 2 hours or overnight to let the cookies soften and flavors meld.
- Just before serving, add a few mint leaves or edible flowers for a fresh pop of color. Slice with a sharp knife dipped in hot water for clean cuts.
Notes
Keep mixing bowl and beaters chilled before whipping cream for best results. Use fresh, firm berries and pat dry to avoid sogginess. Chill cake overnight for best flavor and texture. Warm knife under hot water before slicing for clean cuts. For dairy-free version, substitute heavy cream with coconut whipped cream and use dairy-free cookies. Gluten-free cookies can be used for gluten-sensitive diets.
Nutrition
- Serving Size: 1 slice (1/12 of cak
- Calories: 280
- Sugar: 25
- Fat: 16
- Carbohydrates: 32
- Fiber: 1
- Protein: 3
Keywords: no-bake dessert, Oreo cake, icebox cake, summer party dessert, patriotic dessert, easy dessert, Oreo flag cake


