Introduction
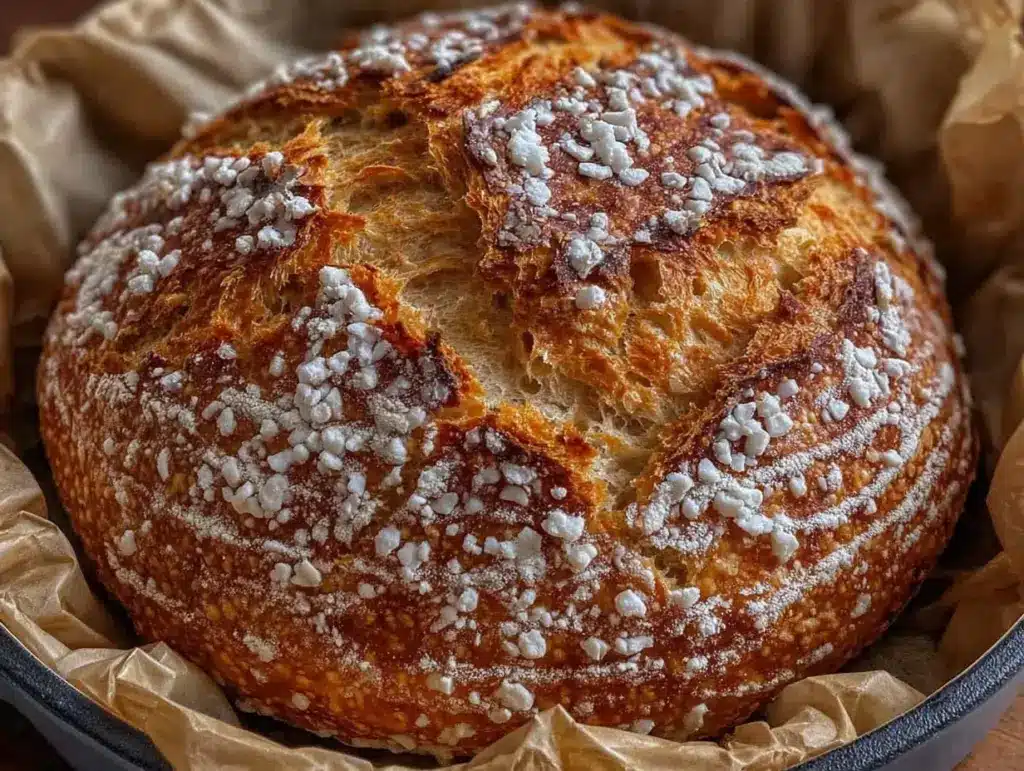
Let me tell you, there’s nothing quite like the sound of freshly baked bread crackling as it cools on your countertop. The golden crust, the soft, airy interior, and that unmistakable smell drifting through the house—it’s enough to make anyone pause, close their eyes, and savor the moment. That’s exactly what I felt the first time I pulled this Crispy No Knead Dutch Oven Bread out of the oven.
Years ago, when I first stumbled upon the concept of no-knead bread, I was skeptical. Could bread this good really be so simple? But after testing this recipe (multiple times, of course, for research), I realized I had found a gem. This recipe became my go-to for family gatherings, cozy weekends, and even gifting to friends—because trust me, people will rave about it.
What makes this recipe truly special is its simplicity. No kneading, no fancy equipment, and no complicated techniques. Just mix, wait, bake, and enjoy. My family couldn’t stop sneaking slices fresh off the cooling rack, and honestly, I couldn’t blame them. Whether you’re a seasoned baker or someone who’s never touched yeast before, this recipe is perfect for you.
You’ll want to bookmark this one, because once you try it, it’s going to feel like a warm hug every time you bake it. Ready to dive into the magic? Let’s get baking!
Why You’ll Love This Recipe
- Easy as pie: No kneading, no fuss, and only five simple steps—you’ll wonder why you didn’t try this sooner.
- Minimal ingredients: You probably have all the basics in your pantry already, making this a budget-friendly treat.
- Crispy crust, soft center: The Dutch oven creates a perfect environment for a bakery-quality crust and light, fluffy interior.
- Perfect for any occasion: Whether it’s a weekend brunch, a side for soup night, or a holiday feast, this bread fits the bill.
- Beginner-friendly: If yeast intimidates you, don’t worry—this recipe is practically foolproof. If you can stir, you can make this bread.
What sets this recipe apart is the technique. The slow fermentation process (don’t worry—it’s hands-free!) develops incredible flavor without the need for hours of effort. It’s the kind of bread that makes you want to grab a pat of butter and savor every bite. Plus, it’s endlessly customizable—you can toss in herbs, seeds, or even cheese for your own personal twist.
If you’ve ever dreamed of making bread that’s as good as what you’d find at an artisan bakery, this recipe is your golden ticket. It’s simple, satisfying, and seriously delicious.
What Ingredients You Will Need
This recipe uses simple, wholesome ingredients to deliver bold flavor and a perfect texture without much effort. Here’s what you’ll need:
- All-purpose flour: The foundation of the bread. Feel free to use bread flour for an even chewier texture.
- Active dry yeast: Just a small amount goes a long way in this slow-rise recipe.
- Salt: Essential for flavor. Don’t skip it!
- Warm water: Helps activate the yeast and bring the dough together. Aim for lukewarm—not too hot!
- Optional mix-ins: Herbs, seeds, shredded cheese, or even dried fruits. Get creative!
If you’re gluten-free, you can experiment with gluten-free flour blends. And for those avoiding salt, a pinch of herbs can add a lovely flavor boost. This recipe is flexible—just stick to the basics and you’ll be golden.
Equipment Needed
You don’t need much to make this bread, but a few tools will make the process easier:
- Large mixing bowl: For combining the dough.
- Wooden spoon or spatula: To mix the ingredients—no need for fancy mixers.
- Dutch oven: The star of the show! A heavy-duty pot with a lid creates the perfect baking environment.
- Parchment paper: Makes transferring the dough to the Dutch oven easy and prevents sticking.
- Clean kitchen towel: For covering the dough as it rises.
If you don’t have a Dutch oven, you can use a heavy-duty oven-safe pot with a lid. I’ve even tested this in a deep casserole dish with great results. Stick to tools you’re comfortable with, and you’ll be just fine!
Preparation Method
- Mix the dough: In a large mixing bowl, combine 3 cups (375g) of flour, 1/2 teaspoon (2g) of active dry yeast, and 1 1/2 teaspoons (9g) of salt. Gradually pour in 1 1/2 cups (350ml) of warm water and stir until a shaggy dough forms. No need to knead—just mix until combined.
- Let it rise: Cover the bowl with a clean kitchen towel and let the dough rise at room temperature for 12-18 hours. It should double in size and develop bubbles.
- Preheat the oven: Place your Dutch oven (with the lid) inside the oven and preheat to 450°F (230°C). This step ensures a crispy crust.
- Shape the dough: Turn the dough out onto a floured surface and shape it into a round loaf. Place it on a piece of parchment paper. Cover with a towel and let it rest for 30 minutes.
- Bake: Carefully transfer the dough (parchment paper included) into the preheated Dutch oven. Cover with the lid and bake for 30 minutes. Remove the lid and bake for an additional 15 minutes until golden brown.
Your bread is ready when the crust is deep golden and it sounds hollow when tapped. Let it cool for at least 30 minutes before slicing—resist the temptation!
Cooking Tips & Techniques
- Don’t rush the rise: The long fermentation is key to flavor. Let the dough sit overnight for the best results.
- Use a thermometer: If you’re unsure about your water temperature, aim for 100-110°F (38-43°C). Too hot and you’ll kill the yeast.
- Play with toppings: Add sesame seeds, a dusting of flour, or even a drizzle of olive oil before baking for extra flair.
- Prevent sticking: Use quality parchment paper or sprinkle cornmeal on the bottom of the Dutch oven.
- Don’t skip the preheat: A hot Dutch oven is what gives the bread that signature crust.
I’ve learned the hard way that patience is key. If your dough seems too sticky, don’t panic—that’s normal for no-knead bread and part of what makes it so amazing!
Variations & Adaptations
- Herbed bread: Mix in 1-2 tablespoons of chopped rosemary or thyme for an aromatic twist.
- Cheesy goodness: Fold in shredded cheddar or parmesan for a cheesy loaf that pairs beautifully with soups.
- Whole wheat option: Swap half the all-purpose flour with whole wheat flour for a nuttier flavor and added nutrients.
- Gluten-free adaptation: Use a gluten-free all-purpose flour blend for a bread that’s safe for gluten-sensitive eaters.
- Seasonal mix-ins: Add dried cranberries and walnuts in the fall, or sun-dried tomatoes and basil in the summer.
I’ve tried adding garlic powder and shredded asiago to mine—game changer! The possibilities are endless, so don’t be afraid to experiment.
Serving & Storage Suggestions
This bread is best served fresh, warm, and crusty. Slice it up and pair it with butter, jam, or a drizzle of olive oil and balsamic vinegar. It’s also perfect alongside soups, stews, or a hearty salad.
To store, wrap the bread in a clean kitchen towel and keep it at room temperature for up to 2 days. For longer storage, slice the loaf and freeze it in an airtight bag. Reheat slices in the oven at 350°F (175°C) for 5-7 minutes or pop them in the toaster for quick refresh.
As the bread sits, the flavor develops even further. So, don’t hesitate to bake ahead and enjoy over a few days!
Nutritional Information & Benefits
One slice of this bread (based on 12 servings per loaf) contains approximately:
- Calories: 120
- Carbohydrates: 24g
- Protein: 3g
- Fat: 0.5g
- Fiber: 1g
This bread is naturally low in fat and free of additives, making it a wholesome choice. The slow fermentation process can even help improve digestibility, and using whole grain flour adds fiber for a nutritional boost.
Conclusion
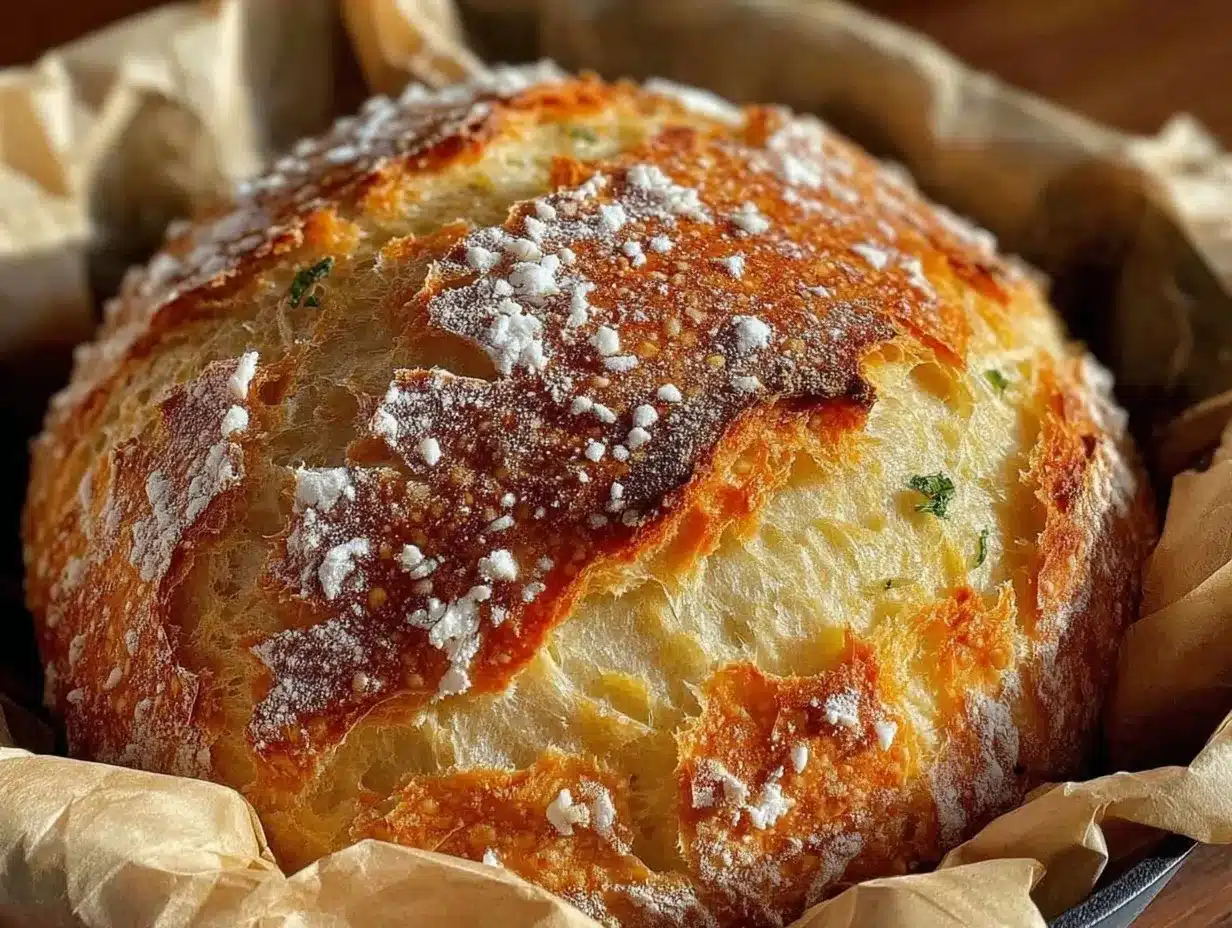
If you’ve been searching for an easy, foolproof way to bake bread at home, this Crispy No Knead Dutch Oven Bread recipe is your answer. It’s simple, versatile, and delivers bakery-quality results every time. The golden crust and soft center are guaranteed to win over anyone who tries it.
Leave a comment below if you try this recipe—I’d love to hear your thoughts or see your personal adaptations! Happy baking!
FAQs
Can I use instant yeast instead of active dry yeast?
Yes! You can substitute instant yeast in the same quantity. It may rise slightly faster, so keep an eye on the dough.
Do I need to grease the Dutch oven?
No, parchment paper prevents sticking. Just place the dough on the paper and transfer it to the pot.
Can I make this bread without a Dutch oven?
Yes, you can use an oven-safe pot with a lid or a deep casserole dish. The key is trapping steam during baking.
What’s the best way to reheat this bread?
Reheat slices in the oven at 350°F (175°C) for 5-7 minutes or toast them for a crispy edge.
Why is my crust too hard?
If the crust is too hard, try reducing the final uncovered baking time by a few minutes or wrapping the bread in a damp towel after it cools.
Pin This Recipe!

Crispy No Knead Dutch Oven Bread Recipe in 5 Steps

This easy no-knead bread recipe delivers a golden crust and soft, airy interior with minimal effort. Perfect for beginners and seasoned bakers alike.
- Prep Time: 15 minutes
- Cook Time: 45 minutes
- Total Time: 13-19 hours
- Yield: 1 loaf (12 slices) 1x
- Category: Bread
- Cuisine: American
Ingredients
- 3 cups (375g) all-purpose flour
- 1/2 teaspoon (2g) active dry yeast
- 1 1/2 teaspoons (9g) salt
- 1 1/2 cups (350ml) warm water
- Optional mix-ins: herbs, seeds, shredded cheese, or dried fruits
Instructions
- Mix the dough: In a large mixing bowl, combine flour, yeast, and salt. Gradually pour in warm water and stir until a shaggy dough forms.
- Let it rise: Cover the bowl with a clean kitchen towel and let the dough rise at room temperature for 12-18 hours until it doubles in size and develops bubbles.
- Preheat the oven: Place your Dutch oven (with the lid) inside the oven and preheat to 450°F (230°C).
- Shape the dough: Turn the dough out onto a floured surface and shape it into a round loaf. Place it on a piece of parchment paper. Cover with a towel and let it rest for 30 minutes.
- Bake: Carefully transfer the dough (parchment paper included) into the preheated Dutch oven. Cover with the lid and bake for 30 minutes. Remove the lid and bake for an additional 15 minutes until golden brown.
Notes
[‘Don’t rush the rise; the long fermentation is key to flavor.’, ‘Use a thermometer to ensure water temperature is between 100-110°F (38-43°C).’, ‘Add toppings like sesame seeds, flour dusting, or olive oil for extra flair.’, ‘Use quality parchment paper or sprinkle cornmeal to prevent sticking.’, ‘A hot Dutch oven is essential for a crispy crust.’]
Nutrition
- Serving Size: 1 slice
- Calories: 120
- Sodium: 220
- Fat: 0.5
- Carbohydrates: 24
- Fiber: 1
- Protein: 3
Keywords: no-knead bread, Dutch oven bread, easy bread recipe, crispy crust bread, artisan bread