Introduction
Let me paint a picture for you: the aroma of pure maple syrup mingling with creamy butter, all wrapped up in a silky blanket of chocolate and topped with crunchy walnuts. The first time I made these Creamy Maple Balls, I was standing in my kitchen on a frosty Sunday morning, just craving something sweet and nostalgic—something that felt like a big, warm hug. My grandma used to make maple candies for winter holidays, and honestly, this recipe brings me right back to those days when I was knee-high to a grasshopper, sneaking pieces off her cooling rack before anyone noticed (well, she always noticed, but she let it slide).
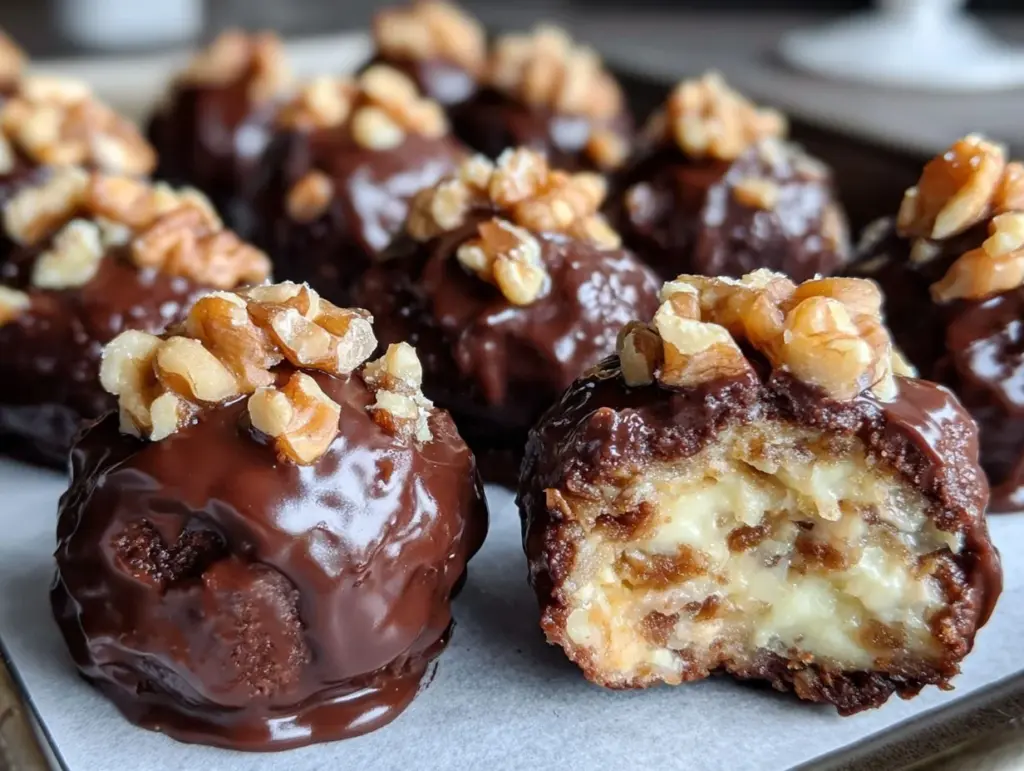
The moment I popped the first ball into my mouth, it was a revelation—the kind of moment where you pause, take a deep breath, and just smile because you know you’re onto something truly special. The creamy maple center is smooth and rich, the chocolate shell is just thick enough to crack with a satisfying snap, and the toasted walnut pieces add that perfect nutty crunch. My family couldn’t stop grabbing them straight off the tray, and honestly, I don’t blame them one bit.
Whether you’re looking to brighten up your Pinterest dessert board, need a sweet treat for your kids, or want something unique for your next potluck, these Creamy Maple Balls fit the bill. They’re dangerously easy to whip up, calling for simple pantry staples and just a little patience for chilling. I’ve tested this recipe more times than I can count (in the name of research, of course), and it’s become a staple for family gatherings, holiday gifting, and those days when you just need a bite of pure, nostalgic comfort. Trust me—you’re going to want to bookmark this one.
Why You’ll Love This Recipe
After years of experimenting (and a few sticky kitchen mishaps), I can confidently say these Creamy Maple Balls are a game-changer for anyone craving a homemade chocolate walnut treat. Here’s why they stand out in my kitchen, and will in yours too:
- Quick & Easy: Comes together in under 40 minutes, including chilling time. Perfect for busy schedules or last-minute dessert emergencies!
- Simple Ingredients: No fancy grocery trips required—just real maple syrup, butter, powdered sugar, and a few classics you probably already have.
- Perfect for Any Occasion: Great for holiday parties, potlucks, family movie nights, or just to brighten up a regular Tuesday.
- Crowd-Pleaser: Kids love the creamy texture, adults appreciate the sophisticated maple flavor, and everyone agrees on the magic of that chocolate walnut topping.
- Unbelievably Delicious: The combination of creamy, maple-infused centers and rich chocolate coating is pure comfort food bliss.
What sets this recipe apart? It’s all about the balance—there’s just the right amount of sweetness (thanks to real maple syrup), the texture is perfectly creamy (not grainy or dry), and the walnut topping adds a toasty, earthy note that brings it all together. I use a trick my grandma taught me: letting the maple filling chill just long enough so it sets up smooth and scoopable, making dipping a breeze and resulting in professional-looking treats (even if you’re a bit clumsy like me).
This isn’t your average candy ball recipe. It’s the one you’ll reach for when you want something that feels special but doesn’t require hours in the kitchen. Comfort food reimagined—healthier, faster, but with the same soul-soothing satisfaction. Whether you’re aiming to impress guests, treat yourself, or just have fun in the kitchen, these Creamy Maple Balls are a sweet success story every time.
What Ingredients You Will Need
This recipe uses simple, wholesome ingredients to deliver bold flavor and a satisfying texture without any complicated steps. Most of these are pantry staples, and a couple can be easily swapped if you’re dealing with dietary restrictions or just running low.
- For the Maple Filling:
- Unsalted butter, softened (1/2 cup / 113g) – helps create that creamy base
- Real maple syrup (1/3 cup / 80ml) – the star; use Grade A for best flavor
- Powdered sugar (2 cups / 240g) – gives structure and sweetness
- Fine sea salt (1/8 tsp / a pinch) – balances the sweetness and brings out the maple
- Pure vanilla extract (1 tsp / 5ml) – adds depth and warmth
- For the Chocolate Coating:
- Semi-sweet chocolate chips or chopped chocolate (1 cup / 170g) – I prefer Ghirardelli for smooth melting
- Coconut oil or neutral oil (1 tbsp / 15ml) – helps the chocolate set with a glossy finish
- For the Walnut Topping:
- Chopped walnuts, toasted (1/2 cup / 60g) – toast in a dry pan for max flavor
- Optional & Substitutions:
- Use vegan butter for dairy-free version (Earth Balance works great)
- Swap walnuts for pecans or hazelnuts if you prefer
- Use gluten-free powdered sugar if needed (Wholesome brand is reliable)
- Substitute dark chocolate for semi-sweet if you want a deeper flavor
- If you don’t have coconut oil, you can skip it—chocolate will just be a bit firmer
Tip: For the best creamy texture, make sure your butter is truly softened (leave it out for 30–60 minutes, not melted). And if you’re using maple syrup, don’t even think about using pancake syrup—it has to be the real deal! In summer, you can add a sprinkle of freeze-dried raspberries on top for a fruity twist. The ingredients really do most of the heavy lifting, and you’ll be amazed by how much flavor you get from such a short list.
Equipment Needed

Here’s what you’ll need to make these Creamy Maple Balls:
- Mixing bowl (medium to large)
- Hand mixer or stand mixer (a sturdy wooden spoon works in a pinch, but it’s a workout!)
- Rubber spatula (for scraping down the bowl)
- Cookie scoop or tablespoon (for portioning the balls)
- Baking sheet (lined with parchment or wax paper)
- Small saucepan or microwave-safe bowl (for melting chocolate)
- Forks or dipping tools (for coating balls in chocolate)
- Wire rack or another parchment-lined tray (for letting chocolate set)
If you don’t have a cookie scoop, two spoons will do the trick—just be ready for some sticky fingers. I’ve tried dipping these with everything from toothpicks to chopsticks (not recommended unless you’re feeling adventurous). For budget-friendly options, most dollar stores have basic mixing bowls and spatulas that work just fine. And a quick tip: if your baking sheet has seen better days, just layer on two sheets of parchment paper—cleanup’s a breeze!
Preparation Method
- Prepare the maple filling: In a mixing bowl, beat 1/2 cup (113g) softened unsalted butter until smooth and creamy, about 1 minute. Add 1/3 cup (80ml) real maple syrup and 1 tsp (5ml) vanilla extract. Mix until fully combined—don’t worry if it looks a bit separated.
- Add powdered sugar: Gradually add 2 cups (240g) powdered sugar, about 1/2 cup at a time, beating well after each addition. The mixture should become thick but still pliable. Add a pinch of fine sea salt and mix again.
- Chill the filling: Cover the bowl with plastic wrap and chill for 20 minutes. The filling should firm up enough to scoop. If it’s still too soft, give it another 10 minutes in the fridge. (If you rush it, you’ll end up with sticky hands and flat balls—learned that the hard way.)
- Shape the balls: Using a cookie scoop or tablespoon, portion out the mixture and roll into 1-inch (2.5cm) balls. Place each ball onto a parchment-lined baking sheet. If the mixture sticks, dust your hands lightly with powdered sugar.
- Chill again: Pop the tray into the fridge for at least 15 minutes to let the balls firm up. This step makes dipping in chocolate so much easier.
- Melt the chocolate: In a small saucepan or microwave-safe bowl, melt 1 cup (170g) semi-sweet chocolate chips with 1 tbsp (15ml) coconut oil in 20-second intervals, stirring between each until smooth. (Chocolate burns quickly—go slow and stir often.)
- Dip the balls: Using forks or dipping tools, dunk each chilled maple ball into the melted chocolate, letting excess drip off. Place back on the parchment-lined sheet.
- Add walnut topping: Immediately sprinkle chopped toasted walnuts over the wet chocolate. Press gently so they stick.
- Set the chocolate: Let the balls sit at room temperature for 20–30 minutes (or pop in the fridge for 10 minutes) until the chocolate is set.
- Serve or store: Enjoy right away, or transfer to an airtight container for later.
Preparation notes: If your kitchen is warm, keep the balls in the fridge between steps. The maple filling can sometimes be fickle—if it’s too soft, just chill longer; if it’s too firm, let it sit at room temp for a few minutes. For best results, keep the chocolate warm as you dip, stirring occasionally. Honestly, don’t stress about perfection—a few lopsided balls just show they’re homemade!
Cooking Tips & Techniques
After making these Creamy Maple Balls dozens of times (and cleaning up my fair share of chocolate drips), here are my best tips:
- Temperature matters: The filling should be cool but not rock-solid. If the balls won’t roll smoothly, let the mixture relax at room temp for a few minutes.
- Don’t skip chilling: Chilled balls hold their shape and dip beautifully—trust me, skipping this step leads to sticky disasters!
- Chocolate melting technique: Always melt chocolate slowly, using a double boiler or short microwave bursts. Burnt chocolate smells terrible and ruins the flavor.
- Troubleshooting: If your filling is too sticky, add a touch more powdered sugar. If it’s crumbly, add a teaspoon of maple syrup. Small adjustments make a big difference.
- Dipping tools: Forks work well, but if you’re aiming for Pinterest-perfect balls, invest in a proper dipping tool set—they’re cheap and make things easy.
- Multitasking: Toast your walnuts while the maple filling chills. It saves time and you won’t forget this crucial step!
- Consistency: Always measure ingredients carefully and use real maple syrup. I tried pancake syrup once—never again!
The first time I made these, I rushed the chilling and ended up with a sticky mess. Patience (and a cold fridge) is your friend here. And if your chocolate sets too quickly, just re-warm it for a few seconds. I’ve learned that homemade treats don’t have to be perfect—just delicious!
Variations & Adaptations
These Creamy Maple Balls are flexible and fun to customize. Here are some tasty ways to switch things up:
- Dietary swaps: Use vegan butter and dairy-free chocolate for a plant-based treat. Almond flour can replace powdered sugar for a lower-carb version (texture will be slightly different).
- Seasonal flavors: Stir in 1/2 tsp cinnamon or pumpkin pie spice for autumn vibes. In summer, sprinkle with freeze-dried berries instead of nuts.
- Different nuts: Pecans, hazelnuts, or even macadamias work beautifully. Toasting is key for maximum flavor.
- No chocolate? Roll the balls in cocoa powder, powdered sugar, or finely chopped nuts.
- Alternative cooking method: If you don’t want to use the stovetop, melt chocolate in the microwave (just go slow—chocolate burns easily).
- Personal twist: I sometimes add 1 tbsp espresso powder to the filling for a mocha kick. It’s a grown-up treat with bold flavor!
Feel free to experiment—these are the kind of treats that invite creativity. Just remember to keep the maple flavor front and center!
Serving & Storage Suggestions
Serve these Creamy Maple Balls chilled or at room temperature—either way, they’re irresistible. Arrange them on a pretty platter, sprinkle with extra chopped walnuts, and watch them disappear. Pair with coffee, hot chocolate, or a scoop of vanilla ice cream for extra indulgence.
For storage: Place balls in an airtight container, separating layers with parchment paper. Refrigerate for up to 1 week, or freeze for up to 2 months. Thaw at room temp for about 30 minutes before serving. If you’re gifting, wrap them in cellophane bags and tie with a ribbon—they make adorable homemade presents.
Reheating: Not needed, but if you want them a touch softer, let them sit out for 10 minutes. Over time, the flavors meld, and the maple gets even richer. Honestly, they never last long enough in my house to worry about storage!
Nutritional Information & Benefits
| Serving Size | Calories | Fat (g) | Carbs (g) | Protein (g) |
|---|---|---|---|---|
| 1 ball (approx. 25g) | 110 | 7 | 12 | 2 |
Key ingredients like maple syrup provide trace minerals (zinc, manganese), while walnuts add heart-healthy fats and a bit of protein. This recipe is naturally gluten-free and can be made dairy-free with vegan substitutes. Watch out for nuts if you have allergies—swap for seeds if needed.
From a wellness perspective, these treats are indulgent but made with real, simple ingredients. I always feel good sharing them with my family because there’s nothing fake or mysterious—just pure comfort in every bite.
Conclusion
If you’re searching for a homemade treat that’s creamy, chocolatey, and packed with maple goodness, these Creamy Maple Balls are truly worth trying. They’re simple, flexible, and just downright delicious. Don’t be afraid to get creative—swap nuts, add spices, or tweak the chocolate. That’s the beauty of homemade desserts!
I love this recipe because it brings a little bit of my childhood into every bite. It’s perfect for sharing, gifting, or just treating yourself on a cozy night in. Give it a try, and let me know how you make it your own—leave a comment with your favorite twist, or share your batch on Pinterest! Your kitchen is about to smell amazing.
Wishing you sweet, maple-filled moments—one creamy ball at a time!
FAQs
How long do Creamy Maple Balls keep in the fridge?
They’ll stay fresh in an airtight container for up to a week. Honestly, they tend to disappear much faster!
Can I freeze these maple balls?
Absolutely! Freeze them in a single layer, then store in a bag for up to 2 months. Thaw at room temp before serving.
Can I use fake maple syrup?
For best flavor, always use real maple syrup. Pancake syrup just doesn’t give the same rich taste.
Are these gluten-free?
Yes, as long as you use gluten-free powdered sugar. Always check your labels to be sure.
Can I make these without nuts?
Yes! Skip the walnuts or use sunflower seeds for crunch. It’s easy to customize for allergies or preferences.
Pin This Recipe!
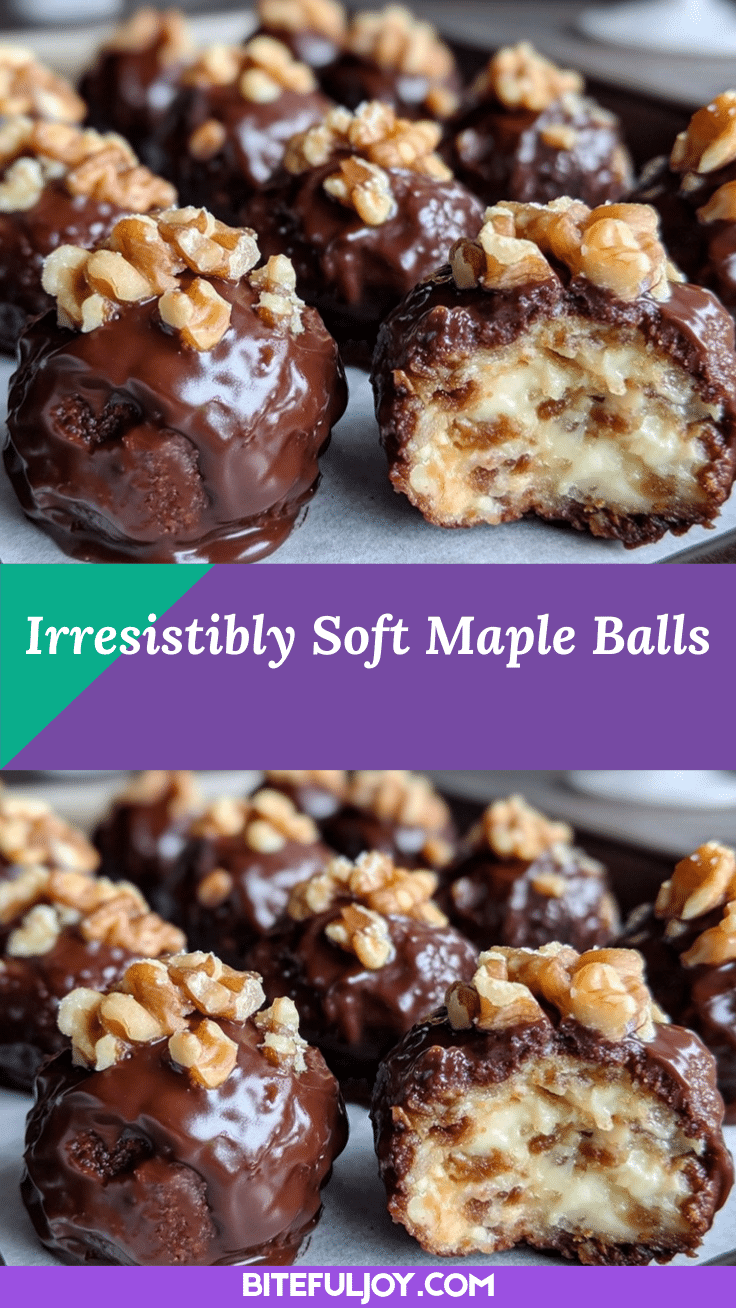
Creamy Maple Balls

Creamy Maple Balls are easy homemade chocolate walnut treats featuring a smooth maple-infused center, rich chocolate coating, and crunchy toasted walnuts. Perfect for holidays, gifting, or a cozy sweet snack, these nostalgic candies come together quickly with simple pantry ingredients.
- Prep Time: 15 minutes
- Cook Time: 5 minutes
- Total Time: 40 minutes
- Yield: 20 balls 1x
- Category: Dessert
- Cuisine: American
Ingredients
- 1/2 cup unsalted butter, softened
- 1/3 cup real maple syrup
- 2 cups powdered sugar
- 1/8 teaspoon fine sea salt
- 1 teaspoon pure vanilla extract
- 1 cup semi-sweet chocolate chips or chopped chocolate
- 1 tablespoon coconut oil or neutral oil
- 1/2 cup chopped walnuts, toasted
Instructions
- In a mixing bowl, beat softened unsalted butter until smooth and creamy, about 1 minute.
- Add real maple syrup and vanilla extract; mix until fully combined.
- Gradually add powdered sugar, about 1/2 cup at a time, beating well after each addition. Add a pinch of fine sea salt and mix again.
- Cover the bowl with plastic wrap and chill for 20 minutes, or until the filling is firm enough to scoop. If too soft, chill an additional 10 minutes.
- Using a cookie scoop or tablespoon, portion out the mixture and roll into 1-inch balls. Place each ball onto a parchment-lined baking sheet.
- Chill the tray in the fridge for at least 15 minutes to let the balls firm up.
- In a small saucepan or microwave-safe bowl, melt semi-sweet chocolate chips with coconut oil in 20-second intervals, stirring between each until smooth.
- Using forks or dipping tools, dunk each chilled maple ball into the melted chocolate, letting excess drip off. Place back on the parchment-lined sheet.
- Immediately sprinkle chopped toasted walnuts over the wet chocolate and press gently so they stick.
- Let the balls sit at room temperature for 20–30 minutes (or refrigerate for 10 minutes) until the chocolate is set.
- Serve immediately or transfer to an airtight container for storage.
Notes
For best texture, use real maple syrup and softened butter. Chill the filling thoroughly before shaping and dipping. Toast walnuts for extra flavor. Vegan and nut-free adaptations are possible. Store in an airtight container in the fridge for up to 1 week or freeze for up to 2 months.
Nutrition
- Serving Size: 1 ball (approx. 25g)
- Calories: 110
- Sugar: 10
- Sodium: 30
- Fat: 7
- Saturated Fat: 4
- Carbohydrates: 12
- Fiber: 1
- Protein: 2
Keywords: maple balls, chocolate walnut treats, homemade candy, maple syrup dessert, gluten-free dessert, holiday candy, easy dessert, no bake treats


