“I wasn’t expecting a baking epiphany while trying to fix a leaky faucet,” my neighbor chuckled as he handed me a sticky, chocolate-smudged note. It was his wife’s recipe for what he called “the best sheet pan brownies ever.” That night, with water dripping and patience thinning, I whipped up those brownies, tossing in peanut butter cups on a whim. Honestly, the moment the rich, fudgy aroma filled my kitchen, I knew this wasn’t just any brownie recipe. Maybe you’ve been there—scrambling last minute for a graduation party dessert, hoping for something simple yet spectacular.
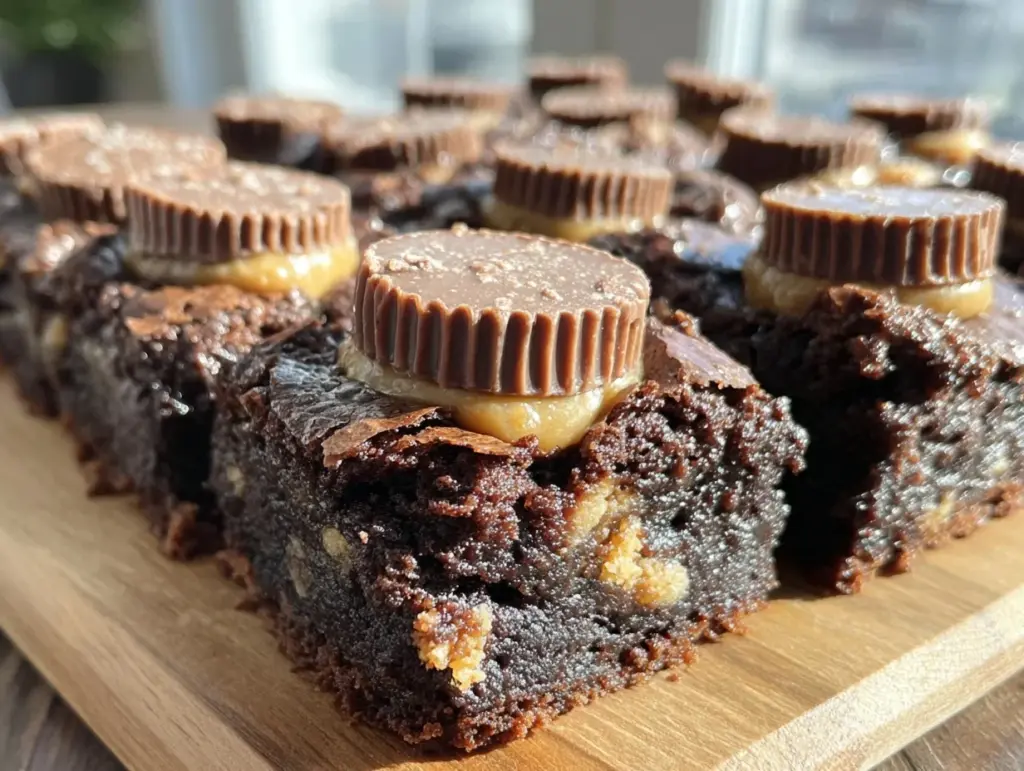
These brownies transformed from a simple fix-what’s-left-of-the-pan treat into a crowd-stopping dessert shaped like graduation caps, perfect for celebrating milestones with a sweet bang. I can’t tell you how many compliments rolled in at my niece’s graduation party last month. This recipe stuck with me because it blends the nostalgic joy of classic brownies with the fun and flair of peanut butter cups, all baked conveniently on a single sheet pan. You know that feeling when a dessert not only tastes amazing but also looks like it took hours of work? Yeah, that.
Making these sheet pan graduation cap brownies became a bit of a ritual—messy, joyful, and totally worth it. Even with the occasional crumb avalanche and a peanut butter cup that melted too soon, it’s the kind of recipe you’ll want to keep on hand for celebrations, last-minute guests, or whenever you need a chocolatey pick-me-up that’s as fun to make as it is to eat.
Why You’ll Love This Recipe
Having tested and tweaked this recipe more times than I can count (and trust me, each batch has been a delicious adventure), I can confidently say this is one of the easiest and most impressive desserts you can pull off. Here’s why it’s a winner:
- Quick & Easy: Ready in under 45 minutes, this recipe fits perfectly into busy days, especially when you’re juggling party prep and other life chaos.
- Simple Ingredients: You don’t need to hunt down anything fancy—just pantry staples and peanut butter cups, which add that irresistible surprise.
- Perfect for Celebrations: Graduation parties, school events, or even casual get-togethers—these brownies bring the fun and flavor every time.
- Crowd-Pleaser: Kids and adults alike go wild for the fudgy texture paired with the creamy peanut butter cups.
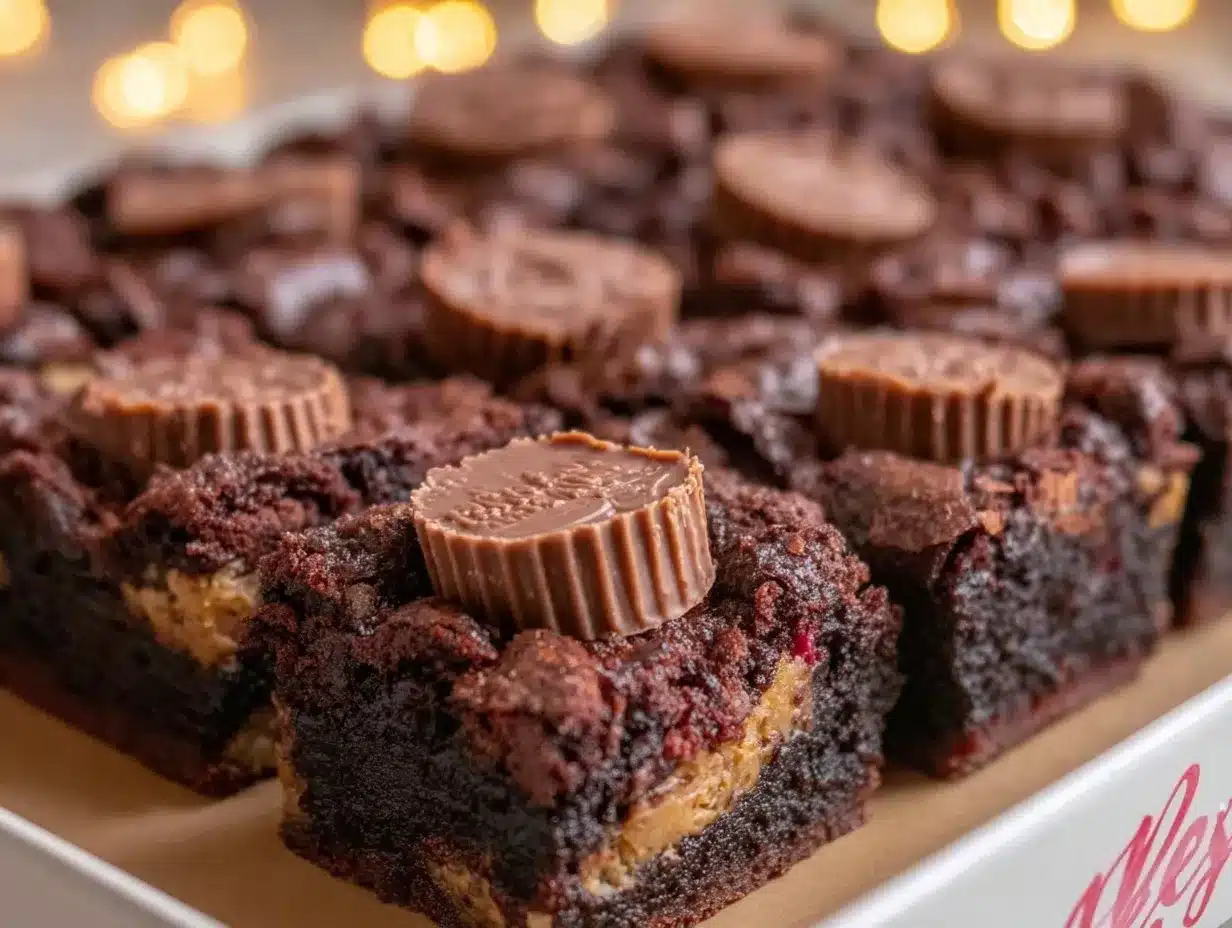
- Unbelievably Delicious: The peanut butter cups melt just right, creating pockets of gooey delight that complement the rich, chocolaty brownie base.
What makes these brownies stand out is the clever sheet pan method combined with a creative graduation cap design that doesn’t require fancy tools or perfect piping skills. The peanut butter cups add a nostalgic twist, giving the brownies a playful texture and flavor that’s both comforting and exciting. Honestly, it’s like comfort food met a celebration and they hit it off.
What Ingredients You Will Need
This recipe calls for straightforward, wholesome ingredients that come together to make a brownie that’s fudgy, flavorful, and festive. Most of these are pantry staples, so you likely have them on hand. The peanut butter cups are the star addition, bringing that classic sweet and salty combo.
- For the Brownie Batter:
- 1 cup (226g) unsalted butter, melted (I prefer Kerrygold for its creamy richness)
- 2 cups (400g) granulated sugar
- 4 large eggs, room temperature
- 1 tablespoon pure vanilla extract
- 1 cup (125g) all-purpose flour (Bob’s Red Mill works well here)
- ¾ cup (75g) unsweetened cocoa powder (Dutch-processed cocoa gives a deeper flavor)
- ½ teaspoon salt
- ½ teaspoon baking powder
- For the Peanut Butter Cups:
- 12 regular-sized peanut butter cups (Reese’s or your favorite brand)
- Optional: mini peanut butter cups for decoration or extra gooey spots
- For the Graduation Cap Decorations:
- Black licorice strings or thin strips of fondant (for the tassels)
- Square-shaped chocolate pieces or cut brownies (to top the peanut butter cups as caps)
If you want to make this gluten-free, swap the all-purpose flour for a gluten-free blend. Dairy-free butter and vegan peanut butter cups also work well for those with dietary restrictions. The key is to use quality cocoa powder and fresh eggs to get that fudgy, rich brownie base. In summer, swapping peanut butter cups with fresh berries or caramel candies adds a fun twist, but honestly, the classic combo wins every time in my book.
Equipment Needed
- Sheet pan (approximately 9×13 inches or 23×33 cm) – a sturdy, rimmed pan works best to hold the batter evenly
- Mixing bowls – at least two, one for wet ingredients and one for dry
- Whisk or electric hand mixer – to blend ingredients smoothly
- Rubber spatula – great for folding and scraping the batter out without waste
- Measuring cups and spoons – accurate measurements make all the difference
- Knife or pizza cutter – for cutting brownies into squares and shaping caps
- Cooling rack – helps brownies cool evenly and prevents sogginess
If you don’t have an electric mixer, no worries—whisking by hand works just fine, though it takes a bit longer. For budget-friendly options, a basic aluminum sheet pan from your local store will do, just line it with parchment paper for easy cleanup and to prevent sticking. I’ve tried silicone baking mats in the pan, but parchment gives a better texture on the bottom crust. Keeping your tools clean and dry, especially the bowl and beaters, helps the batter come together perfectly.
Preparation Method
- Preheat Your Oven: Set your oven to 350°F (175°C). Line your 9×13 inch (23×33 cm) sheet pan with parchment paper, leaving some overhang for easy lifting later. This takes about 10 minutes.
- Mix Wet Ingredients: In a large bowl, whisk together 1 cup (226g) melted unsalted butter and 2 cups (400g) granulated sugar until smooth and shiny—this usually takes about 2 minutes with a hand mixer. Add 4 large eggs one at a time, beating well after each addition. Stir in 1 tablespoon pure vanilla extract. The mixture should look glossy and thick.
- Combine Dry Ingredients: In a separate bowl, sift together 1 cup (125g) all-purpose flour, ¾ cup (75g) unsweetened cocoa powder, ½ teaspoon salt, and ½ teaspoon baking powder. Sifting helps avoid lumps and makes the batter lighter.
- Fold Dry into Wet: Gradually add the dry ingredients into the wet mixture, folding gently with a rubber spatula until just combined. Don’t overmix—some streaks of flour are okay. The batter will be thick and fudgy.
- Spread Batter in Pan: Pour the batter into your prepared sheet pan. Use the spatula to spread evenly, smoothing the top. This step takes about 3 minutes.
- Add Peanut Butter Cups: Gently press 12 peanut butter cups evenly spaced on top of the batter. Don’t push too hard, or they’ll sink completely. The cups will partially melt into the brownies, creating delicious gooey pockets.
- Bake: Place the pan on the middle rack and bake for 30-35 minutes. Start checking at 30 minutes by inserting a toothpick between the peanut butter cups (not through them). It should come out with a few moist crumbs but no wet batter.
- Cool Completely: Let the brownies cool in the pan on a wire rack for at least 1 hour. This helps them firm up for cutting and decorating.
- Cut & Decorate: Carefully lift the brownies out using parchment overhang. Cut into squares around each peanut butter cup. Use small square brownie pieces or chocolate squares to place on top of each peanut butter cup to mimic graduation caps. Add licorice strings or fondant strips for tassels.
- Serve & Enjoy: These look adorable on a platter and are ready to impress. Serve at room temperature for the best texture.
Pro tip: If your peanut butter cups start melting too much while baking, try chilling them in the fridge for 10 minutes before pressing into the batter. Also, be patient during cooling—cutting too soon can lead to a crumbly mess. I once got interrupted by a phone call mid-bake and forgot the timer, which resulted in slightly crisp edges, but honestly, many guests loved that extra crunch!
Cooking Tips & Techniques
One key to these brownies’ success is not overbaking. I’ve learned through trial and error that even a minute or two too long makes the texture dry rather than fudgy. Keep a close eye starting at the 30-minute mark. The toothpick test is your best friend—look for moist crumbs, not wet batter.
When melting butter, use medium heat or microwave in short bursts to avoid burning. Burnt butter ruins the flavor, which I learned the hard way during my first batch (the whole kitchen smelled like a campfire!). Stir the batter gently to keep it light—overmixing develops gluten, making brownies tough.
Multi-tasking tip: prepare your decorations (cutting licorice, chocolate squares) while brownies bake, so you’re ready to assemble right away. Also, using room temperature eggs helps the batter come together smoothly without lumps.
For consistent peanut butter cup distribution, mark the pan lightly with a knife before baking to guide spacing. This little step keeps things neat and ensures no brownie gets left out of the peanut butter party. If you’re feeling fancy, dust with powdered sugar or drizzle melted chocolate on top after decorating.
Variations & Adaptations
- Nut-Free Version: Swap peanut butter cups for dairy-free caramel candies or chocolate chips. Use a nut-free butter substitute for allergy-friendly brownies.
- Seasonal Twist: Add fresh raspberries or chopped strawberries in place of peanut butter cups during summer. The fruity burst offers a refreshing contrast to the rich chocolate.
- Double Chocolate: Mix in white chocolate chunks or swirl in melted white chocolate before baking for a marbled effect.
- Vegan Adaptation: Use flax eggs (1 tablespoon flaxseed meal + 3 tablespoons water per egg), dairy-free butter, and vegan peanut butter cups. Baking time might vary slightly.
- Personal Touch: I once sprinkled a pinch of sea salt over the peanut butter cups before baking—it added a subtle, savory note that made the sweetness pop.
Feel free to experiment with different toppings or mix-ins like chopped nuts or shredded coconut. Just be mindful of how additional moisture or fat can affect baking time and texture.
Serving & Storage Suggestions
Serve these brownies at room temperature to enjoy that perfect fudgy texture and melty peanut butter goodness. They look fantastic arranged on a simple white platter with the graduation caps neatly lined up. Pair with cold milk, coffee, or even a scoop of vanilla ice cream for an indulgent treat.
Leftovers keep well in an airtight container at room temperature for up to 3 days. For longer storage, refrigerate for up to a week or freeze for up to 3 months—just thaw overnight before serving. Reheat briefly in the microwave (10-15 seconds) to refresh the gooey peanut butter cups.
As these brownies sit, the flavors deepen and the texture firms up slightly, which some folks prefer for easier slicing. If you’re prepping ahead, decorate right before serving to keep the licorice tassels looking fresh.
Nutritional Information & Benefits
Each serving of these sheet pan graduation cap brownies packs approximately 320 calories, with around 18g fat, 40g carbohydrates, and 5g protein. The peanut butter cups add protein and healthy fats, while the cocoa powder contributes antioxidants.
This recipe is a treat, so enjoy it as an occasional indulgence. For those watching gluten or dairy, easy substitutions make it accessible. Cocoa powder is known for its mood-boosting properties, which definitely helps when you’re juggling party prep and life’s craziness.
Personally, I appreciate that these brownies bring joy and a sense of accomplishment without complicated prep or rare ingredients—sometimes that’s the best kind of nourishment.
Conclusion
These best sheet pan graduation cap brownies with peanut butter cups aren’t just a dessert—they’re a celebration on a plate. They combine ease, flavor, and that extra little wow-factor that makes any graduation party or gathering feel special without the stress. Customize them your way, add your favorite toppings, or keep them classic—the recipe welcomes your creativity.
I keep making these because they remind me of those last-minute, slightly chaotic moments that turn into cherished memories. Now it’s your turn to give them a try. If you do, I’d love to hear how your batch turned out, any fun variations you tried, or even your own kitchen mishaps along the way. Share your story and spread the joy!
Happy baking and congrats to all the graduates out there!
Frequently Asked Questions
Can I use different types of candy instead of peanut butter cups?
Absolutely! Caramel candies, chocolate chips, or even chopped nuts work well if you want a different flavor or texture.
How do I store leftover brownies to keep them fresh?
Store in an airtight container at room temperature for up to 3 days, or refrigerate for up to a week. Freeze for longer storage, and thaw overnight before serving.
Can I make these brownies gluten-free?
Yes! Substitute the all-purpose flour with a gluten-free baking blend. Make sure your cocoa powder and other ingredients are gluten-free certified.
What’s the best way to cut these brownies without them crumbling?
Cool the brownies completely before cutting. Using a sharp knife warmed with hot water and wiped dry helps make clean cuts.
Can I prepare the batter ahead of time?
You can mix the batter and refrigerate it overnight, but allow it to come to room temperature before baking to ensure even cooking.
Pin This Recipe!
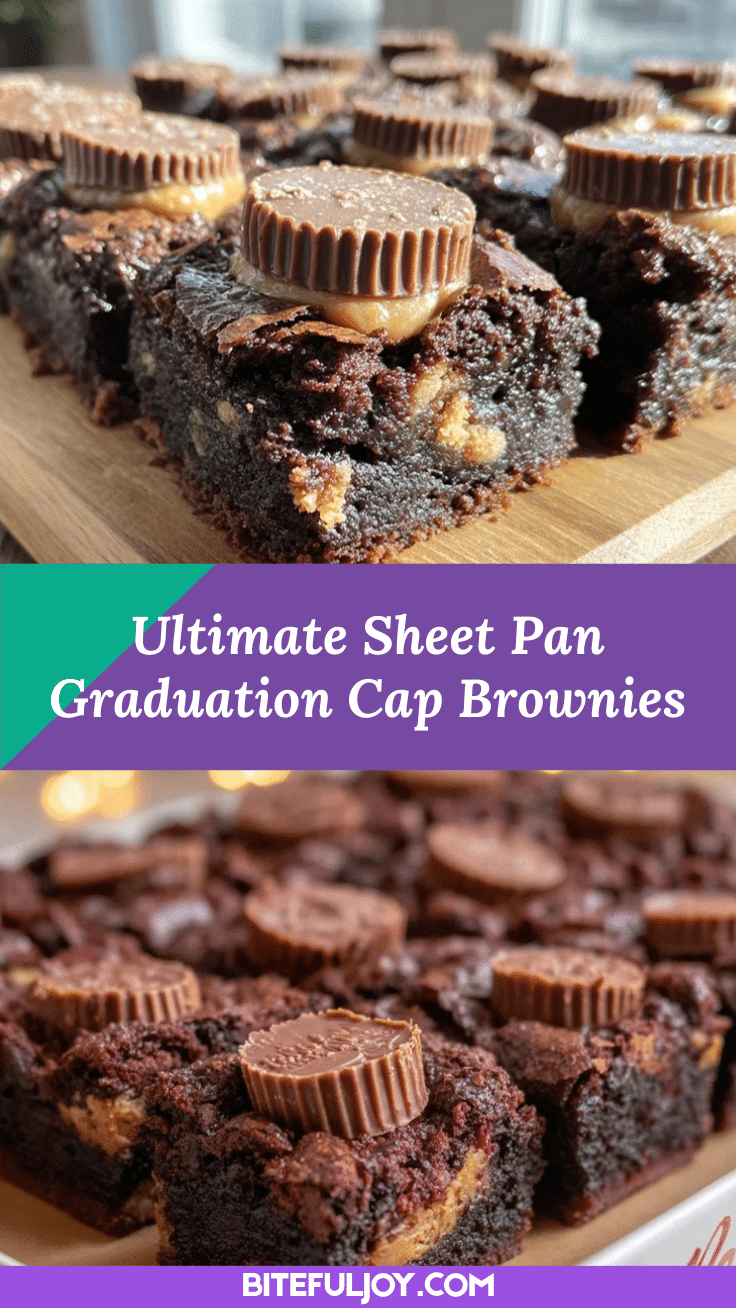
Best Sheet Pan Graduation Cap Brownies with Peanut Butter Cups
These fudgy sheet pan brownies with peanut butter cups are easy to make and perfect for graduation parties, combining classic chocolate flavor with a fun graduation cap design.
- Prep Time: 15 minutes
- Cook Time: 30-35 minutes
- Total Time: 45-50 minutes
- Yield: 12 servings 1x
- Category: Dessert
- Cuisine: American
Ingredients
- 1 cup (226g) unsalted butter, melted
- 2 cups (400g) granulated sugar
- 4 large eggs, room temperature
- 1 tablespoon pure vanilla extract
- 1 cup (125g) all-purpose flour
- ¾ cup (75g) unsweetened cocoa powder
- ½ teaspoon salt
- ½ teaspoon baking powder
- 12 regular-sized peanut butter cups
- Optional: mini peanut butter cups for decoration or extra gooey spots
- Black licorice strings or thin strips of fondant (for the tassels)
- Square-shaped chocolate pieces or cut brownies (to top the peanut butter cups as caps)
Instructions
- Preheat oven to 350°F (175°C). Line a 9×13 inch sheet pan with parchment paper, leaving some overhang for easy lifting.
- In a large bowl, whisk together melted butter and granulated sugar until smooth and shiny, about 2 minutes.
- Add eggs one at a time, beating well after each addition. Stir in vanilla extract until mixture is glossy and thick.
- In a separate bowl, sift together flour, cocoa powder, salt, and baking powder.
- Gradually fold dry ingredients into wet mixture with a rubber spatula until just combined; do not overmix.
- Pour batter into prepared sheet pan and spread evenly with a spatula.
- Gently press 12 peanut butter cups evenly spaced on top of the batter without pushing them too deep.
- Bake on middle rack for 30-35 minutes, checking at 30 minutes with a toothpick inserted between peanut butter cups; toothpick should come out with moist crumbs but no wet batter.
- Cool brownies completely in the pan on a wire rack for at least 1 hour.
- Lift brownies out using parchment overhang and cut into squares around each peanut butter cup.
- Top each peanut butter cup with a square brownie piece or chocolate square to mimic graduation caps.
- Add licorice strings or fondant strips as tassels.
- Serve at room temperature.
Notes
If peanut butter cups start melting too much, chill them in the fridge for 10 minutes before pressing into batter. Cool brownies completely before cutting to avoid crumbling. Use a sharp knife warmed with hot water for clean cuts. For gluten-free, substitute flour with gluten-free blend. Vegan and dairy-free substitutions are possible.
Nutrition
- Serving Size: 1 brownie square wit
- Calories: 320
- Fat: 18
- Carbohydrates: 40
- Protein: 5
Keywords: brownies, sheet pan brownies, peanut butter cups, graduation dessert, easy brownies, chocolate dessert, party dessert


