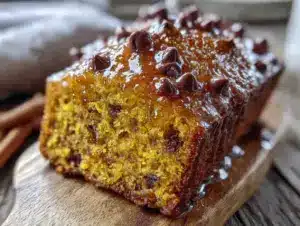
My neighbor knocked on my door holding a loaf of pumpkin bread wrapped in foil, and I almost cried. Not because I was hungry—though I was—but because it was one of those weeks where everything felt heavy, and she just showed up. I took a bite while standing in the doorway, and honestly, I didn’t even say thank you properly. I just made a noise. You know the one. That involuntary hum that means this is really, really good.
I asked for the recipe, and she laughed. “It’s the one on the back of the pumpkin can,” she said. “But I tweaked it.”
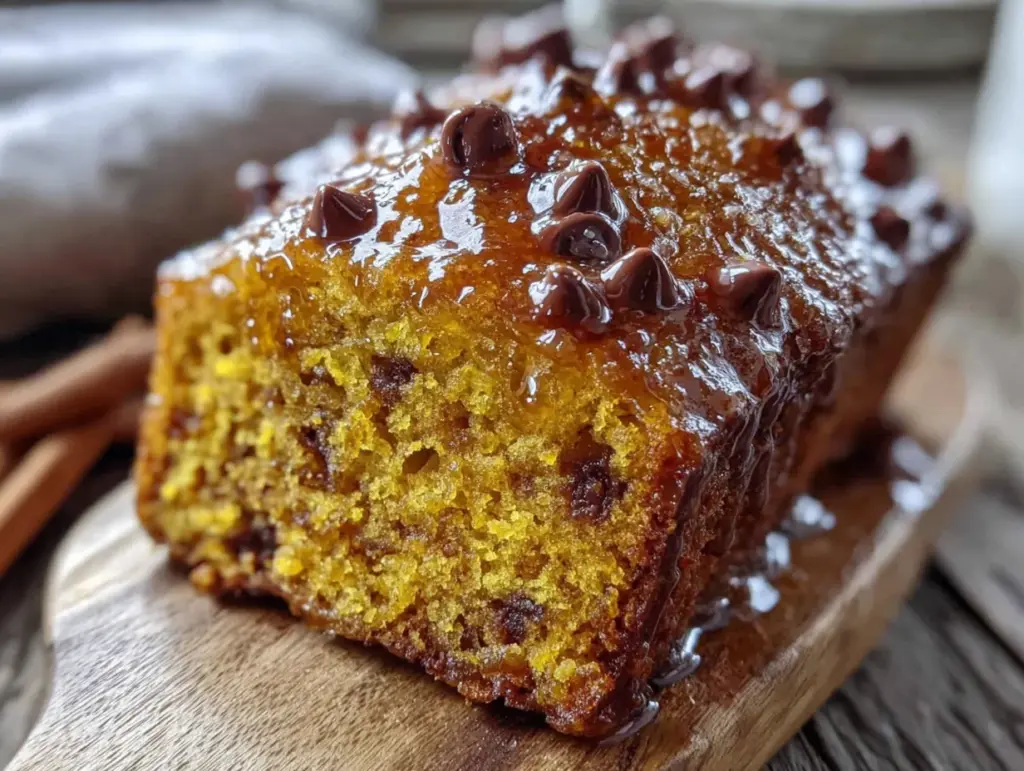
That tweaked version became my obsession for the next two weeks. I made it four times, changing little things each batch until it felt like mine. The chocolate chips, the extra warming spices, the way the top gets that crackly, bakery-style crust without using a mixer. This easy one-bowl pumpkin chocolate chip bread is the result of those late-night baking experiments, and it’s become the thing I bring to playdates, drop off for friends, and hide in my freezer for emergencies.
It’s the kind of recipe that doesn’t ask for much—just a bowl, a whisk, and forty-five minutes—but gives you back something that feels like a hug in loaf form. The pumpkin keeps it moist for days, the chocolate chips melt into little pockets of sweetness, and the whole thing comes together without dragging out the stand mixer. No mixer. No fuss. Just really good bread.
Why You’ll Love This Recipe
I’ve tested this easy one-bowl pumpkin chocolate chip bread more times than I care to admit, and each batch taught me something. The first one was too dense. The second was perfect but I forgot the salt. The third? That was the one where I finally understood why resting the batter for five minutes makes such a difference. So trust me when I say this version is the one.
- No mixer required – Just a bowl and a whisk. No dragging out the stand mixer, no washing beaters. You can have the batter ready in under ten minutes.
- Simple pantry ingredients – Canned pumpkin, flour, sugar, eggs, oil, and chocolate chips. If you bake even occasionally, you probably have everything already.
- Perfect for fall mornings – Or honestly, any morning. It’s not overly sweet, so it works for breakfast, snack time, or dessert.
- Stays moist for days – Pumpkin is magic like that. This loaf is even better on day two, when the flavors have had time to settle.
- Freezes beautifully – I always make two loaves now. One for now, one for later. Future me is always grateful.
- Kid-approved and adult-approved – My kids fight over the end pieces, and I’ve caught my husband eating a slice at 10 p.m. standing in front of the fridge.
This isn’t just another pumpkin bread recipe. The combination of warm spices—cinnamon, nutmeg, ginger, and a pinch of cloves—gives it that cozy depth, while the chocolate chips add just enough richness to make every bite interesting. It’s comfort food that comes together fast, uses simple ingredients, and makes your whole house smell like October.
What Ingredients You Will Need
This recipe uses simple, everyday ingredients that work together to create a moist, tender loaf with just the right amount of spice and sweetness. Nothing fancy here—just good, honest baking staples.
- Canned pumpkin puree – 1 cup (240g). Make sure you grab pure pumpkin puree, not pumpkin pie filling. I prefer Libby’s for consistent texture, but store brands work fine too. If you have homemade pumpkin puree, just make sure it’s well-drained so the bread doesn’t turn out soggy.
- All-purpose flour – 1 ¾ cups (220g). Spoon and level it into your measuring cup for the most accurate measurement. Scooping directly can pack the flour and make the bread dry.
- Granulated sugar – ¾ cup (150g). It adds just enough sweetness without overwhelming the pumpkin. You can reduce it to ½ cup if you prefer a less sweet loaf.
- Brown sugar – ½ cup (100g), packed. Light or dark both work. Dark brown sugar gives a deeper, almost molasses-like flavor that pairs beautifully with the spices.
- Large eggs – 2, at room temperature. Cold eggs can seize up the batter. If you forgot to take them out ahead of time, place them in a bowl of warm water for five minutes.
- Vegetable oil – ½ cup (120ml). It keeps the bread incredibly moist. Canola or any neutral oil works. Avoid olive oil here—the flavor is too strong.
- Milk – ¼ cup (60ml). Whole milk adds richness, but any milk you have works. I’ve used oat milk and almond milk with great results.
- Vanilla extract – 1 teaspoon. Pure vanilla is best, but imitation works in a pinch.
- Baking soda – 1 teaspoon. Make sure it’s fresh—stale baking soda won’t give the bread the lift it needs.
- Baking powder – ½ teaspoon. Double-check the expiration date. Old baking powder is the number one reason quick breads turn out flat.
- Salt – ½ teaspoon. Don’t skip it. Salt balances the sweetness and makes the spices pop.
- Ground cinnamon – 1 ½ teaspoons. This is the backbone of the spice blend.
- Ground nutmeg – ½ teaspoon. Freshly grated if you have it—it makes a noticeable difference.
- Ground ginger – ½ teaspoon. Adds a little warmth without being spicy.
- Ground cloves – ¼ teaspoon. A little goes a long way. Too much can make the bread taste medicinal.
- Semi-sweet chocolate chips – 1 cup (175g). I use Ghirardelli—they hold their shape and don’t sink to the bottom. You can also use dark chocolate chips or milk chocolate if that’s your thing.
Substitution notes: For a gluten-free version, swap the all-purpose flour with a 1:1 gluten-free baking flour blend. For a dairy-free option, use oat milk or almond milk and make sure your chocolate chips are dairy-free (most semi-sweet chips are). If you want to cut down on sugar, reduce the granulated sugar to ½ cup—the bread will still be sweet enough, especially with the chocolate chips.
Equipment Needed
You don’t need much for this easy one-bowl pumpkin chocolate chip bread. That’s honestly my favorite part.
- Large mixing bowl – Any big bowl works. I use a ceramic one because it doesn’t slide around on the counter.
- Whisk – For mixing the wet ingredients and combining everything. A fork works in a pinch, but a whisk gives you a smoother batter.
- Rubber spatula – For folding in the chocolate chips and scraping down the sides. A wooden spoon works too, but the spatula is gentler on the batter.
- 9×5-inch loaf pan – Standard size. If your pan is slightly smaller, just keep an eye on the baking time—it might need a few extra minutes.
- Parchment paper – I line the pan with a sling of parchment paper so the loaf lifts out cleanly. If you don’t have parchment, grease the pan well with butter or non-stick spray.
- Cooling rack – Letting the bread cool in the pan for ten minutes, then transferring it to a rack, prevents the bottom from getting soggy. If you don’t have a rack, just tilt the loaf on its side on a cutting board.
- Measuring cups and spoons – For accuracy. I keep a set of dry measuring cups for flour and sugar and a liquid measuring cup for the oil and milk.
- Toothpick or skewer – For testing doneness. A clean toothpick means the bread is ready.
I’ve made this bread with a cheap loaf pan from the grocery store and a fancy one from a kitchen boutique. Both worked perfectly. Don’t overthink the equipment—if you have a bowl and a pan, you’re good to go.
Preparation Method
Preheat your oven to 350°F (175°C). Line your loaf pan with parchment paper, leaving a little overhang on the long sides so you can lift the bread out later. Or just grease it well—whatever you prefer.
- Mix the wet ingredients. In a large bowl, whisk together the pumpkin puree, granulated sugar, brown sugar, eggs, vegetable oil, milk, and vanilla extract. Whisk until everything is smooth and well combined. The mixture should look glossy and smell amazing already. Don’t worry if it seems thin—that’s normal.
- Add the dry ingredients. Sprinkle the flour, baking soda, baking powder, salt, cinnamon, nutmeg, ginger, and cloves right on top of the wet mixture. Yes, right on top. No need for a separate bowl—this is one-bowl baking, remember? Stir gently with your whisk or spatula until just combined. A few streaks of flour are okay. Overmixing will make the bread tough, so stop as soon as you don’t see any more dry flour.
- Fold in the chocolate chips. Pour in the chocolate chips and fold them in with your spatula. Make sure they’re evenly distributed. If you want to prevent them from sinking to the bottom, toss them with a tablespoon of flour before adding them. I usually don’t bother, and they stay suspended just fine.
- Let the batter rest. This is the step I learned from my fourth batch. Let the batter sit for 5 minutes. It gives the flour time to hydrate and the baking soda and powder time to start working. The batter will thicken slightly. Don’t skip this—it makes a difference in the texture.
- Pour into the pan. Scrape the batter into your prepared loaf pan and spread it evenly. The batter will be thick and slightly lumpy—that’s perfect. Tap the pan gently on the counter a few times to release any air bubbles.
- Bake. Place the pan in the center of the oven and bake for 50 to 60 minutes. At the 30-minute mark, check the top. If it’s browning too quickly, tent the pan loosely with aluminum foil. My oven runs hot, so I usually check at 45 minutes. The bread is done when a toothpick inserted into the center comes out clean or with just a few moist crumbs. If it comes out with wet batter, give it another 5 minutes and test again.
- Cool. Let the bread cool in the pan for 10 minutes. Then lift it out using the parchment paper sling and transfer it to a cooling rack. Let it cool completely before slicing—about 1 hour. I know it’s hard to wait, but slicing too early will give you crumbly, gummy pieces. The bread needs that time to set.
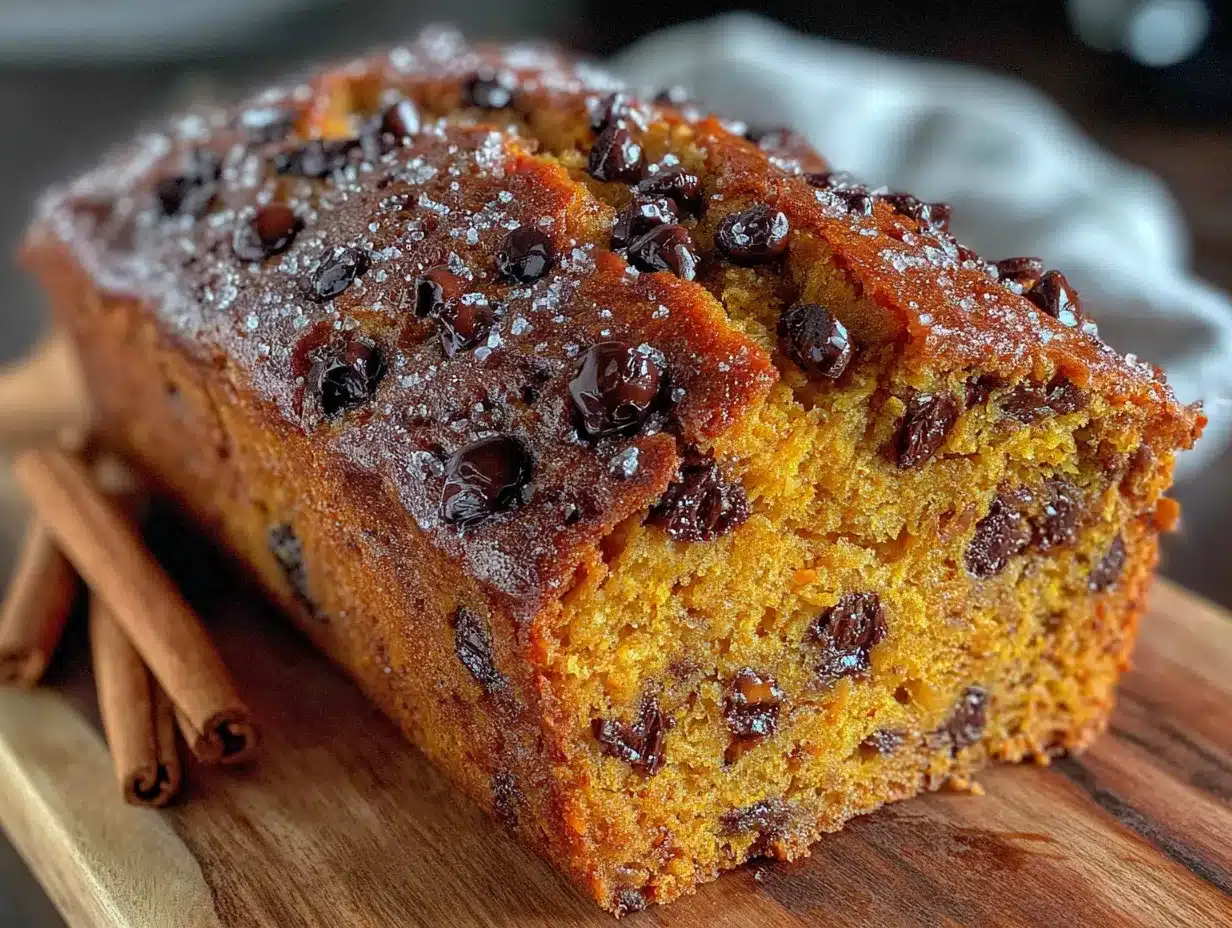
Visual cue: The top should be a deep golden brown with a crackled, slightly domed surface. The edges will pull away from the pan slightly. If you press gently on the center, it should spring back. And your kitchen will smell like a fall candle commercial—but better.
Cooking Tips & Techniques
I’ve made this easy one-bowl pumpkin chocolate chip bread at least a dozen times now, and I’ve learned a few things the hard way. Let me save you the trouble.
Don’t overmix the batter. I know I said this already, but it’s worth repeating. Stir until the flour disappears, then stop. Overmixing develops gluten, and too much gluten makes quick breads dense and rubbery. You want tender, not tough. I once got distracted and kept stirring while talking to my mom on the phone, and that loaf came out like a brick. Learn from my mistakes.
Use room temperature ingredients. Cold eggs and cold milk can make the batter seize up, especially when mixed with the oil. Take everything out of the fridge 30 minutes before you start. If you forgot, place the eggs in a bowl of warm water for 5 minutes and microwave the milk for 10 seconds. It makes a difference in how evenly everything combines.
Check your oven temperature. Ovens lie. Mine runs 25 degrees hot, so I always use an oven thermometer. If your bread is browning too fast on the outside but still raw in the center, your oven is probably too hot. Tent it with foil and lower the temperature by 25 degrees for the remaining time.
Let it cool completely. This is the hardest part of the whole recipe. The bread smells incredible, and you want to cut into it immediately. But if you slice it while it’s still warm, the texture will be gummy and the chocolate chips will smear everywhere. I’ve done it. It’s disappointing. Give it a full hour on the cooling rack. Your patience will be rewarded.
Toast leftover slices. If the bread is a day or two old, pop a slice in the toaster or under the broiler for a minute. The edges get slightly crispy, the chocolate chips soften, and it tastes almost better than fresh. I do this with the end pieces especially.
Variations & Adaptations
This recipe is forgiving, so feel free to play around. Here are some variations I’ve tried and loved.
Gluten-free version: Substitute the all-purpose flour with a 1:1 gluten-free baking flour blend. I’ve used Bob’s Red Mill and King Arthur, and both worked well. The texture is slightly more crumbly, but still delicious. Add an extra tablespoon of milk to compensate for the drier flour blend.
Vegan version: Replace the eggs with flax eggs (2 tablespoons ground flaxseed mixed with 6 tablespoons water, let sit for 5 minutes). Use a plant-based milk like oat or almond, and swap the chocolate chips for vegan-friendly ones. The bread will be slightly denser but still moist and flavorful.
Spice it up: Add ¼ teaspoon of cardamom or allspice for a more complex spice profile. I made a batch with cardamom once, and it tasted like a chai latte in bread form. Highly recommend.
Add nuts: Fold in ½ cup of chopped walnuts or pecans along with the chocolate chips. Toast them first for extra flavor. My husband prefers it this way—he says the crunch balances the softness of the bread.
Swap the chocolate: Use white chocolate chips for a sweeter, creamier version. Or try butterscotch chips for something totally different. I made a batch with white chocolate and dried cranberries for Thanksgiving, and it disappeared in ten minutes.
Make it a muffin: Divide the batter into a lined muffin tin and bake for 18 to 22 minutes. Perfect for grab-and-go breakfasts. This is my go-to when I need something portable for school drop-offs.
Add a streusel topping: Mix ¼ cup flour, ¼ cup brown sugar, 2 tablespoons cold butter, and ½ teaspoon cinnamon until crumbly. Sprinkle it on top before baking. It adds a lovely crunchy crust that contrasts with the soft bread.
Serving & Storage Suggestions
This easy one-bowl pumpkin chocolate chip bread is wonderful on its own, but here are some ways to make it even better.
Serving temperature: Room temperature is ideal. The flavors are more pronounced, and the texture is at its best. If you’re impatient like me, a warm slice with a pat of butter melting into it is absolute perfection.
Pairing ideas: Serve with a hot cup of coffee, chai latte, or a glass of cold milk. For a brunch spread, pair it with crispy brioche French toast or mimosa bar French toast bake for a full fall-themed menu. It also works beautifully alongside savory dishes like spinach and feta croissant bake for a balanced brunch table.
Storage: Wrap the cooled loaf tightly in plastic wrap or aluminum foil and store at room temperature for up to 4 days. I keep mine on the counter, not in the fridge—the fridge dries it out. If your kitchen is very warm, you can store it in an airtight container instead.
Freezing: This bread freezes beautifully. Wrap the cooled loaf in plastic wrap, then in a layer of foil, and freeze for up to 3 months. You can also slice it first and freeze individual slices wrapped in parchment paper. That way, you can pull out one slice at a time for quick breakfasts or snacks. To thaw, leave it on the counter for about an hour, or pop a frozen slice in the toaster.
Flavor development: Honestly, this bread tastes even better on day two. The spices mellow and meld together, and the pumpkin flavor becomes more pronounced. So if you can resist eating it all on day one, you’re in for a treat.
Nutritional Information & Benefits
Here’s the approximate nutritional breakdown for one slice (based on 10 slices per loaf):
| Nutrient | Amount per slice |
|---|---|
| Calories | 290 |
| Total Fat | 14g |
| Saturated Fat | 4g |
| Cholesterol | 35mg |
| Sodium | 220mg |
| Total Carbohydrates | 39g |
| Dietary Fiber | 2g |
| Sugars | 23g |
| Protein | 4g |
Pumpkin is packed with vitamin A, which supports eye health and immunity. It’s also a good source of fiber, which helps with digestion and keeps you feeling full. The chocolate chips add a little antioxidant boost from the cocoa, and the eggs provide protein to balance out the carbs. This isn’t health food, but it’s not junk either—it’s a wholesome treat that satisfies without sending your blood sugar on a rollercoaster.
Dietary considerations: This recipe contains gluten, dairy, and eggs. For gluten-free, dairy-free, or vegan adaptations, check the variations section above. It’s naturally nut-free if you skip the optional nuts, making it a safe choice for school bake sales or nut-free households.
Conclusion
This easy one-bowl pumpkin chocolate chip bread has become my fall baking staple, and I have a feeling it’ll become yours too. It’s the recipe I turn to when I want something homemade without the hassle—no mixer, no complicated steps, no fancy ingredients. Just a bowl, a whisk, and forty-five minutes of baking time that fills your kitchen with the coziest scent imaginable.
What I love most about this bread is how adaptable it is. Make it with chocolate chips or without. Add nuts or leave them out. Turn it into muffins or keep it as a loaf. It works for breakfast, snack time, dessert, or as a hostess gift wrapped in a tea towel. It’s forgiving, reliable, and always, always delicious.
I’d love to hear how it turns out for you. Did you add any fun mix-ins? Did your kids ask for it three days in a row like mine did? Drop a comment below and let me know—I read every single one. And if you snap a photo, tag me on Pinterest. There’s nothing that makes my day like seeing someone else enjoying a recipe that started as a knock on my door.
Happy baking, friends. Your pumpkin bread adventure starts now.
Frequently Asked Questions
Can I use fresh pumpkin instead of canned?
Yes, you can use fresh pumpkin puree. Just make sure to drain it well after blending or mashing. Fresh pumpkin tends to have more water than canned, which can make the bread soggy. Spread the puree on a paper towel-lined plate for a few minutes to absorb excess moisture before using it.
Why did my pumpkin bread sink in the middle?
This usually happens when the bread is underbaked or the oven temperature is too low. Make sure your oven is fully preheated to 350°F and test the bread with a toothpick before taking it out. Another common cause is opening the oven door too often during baking, which lets cold air in and causes the bread to collapse.
Can I make this recipe without chocolate chips?
Absolutely. The pumpkin bread is delicious on its own. You can leave out the chocolate chips entirely, or swap them for dried cranberries, raisins, chopped nuts, or even a swirl of cream cheese for a different twist. The base recipe works beautifully no matter what you add.
How do I know when the bread is done baking?
Insert a toothpick or skewer into the center of the loaf. If it comes out clean or with just a few moist crumbs attached, it’s done. If it comes out with wet batter, bake for another 5 minutes and test again. The top should also be golden brown and spring back when lightly pressed.
Can I double this recipe?
Yes, this recipe doubles easily. Use a larger bowl and whisk everything together as usual. You can bake two loaves at the same time—just rotate the pans halfway through baking to ensure even browning. The baking time may be slightly longer, so start checking at the 50-minute mark.
Pin This Recipe!
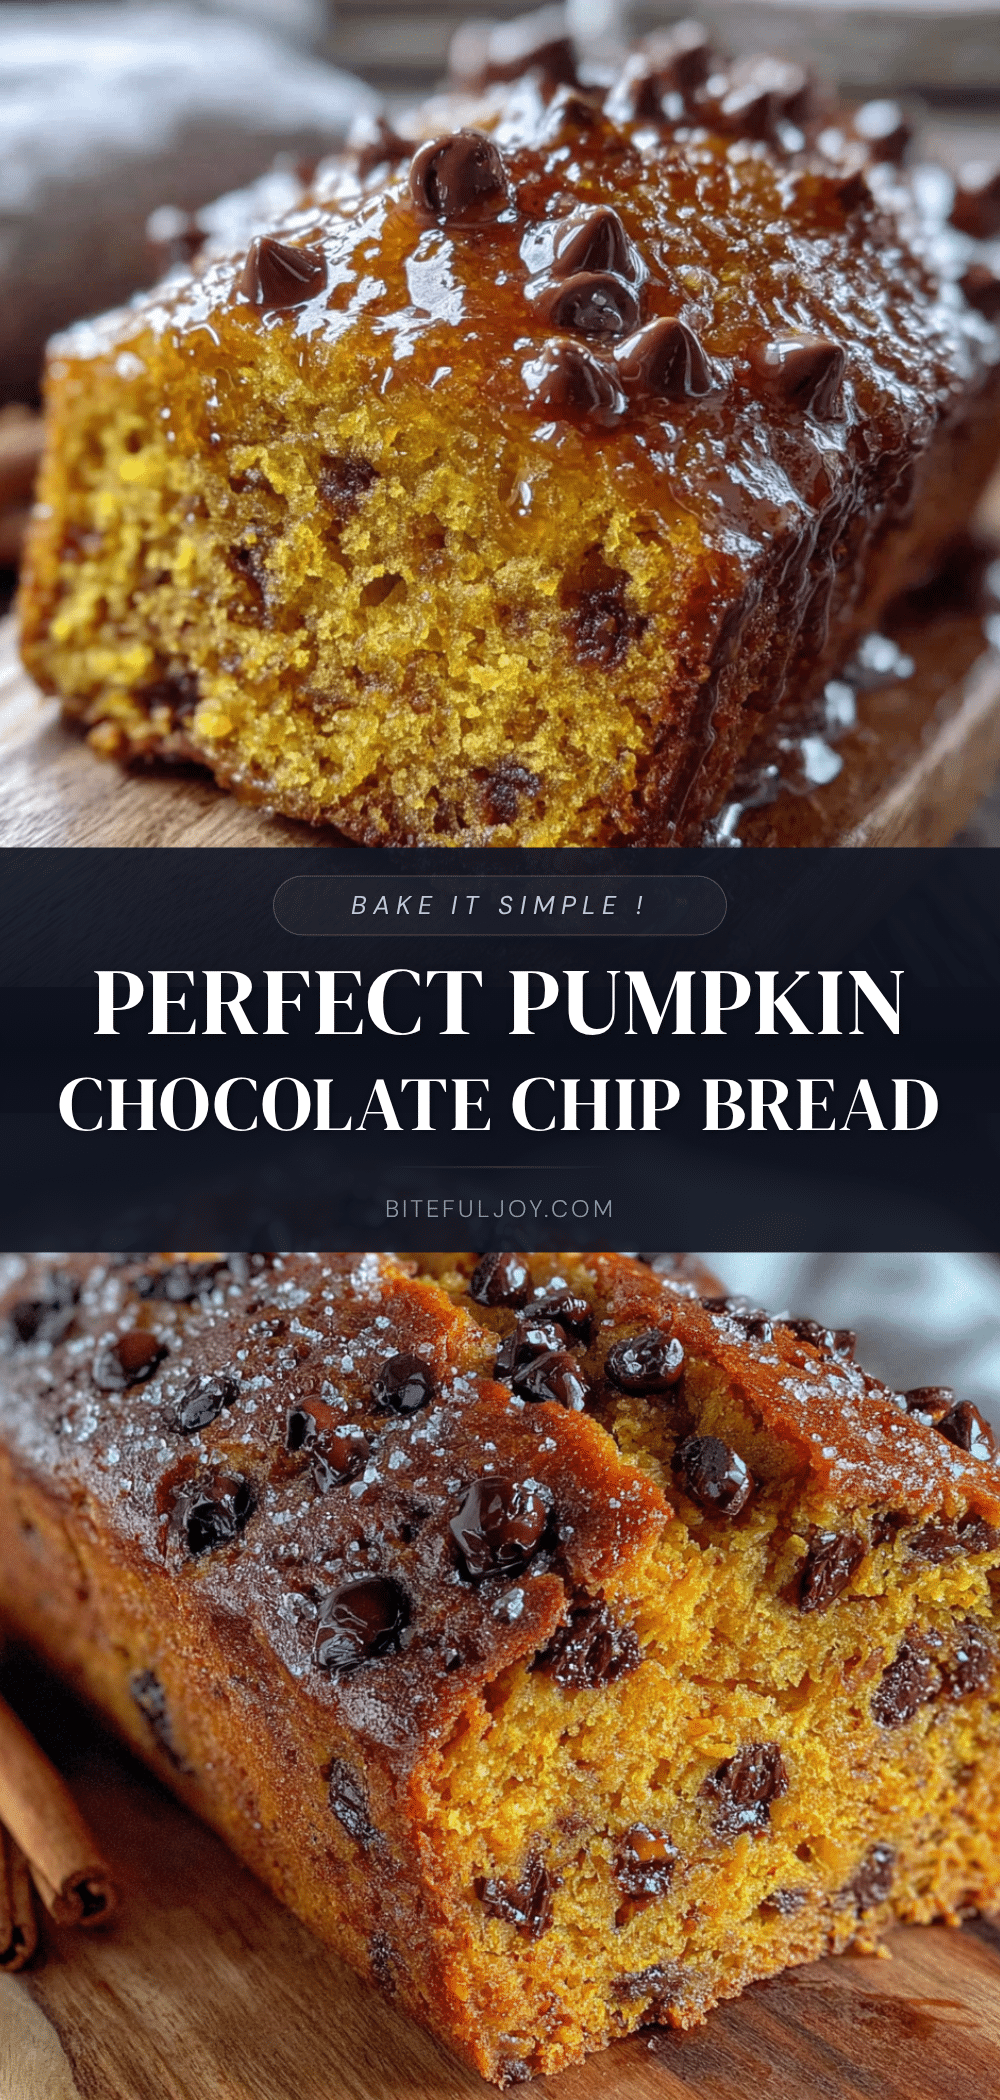
Easy One-Bowl Pumpkin Chocolate Chip Bread (No Mixer!)

This easy one-bowl pumpkin chocolate chip bread is moist, spiced, and studded with melty chocolate chips. No mixer required, just a bowl and whisk for a cozy fall loaf that’s perfect for breakfast, snack, or dessert.
- Prep Time: 10 minutes
- Cook Time: 55 minutes
- Total Time: 1 hour 5 minutes
- Yield: 10 servings 1x
- Category: Bread
- Cuisine: American
Ingredients
- 1 cup (240g) canned pumpkin puree (not pumpkin pie filling)
- 1 ¾ cups (220g) all-purpose flour
- ¾ cup (150g) granulated sugar
- ½ cup (100g) packed brown sugar (light or dark)
- 2 large eggs, at room temperature
- ½ cup (120ml) vegetable oil (or canola oil)
- ¼ cup (60ml) milk (whole, oat, or almond)
- 1 teaspoon vanilla extract
- 1 teaspoon baking soda
- ½ teaspoon baking powder
- ½ teaspoon salt
- 1 ½ teaspoons ground cinnamon
- ½ teaspoon ground nutmeg
- ½ teaspoon ground ginger
- ¼ teaspoon ground cloves
- 1 cup (175g) semi-sweet chocolate chips
Instructions
- Preheat oven to 350°F (175°C). Line a 9×5-inch loaf pan with parchment paper, leaving overhang on the long sides, or grease well.
- In a large bowl, whisk together pumpkin puree, granulated sugar, brown sugar, eggs, vegetable oil, milk, and vanilla extract until smooth and glossy.
- Sprinkle flour, baking soda, baking powder, salt, cinnamon, nutmeg, ginger, and cloves over the wet mixture. Stir gently with a whisk or spatula until just combined (a few streaks of flour are okay). Do not overmix.
- Fold in chocolate chips until evenly distributed.
- Let batter rest for 5 minutes to hydrate the flour and activate leavening.
- Pour batter into prepared loaf pan and spread evenly. Tap pan gently on counter to release air bubbles.
- Bake for 50–60 minutes. At 30 minutes, tent with foil if top is browning too quickly. Bread is done when a toothpick inserted in center comes out clean or with a few moist crumbs.
- Cool in pan for 10 minutes, then lift out using parchment sling and transfer to a cooling rack. Cool completely (about 1 hour) before slicing.
Notes
For best texture, use room temperature ingredients and do not overmix. Let batter rest 5 minutes before baking. Bread tastes even better on day two. Store wrapped at room temperature for up to 4 days, or freeze for up to 3 months.
Nutrition
- Serving Size: 1 slice
- Calories: 290
- Sugar: 23
- Sodium: 220
- Fat: 14
- Saturated Fat: 4
- Carbohydrates: 39
- Fiber: 2
- Protein: 4
Keywords: pumpkin bread, chocolate chip, one bowl, no mixer, fall baking, easy pumpkin bread