“You won’t believe how this came together,” my friend Jenna said, holding up a cup filled with the most dazzling pink gelatin dessert I’d ever seen. It was a regular Thursday evening, and honestly, I wasn’t expecting much from a quick treat she whipped up between answering emails and chasing her toddler around. But that vibrant pink glow caught my eye, pulling me closer like a moth to a flame. I mean, who knew that a simple gelatin jello could look this stunning?
Jenna confessed she’d stumbled upon this trick layered dessert cups recipe while trying to salvage a batch of jello that hadn’t set properly. Instead of tossing it, she layered it with creamy additions and a secret whip-up that made it pop—visually and flavor-wise. I remember her kitchen was a mess, bowls everywhere, a cracked measuring cup on the counter, but those cups were perfect. They were the kind of dessert you’d want to post on Instagram and then actually eat because they taste as good as they look.
Maybe you’ve been there, staring at a box of jello mix wondering how to make it exciting. This recipe is exactly that—simple, fun, and guaranteed to bring some wow to your dessert table. Whether you’re rushing to finish party prep or craving an easy, playful treat, these vibrant pink gelatin jello trick layered dessert cups will become your new go-to. Let me tell you, once you try this approach, you’ll keep coming back for more.
Why You’ll Love This Recipe
Honestly, this isn’t just another jello dessert—it’s kind of magical. After testing this at least a dozen times (yes, I kept sneaking bites), I’m convinced it’s the easiest way to impress without breaking a sweat. Here’s why it shines:
- Quick & Easy: Ready in under 30 minutes, perfect for those last-minute party cravings or casual family nights.
- Simple Ingredients: Uses pantry staples like gelatin mix, cream cheese, and a few dairy options you probably already have.
- Perfect for Parties: Those layered cups look fancy but require minimal effort, making them perfect for potlucks, birthdays, or just because.
- Crowd-Pleaser: Kids and adults alike adore the creamy layers contrasting with the vibrant pink jello—trust me, it disappears fast.
- Unbelievably Delicious: The combo of tangy gelatin and smooth cream layers hits the spot every time.
What sets this recipe apart is the simple layering trick: a creamy whipped layer that softens the jello’s texture and adds a touch of richness. Plus, it’s easy to customize with fresh fruit or flavor twists. Honestly, it’s the kind of dessert that makes you close your eyes after the first bite and smile. This recipe isn’t complicated, but it brings a splash of fun and color to your table—something I’m pretty sure you’ll keep making once you get the hang of it.
What Ingredients You Will Need
This recipe calls for straightforward ingredients that balance each other perfectly. The gelatin provides that signature pink pop, while the creamy layers add softness and depth. Most ingredients are pantry staples, and substitutions are simple if you’re tweaking for allergies or preferences.
- Pink Gelatin Mix: 1 package (3 oz) of strawberry or raspberry flavored gelatin (I prefer Kraft for consistent color and flavor)
- Boiling Water: 1 cup (240 ml) to dissolve the gelatin completely
- Cold Water: 1 cup (240 ml) to cool the gelatin mixture
- Cream Cheese: 4 oz (115 g), softened (Philadelphia brand works best for smoothness)
- Whipped Topping: 1 cup (240 ml), thawed (use dairy-free if preferred, like So Delicious brand)
- Sugar: 2 tablespoons (25 g), to sweeten the cream cheese layer
- Vanilla Extract: 1 teaspoon (5 ml), adds depth to the creamy layer
- Optional Fresh Fruit: Sliced strawberries or raspberries for garnish or layering (fresh or frozen works)
For a gluten-free or dairy-free version, swap cream cheese with coconut cream and use gelatin certified gluten-free. If you want to play with flavors, swapping strawberry for raspberry or cherry gelatin can give a nice twist. The key is to use good-quality gelatin mix and softened cream cheese to ensure smooth layers.
Equipment Needed
Nothing fancy here, which is great because you can make this in practically any kitchen. Here’s what you’ll need:
- Mixing Bowls: One medium for gelatin and one for the cream layer. Glass or plastic works fine.
- Measuring Cups & Spoons: For accuracy in liquids and sugar.
- Electric Mixer or Whisk: An electric hand mixer is easier for whipping cream cheese and topping, but a sturdy whisk works if you’re up for a workout.
- Spoons or Small Spatulas: For folding and layering the cream mixture smoothly.
- Clear Dessert Cups or Glasses: Small clear cups showcase the layers beautifully. I use 6-ounce (180 ml) plastic cups from the dollar store for casual events.
- Refrigerator Space: To chill and set the layers properly.
If you don’t have a mixer, be patient and whisk slowly until smooth—cream cheese can be a bit stubborn. Also, keeping your gelatin bowls at room temperature before chilling helps with even setting. I’ve used mason jars too, and they’re charming for gifting.
Preparation Method
- Dissolve the Gelatin: Boil 1 cup (240 ml) of water and pour over the pink gelatin powder in a medium bowl. Stir constantly for 2 minutes until fully dissolved (no granules visible). Add 1 cup (240 ml) cold water and mix gently. Let it cool to room temperature but don’t let it set—about 15 minutes. (Tip: Stir occasionally to prevent skin forming on top.)
- Prepare the Creamy Layer: While gelatin cools, beat 4 oz (115 g) softened cream cheese with 2 tablespoons (25 g) sugar and 1 teaspoon (5 ml) vanilla extract until smooth and creamy (about 3-4 minutes). Gently fold in 1 cup (240 ml) whipped topping until fully incorporated. (If it looks lumpy, keep folding gently; don’t overmix or it deflates.)
- Layer the Cups – First Layer: Pour a thin layer (about 2 tablespoons or 30 ml) of the cooled but liquid gelatin into each dessert cup. Place cups in the fridge for 15-20 minutes or until the gelatin layer is just firm to the touch but not fully solid (it should jiggle slightly).
- Layer the Cream Cheese Mixture: Spoon or pipe a layer (about 2 tablespoons or 30 ml) of the creamy mixture over the set gelatin layer. Smooth it carefully with the back of a spoon. Return cups to fridge for another 20 minutes to let this layer set slightly.
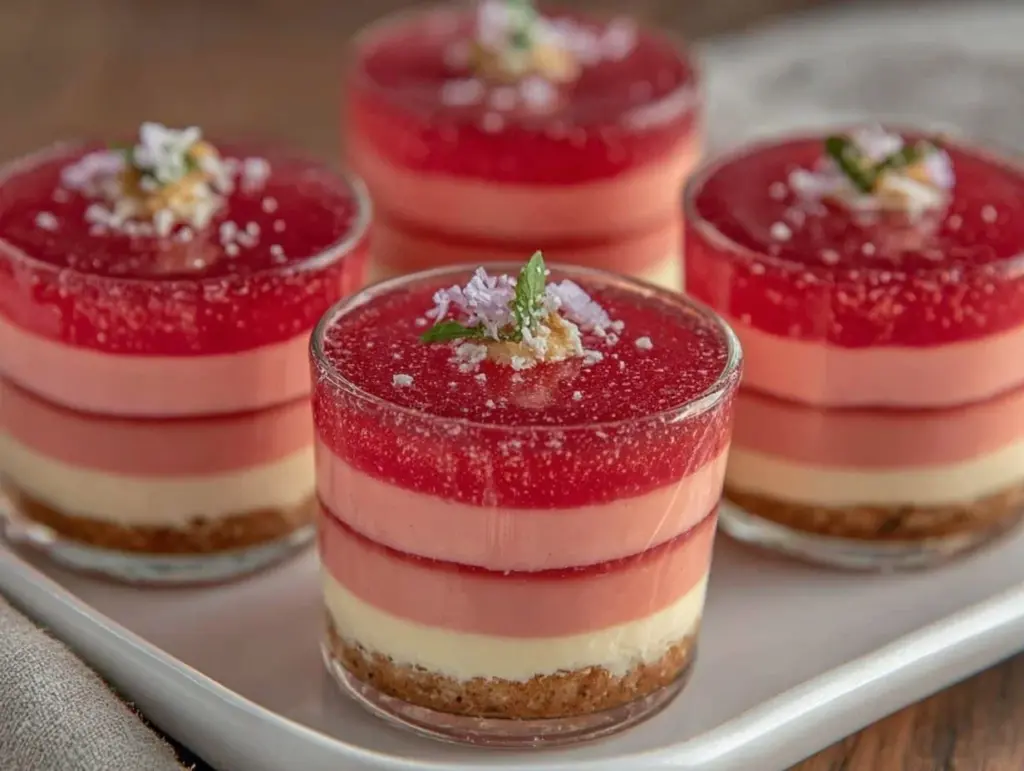
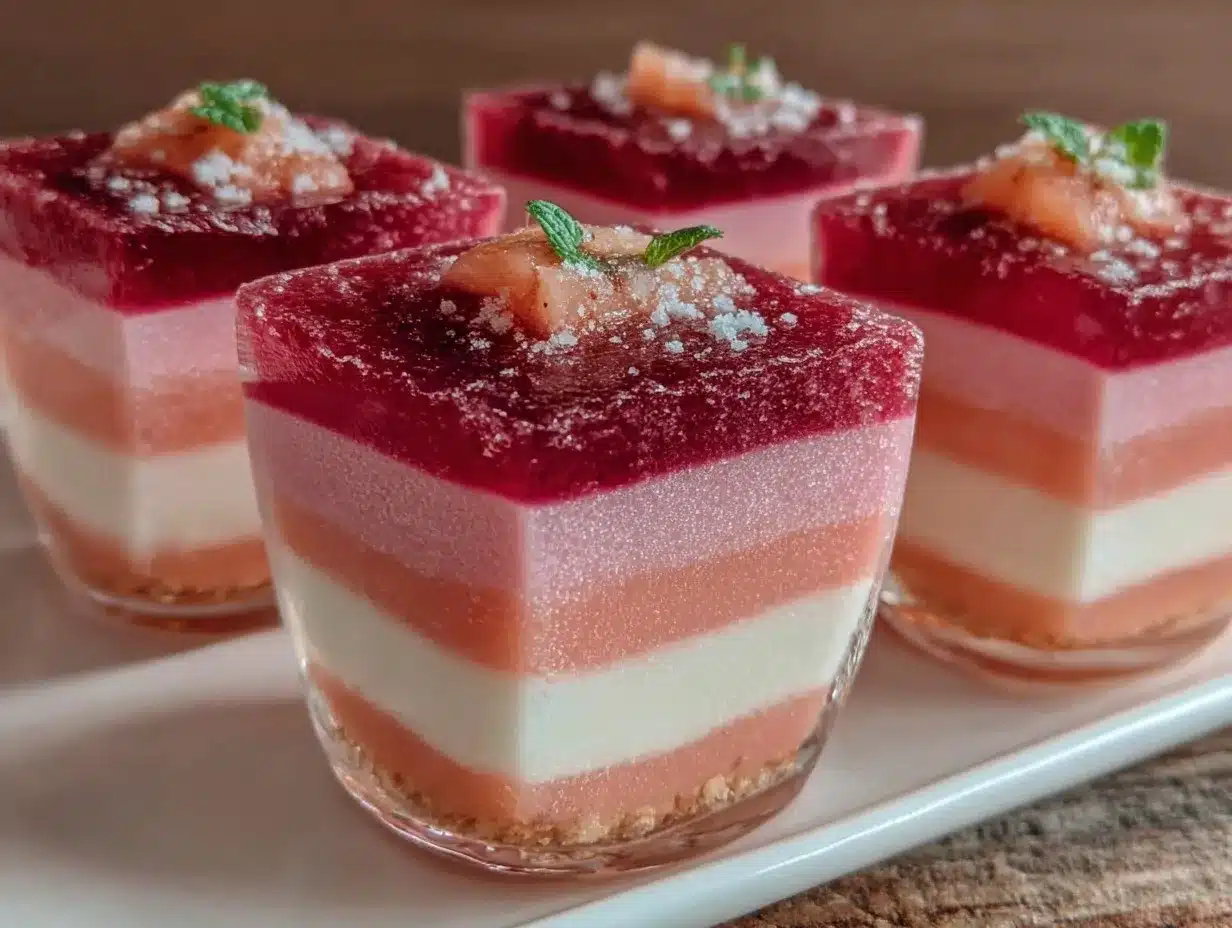
- Repeat Layers: Continue alternating layers of the gelatin and cream mixture until cups are filled, finishing with a cream layer on top. Usually, 3-4 layers total work beautifully. Chill the cups for at least 2 hours to set completely.
- Optional Garnish: Before serving, add fresh berries or a sprig of mint on top for a pop of freshness and color.
Note: Timing is key here. Don’t rush chilling each layer, or they may blend together. The slight firmness between layers creates that stunning “trick” effect where each layer stands out. I once got impatient and skipped chilling, and honestly—layers mixed into a pink mush. Lesson learned!
Cooking Tips & Techniques
Layered gelatin desserts may seem simple, but a few tricks make all the difference:
- Cool Gelatin Properly: Always let your gelatin cool to room temperature before layering. If it’s too hot, it melts the previous layer; too cold, it sets unevenly.
- Softened Cream Cheese is a Must: Cold cream cheese lumps up. Leave it out for 30 minutes or microwave in 5-second bursts to soften.
- Gently Fold Whipped Topping: Folding keeps the airy texture. Stirring vigorously deflates the mixture, leading to denser layers.
- Use Clear Cups: The visual appeal of the layers is part of the charm. Transparent containers show off those pink and white stripes beautifully.
- Patience with Chilling: Each layer needs to be firm enough before adding the next. I know waiting isn’t fun, but it’s worth it for clean lines.
- Multitasking: While one layer chills, prepare the next mixture or clean up. It keeps the process smooth and less tedious.
I once tried to shortcut the chilling time because guests were arriving, and, well, the layers blended into a pastel mess. So take your time—it’s the secret to that wow factor.
Variations & Adaptations
Want to switch things up? This recipe is pretty flexible, so here are some ideas:
- Dairy-Free Option: Replace cream cheese with coconut cream and use dairy-free whipped topping for a tropical twist.
- Flavor Variations: Use lime or cherry gelatin for different colors and tastes. Add a splash of citrus zest to the cream layer for zing.
- Fruit Layers: Incorporate finely chopped strawberries or raspberries between layers for texture and freshness.
- Layered with Yogurt: Swap whipped topping for Greek yogurt mixed with a bit of honey for a tangy and protein-packed version.
- Alcohol-Infused: For adults, add a tablespoon of flavored liqueur (like raspberry or peach schnapps) to the cream layer for a grown-up treat.
Personally, I tried the coconut cream version once during a summer barbecue, and it was a hit—light, refreshing, and just as visually stunning. Feel free to experiment and make this recipe your own!
Serving & Storage Suggestions
These pink gelatin jello trick layered dessert cups are best served chilled. Keep them in the refrigerator until about 10-15 minutes before serving to let them soften just slightly—this brings out the flavors and perfect texture.
They pair wonderfully with fresh fruit salad, a scoop of vanilla ice cream, or even a light bubbly rosé for grown-ups. Presentation-wise, garnish with a mint leaf or a few berries on top to make those layers pop even more.
Store leftovers in the fridge, covered tightly with plastic wrap or in an airtight container, for up to 3 days. Avoid freezing, as gelatin texture changes when thawed. When reheating, just let them sit at room temperature for a bit; microwaving isn’t recommended because it can melt the layers.
Fun fact: the flavors mellow and blend beautifully if you let the cups chill overnight. Sometimes, I make these the night before a party and find the next day they taste even better. You know that feeling when a dessert tastes like it’s had a little extra time to get to know itself? That’s this!
Nutritional Information & Benefits
Each serving of these layered dessert cups is roughly 150-180 calories, depending on the size and exact ingredients used. They’re low in fat if you use light cream cheese and whipped topping, and quite low in carbs compared to many sugary desserts.
Gelatin itself is a good source of protein and supports joint and skin health, which is a neat bonus for a sweet treat. The cream cheese adds calcium and some protein, while the optional fruit layers provide antioxidants and vitamins.
If you’re watching allergens, this recipe is naturally gluten-free. Just swap dairy components with plant-based options if needed. It’s a fun dessert that can fit into many diets without feeling like a compromise.
From a wellness perspective, it’s a satisfying dessert that won’t weigh you down—perfect for when you want something sweet but not too heavy. I often enjoy it as a light after-dinner treat that feels like a little celebration.
Conclusion
If you’re looking for a dessert that’s as fun to make as it is to eat, these vibrant pink gelatin jello trick layered dessert cups are a no-brainer. They bring a splash of color and a mix of textures that make every bite interesting and satisfying.
Feel free to tweak the layers, swap flavors, or add your favorite fruits to make it your own. I love this recipe because it combines simplicity with a little bit of showmanship—perfect for impressing friends without stress.
Try it out, share your creative spins, and let me know how your dessert cups turn out. Happy layering, and here’s to bright, beautiful treats that make life a little sweeter!
FAQs
How long does it take for each gelatin layer to set?
About 15-20 minutes in the fridge until it’s firm but still a little jiggly. This helps to keep layers distinct.
Can I use flavored gelatin other than strawberry?
Absolutely! Raspberry, cherry, or even lime work great. Just keep the color and flavor in mind for layering.
What if I don’t have an electric mixer?
You can whisk cream cheese and whipped topping by hand, but it may take a bit longer to get a smooth, fluffy consistency.
Can I make these dessert cups ahead of time?
Yes, make them a day in advance and keep refrigerated. The flavors meld nicely, and they’ll be ready to serve when guests arrive.
How do I prevent gelatin from sticking to the cups?
Make sure your cups are clean and dry before pouring gelatin. Also, chilling layers properly helps them release cleanly if you want to unmold them.
Pin This Recipe!

Vibrant Pink Gelatin Jello Trick Layered Dessert Cups

A quick and easy layered pink gelatin dessert with creamy layers, perfect for parties and casual treats. This recipe uses simple pantry staples and creates stunning, Instagram-worthy cups that taste as good as they look.
- Prep Time: 15 minutes
- Cook Time: 15 minutes
- Total Time: 2 hours 30 minutes
- Yield: 6 servings 1x
- Category: Dessert
- Cuisine: American
Ingredients
- 1 package (3 oz) strawberry or raspberry flavored gelatin mix
- 1 cup (240 ml) boiling water
- 1 cup (240 ml) cold water
- 4 oz (115 g) cream cheese, softened
- 1 cup (240 ml) whipped topping, thawed
- 2 tablespoons (25 g) sugar
- 1 teaspoon (5 ml) vanilla extract
- Optional: sliced strawberries or raspberries for garnish or layering
Instructions
- Dissolve the gelatin: Boil 1 cup (240 ml) of water and pour over the gelatin powder in a medium bowl. Stir constantly for 2 minutes until fully dissolved. Add 1 cup (240 ml) cold water and mix gently. Let cool to room temperature but do not let it set, about 15 minutes, stirring occasionally.
- Prepare the creamy layer: Beat 4 oz (115 g) softened cream cheese with 2 tablespoons (25 g) sugar and 1 teaspoon (5 ml) vanilla extract until smooth and creamy (3-4 minutes). Gently fold in 1 cup (240 ml) whipped topping until fully incorporated.
- Layer the cups – first layer: Pour about 2 tablespoons (30 ml) of the cooled but liquid gelatin into each dessert cup. Refrigerate for 15-20 minutes until the gelatin layer is just firm but still slightly jiggly.
- Layer the cream cheese mixture: Spoon or pipe about 2 tablespoons (30 ml) of the creamy mixture over the set gelatin layer. Smooth carefully and return to fridge for another 20 minutes to set slightly.
- Repeat layers: Alternate gelatin and cream layers until cups are filled, finishing with a cream layer on top (3-4 layers total). Chill for at least 2 hours to set completely.
- Optional garnish: Add fresh berries or a mint sprig on top before serving.
Notes
Let gelatin cool to room temperature before layering to avoid melting previous layers. Soften cream cheese well for smooth texture. Chill each layer until just firm but still slightly jiggly to keep layers distinct. Use clear cups for best visual effect. Patience with chilling is key to avoid blending layers.
Nutrition
- Serving Size: One dessert cup (abo
- Calories: 150180
- Sugar: 18
- Sodium: 120
- Fat: 7
- Saturated Fat: 4
- Carbohydrates: 20
- Protein: 3
Keywords: pink gelatin, jello dessert, layered dessert cups, party treats, easy dessert, creamy gelatin, quick dessert, layered jello


