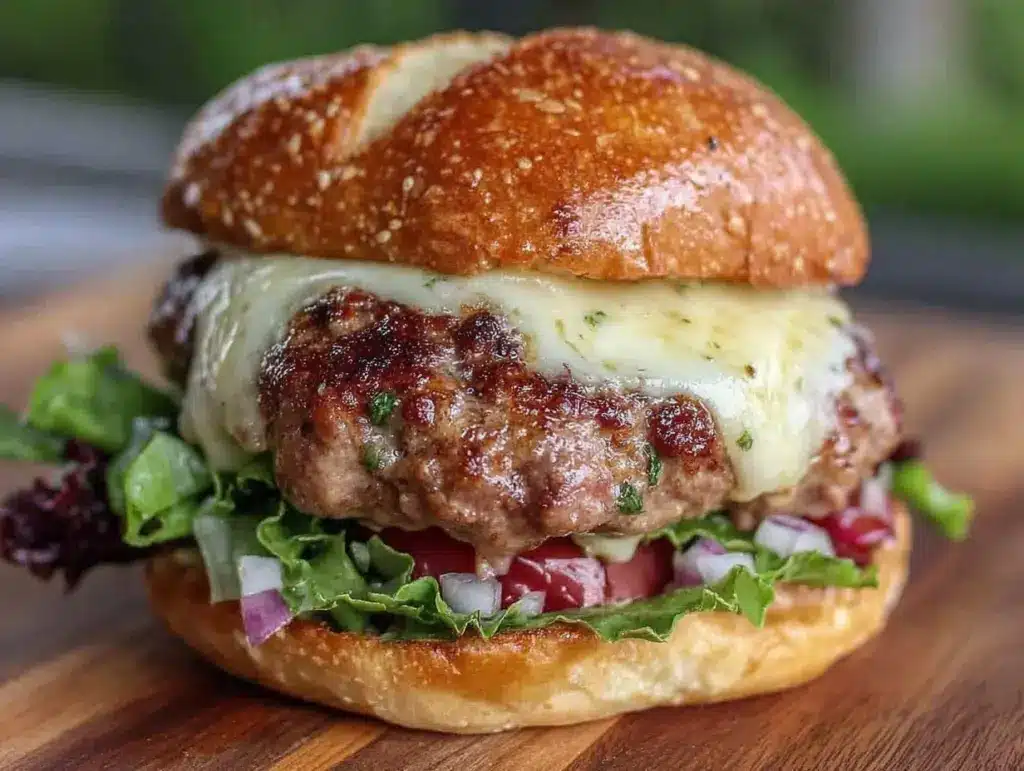
Let me tell you, the sizzle and aroma of a freshly grilled cheeseburger, with melting cheese dripping down the sides, is enough to make anyone stop what they’re doing and drool. The first time I made this ultimate cheeseburger recipe, I was honestly blown away by just how juicy and flavorful it turned out. You know that kind of moment where you pause, take a deep breath, and just smile because you know you’re onto something truly special? That was it for me.
Years ago, when I was knee-high to a grasshopper, my grandma used to make burgers that felt like a warm hug after a long day. I tried to recreate that magic many times, but it wasn’t until I crafted this recipe that I finally hit the jackpot. My family couldn’t stop sneaking the burgers off the grill or piling on extra cheese (and I can’t really blame them!).
Honestly, this delicious ultimate cheeseburger recipe is dangerously easy to make at home and brings pure, nostalgic comfort. Whether you’re feeding hungry kids on a weekend, impressing friends at a backyard cookout, or just craving a juicy homemade burger that brightens up your dinner plate, this recipe has got you covered. I’ve tested it countless times—in the name of research, of course—and it’s become a staple for family gatherings and casual dinners alike. Trust me, you’re going to want to bookmark this one.
Why You’ll Love This Recipe
After many rounds of trial and error (and a few burnt patties), I’ve perfected this recipe to bring you the best cheeseburger experience possible. Here’s why I think you’ll love it:
- Quick & Easy: Comes together in under 30 minutes, perfect for busy weeknights or last-minute burger cravings.
- Simple Ingredients: No fancy grocery trips needed; odds are you already have everything for this juicy burger in your pantry or fridge.
- Perfect for Any Occasion: Whether it’s a casual family dinner, a weekend BBQ, or a fun game day meal, this cheeseburger fits right in.
- Crowd-Pleaser: Kids and adults alike rave about these juicy patties with perfectly melted cheese—no leftovers here!
- Unbelievably Delicious: The secret blend of seasonings and the method of forming the patties locks in juicy goodness every time.
This isn’t just another cheeseburger recipe; it’s the one you’ll turn to when you want that perfectly juicy, flavorful burger that tastes like it came from a classic diner. The trick? Gently mixing the beef without overworking it and adding a touch of seasoning that hits all the right notes—no boring bland patties here. This recipe delivers that comforting, satisfying bite you close your eyes for, while still being easy enough to whip up without stress.
What Ingredients You Will Need
This recipe uses simple, wholesome ingredients to deliver bold flavor and juicy texture without any fuss. Most are pantry staples or easy to find at your local market.
- Ground Beef (80/20 blend): 1 lb (450 g) – The fat content is key for juicy burgers. I prefer fresh, never frozen beef from a trusted butcher or brand like Butcher’s Best.
- Salt: 1 tsp – Kosher salt works best for seasoning the meat evenly.
- Black Pepper: ½ tsp – Freshly ground for that peppery kick.
- Garlic Powder: ½ tsp – Adds a subtle savory undertone.
- Onion Powder: ½ tsp – Enhances the meaty flavor without overpowering.
- Cheddar Cheese Slices: 4 slices – Sharp or mild, depending on your preference. I recommend Tillamook for meltability and flavor.
- Hamburger Buns: 4 – Soft, slightly toasted brioche buns work like a dream here.
- Butter: 2 tbsp – For toasting the buns to golden perfection.
- Optional Toppings:
- Lettuce leaves (crisp iceberg or romaine)
- Tomato slices (ripe and juicy)
- Pickles (dill or bread and butter)
- Sliced red onions (raw or caramelized)
- Ketchup, mustard, or mayo
Substitution notes: If you want a leaner burger, ground sirloin works too but expect slightly less juiciness. For a gluten-free bun, try lettuce wraps or gluten-free bread. If dairy-free, swap cheddar with a plant-based cheese that melts well.
Equipment Needed
- Grill or Cast Iron Skillet: Both work beautifully. I love using a cast iron skillet indoors for consistent heat and a great sear.
- Spatula: A sturdy, flat spatula helps flip the patties without breaking them apart.
- Mixing Bowl: For gently combining the meat and seasonings.
- Meat Thermometer (optional): Handy for checking doneness if you’re particular about burger temperature.
- Basting Brush: Useful if you want to butter the buns evenly before toasting.
If you don’t have a grill, no worries. A heavy skillet or even a griddle pan will do the trick perfectly. For budget-friendly options, a non-stick skillet works fine but won’t develop the same crust as cast iron.
Preparation Method

- Prepare the Ground Beef: In a large mixing bowl, gently combine 1 lb (450 g) of ground beef with 1 tsp kosher salt, ½ tsp black pepper, ½ tsp garlic powder, and ½ tsp onion powder. Be careful not to overwork the meat—it should just barely come together. Overmixing leads to tough burgers.
- Form the Patties: Divide the meat mixture into 4 equal portions (about 4 oz or 113 g each). Shape each into a round patty about ¾ inch (2 cm) thick. Press a slight indentation in the center of each patty with your thumb; this helps them cook evenly and prevents puffing up.
- Preheat Your Cooking Surface: Heat your grill or cast iron skillet over medium-high heat for about 5 minutes. The surface should be hot enough that a drop of water sizzles and evaporates immediately.
- Cook the Patties: Place the patties on the grill or skillet. Cook for about 3-4 minutes on the first side without pressing down. Flip once the bottom has a deep brown crust.
- Add the Cheese: After flipping, cook for another 3 minutes, then place a slice of cheddar cheese on each patty. Cover the pan or close the grill lid for about 1 minute to melt the cheese perfectly.
- Toast the Buns: While the cheese melts, spread 2 tbsp of softened butter on the cut sides of the buns. Toast them in a separate skillet or on the grill for 1-2 minutes until golden and crisp.
- Assemble the Burgers: Place the cooked patties on the bottom buns. Add your preferred toppings like lettuce, tomato, pickles, and onions. Spread condiments of your choice on the top buns, then crown your masterpiece.
Pro Tip: If you prefer your burger medium-rare, aim for an internal temperature of 130°F (54°C). For medium, 140°F (60°C) is ideal. Remember, the meat will continue to cook slightly while resting.
Don’t rush the process! Letting the patties rest for a couple of minutes after cooking locks in those juicy flavors. Plus, it gives you a moment to get your sides ready (because let’s face it, fries or coleslaw are a must).
Cooking Tips & Techniques
Getting that juicy, perfectly cooked cheeseburger isn’t just about the ingredients—it’s about how you treat them. Here are some tips I’ve picked up over the years:
- Don’t Overwork the Meat: Mixing too vigorously compacts the beef and results in a dry, dense patty. Gently fold in seasonings just until combined.
- Indent the Patties: That little thumbprint in the middle prevents puffing up and keeps the burger nice and flat for even cooking.
- High Heat is Your Friend: Cooking over medium-high heat helps form a delicious crust (that Maillard reaction!) which locks in flavor and juiciness.
- Resist Pressing the Patties: I know it’s tempting to press down to speed cooking or get rid of grease, but don’t do it. You’ll squeeze out precious juices and end up with a dry burger.
- Rest Before Serving: Let the burgers rest for 3-5 minutes after cooking. This helps redistribute the juices and keeps every bite juicy.
- Use a Meat Thermometer: This small gadget is a game changer if you’re unsure about doneness. It takes the guesswork out of the equation.
Honestly, following these simple tips saved me from so many dry or flat burgers in the past. Trust me, with a little patience and attention, your ultimate cheeseburger will come out juicy and flavorful every time.
Variations & Adaptations
Everyone loves a classic cheeseburger, but sometimes it’s fun to switch things up a bit. Here are some of my favorite variations you can try:
- Spicy Jalapeño Burger: Add finely diced jalapeños to the beef mixture or top with pickled jalapeños and pepper jack cheese for a fiery kick.
- Turkey or Chicken Burgers: Swap ground beef for ground turkey or chicken. Use a binding agent like an egg or breadcrumbs to keep things together, and season generously to boost flavor.
- Veggie Burger: Use a black bean or lentil-based patty for a meatless version. Top with avocado and your favorite vegan cheese.
- Seasonal Toppings: In summer, fresh grilled pineapple or heirloom tomato slices add a juicy twist. In cooler months, caramelized onions and sautéed mushrooms bring cozy flavors.
- Gluten-Free: Use gluten-free buns or lettuce wraps and check your condiments to avoid hidden gluten.
Personally, I’ve tried swapping out cheddar for smoked gouda once, and it added a delicious smoky depth to the burger. Don’t be afraid to experiment with different cheeses, spices, or toppings to make this recipe your own.
Serving & Storage Suggestions
This ultimate cheeseburger recipe is best enjoyed hot off the grill, with the cheese still gooey and the bun toasted to golden perfection. Serve immediately for the juiciest bite.
Pair your cheeseburger with crispy fries, onion rings, or a fresh garden salad. A cold soda or an ice-cold beer complements it perfectly, depending on your mood.
If you happen to have leftovers (rare, but it happens), wrap the burgers tightly in foil and refrigerate. They’ll keep well for 1-2 days. To reheat, pop them in a preheated oven at 350°F (175°C) for about 10 minutes, or warm gently in a skillet to preserve juiciness.
Note that the flavors often deepen after resting overnight, especially if you add pickles or onions. Just avoid soggy buns by storing patties and buns separately if you plan to reheat.
Nutritional Information & Benefits
Here’s an estimated breakdown per serving (1 cheeseburger with bun and cheese):
| Calories | ~550 kcal |
|---|---|
| Protein | 35 g |
| Fat | 35 g |
| Carbohydrates | 30 g |
| Fiber | 2 g |
This recipe provides a good dose of protein from the beef and cheese, essential for muscle repair and energy. The fat content contributes to the burger’s juiciness and satiety. If you want to lighten things up, consider a whole-wheat bun or a lettuce wrap to cut carbs.
Keep in mind, this recipe contains dairy and gluten (in the buns) and isn’t suitable for those with allergies unless you swap ingredients accordingly. From my wellness perspective, treating yourself to a homemade burger like this every now and then is a satisfying way to enjoy comfort food without the additives found in fast food.
Conclusion
In the end, this delicious ultimate cheeseburger recipe is more than just a meal—it’s a little celebration of juicy, cheesy goodness that you can make anytime at home. The perfect balance of seasoning, the tender patty, and melty cheese come together in a way that’s hard to resist. I love how customizable it is, letting you add your favorite toppings or switch up the cheese to suit your taste.
Give this recipe a try, make it your own, and watch it become a favorite in your household too. I’d love to hear about your burger adventures in the comments—any twists or tips you’ve discovered along the way. Don’t forget to share this with fellow burger lovers who deserve a juicy homemade treat. You’ve got a winner here that’s sure to bring smiles at any table!
FAQs
What type of ground beef is best for juicy cheeseburgers?
Go for an 80/20 blend (80% lean, 20% fat) for the best combination of flavor and juiciness. The fat helps keep the patties moist during cooking.
Can I make these cheeseburgers ahead of time?
You can prep the patties ahead and refrigerate them for a few hours before cooking. Just cover tightly to prevent drying out. Cooking them fresh is best for juiciness.
How do I prevent my burgers from falling apart?
Don’t overmix the meat when seasoning and avoid pressing down on the patties while cooking. Also, making a small indentation in the center helps them hold their shape.
What’s the best way to melt cheese on a burger?
Place the cheese slice on the patty during the last minute of cooking and cover the pan or close the grill lid to trap heat and melt the cheese evenly.
How can I make this recipe gluten-free?
Simply swap regular hamburger buns for gluten-free buns or use large lettuce leaves as wraps. Also, check condiments for gluten-containing ingredients.
Pin This Recipe!

Ultimate Cheeseburger Recipe Easy Juicy Homemade Burger Perfection

A quick and easy recipe for juicy, flavorful homemade cheeseburgers with perfectly melted cheese and toasted buns, perfect for family dinners or backyard cookouts.
- Prep Time: 10 minutes
- Cook Time: 10 minutes
- Total Time: 20 minutes
- Yield: 4 servings 1x
- Category: Main Course
- Cuisine: American
Ingredients
- 1 lb (450 g) ground beef (80/20 blend)
- 1 tsp kosher salt
- ½ tsp freshly ground black pepper
- ½ tsp garlic powder
- ½ tsp onion powder
- 4 slices cheddar cheese (sharp or mild)
- 4 hamburger buns (preferably brioche)
- 2 tbsp butter (for toasting buns)
- Optional toppings: lettuce leaves, tomato slices, pickles, sliced red onions, ketchup, mustard, mayo
Instructions
- In a large mixing bowl, gently combine ground beef with salt, black pepper, garlic powder, and onion powder. Mix just until combined, being careful not to overwork the meat.
- Divide the meat mixture into 4 equal portions (about 4 oz or 113 g each). Shape each into a round patty about ¾ inch (2 cm) thick. Press a slight indentation in the center of each patty with your thumb.
- Preheat grill or cast iron skillet over medium-high heat for about 5 minutes until hot.
- Place patties on the grill or skillet. Cook for 3-4 minutes on the first side without pressing down. Flip once the bottom has a deep brown crust.
- Cook for another 3 minutes on the second side, then place a slice of cheddar cheese on each patty. Cover the pan or close the grill lid for about 1 minute to melt the cheese.
- While cheese melts, spread softened butter on cut sides of buns and toast in a separate skillet or on the grill for 1-2 minutes until golden and crisp.
- Assemble burgers by placing patties on bottom buns, adding preferred toppings, spreading condiments on top buns, and crowning the burger.
Notes
Do not overmix the meat to avoid tough burgers. Press a thumb indentation in patties to prevent puffing. Let burgers rest 3-5 minutes after cooking to redistribute juices. Use a meat thermometer for preferred doneness: 130°F for medium-rare, 140°F for medium. For gluten-free, use gluten-free buns or lettuce wraps. For dairy-free, substitute cheddar with plant-based cheese.
Nutrition
- Serving Size: 1 cheeseburger with
- Calories: 550
- Fat: 35
- Carbohydrates: 30
- Fiber: 2
- Protein: 35
Keywords: cheeseburger, homemade burger, juicy burger, easy burger recipe, backyard cookout, classic cheeseburger


