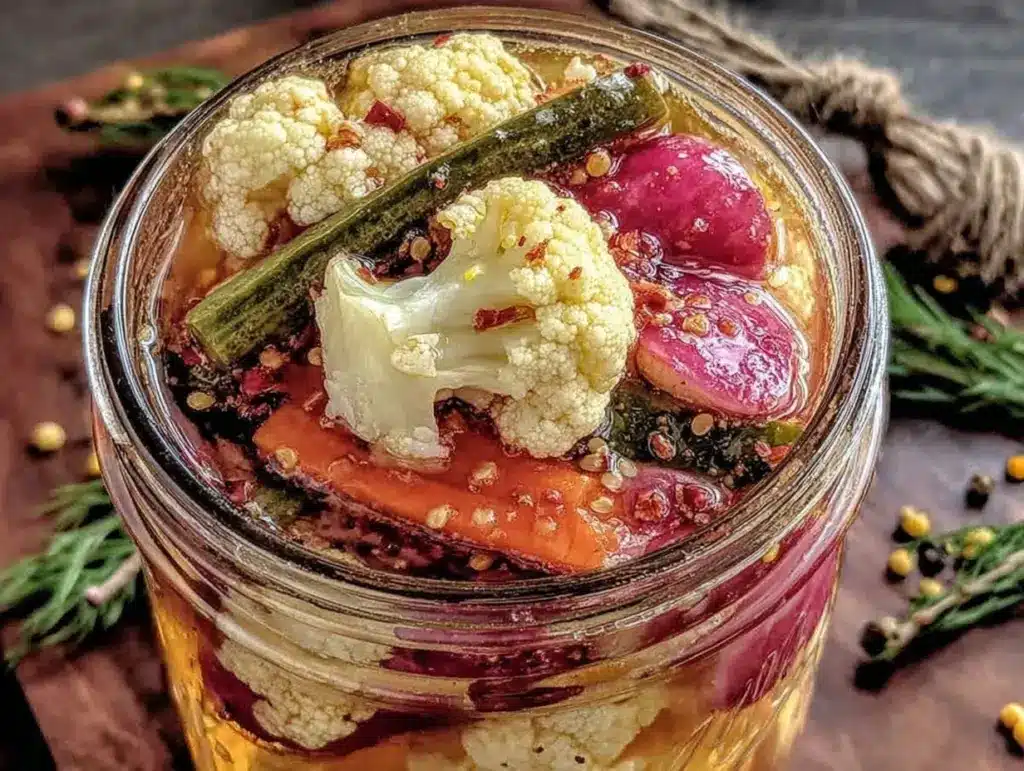
Let me tell you, the sharp, tangy scent of freshly pickled vegetables sizzling with just the right crunch is enough to make anyone’s mouth water. The first time I made this tangy crisp pickled vegetables recipe, I was instantly hooked—the kind of moment where you pause, take a deep breath, and just smile because you know you’re onto something truly special. Years ago, when I was knee-high to a grasshopper, my grandma used to bring out jars of pickled veggies during family dinners, and honestly, no matter how much I tried to wait patiently, I always snuck a few before the meal even started.
I stumbled upon this particular recipe on a rainy weekend, trying to recreate that nostalgic flavor with a little twist of my own. My family couldn’t stop sneaking these crisp pickled vegetables off the counter while they cooled (and I can’t really blame them). You know what? This tangy crisp pickled vegetables recipe is dangerously easy and brings pure, nostalgic comfort to any table.
Perfect for brightening up your Pinterest board or adding a zesty crunch to sandwiches and salads, this recipe has become a staple for family gatherings, gifting, and even last-minute snack emergencies. Trust me, you’re going to want to bookmark this one and make it your go-to for homemade pickled delights.
Why You’ll Love This Recipe
After testing this tangy crisp pickled vegetables recipe multiple times (in the name of research, of course), I can confidently say it stands out from any other pickling recipe out there. Here’s why you’re going to love it:
- Quick & Easy: Comes together in under 30 minutes, perfect for busy weeknights or last-minute cravings.
- Simple Ingredients: No fancy grocery trips needed; you likely already have everything in your kitchen.
- Perfect for Any Occasion: Great for potlucks, picnics, or jazzing up your lunchbox.
- Crowd-Pleaser: Always gets rave reviews from kids and adults alike thanks to its bright, balanced flavor.
- Unbelievably Delicious: The combo of tanginess with a satisfying crunch is pure comfort food with a fresh twist.
What makes this recipe different? Well, it’s the perfect balance of vinegar, sugar, and spices that create a tangy punch without overpowering the vegetables’ natural freshness. Plus, the secret to that satisfying crisp texture comes from a quick soaking technique and the right choice of veggies. Honestly, this isn’t just another jar on the shelf—it’s the best homemade tangy crisp pickled vegetables recipe you’ll find, and it’ll have you closing your eyes after the first bite.
Whether you want to impress guests without the fuss or just treat yourself to a flavor-packed snack, this recipe delivers every single time.
What Ingredients You Will Need
This tangy crisp pickled vegetables recipe uses simple, wholesome ingredients to deliver bold flavor and satisfying texture without the fuss. Most are pantry staples, and the veggies are easy to swap depending on what’s fresh or seasonal.
- Vegetables:
- 1 cup cucumber, sliced into spears or rounds (choose firm, fresh cucumbers like Kirby)
- 1 cup carrots, peeled and sliced into sticks (adds natural sweetness and crunch)
- 1 cup cauliflower florets (small to medium size for even pickling)
- 1 cup green beans, trimmed (optional, but adds great texture)
- Pickling Brine:
- 1 ½ cups distilled white vinegar (or apple cider vinegar for a milder tang)
- 1 cup water
- 2 tablespoons granulated sugar (balances acidity)
- 1 tablespoon kosher salt (I prefer Diamond Crystal for consistent texture)
- Spices & Aromatics:
- 2 cloves garlic, smashed (provides savory depth)
- 1 teaspoon mustard seeds (adds subtle warmth)
- ½ teaspoon black peppercorns (for gentle heat)
- ½ teaspoon crushed red pepper flakes (optional, for a spicy kick)
- Fresh dill sprigs or 1 teaspoon dried dill (classic pickling herb)
Ingredient tips: Feel free to swap out any of the vegetables for seasonal favorites like radishes or bell peppers. If you prefer gluten-free, this recipe is naturally safe, and for a low-sodium version, reduce the salt slightly but expect a mild change in flavor.
Equipment Needed
- 1 large mixing bowl for prepping vegetables
- 1 medium saucepan to heat the pickling brine
- 1 quart-sized glass jar with a tight-fitting lid (sterilized for best results)
- Sharp kitchen knife and cutting board for slicing veggies
- Measuring cups and spoons for precise brine ratios
If you don’t have a glass jar handy, a food-grade plastic container with a lid can work too, but glass is preferred to avoid any off-flavors. I’ve tried wide-mouth jars and standard ones; wide-mouth makes filling and serving easier. Also, a funnel can be a handy budget-friendly tool to avoid spills when adding brine.
Preparation Method

- Prepare the Vegetables (10 minutes): Wash all vegetables thoroughly. Slice cucumbers into spears or rounds about ¼ inch thick. Peel and cut carrots into sticks roughly the same size as cucumber spears. Break cauliflower into small florets, and trim green beans. Place all veggies into a large mixing bowl.
- Make the Brine (5 minutes): In a medium saucepan, combine vinegar, water, sugar, and kosher salt. Heat over medium flame, stirring occasionally until the sugar and salt dissolve completely. Remove from heat once clear and slightly steaming.
- Pack the Jar (5 minutes): Into your sterilized quart jar, add smashed garlic cloves, mustard seeds, black peppercorns, red pepper flakes (if using), and dill sprigs. Then, pack the prepared vegetables tightly but without crushing them to keep that crisp texture.
- Pour the Brine (2 minutes): Carefully pour the hot brine over the vegetables, making sure everything is fully submerged. Leave about ½ inch of headspace at the top of the jar.
- Seal and Cool (1 minute): Screw the lid on tightly. Let the jar cool to room temperature on the counter (about 1 hour). This step also allows the veggies to start soaking up that tangy brine.
- Refrigerate and Wait (24-48 hours): Transfer the jar to the fridge. While you can eat them after 24 hours, the flavor deepens and the crunch improves at 48 hours. Honest tip: I sometimes sneak a peek and nibble earlier, but patience really pays off here!
Pro tip: If you notice your vegetables losing their crunch, a quick soak in ice water before pickling can help keep them firm. Also, using distilled white vinegar gives the best bright tang without cloudiness in your brine.
Cooking Tips & Techniques
Getting that perfect tangy crisp pickled vegetable texture takes a little know-how. Here’s what I’ve learned:
- Use Fresh, Firm Vegetables: Limp or old veggies won’t crisp up well. Always choose firm cucumbers and fresh carrots for that satisfying crunch.
- Don’t Skip the Salt: Kosher salt is preferred because it dissolves easily and doesn’t contain additives that can cloud your brine.
- Heat the Brine Just Right: You want it hot enough to dissolve sugar and salt, but no need to boil vigorously. A gentle simmer is perfect.
- Pack Without Crushing: Press vegetables snugly but gently in the jar to avoid mushiness.
- Let It Rest: Refrigeration time is key; the flavors deepen and the veggies get that perfect snap after a day or two.
- Watch Out For Cloudy Brine: Cloudiness is normal after a few days but avoid if you see mold or strange smells.
One time, I forgot to dissolve the sugar completely, and the brine tasted off. Lesson learned: always stir the brine until fully dissolved for balanced flavor. Also, multitasking helps—prep your veggies while the brine heats to save time.
Variations & Adaptations
This tangy crisp pickled vegetables recipe is super adaptable, so feel free to mix and match based on taste or dietary needs.
- Spicy Kick: Add sliced jalapeños or a few extra red pepper flakes for heat lovers.
- Sweet & Tangy: Swap granulated sugar for honey or maple syrup to add a natural sweetness and depth.
- Low-Sodium: Reduce the salt amount by half; just note the flavor will be milder.
- Different Vinegars: Use rice vinegar for a lighter, sweeter brine or white wine vinegar for a more nuanced bite.
- Fermented Twist: Skip boiling the brine and let your veggies ferment at room temperature for a few days to develop probiotics.
Personally, I tried adding sliced radishes and fennel for a fresh twist, and it was a hit at my last brunch. Plus, if you’re gluten-free or vegan (obviously this recipe is already), it fits perfectly.
Serving & Storage Suggestions
These tangy crisp pickled vegetables are best served chilled or at room temperature. They add a wonderful crunch and bright flavor as a side to sandwiches, burgers, or grilled meats. You can also chop them up and toss into salads or grain bowls for an extra zing.
Store your pickled veggies in the fridge for up to 3 weeks. Over time, the flavors mellow and deepen, so they’re even better after a week. To re-crisp slightly softened veggies, soak them briefly in ice water before serving.
For gifting, jar them in cute glass containers and add a handwritten label. Friends love these as homemade treats!
Nutritional Information & Benefits
Per serving (about ½ cup): approximately 25 calories, 0g fat, 5g carbohydrates, 1g fiber, 2g sugar, and 1g protein.
The key ingredients provide some nice perks: vinegar can aid digestion, fresh veggies are loaded with vitamins and antioxidants, and garlic adds immune-boosting compounds. This recipe is naturally gluten-free, vegan, and low-carb, making it a smart snack or side for many diets. Just a heads-up if you’re watching sodium—you might want to adjust the salt to taste.
Conclusion
This tangy crisp pickled vegetables recipe is a must-try for anyone who loves a little zing and crunch in their meals. It’s easy to make, uses simple ingredients, and delivers flavor that’s both nostalgic and fresh. Feel free to tweak it to your taste—more spice, less sugar, or different veggies—and make it truly your own.
I love this recipe because it brings back sweet memories while fitting perfectly into my busy life. Now, it’s a staple in my fridge, ready to brighten any meal or snack time.
Give it a go, share your variations in the comments, and don’t forget to spread the pickled love with your friends and family!
Frequently Asked Questions
How long do tangy crisp pickled vegetables last in the fridge?
They’ll stay fresh and tasty for up to 3 weeks when stored in an airtight container in the refrigerator.
Can I use other vegetables besides the ones listed?
Absolutely! Radishes, bell peppers, and fennel are great options. Just keep the pieces roughly the same size for even pickling.
Do I need to boil the vegetables before pickling?
Nope! This recipe uses a hot brine poured over raw vegetables to keep them crisp and fresh.
Is this recipe gluten-free and vegan?
Yes, it’s naturally gluten-free and vegan, making it suitable for most dietary needs.
How can I make my pickled vegetables crunchier?
Use fresh, firm veggies and consider soaking them in ice water before pickling. Also, avoid overcrowding the jar to let the brine circulate well.
Pin This Recipe!
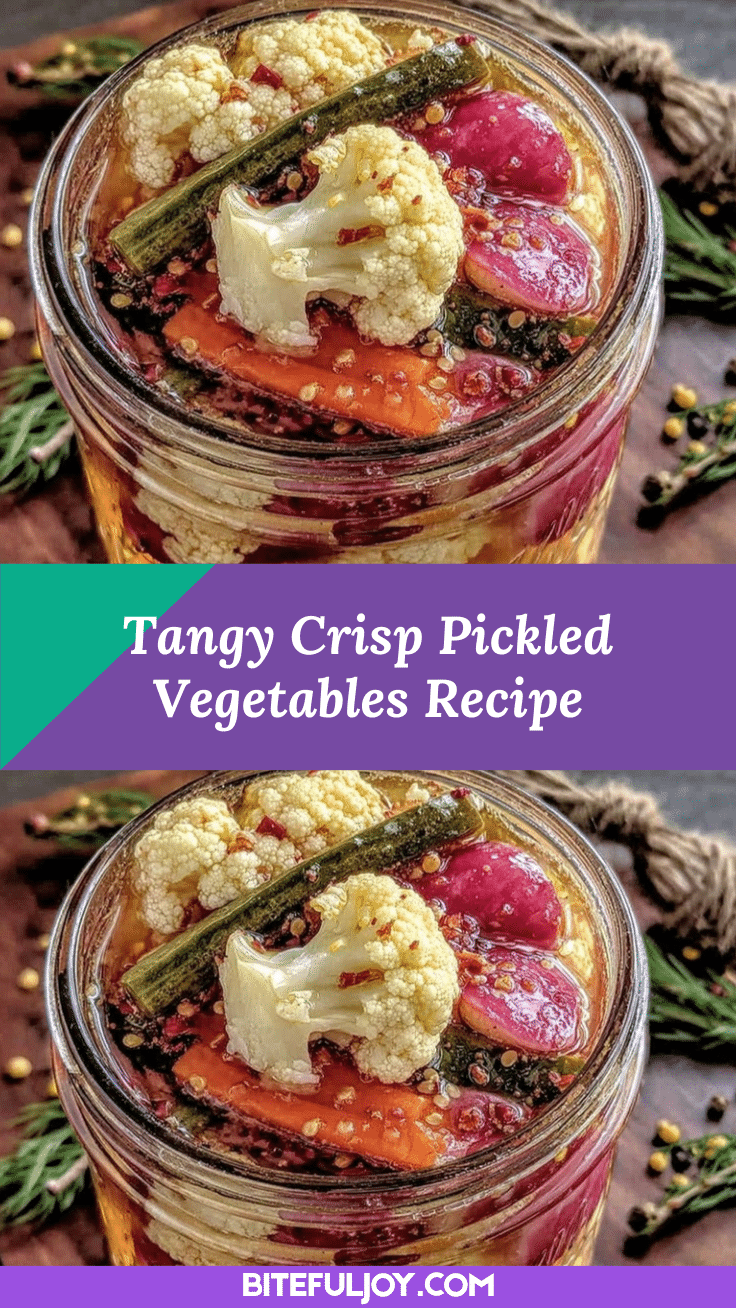
Tangy Crisp Pickled Vegetables Recipe

A quick and easy homemade recipe for tangy, crisp pickled vegetables that bring nostalgic comfort and a satisfying crunch to any meal.
- Prep Time: 10 minutes
- Cook Time: 13 minutes
- Total Time: 23 minutes plus 24-48 hours refrigeration
- Yield: About 4 servings 1x
- Category: Side Dish
- Cuisine: American
Ingredients
- 1 cup cucumber, sliced into spears or rounds (choose firm, fresh cucumbers like Kirby)
- 1 cup carrots, peeled and sliced into sticks
- 1 cup cauliflower florets (small to medium size)
- 1 cup green beans, trimmed (optional)
- 1 ½ cups distilled white vinegar (or apple cider vinegar)
- 1 cup water
- 2 tablespoons granulated sugar
- 1 tablespoon kosher salt
- 2 cloves garlic, smashed
- 1 teaspoon mustard seeds
- ½ teaspoon black peppercorns
- ½ teaspoon crushed red pepper flakes (optional)
- Fresh dill sprigs or 1 teaspoon dried dill
Instructions
- Wash all vegetables thoroughly. Slice cucumbers into spears or rounds about ¼ inch thick. Peel and cut carrots into sticks roughly the same size as cucumber spears. Break cauliflower into small florets, and trim green beans. Place all veggies into a large mixing bowl.
- In a medium saucepan, combine vinegar, water, sugar, and kosher salt. Heat over medium flame, stirring occasionally until the sugar and salt dissolve completely. Remove from heat once clear and slightly steaming.
- Into your sterilized quart jar, add smashed garlic cloves, mustard seeds, black peppercorns, red pepper flakes (if using), and dill sprigs. Then, pack the prepared vegetables tightly but without crushing them to keep that crisp texture.
- Carefully pour the hot brine over the vegetables, making sure everything is fully submerged. Leave about ½ inch of headspace at the top of the jar.
- Screw the lid on tightly. Let the jar cool to room temperature on the counter (about 1 hour). This step also allows the veggies to start soaking up that tangy brine.
- Transfer the jar to the fridge. While you can eat them after 24 hours, the flavor deepens and the crunch improves at 48 hours.
Notes
Use fresh, firm vegetables for best crunch. Soak vegetables in ice water before pickling if needed to maintain firmness. Use distilled white vinegar for a bright tang and clear brine. Refrigerate for at least 24 hours before eating; 48 hours recommended for best flavor and texture. Store in fridge up to 3 weeks. Adjust salt for low-sodium version. Wide-mouth jars make filling and serving easier.
Nutrition
- Serving Size: About ½ cup
- Calories: 25
- Sugar: 2
- Carbohydrates: 5
- Fiber: 1
- Protein: 1
Keywords: pickled vegetables, tangy pickles, homemade pickles, crisp pickled veggies, easy pickling recipe, quick pickled vegetables, vegan pickles, gluten-free pickles


