
Let me tell you, the sweet, buttery aroma of melting marshmallows swirling with crispy rice cereal is one of those scents that instantly fills your kitchen with holiday cheer. The first time I rolled a batch of these Rice Crispy Treats Holiday Balls, my hands were sticky, my kids were giggling, and the counters were dusted with sprinkles—pure bliss in every sense. There’s something magical about seeing those glossy marshmallow ribbons stretch as you stir, knowing you’re crafting a treat that’s as fun to make as it is to eat.
I was instantly hooked the moment I popped one of these festive balls into my mouth at a neighborhood cookie swap—soft, chewy, with the perfect crunch and a burst of festive color from tiny candy bits. It’s the kind of moment where you pause, take a deep breath, and just smile because you know you’re onto something truly special. Honestly, I wish I’d stumbled on this idea years ago, back when I was knee-high to a grasshopper and grandma was teaching me how to make classic crispy squares for Saturday movie nights.
My family couldn’t stop sneaking them off the cooling rack (and I can’t really blame them). Every year, these holiday balls disappear faster than I can wrap them up for gifts. They’re dangerously easy, loaded with pure, nostalgic comfort, and perfect for potlucks, classroom holiday parties, or just brightening up your Pinterest cookie board. You know what? These treats have become a staple for family gatherings and gifting—tested and retested in the name of research, of course. If you’re craving something that feels like a warm hug and tastes like holiday magic, you’re going to want to bookmark this one!
Why You’ll Love This Recipe
If you’ve ever wished for a dessert that’s festive, fuss-free, and flat-out delicious, Rice Crispy Treats Holiday Balls are about to become your new go-to. I’ve made these so many times—whether for last-minute parties or just because—and every batch gets rave reviews. As a longtime home baker (and honestly, a bit of a rice crispy treat enthusiast), I can promise these are a hit with kids and adults alike.
- Quick & Easy: Comes together in under 25 minutes, so you’ll have more time for holiday fun (and less time elbow-deep in dishes).
- Simple Ingredients: No fancy grocery trips needed; you likely already have everything in your pantry.
- Perfect for Parties & Gifting: These treats are individually portioned, mess-free, and totally adorable for cookie trays, teacher gifts, or holiday brunches.
- Crowd-Pleaser: The classic combo of marshmallow and crispy cereal never gets old—kids snatch them up, and grown-ups sneak seconds.
- Unbelievably Delicious: Each ball is chewy, a little gooey, with a satisfying crunch and festive pops of color from holiday candies or sprinkles.
What sets my version apart? I use an extra splash of vanilla and a pinch of salt for depth, plus a clever technique for shaping perfect balls without the sticky mess. Trust me, this isn’t just another rice crispy treat—these holiday balls are next-level. After the first bite, you’ll know what I mean: it’s comfort food reimagined, still sweet and nostalgic but with a festive twist that’s hard to resist.
Whether you’re impressing guests or just making a Tuesday feel special, these treats deliver. They’re foolproof, customizable, and guaranteed to make your dessert table sparkle. In my book, that’s the best kind of recipe.
What Ingredients You Will Need
This recipe uses simple, wholesome ingredients to deliver bold flavor and satisfying texture without the fuss. Most of what you’ll need is probably already hanging out in your pantry, making these Rice Crispy Treats Holiday Balls an absolute breeze.
- For the treat base:
- 6 cups (150g) crispy rice cereal (Rice Krispies or your favorite brand—look for the classic, not cocoa or flavored)
- 4 cups (180g) mini marshmallows (I prefer Jet-Puffed for the softest melt)
- 3 tablespoons (42g) unsalted butter, plus a little extra for greasing your hands (softened works best)
- 1/2 teaspoon pure vanilla extract (adds warmth and depth)
- 1/4 teaspoon fine sea salt (balances the sweetness)
- For the festive coating & mix-ins:
- 1/2 cup (90g) holiday-colored mini chocolate candies (M&Ms or similar—use reds, greens, golds for a festive look)
- 1/4 cup (35g) holiday sprinkles or nonpareils (optional, but highly recommended for sparkle and crunch)
- 1/2 cup (75g) white chocolate chips (for optional drizzle or dipping)
- Ingredient swaps & options:
- Use vegan marshmallows and plant-based butter for a dairy-free version
- Gluten-free crispy rice cereal is easy to find for sensitive tummies
- If you’re out of mini marshmallows, large ones chopped up work fine—just melt a little longer
- Swap candies for dried cranberries or chopped nuts for a different texture
- No vanilla? Almond extract works for a nutty twist (just use a tiny amount)
- Tips for choosing ingredients:
- Fresh marshmallows melt smoother—skip the stale, sticky bag in the back of the pantry
- Don’t skimp on butter; it makes the treats rich and keeps them soft
- Holiday sprinkles make these really pop for party trays, but plain works if you’re keeping it classic
Honestly, it’s all about mixing and matching what you love. These ingredients are forgiving and flexible, so feel free to play around and make the recipe your own!
Equipment Needed
- Large nonstick saucepan: Essential for melting butter and marshmallows evenly (I’ve scorched a batch before using a thin pot—lesson learned).
- Wooden spoon or silicone spatula: For stirring the marshmallow mixture and folding in cereal. I prefer silicone—easier cleanup and less sticking.
- Mixing bowl: Useful for combining rice cereal and add-ins before adding to the marshmallow mix.
- Small scoop or cookie scoop: Helps shape uniform balls (a tablespoon works in a pinch, but a scoop makes things way easier).
- Wax paper or parchment paper: Perfect for cooling the balls without sticking.
- Butter or nonstick spray: For greasing hands and utensils—trust me, this step saves so much frustration!
- Microwave-safe bowl: If you’re melting chocolate for drizzling or dipping.
If you don’t have a cookie scoop, your hands are your best tools (just keep them greased). A sturdy saucepan with a thick bottom prevents burning, and parchment paper doubles as a festive tray liner for parties. Budget-friendly brands work fine for most tools—no need to buy anything fancy. Just make sure everything’s clean and dry before starting.
After years of sticky fingers and wonky treat shapes, I can say a little prep goes a long way. Your kitchen doesn’t need to be fancy—just functional!
Preparation Method
- Prepare your workspace: Line a baking sheet or counter with parchment paper. Grease your hands lightly with butter or nonstick spray (trust me, this is a lifesaver for rolling).
- Melt the marshmallows and butter: In a large nonstick saucepan over medium-low heat, add 3 tablespoons (42g) unsalted butter. Let it melt, swirling gently. Add 4 cups (180g) mini marshmallows. Stir continuously for 3–5 minutes until everything’s melted and smooth—watch for that silky, gooey texture. If marshmallows start to brown, lower the heat! Stir in 1/2 teaspoon vanilla extract and 1/4 teaspoon salt.
- Mix in the cereal: Remove the saucepan from heat. Pour in 6 cups (150g) crispy rice cereal and gently fold with a silicone spatula. The mixture will be sticky but keep folding until every piece is coated. (If it’s too dry, melt a bit more butter and marshmallow and mix in—sometimes the cereal soaks up more than expected.)
- Add the festive mix-ins: Let the mixture cool for 1–2 minutes—just enough so the candies don’t melt. Sprinkle in 1/2 cup (90g) holiday-colored mini chocolate candies and 1/4 cup (35g) sprinkles. Use a gentle hand so the colors stay bright and don’t bleed.
- Shape the balls: Scoop out about 2 tablespoons of mixture at a time (roughly the size of a golf ball). Roll quickly between greased palms to form balls. Place each ball onto parchment paper. (If the mixture sticks, re-grease your hands or chill the mixture for 5 minutes.)
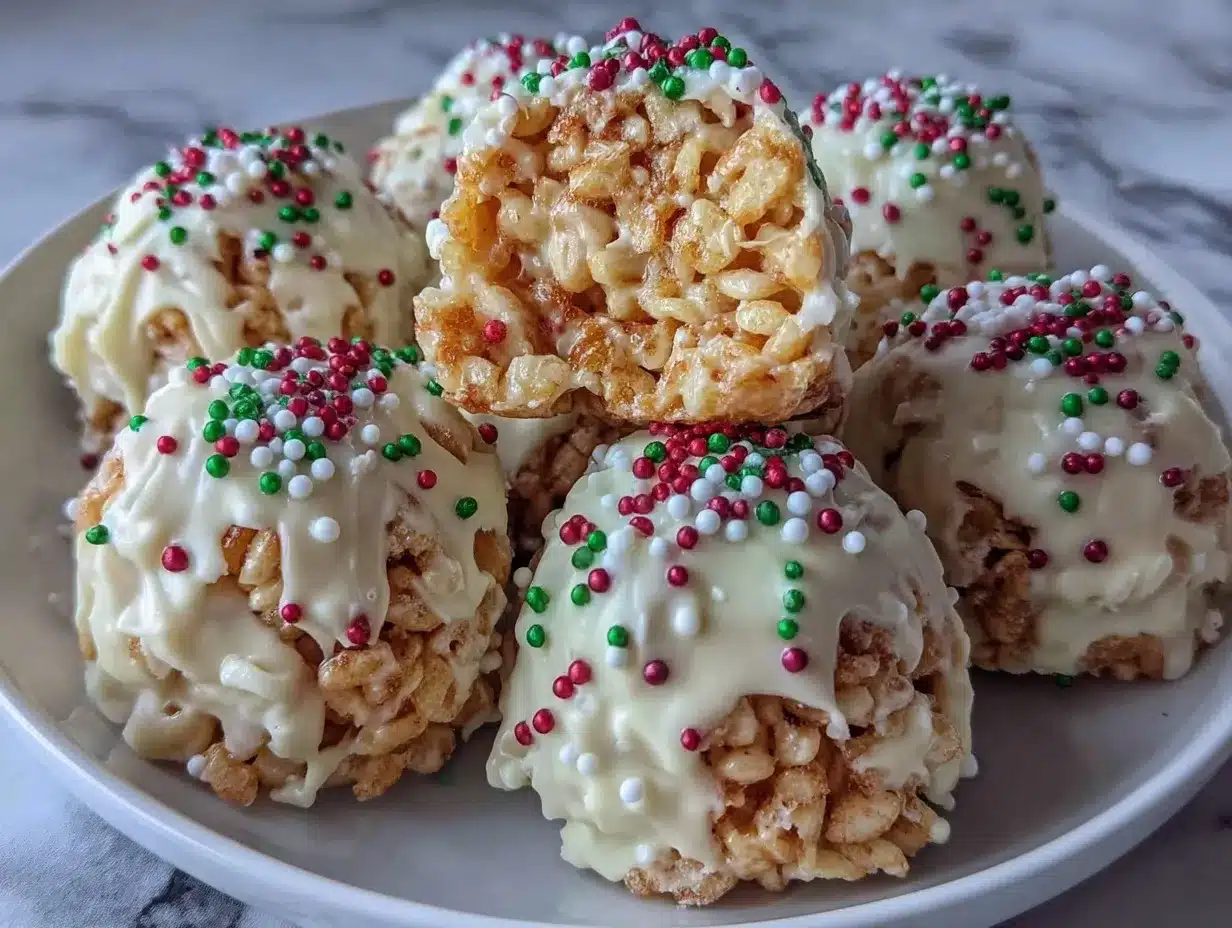
- Decorate (optional): Melt 1/2 cup (75g) white chocolate chips in a microwave-safe bowl—30-second bursts, stirring each time until smooth. Drizzle over cooled balls or dip half of each ball for a frosted look. Add extra sprinkles while the chocolate is still wet.
- Cool and set: Let the balls rest at room temperature for 20 minutes, or until firm to the touch. If you’re in a rush, pop them in the fridge for 10 minutes.
- Troubleshooting tips: If the mixture hardens before shaping, microwave for 10 seconds and stir. For sticky hands, just rinse and re-grease. If the balls flatten, add a little more cereal and re-roll.
- Efficiency tip: Get a helper—one person scoops, one rolls, one decorates. Makes it a party!
Each step brings you closer to a tray of cheerful, festive Rice Crispy Treats Holiday Balls. The hardest part? Waiting for them to set before sneaking a taste!
Cooking Tips & Techniques
After years of making rice crispy treats, I’ve picked up a handful of tricks that really make a difference. Here’s how you can nail Rice Crispy Treats Holiday Balls every time:
- Don’t overheat the marshmallows: Keep the heat medium-low. If you rush and crank up the heat, you’ll end up with hard, crumbly treats (been there, regretted that).
- Grease everything: Spoon, spatula, hands—grease them well before shaping balls. Marshmallow is sticky stuff, and this simple trick keeps things moving smoothly.
- Mix-ins go in last: Let your cereal-marshmallow mixture cool a minute before adding candies and sprinkles so they stay bright and don’t melt.
- Uniform shaping: Use a cookie scoop or even an ice cream scoop for perfectly sized balls. If you freehand, make sure each portion is roughly the same so they set evenly.
- Work quickly: The mixture firms up as it cools. Shape balls right away, or the mixture will get stiff and hard to roll.
- Batch multitasking: Set up an assembly line—one person rolls, one decorates, one lines up the treats. It’s faster and way more fun.
- If balls are too sticky: Chill the mixture briefly or add a little more cereal. Sometimes humidity can make things extra gooey.
- Consistency matters: Don’t skimp on butter—less butter equals tougher treats. More marshmallow means softer, chewier balls.
I’ve had my share of lumpy, uneven treats and sticky fingers. Now, I always keep a bowl of cold water nearby to rinse my hands between batches—it keeps things neat and helps with rolling. Little details like these turn a good batch into a great one!
Variations & Adaptations
The beauty of Rice Crispy Treats Holiday Balls is how flexible they are. Over the years, I’ve tried dozens of twists—some hits, some misses, but always fun! Here are a few favorite variations you can try:
- Dietary swap: For gluten-free treats, just use certified gluten-free crispy rice cereal and vegan marshmallows. Easy and tasty!
- Seasonal twist: Swap in pastel sprinkles for spring, orange and black candies for Halloween, or red and pink for Valentine’s Day. These treats adapt to every holiday.
- Flavor boost: Stir in 1/2 teaspoon cinnamon or nutmeg for a warm, spiced winter flavor. Or add a handful of dried cranberries or chopped pecans for texture.
- Cooking method: Microwave the marshmallow and butter mixture if you don’t want to use the stove—just heat in 30-second bursts, stirring each time.
- Allergen substitutions: Use sunflower seed butter instead of regular butter for nut-free treats. Dairy-free butter works too!
- Personal favorite: I once mixed in crushed peppermint candies and drizzled dark chocolate—these were gone in minutes at our holiday open house.
Customize the mix-ins, swap flavors, or play with colors—these treats are meant to be fun! Whatever you choose, you’ll end up with a tray of festive, irresistible holiday snacks.
Serving & Storage Suggestions
Rice Crispy Treats Holiday Balls are best served at room temperature, stacked high on a festive platter lined with parchment or wax paper. If you’re feeling fancy, pop them in mini cupcake liners for easy grabbing (and a Pinterest-worthy look).
Pair with hot cocoa, spiced cider, or a mug of coffee for a cozy dessert moment. These treats are also perfect alongside a tray of assorted holiday cookies—bright, colorful, and a little bit whimsical.
For storage, keep the balls in an airtight container at room temperature for up to 5 days. If your kitchen runs warm, a layer of wax paper between treats prevents sticking. You can freeze them for up to a month—just thaw at room temp for an hour before serving. To refresh, microwave each ball for 5 seconds for a gooey bite. Flavors develop as they sit, so day two is often even better than day one (if you can wait that long!).
Nutritional Information & Benefits
Each Rice Crispy Treats Holiday Ball is approximately 90 calories, with 2g fat, 18g carbs, and 1g protein (numbers vary based on mix-ins and size). They’re naturally nut-free if you skip nut-based add-ins, and gluten-free if you use certified cereal and marshmallows.
Marshmallows are mostly sugar, but crispy rice cereal is low-fat, and you can keep the treats dairy-free with plant-based butter. The recipe is a sweet indulgence—best enjoyed in moderation. If you’re watching allergens, check ingredient labels for gluten, dairy, or nut traces.
I love these treats as a lighter dessert option—one ball satisfies a sweet tooth without going overboard. Just remember, portion control is your friend (even when they’re this fun!).
Conclusion
Rice Crispy Treats Holiday Balls are the kind of dessert that brings people together—easy to make, endlessly adaptable, and always a crowd favorite. Whether you’re baking with your kids, gifting to neighbors, or just treating yourself, these festive balls deliver pure holiday joy with every bite.
Don’t be afraid to play around with flavors, colors, or mix-ins. Make them your own! Honestly, I love this recipe because it’s simple, nostalgic, and totally fun—each batch brings back sweet memories and sparks new ones.
If you give these a try, let me know how you customize your batch! Share your photos, tweaks, and ideas in the comments below—or tag me on Pinterest. Here’s to more moments of sticky fingers, big smiles, and holiday laughter. Happy baking!
FAQs
How long do Rice Crispy Treats Holiday Balls stay fresh?
They’ll keep for up to 5 days in an airtight container at room temperature. For longer storage, freeze them for up to a month and thaw before serving.
Can I make these treats dairy-free?
Absolutely! Just swap in plant-based butter and vegan marshmallows. The result is just as chewy and delicious.
How do I prevent the mixture from sticking to my hands?
Grease your hands with butter or nonstick spray before rolling. If things get too sticky, rinse and re-grease as needed.
Can I use large marshmallows instead of mini?
Yes, just chop them up and melt a little longer. The texture will be the same—just keep stirring until smooth.
Can I add chocolate chips or dried fruit?
Definitely! Toss in chocolate chips, dried cranberries, or chopped nuts after the mixture cools slightly. Customize to your heart’s content!
Pin This Recipe!

Rice Crispy Treats Holiday Balls

Rice Crispy Treats Holiday Balls are a festive, chewy, and crunchy dessert perfect for parties, gifting, or family gatherings. These easy-to-make treats combine classic marshmallow rice crispy goodness with colorful candies and sprinkles for a burst of holiday cheer.
- Prep Time: 10 minutes
- Cook Time: 10 minutes
- Total Time: 25 minutes
- Yield: 24 balls 1x
- Category: Dessert
- Cuisine: American
Ingredients
- 6 cups crispy rice cereal (Rice Krispies or similar)
- 4 cups mini marshmallows
- 3 tablespoons unsalted butter, plus extra for greasing hands
- 1/2 teaspoon pure vanilla extract
- 1/4 teaspoon fine sea salt
- 1/2 cup holiday-colored mini chocolate candies (M&Ms or similar)
- 1/4 cup holiday sprinkles or nonpareils (optional)
- 1/2 cup white chocolate chips (for optional drizzle or dipping)
Instructions
- Line a baking sheet or counter with parchment paper. Grease your hands lightly with butter or nonstick spray.
- In a large nonstick saucepan over medium-low heat, melt 3 tablespoons unsalted butter. Add 4 cups mini marshmallows and stir continuously for 3–5 minutes until melted and smooth. Stir in vanilla extract and salt.
- Remove saucepan from heat. Pour in crispy rice cereal and gently fold with a silicone spatula until evenly coated.
- Let mixture cool for 1–2 minutes. Sprinkle in mini chocolate candies and sprinkles, gently folding to distribute.
- Scoop out about 2 tablespoons of mixture at a time and roll quickly between greased palms to form balls. Place each ball onto parchment paper.
- Optional: Melt white chocolate chips in a microwave-safe bowl in 30-second bursts, stirring until smooth. Drizzle over cooled balls or dip half of each ball. Add extra sprinkles while chocolate is wet.
- Let balls rest at room temperature for 20 minutes, or until firm. Alternatively, chill in the fridge for 10 minutes.
- If mixture hardens before shaping, microwave for 10 seconds and stir. For sticky hands, rinse and re-grease. If balls flatten, add more cereal and re-roll.
Notes
For gluten-free treats, use certified gluten-free crispy rice cereal and vegan marshmallows. Grease hands and utensils well to prevent sticking. Customize with different mix-ins like dried fruit, nuts, or flavored extracts. Store in an airtight container for up to 5 days or freeze for up to a month.
Nutrition
- Serving Size: 1 ball
- Calories: 90
- Sugar: 10
- Sodium: 40
- Fat: 2
- Saturated Fat: 1
- Carbohydrates: 18
- Protein: 1
Keywords: rice crispy treats, holiday dessert, festive snacks, party treats, marshmallow balls, easy dessert, Christmas treats, kid-friendly, gluten-free option


