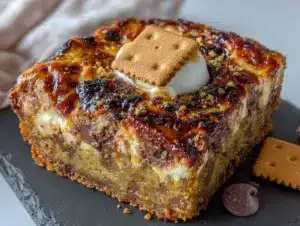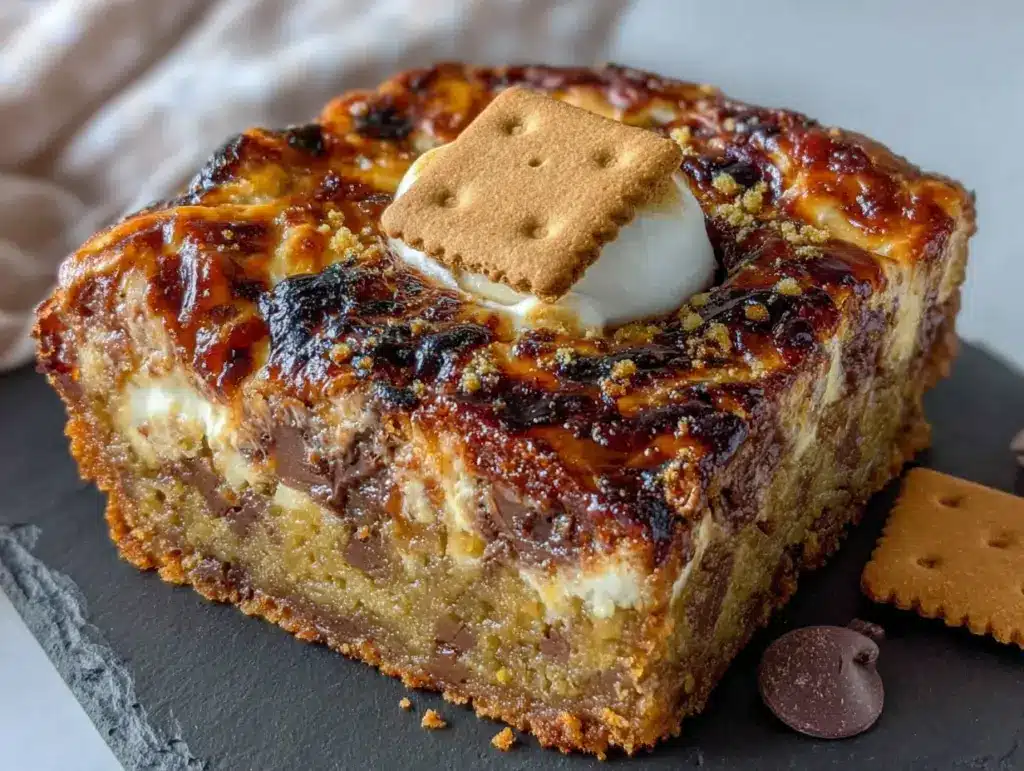
I was elbow-deep in a bag of marshmallows, standing over a sink full of camping gear we hadn’t touched in two years, when it hit me. The summer had been a blur of rain and postponed trips, and the closest I’d get to a campfire was the flickering blue light of the stove. I wanted that smoky, sweet, sticky feeling of a s’more, but I didn’t want to build a fire or even turn on the grill. I wanted it now, and I wanted it in bar form. That’s how these gooey brown butter s’mores blondie bars were born—right there in my kitchen, with a half-stick of butter browning in a pan and a bag of chocolate chips calling my name.
These aren’t your average blondies. They start with brown butter, which sounds fancy but honestly just means you burn the butter a little on purpose. The nutty, toasty flavor it creates is the perfect backbone for the campfire classic we all know and love. No tent required. No bug spray. Just a pan, an oven, and a serious craving for something sweet and messy.
The first time I made them, I ate three before they even cooled. I’m not proud of it, but I’m also not sorry. There is something about the way the chewy blondie base meets the melted chocolate and the slightly charred marshmallow topping that just works. It’s comfort food at its most honest, and it’s exactly the kind of dessert that makes you forget you’re not sitting by a fire.
These gooey brown butter s’mores blondie bars are the shortcut to summer you didn’t know you needed. Let’s get baking.
Why You’ll Love This Recipe
I’ve tested this recipe more times than I care to admit, and I can tell you with full confidence—it delivers every single time. Here is why these bars deserve a permanent spot in your dessert rotation.
- Quick & Easy : From start to finish, you’re looking at about 45 minutes. Most of that is hands-off baking time. It’s perfect for when a craving strikes out of nowhere.
- Simple Ingredients : You probably have almost everything already. Butter, sugar, eggs, flour, vanilla, chocolate chips, and marshmallows. That’s it. No weird extracts or hard-to-find items.
- Perfect for Any Occasion : These work for backyard barbecues, potlucks, birthday parties, or just a random Tuesday when you need a pick-me-up. They travel well and disappear fast.
- Crowd-Pleaser : I’ve yet to meet anyone who doesn’t love them. Kids go wild for the marshmallow topping, and adults appreciate the sophisticated brown butter flavor.
- Unbelievably Delicious : The combination of nutty brown butter, rich chocolate, and gooey toasted marshmallow is pure magic. It’s nostalgic but elevated, and it hits every single note you want in a dessert.
What makes these different from other s’mores bars is the brown butter. It adds a depth of flavor that plain butter just can’t touch. It makes the blondie base taste almost caramelized, and it pairs perfectly with the chocolate and marshmallow. This isn’t just another version of a s’mores bar—it’s the one you’ll keep coming back to.
Honestly, this is the kind of recipe that makes you close your eyes after the first bite. It’s comfort food reimagined—faster, easier, but with the same soul-soothing satisfaction. And it’s perfect for impressing guests without any stress. Just bake, top, and watch them disappear.
What Ingredients You Will Need
This recipe uses simple, wholesome ingredients to deliver bold flavor and satisfying texture without the fuss. Most of these are pantry staples, which makes this an easy last-minute dessert to whip up.
For the Blondie Base
- Unsalted butter – ½ cup (1 stick or 113g). You’ll be browning this, so unsalted gives you full control over the salt level. I prefer using a good quality European-style butter for extra richness, but standard butter works perfectly fine.
- Light brown sugar – 1 cup (200g), packed. Brown sugar adds moisture and that deep, molasses-like sweetness that pairs so well with brown butter. You can use dark brown sugar for an even more intense flavor.
- Granulated sugar – ¼ cup (50g). A little white sugar helps with structure and keeps the blondies from being too dense.
- Large egg – 1, at room temperature. Room temperature eggs incorporate more evenly into the batter. If you forget to take it out early, place it in a bowl of warm water for 5 minutes.
- Egg yolk – 1 large. This extra yolk is the secret to a chewier, richer blondie. Don’t skip it.
- Vanilla extract – 1 teaspoon. Pure vanilla extract makes a noticeable difference here. Imitation will work, but the flavor won’t be as warm and complex.
- All-purpose flour – 1 cup (120g). Spoon and level your flour for the most accurate measurement. Scooping directly from the bag can pack in too much flour and make the bars dry.
- Salt – ½ teaspoon. Salt balances the sweetness and enhances the brown butter flavor. I use fine sea salt.
- Baking powder – ½ teaspoon. Just enough to give the blondies a slight lift without making them cakey.
For the S’mores Topping
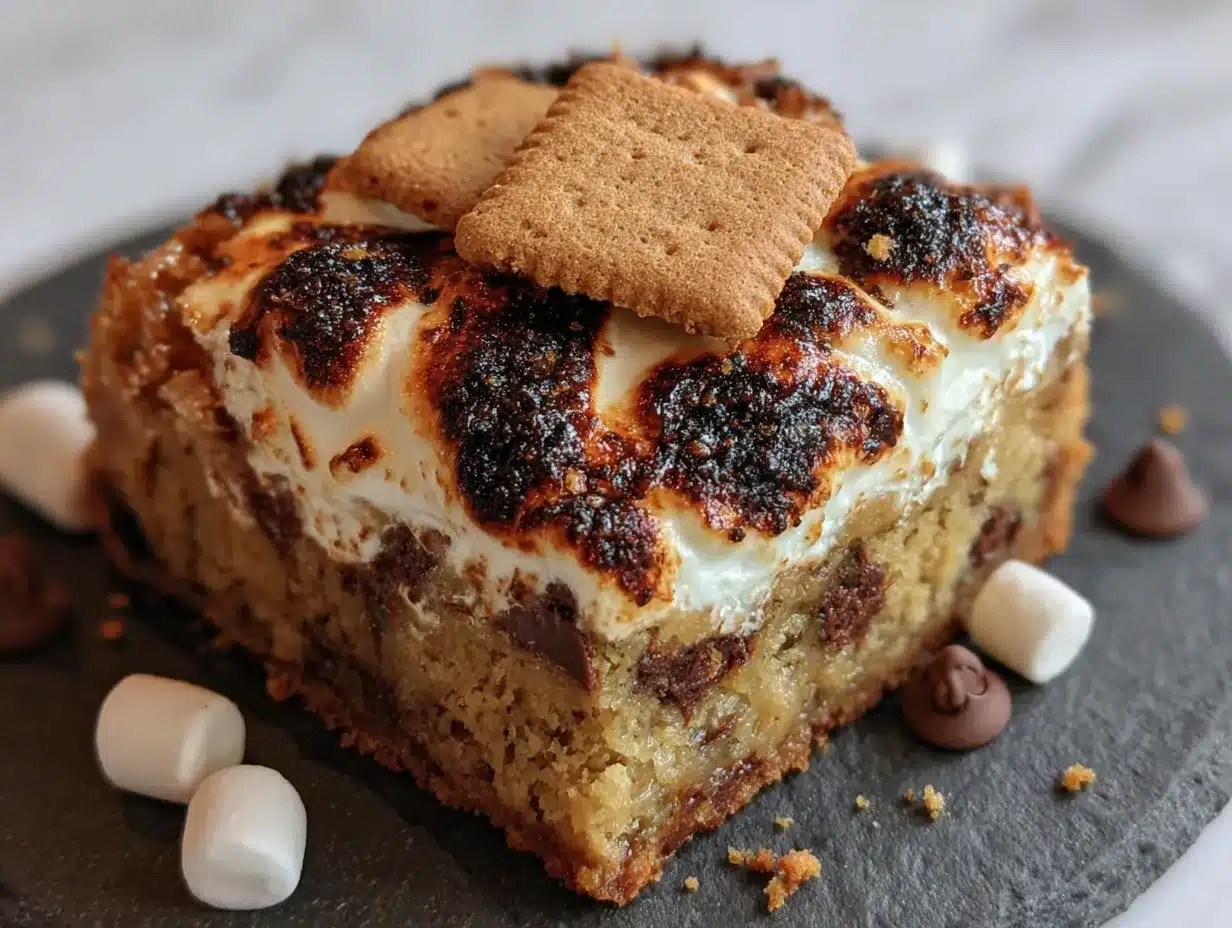
- Semi-sweet chocolate chips – ¾ cup (130g). You can also use chopped chocolate bars or milk chocolate chips if you prefer a sweeter bar. I like semi-sweet because it balances the sweetness of the brown sugar and marshmallows.
- Mini marshmallows – 1 ½ cups (about 85g). Mini marshmallows melt more evenly and cover the surface better than large ones. If you only have large marshmallows, cut them in half with kitchen shears.
- Graham cracker pieces – ½ cup, roughly crushed. You want some texture, not dust. I break them into small pieces by hand. About 4 full sheets will do the trick.
For the chocolate, I recommend using a brand you trust like Ghirardelli or Guittard. They melt smoothly and have a nice snap when you bite into them. As for the marshmallows, any brand works, but I find that name-brand mini marshmallows tend to toast a little more evenly than store-brand versions.
If you want to switch things up, you can use dark chocolate chips for a less sweet bar, or even white chocolate chips for a fun twist. Just keep in mind that white chocolate is much sweeter, so you may want to reduce the brown sugar slightly.
Equipment Needed
You don’t need a fully stocked bakery kitchen to make these gooey brown butter s’mores blondie bars. Here is what you will need.
- 8×8-inch baking pan – This is the perfect size for this recipe. A 9×9-inch pan will work too, but your bars will be thinner and may bake a few minutes faster.
- Light-colored saucepan – Browning butter in a dark pan makes it hard to see when the milk solids turn golden. A light-colored pan gives you a clear view.
- Mixing bowls – One large bowl for the wet ingredients and one medium bowl for the dry ingredients.
- Whisk – For combining the wet ingredients smoothly.
- Rubber spatula – For folding everything together and scraping every last bit of batter into the pan.
- Parchment paper – Lining the pan with parchment paper makes lifting the bars out so much easier. Leave an overhang on two opposite sides for handles.
- Kitchen torch (optional) – If you want that campfire-toasted look without turning on your broiler, a kitchen torch is a game-changer. I use mine for these bars and for toasting the marshmallows on my creamy passion fruit mousse cups too.
If you don’t have a kitchen torch, don’t worry. Your oven’s broiler works perfectly fine. Just keep a close eye on it because marshmallows go from golden to burnt in seconds. I learned that the hard way my first time.
Preparation Method
Let’s walk through this step by step. I promise it’s easier than it sounds, and the payoff is huge.
- Preheat your oven to 350°F (175°C). Line your 8×8-inch baking pan with parchment paper, leaving an overhang on two sides. Lightly grease the parchment with non-stick spray or butter.
- Brown the butter. Place the ½ cup of unsalted butter in a light-colored saucepan over medium heat. Stir it constantly with a rubber spatula or wooden spoon. The butter will melt, then foam, then start to crackle and pop. Keep stirring. After about 5-7 minutes, you’ll see golden brown specks forming at the bottom of the pan and the butter will smell nutty and rich. The moment it turns amber and smells like toasted nuts, remove it from the heat immediately. Pour it into a large mixing bowl to stop the cooking process. Do not walk away from the pan—brown butter can go from perfect to burnt in about 20 seconds.
- Cool the brown butter slightly. Let it sit for about 5 minutes. You want it warm but not hot. If it’s too hot, it will scramble your egg when you add it.
- Add the sugars. Whisk in the 1 cup packed light brown sugar and ¼ cup granulated sugar until fully combined. The mixture will look a bit grainy, and that’s fine. Whisk for about a minute to help dissolve some of the sugar into the butter.
- Add the egg and egg yolk. Crack the egg and the extra yolk into the bowl. Add the 1 teaspoon of vanilla extract. Whisk vigorously for about 30 seconds until the mixture is smooth, glossy, and slightly thickened. This is where the magic starts.
- Combine the dry ingredients. In a separate medium bowl, whisk together the 1 cup all-purpose flour, ½ teaspoon salt, and ½ teaspoon baking powder. Make sure there are no clumps.
- Fold the dry ingredients into the wet. Add the flour mixture to the butter-sugar mixture. Use a rubber spatula to fold gently until just combined. Do not overmix. A few streaks of flour are okay. Overmixing will make your blondies tough, and nobody wants that.
- Fold in the chocolate chips. Reserve about ¼ cup of the chocolate chips to sprinkle on top later. Fold the remaining ½ cup into the batter. The batter will be thick and slightly sticky. That’s exactly what you want.
- Spread the batter into the pan. Use your spatula to spread it evenly into the prepared pan. It will be a thin layer, but don’t worry—the bars will rise a bit as they bake. Sprinkle the reserved chocolate chips evenly over the top.
- Bake the blondie base. Place the pan in the preheated oven and bake for 18-20 minutes. The edges should be golden brown, and the center should look set but still slightly soft. A toothpick inserted into the center should come out with a few moist crumbs. Do not overbake, or the bars will be dry.
- Add the marshmallows and graham crackers. Remove the pan from the oven. Immediately sprinkle the 1 ½ cups of mini marshmallows evenly over the hot blondie base. Sprinkle the ½ cup of crushed graham cracker pieces over the marshmallows.
- Toast the topping. Switch your oven to broil. Place the pan back in the oven on the top rack. Watch it like a hawk—this takes only 1-2 minutes. The marshmallows will puff up and turn golden brown. They can burn in an instant, so don’t walk away. Alternatively, you can use a kitchen torch to toast the marshmallows for more control.
- Cool completely before cutting. This is the hardest part. Let the bars cool in the pan on a wire rack for at least 30 minutes. If you cut them too soon, the marshmallows will slide right off. For cleaner slices, refrigerate the pan for 15 minutes before cutting. Use the parchment overhang to lift the whole block out, then slice into 9 or 16 squares with a sharp knife. Wipe the knife clean between cuts for the neatest edges.
Cooking Tips & Techniques
I’ve made these bars more times than I can count, and I’ve definitely made my share of mistakes along the way. Here are the tips I wish someone had told me from the start.
Don’t rush the brown butter. I know it’s tempting to crank up the heat, but medium heat is your friend. High heat will burn the milk solids before they have a chance to toast evenly, leaving you with bitter, not nutty, butter. Trust the process. The nutty aroma is your cue.
Room temperature eggs matter. Cold eggs can seize the brown butter, causing it to clump. If you forget to take your eggs out ahead of time, place them in a bowl of warm water for 5 minutes. This small step makes a big difference in the final texture.
Watch the broiler closely. I cannot stress this enough. The first time I made these, I got distracted by a text message, and my marshmallows turned into black hockey pucks. The broiler is aggressive. Stay in front of the oven door the entire time.
Let them cool. I know the smell is intoxicating. I know you want to dig in immediately. But cutting into warm bars is a recipe for a marshmallow avalanche. The bars need time to set so the marshmallow layer adheres to the blondie base. Patience pays off here.
Use a sharp knife. A dull knife will drag through the marshmallow and make a sticky mess. Run your knife under hot water, wipe it dry, and slice. Clean the blade between each cut for the best-looking bars.
If you love recipes that combine sweet and savory elements, you should also try my smoked mac and cheese for another crowd-pleasing dish that disappears fast.
Variations & Adaptations
One of the best things about this recipe is how easy it is to tweak. Here are some variations I’ve tried and loved.
Peanut Butter S’mores Blondies. Swirl ¼ cup of creamy peanut butter into the batter before baking. The combination of peanut butter, chocolate, and marshmallow is absolutely irresistible. I made a batch for a potluck last summer, and they were gone in ten minutes flat.
Gluten-Free Version. Substitute the all-purpose flour with a 1:1 gluten-free baking flour blend. I’ve tested this with Bob’s Red Mill 1-to-1 Baking Flour, and the texture is remarkably close to the original. Just make sure your blend contains xanthan gum for structure.
Dark Chocolate Lover’s Version. Use dark chocolate chips (60-70% cacao) in place of semi-sweet, and add an extra tablespoon of brown sugar to balance the bitterness. The dark chocolate pairs beautifully with the nutty brown butter.
Extra Crunchy Version. Double the graham cracker topping and add a layer of crushed graham crackers on the bottom of the pan before pouring in the batter. This gives you a crust that mimics the classic s’mores texture even more closely.
Vegan Adaptation. Use a vegan butter stick (like Miyoko’s), a flax egg (1 tablespoon ground flaxseed mixed with 3 tablespoons water), and dairy-free chocolate chips. The texture will be slightly less dense, but the flavor is still fantastic.
For a fun twist, try using flavored marshmallows like toasted coconut or strawberry. I once made a batch with vanilla bean marshmallows, and they were incredible. The possibilities are endless, so don’t be afraid to experiment.
Serving & Storage Suggestions
These bars are best served slightly warm, when the marshmallows are still soft and the chocolate is melty. If you’ve refrigerated them, pop a bar in the microwave for 10-15 seconds to bring back that gooey texture.
For a truly decadent experience, serve them with a scoop of vanilla ice cream or a drizzle of warm caramel sauce. The cold ice cream against the warm, sticky bar is a combination that never gets old. I also love serving them alongside a tall glass of cold milk or a hot cup of coffee.
These bars pair beautifully with other desserts. For a summer party spread, I often make these alongside a batch of crispy blueberry cobbler for a dessert table that covers all the bases.
Storage: Store leftover bars in an airtight container at room temperature for up to 3 days. If you stack them, place a piece of parchment paper between layers to prevent the marshmallows from sticking together.
Freezing: These bars freeze surprisingly well. Place them in a single layer on a baking sheet and freeze until solid, about 1 hour. Then transfer them to a freezer-safe bag or container. They’ll keep for up to 2 months. Thaw at room temperature or warm in the microwave for 15-20 seconds.
Reheating: The best way to reheat a single bar is in the microwave for 10-15 seconds. For a whole pan, cover with foil and warm in a 300°F oven for about 10 minutes. The marshmallows will soften and the chocolate will get melty again.
The flavors actually develop more over time. Day-old bars are often even better than fresh ones because the brown butter flavor has had time to deepen. Just make sure they’re stored properly so the marshmallows don’t dry out.
Nutritional Information & Benefits
Let’s be real—these are a treat, not a health food. But knowing what’s in them helps you enjoy them mindfully.
Per serving (based on 9 bars):
- Calories: 385
- Fat: 18g
- Saturated Fat: 11g
- Carbohydrates: 53g
- Sugar: 38g
- Fiber: 1g
- Protein: 4g
- Sodium: 195mg
These numbers are estimates and will vary based on the specific brands and ingredients you use.
While these bars are definitely an indulgence, they do offer a few small benefits. The brown butter provides a small amount of vitamin A and healthy fats. Dark chocolate (if you use semi-sweet or dark) contains antioxidants and flavonoids. And hey, there’s an egg in there, so you’re getting a little protein too.
From a dietary perspective, this recipe is vegetarian and can be made gluten-free and vegan with the substitutions mentioned above. It contains dairy, eggs, and gluten in its standard form, so keep that in mind if you’re serving guests with allergies.
My personal philosophy is that dessert should be enjoyed without guilt. These bars are meant to be a celebration, a moment of pure joy. Life is too short to skip the marshmallows.
Conclusion
These gooey brown butter s’mores blondie bars are everything I want in a dessert—nostalgic, indulgent, and surprisingly easy to make. The brown butter adds a layer of sophistication that elevates a childhood classic into something truly special, but the heart of the recipe is still pure, messy, campfire fun.
I love that you can make these with ingredients you probably already have in your pantry. I love that they come together in under an hour. And I really love that they make the whole house smell like toasted marshmallows and warm butter.
Whether you’re making them for a summer barbecue, a holiday party, or just because it’s Tuesday, I hope these bars bring you as much joy as they’ve brought me. Feel free to customize them to your heart’s content—swap the chocolate, add peanut butter, or pile on extra marshmallows. There’s no wrong way to enjoy them.
If you make these, I’d love to hear about it. Drop a comment below and let me know how they turned out, or share your own twist on the recipe. And if you’re looking for more easy, crowd-pleasing desserts, check out my creamy white chocolate raspberry cheesecake bars for another recipe that disappears fast.
Happy baking, friends. Go make something delicious.
Frequently Asked Questions
Can I use salted butter instead of unsalted?
Yes, you can. Just reduce the added salt in the recipe to ¼ teaspoon. The brown butter will still be delicious, but you’ll have less control over the final salt level.
Why did my blondies turn out dry?
Dry blondies are usually the result of overbaking or overmeasuring the flour. Make sure you spoon and level your flour, and pull the bars out of the oven when the center is still slightly soft. They will continue to set as they cool.
Can I make these ahead of time?
Absolutely. These bars taste even better the next day. Bake them, cool them completely, and store them in an airtight container at room temperature. Add the marshmallow topping just before serving if you want it to be extra gooey.
How do I get clean cuts through the marshmallows?
Chill the bars in the refrigerator for at least 15 minutes before slicing. Use a sharp knife and run it under hot water, wiping it dry between each cut. This prevents the marshmallows from sticking and dragging.
Can I use a 9×13-inch pan instead?
Yes, but you’ll need to double the recipe. The baking time will also be slightly shorter, so start checking at 15 minutes. The bars will be thinner, so keep a close eye on them to prevent overbaking.
Pin This Recipe!
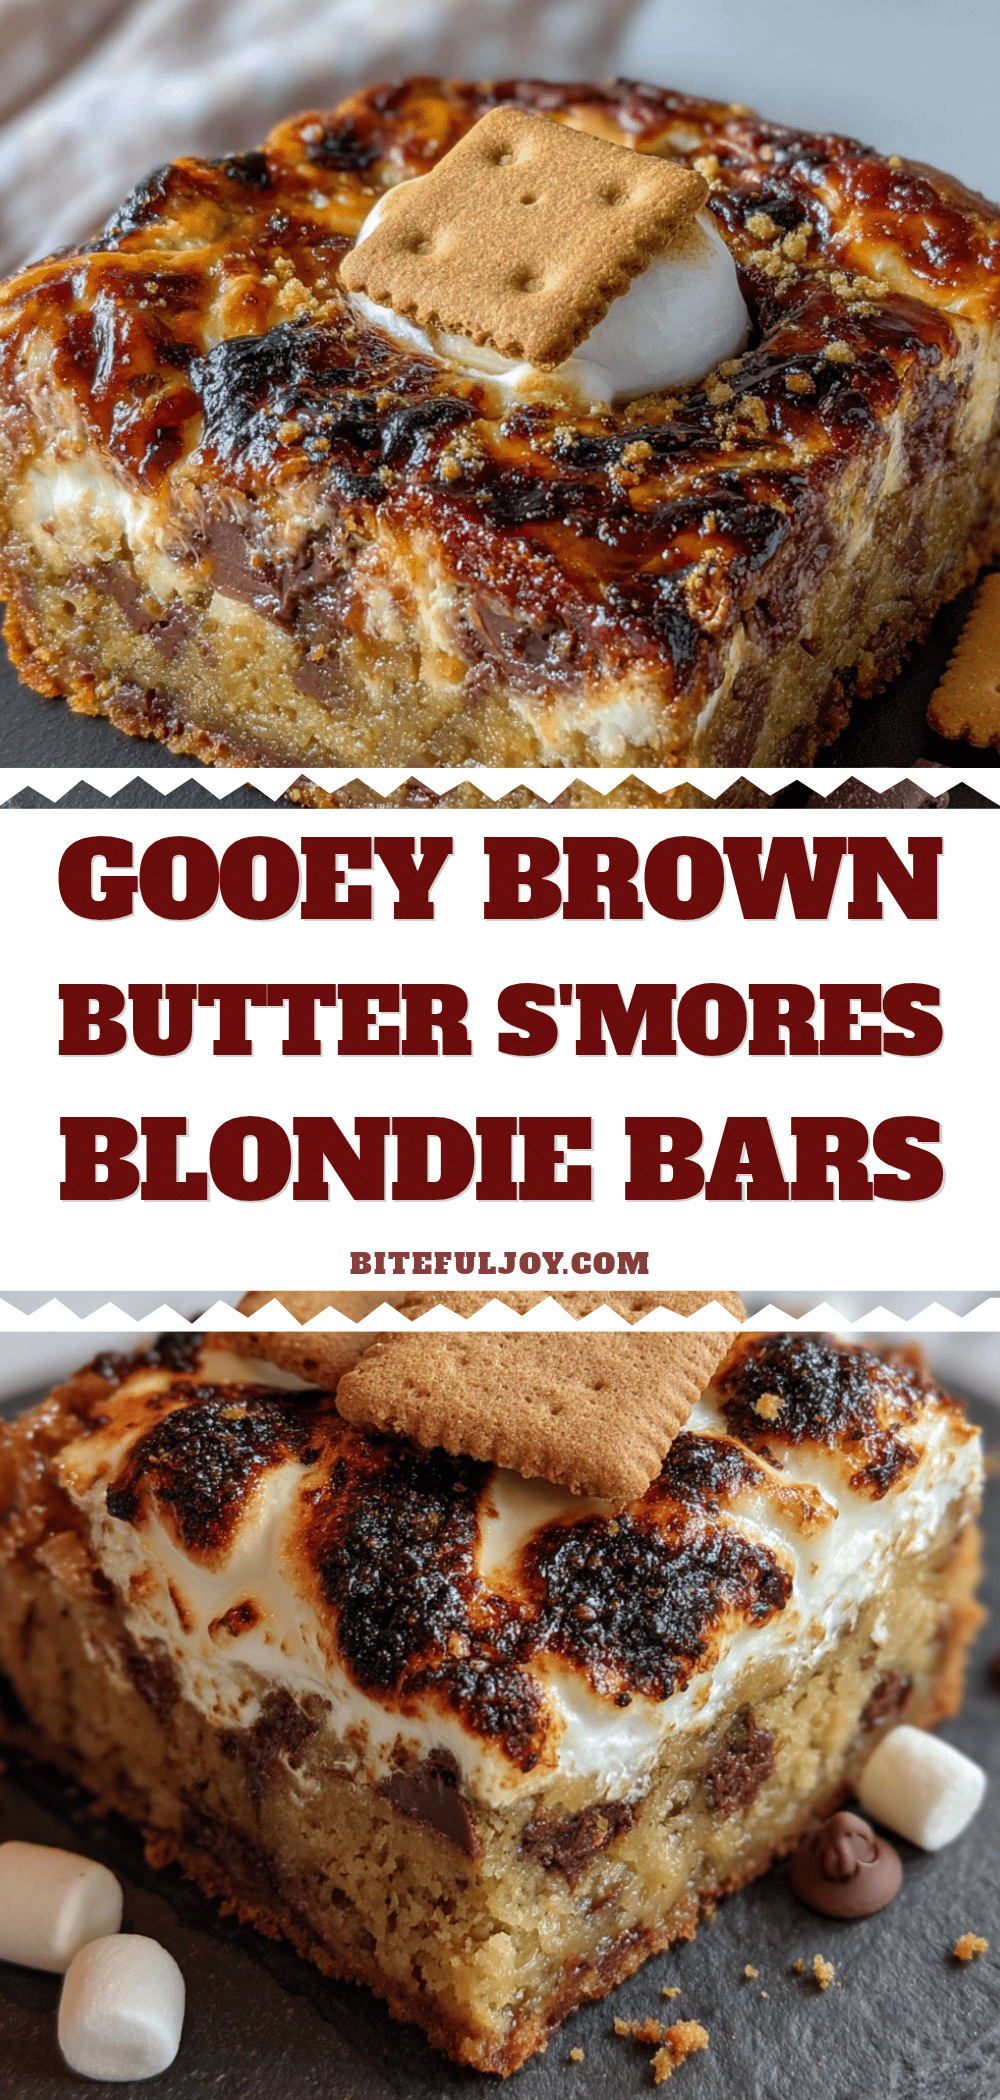
Gooey Brown Butter Smores Blondie Bars

These gooey brown butter s’mores blondie bars are the shortcut to summer you didn’t know you needed. They combine a nutty brown butter blondie base with melted chocolate and toasted marshmallows for a campfire classic without the fire.
- Prep Time: 15 minutes
- Cook Time: 20 minutes
- Total Time: 45 minutes
- Yield: 9 servings 1x
- Category: Dessert
- Cuisine: American
Ingredients
- ½ cup (1 stick or 113g) unsalted butter
- 1 cup (200g) packed light brown sugar
- ¼ cup (50g) granulated sugar
- 1 large egg, at room temperature
- 1 large egg yolk
- 1 teaspoon vanilla extract
- 1 cup (120g) all-purpose flour
- ½ teaspoon salt
- ½ teaspoon baking powder
- ¾ cup (130g) semi-sweet chocolate chips
- 1 ½ cups (about 85g) mini marshmallows
- ½ cup roughly crushed graham cracker pieces (about 4 full sheets)
Instructions
- Preheat your oven to 350°F (175°C). Line an 8×8-inch baking pan with parchment paper, leaving an overhang on two sides. Lightly grease the parchment with non-stick spray or butter.
- Brown the butter: Place ½ cup unsalted butter in a light-colored saucepan over medium heat. Stir constantly. The butter will melt, foam, then crackle and pop. After about 5-7 minutes, when golden brown specks form and the butter smells nutty, remove from heat immediately. Pour into a large mixing bowl to stop cooking.
- Cool the brown butter for about 5 minutes until warm but not hot.
- Whisk in 1 cup packed light brown sugar and ¼ cup granulated sugar until fully combined. Whisk for about a minute.
- Add the egg, egg yolk, and 1 teaspoon vanilla extract. Whisk vigorously for about 30 seconds until smooth, glossy, and slightly thickened.
- In a separate medium bowl, whisk together 1 cup all-purpose flour, ½ teaspoon salt, and ½ teaspoon baking powder.
- Add the flour mixture to the butter-sugar mixture. Fold gently with a rubber spatula until just combined. Do not overmix.
- Reserve about ¼ cup of chocolate chips for the top. Fold the remaining ½ cup into the batter.
- Spread the batter evenly into the prepared pan. Sprinkle the reserved chocolate chips over the top.
- Bake for 18-20 minutes until edges are golden brown and center is set but still slightly soft. A toothpick inserted into the center should come out with a few moist crumbs.
- Remove pan from oven. Immediately sprinkle 1 ½ cups mini marshmallows evenly over the hot blondie base. Sprinkle ½ cup crushed graham cracker pieces over the marshmallows.
- Switch oven to broil. Place pan back on top rack and broil for 1-2 minutes, watching constantly, until marshmallows are puffed and golden brown. Alternatively, use a kitchen torch.
- Cool completely in the pan on a wire rack for at least 30 minutes. For cleaner slices, refrigerate for 15 minutes before cutting. Use parchment overhang to lift the block out, then slice into 9 or 16 squares with a sharp knife, wiping clean between cuts.
Notes
Don’t rush the brown butter; use medium heat. Room temperature eggs matter. Watch the broiler closely to avoid burning marshmallows. Let bars cool completely before cutting to prevent marshmallow avalanche. Use a sharp knife for clean cuts.
Nutrition
- Serving Size: 1 bar (based on 9 ba
- Calories: 385
- Sugar: 38
- Sodium: 195
- Fat: 18
- Saturated Fat: 11
- Carbohydrates: 53
- Fiber: 1
- Protein: 4
Keywords: brown butter, s'mores, blondie bars, easy dessert, summer dessert, marshmallow, chocolate