
“Hey, have you ever tried making a veggie tray shaped like a bunny?” my neighbor asked me one sunny Saturday afternoon, just as I was wondering what to bring to our casual Easter brunch. I’ll admit, I was skeptical—veggies don’t usually scream “party centerpiece” in my book. But she insisted it was surprisingly fun and, honestly, a refreshing change from the usual chips and dip. So, I gave it a shot, and well, it turned out to be a total hit.
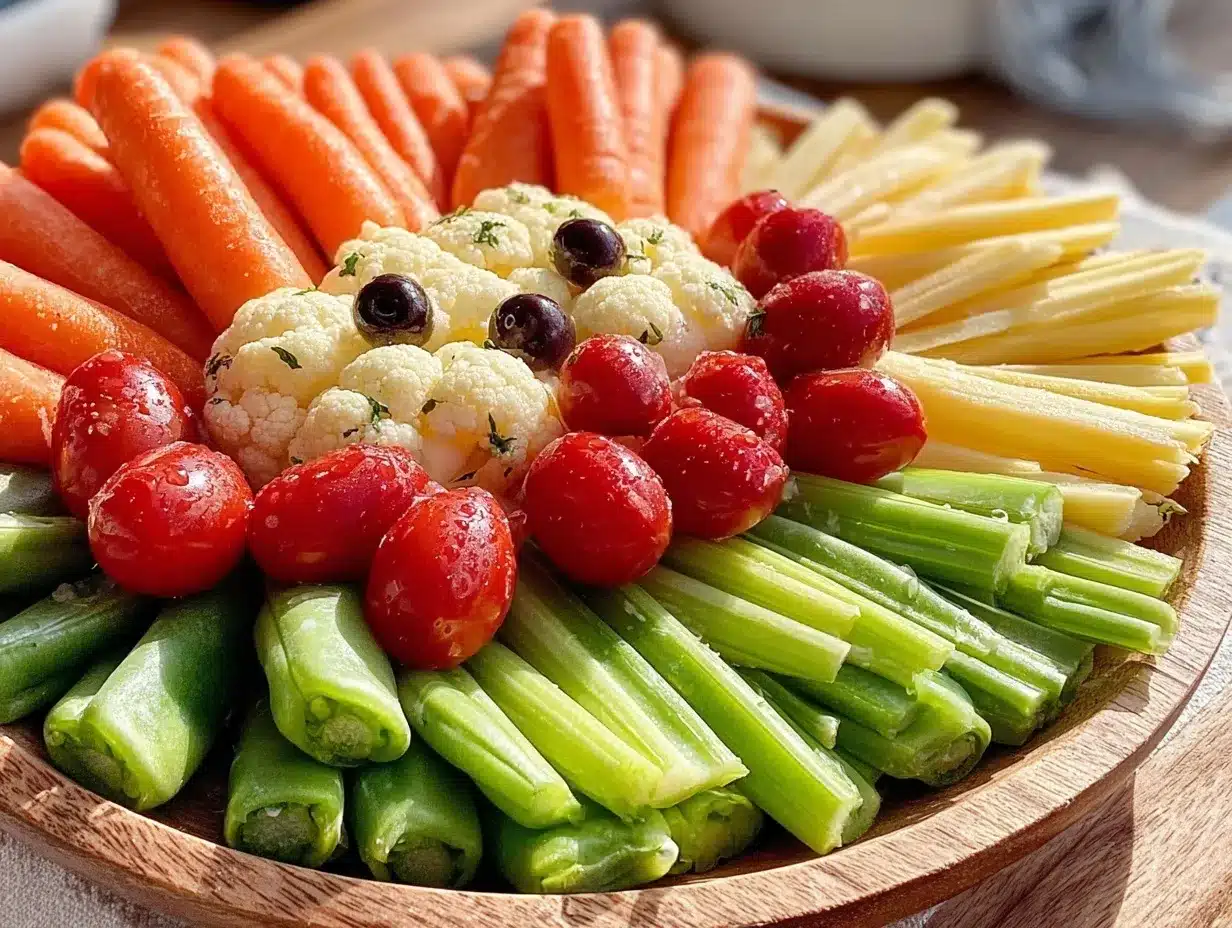
There was something oddly satisfying about arranging crisp carrots, crunchy celery, and vibrant cherry tomatoes into the shape of a bunny face. The kids loved it—probably because of the ears made from green beans and the eyes from black olives. My husband even admitted it was “pretty clever” (which means a lot coming from him). That day, the Fresh Easter Bunny Veggie Tray became my go-to festive snack for spring gatherings.
What surprised me most was how easy it was to throw together with just a few simple ingredients I already had on hand. No complicated prep, no weird veggies nobody wants to eat, just fresh, colorful produce that everyone could munch on guilt-free. Honestly, it felt like sneaking in some extra greens without any fuss or complaints.
Now, every Easter, this little bunny veggie tray quietly steals the show—no flashy desserts required. It’s one of those recipes that sticks not because it’s fancy, but because it brings a little joy and whimsy to the table. And that’s probably why I keep coming back to it year after year.
Why You’ll Love This Recipe
This Fresh Easter Bunny Veggie Tray isn’t just a cute idea—it’s a practical recipe that’s been tested multiple times across family gatherings and neighborhood parties. Here’s why it might just become your new seasonal favorite:
- Quick & Easy: You can assemble this entire tray in about 20 minutes, making it perfect for those last-minute Easter plans or when the kids decide they want something “fun” to snack on.
- Simple Ingredients: No need for specialty grocery runs—just grab your regular fresh veggies from the fridge or local market.
- Perfect for Festive Occasions: Beyond Easter, this bunny veggie tray makes a charming addition to spring brunches, baby showers, or even garden parties.
- Crowd-Pleaser: Little ones love the playful presentation, and adults appreciate the fresh, crunchy flavors as a light appetizer.
- Unbelievably Delicious: The combo of crisp veggies with a creamy ranch or hummus dip is somehow more satisfying when it’s shaped like a smiling bunny.
What sets this recipe apart is the way it balances fun and health without feeling forced. The secret? Thoughtful veggie placement—like using cucumber slices to create a smooth face and colorful bell pepper strips for the ears—that makes each bite visually appealing and texturally delightful. Plus, it’s a chance to sneak in some extra nutrients disguised as a festive treat.
Honestly, this tray isn’t just an appetizer; it’s a conversation starter, a little burst of spring cheer, and a reminder that healthy food can be playful too. I remember once bringing it alongside smoked salmon cucumber tea sandwiches to a friend’s Easter gathering—let’s just say both dishes vanished fast.
What Ingredients You Will Need
This recipe uses simple, wholesome ingredients to deliver bold color and satisfying crunch without the fuss. Most of these are pantry staples or easily found fresh produce that you can mix and match depending on your preferences.
- Base Veggies for the Bunny Face:
- 1 large cucumber, sliced into rounds (for a smooth, cool face)
- 1 cup cherry tomatoes, halved (adds pops of red and sweetness)
- 1 cup baby carrots, peeled (classic crunchy texture)
- Celery sticks, trimmed (for the bunny’s whiskers and cheeks)
- Ears and Details:
- Green beans or snap peas (for long, slender ears)
- Red and yellow bell pepper strips (for colorful ear accents)
- Black olives, pitted and sliced (for the eyes and nose)
- Baby spinach or kale leaves (to create a leafy collar or background)
- Dips and Extras:
- Ranch dressing or hummus (to serve on the side or as a base layer)
- Optional: radish slices for rosy cheeks
I usually opt for organic veggies when I can, just because the colors and flavors pop a bit more. For olives, I like the Kalamata variety—they have a nice, mild tang. And if you’re after a dairy-free dip, hummus is a foolproof choice that pairs beautifully with all the crunchy veggies.
One quick tip: In spring, if you want to freshen things up, swapping cherry tomatoes for colorful mini bell peppers or even sugar snap peas works like a charm. And for a gluten-free twist, everything here fits perfectly since it’s naturally grain-free.
Equipment Needed
You don’t need fancy gadgets for this Fresh Easter Bunny Veggie Tray. Here’s what I recommend:
- Large serving platter or tray (a white or pastel-colored one really makes the veggies pop)
- Sharp knife and cutting board (for clean slicing and shaping)
- Small bowls for dips (to nestle on the side or within the veggie arrangement)
- Tongs or small spoons (helpful for arranging delicate veggies without squishing them)
If you don’t have a platter, a large wooden cutting board works just fine—and adds a rustic vibe to the presentation. I’ve tried using cookie cutters to make cute shapes with cucumber slices before, but honestly, freehand looks more natural and less fussy.
Keeping your knife sharp is key here; it makes slicing veggies like bell peppers and cucumbers a breeze and prevents bruising. Also, if you want to keep things ultra-fresh, assembling the tray shortly before serving is best, but using a damp towel over the veggies helps maintain crispness for a few hours.
Preparation Method
- Prepare the Veggies: Wash all vegetables thoroughly. Peel the carrots if needed and slice the cucumber into even rounds about ¼ inch (6 mm) thick. Halve the cherry tomatoes and trim celery sticks to about 3 inches (7.5 cm) long.
- Create the Bunny Face Base: Arrange cucumber slices in an oval shape in the center of your platter to form the bunny’s face. Overlap the slices slightly for a solid base that won’t look patchy.
- Add Facial Features: Place two black olive slices for the eyes near the top center of the cucumber oval. Use a small olive piece or a cherry tomato half for the nose just below the eyes. For the mouth, you can use thin celery sticks or bell pepper strips curved gently.
- Shape the Bunny Ears: Position green beans or snap peas on either side of the head to create long, pointed ears. Layer some red and yellow bell pepper strips inside the ears for color contrast.
- Build the Cheeks and Whiskers: Fan out baby carrots on either side of the face to mimic fluffy cheeks. Add celery sticks radiating outwards near the cheeks to represent whiskers.
- Fill in the Background: Use baby spinach or kale leaves around the edges of the bunny’s face to give a leafy, fresh backdrop. This also helps frame the design and keeps everything snug.
- Place Dip Bowls: Nestle small bowls of ranch dressing or hummus near the bunny’s paws or at the bottom of the tray for easy dipping.
- Final Touches: Optionally, add radish slices as rosy cheeks or scatter extra cherry tomatoes and baby carrots around the platter for a burst of color.
Each step should take about 2-4 minutes, so the whole assembly can be done in roughly 20 minutes. If you’re prepping for a crowd, chopping veggies in advance and storing them lightly covered in the fridge helps speed things up.
Watch out for soggy cucumber slices if you slice too early—try to cut them right before assembling. Also, when placing olives, use tweezers or a small spoon for precision. I learned that the hard way after dropping them all over the floor once!
Cooking Tips & Techniques
Since this recipe is all about fresh, raw veggies, the “cooking” mostly involves smart prep and presentation tricks.
- Keep It Crisp: Store all veggies in cold water or wrapped in damp towels before assembly to preserve crunch. This is especially true with carrots and celery.
- Consistent Slicing: Uniform cucumber rounds make the bunny face look neater. Use a mandoline slicer if you have one, but a sharp knife works just as well.
- Secure Small Details: To prevent olives from sliding off, you can lightly press them into a small dollop of dip or cream cheese on the cucumber base.
- Balance Colors: Spread out red, yellow, and green veggies evenly for an eye-catching display. Too much of one color can make the tray look flat.
- Multitasking Hack: While chopping veggies, pre-fill dip bowls and chill them to save time during assembly.
- Personal Lesson: I once made the mistake of assembling the tray too early, and the cucumbers started sweating, making the whole thing soggy. Lesson learned: assemble close to serving time!
Variations & Adaptations
This Easter Bunny Veggie Tray is super flexible. Here are some ways to make it your own:
- Dietary Adjustments: Use vegan dips like a roasted red pepper hummus instead of ranch to keep it plant-based and dairy-free.
- Seasonal Swaps: In warmer months, swap spinach with fresh herbs like parsley or mint for a fragrant twist. You could also add fresh peas for extra pops of green.
- Flavor Twists: Add a sprinkle of smoked paprika or cumin to your dip for a subtle kick that complements the veggies.
- Alternative Shapes: If bunnies aren’t your thing, try an Easter egg shape using similar veggie layouts. My friend paired this with a creamy passion fruit mousse for a sweet and savory spring spread.
- Personal Variation: One year, I added small cheese cubes around the bunny as “carrot treats” for a bit of indulgence that everyone loved.
Serving & Storage Suggestions
Serve this Fresh Easter Bunny Veggie Tray chilled or at room temperature, ideally within an hour of assembly to keep the veggies crisp and fresh. The colors really shine when the tray is set against a light-colored tablecloth or wooden board.
Pair it with light, festive beverages like sparkling water with lemon or a mimosa bar setup, similar to the vibe from my mimosa bar French toast bake brunch parties.
If you have leftovers (though that rarely happens!), cover the tray tightly with plastic wrap and refrigerate. Most veggies will keep well for up to 2 days, but the cucumber slices might get a bit watery. To revive them, blot with a paper towel and serve with fresh dip.
Reheating isn’t needed here, but if you want to prepare components ahead, chopping and storing veggies separately in airtight containers helps maintain freshness until assembly.
Also, over time, the flavors mellow and the tray might lose some of its initial crunch, so it’s best enjoyed fresh for that perfect festive crunch.
Nutritional Information & Benefits
This Fresh Easter Bunny Veggie Tray is naturally low in calories and packed with vitamins, minerals, and fiber. Here’s a rough estimate per serving (about 1 cup of assorted veggies with dip):
| Nutrient | Amount |
|---|---|
| Calories | 70-90 kcal |
| Fiber | 3-4 grams |
| Vitamin A | 20-30% Daily Value |
| Vitamin C | 25-40% Daily Value |
| Fat | 2-5 grams (depending on dip) |
Key ingredients like carrots and bell peppers provide beta-carotene and antioxidants, supporting eye health and immune function. Cucumbers contribute hydration with their high water content, while olives add a touch of heart-healthy monounsaturated fats.
If you’re watching allergens, this tray is naturally gluten-free and can be made dairy-free by swapping ranch for hummus or another plant-based dip. It’s a guilt-free way to celebrate spring while sneaking in some extra greens.
Conclusion
This Fresh Easter Bunny Veggie Tray is more than just a festive snack—it’s a playful, easy way to bring some personality and color to your holiday table. Whether you’re feeding a crowd or just craving a cheerful veggie fix, this recipe fits the bill without fuss or stress.
Feel free to mix and match your favorite veggies or dips to suit your taste—there’s no wrong way to make this bunny come alive. Personally, I love how it turns a simple veggie platter into something that sparks smiles and a bit of nostalgia, year after year.
If you try this out, I’d love to hear how you customized it or what fun twists you added. Sharing these small moments of joy is what makes cooking so rewarding. So here’s to fresh veggies, festive fun, and a little bunny magic on your table!
FAQs
Can I make the bunny veggie tray ahead of time?
It’s best to prep the veggies ahead but assemble the tray close to serving time to keep everything crisp and fresh. Store chopped veggies in airtight containers or damp towels in the fridge.
What dip pairs best with the Easter Bunny Veggie Tray?
Classic ranch dressing is a crowd-pleaser, but hummus, tzatziki, or a creamy avocado dip work beautifully too, especially for dairy-free options.
Can I use other vegetables besides those listed?
Absolutely! Feel free to swap in your favorite crunchy veggies like snap peas, sugar snap peas, mini bell peppers, or even radishes to customize the tray.
How do I keep cucumber slices from getting soggy?
Slice cucumbers just before assembling the tray and pat them dry with paper towels if they seem watery. Keeping them chilled until serving also helps.
Is this recipe suitable for kids?
Definitely! Kids love the playful bunny shape and tend to enjoy munching on fresh veggies when they’re presented in a fun way.
Pin This Recipe!
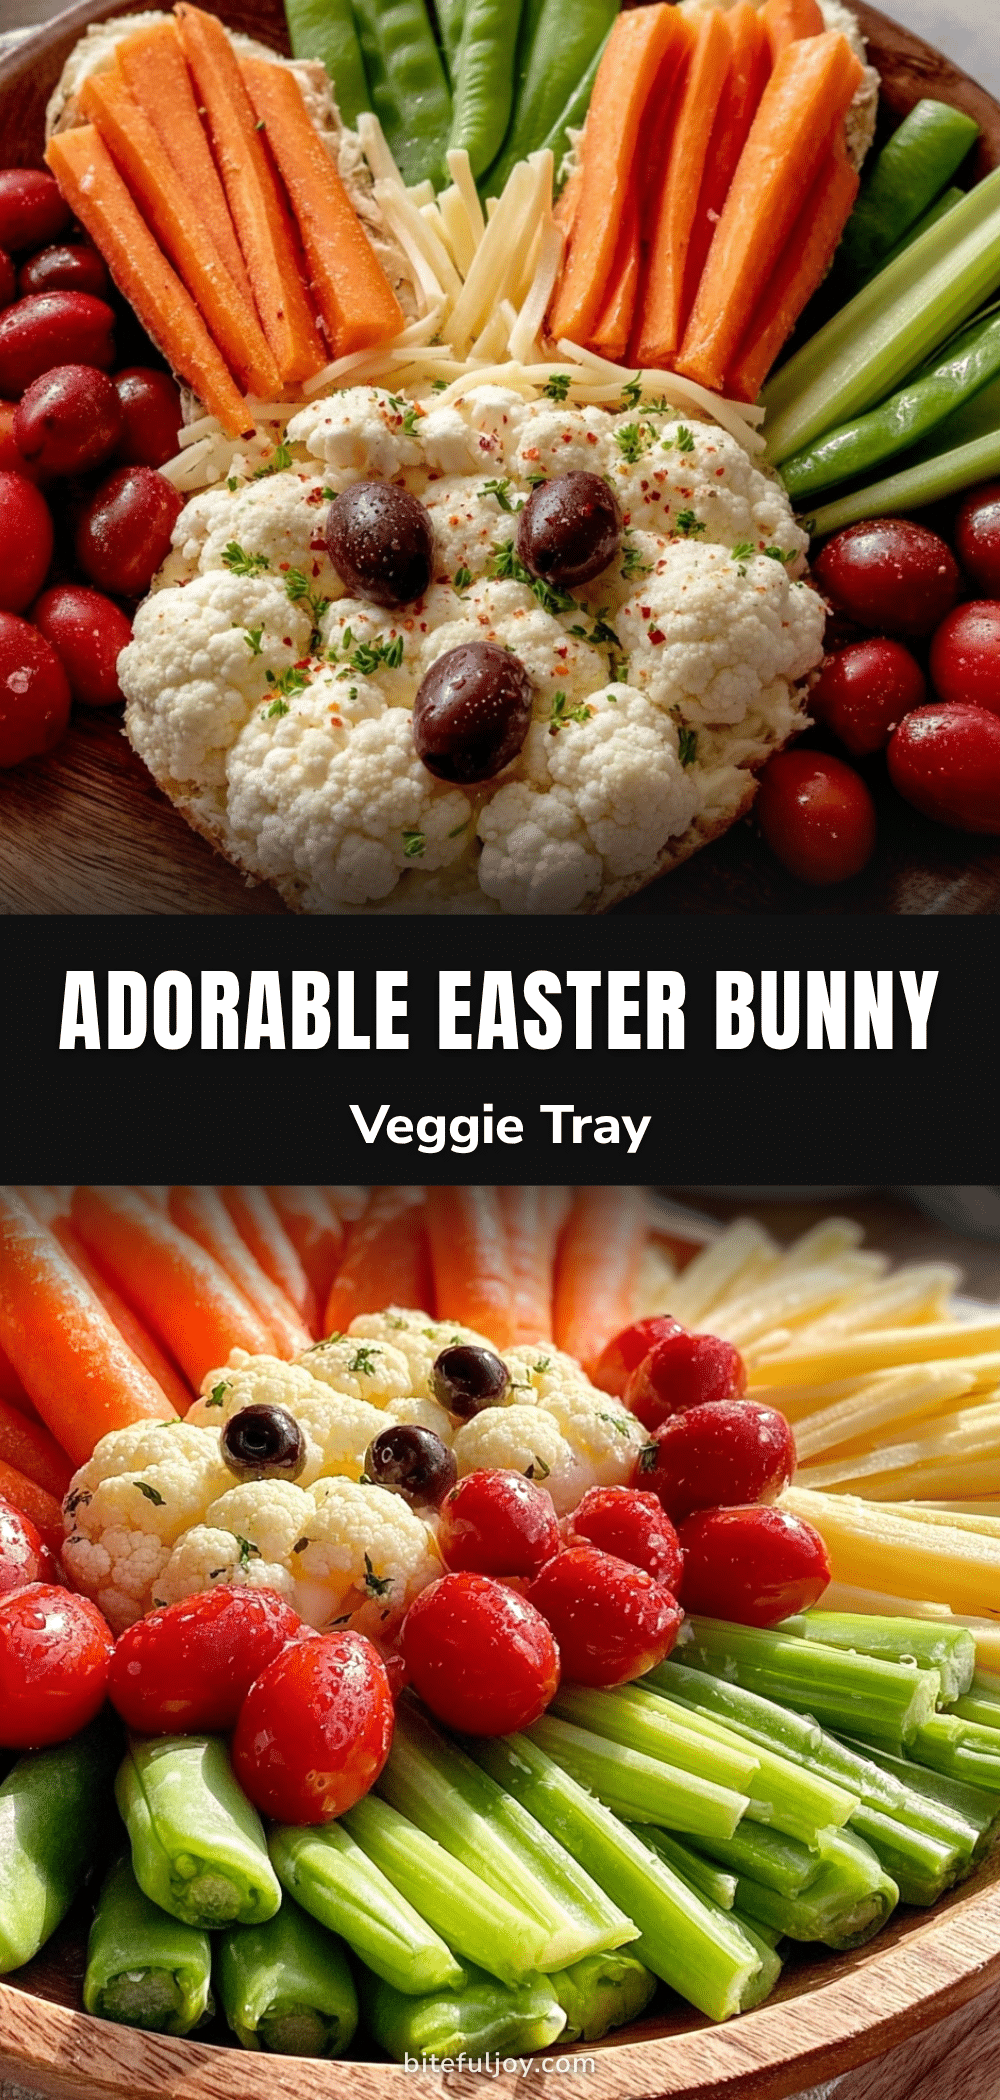
Fresh Easter Bunny Veggie Tray

A fun and festive veggie tray shaped like a bunny, perfect for Easter and spring gatherings. Easy to assemble with fresh, colorful vegetables and served with ranch or hummus dip.
- Prep Time: 15 minutes
- Cook Time: 0 minutes
- Total Time: 15 minutes
- Yield: 6 servings 1x
- Category: Appetizer
- Cuisine: American
Ingredients
- 1 large cucumber, sliced into rounds
- 1 cup cherry tomatoes, halved
- 1 cup baby carrots, peeled
- Celery sticks, trimmed
- Green beans or snap peas
- Red and yellow bell pepper strips
- Black olives, pitted and sliced
- Baby spinach or kale leaves
- Ranch dressing or hummus (for dipping)
- Optional: radish slices
Instructions
- Wash all vegetables thoroughly. Peel the carrots if needed and slice the cucumber into even rounds about 1/4 inch thick.
- Halve the cherry tomatoes and trim celery sticks to about 3 inches long.
- Arrange cucumber slices in an oval shape in the center of your platter to form the bunny’s face, overlapping slightly.
- Place two black olive slices for the eyes near the top center of the cucumber oval. Use a small olive piece or a cherry tomato half for the nose just below the eyes.
- For the mouth, use thin celery sticks or bell pepper strips curved gently.
- Position green beans or snap peas on either side of the head to create long, pointed ears. Layer some red and yellow bell pepper strips inside the ears for color contrast.
- Fan out baby carrots on either side of the face to mimic fluffy cheeks. Add celery sticks radiating outwards near the cheeks to represent whiskers.
- Use baby spinach or kale leaves around the edges of the bunny’s face to give a leafy, fresh backdrop.
- Nestle small bowls of ranch dressing or hummus near the bunny’s paws or at the bottom of the tray for easy dipping.
- Optionally, add radish slices as rosy cheeks or scatter extra cherry tomatoes and baby carrots around the platter for a burst of color.
Notes
Assemble the tray shortly before serving to keep veggies crisp. Store chopped veggies in airtight containers or wrapped in damp towels in the fridge if prepping ahead. Use a damp towel over the assembled tray to maintain freshness for a few hours. For precision placing of olives, use tweezers or a small spoon. Swap dips to accommodate dietary preferences.
Nutrition
- Serving Size: About 1 cup of assor
- Calories: 7090
- Fat: 25
- Fiber: 34
Keywords: Easter, veggie tray, bunny shape, healthy snack, party appetizer, fresh vegetables, kid-friendly, festive food


