
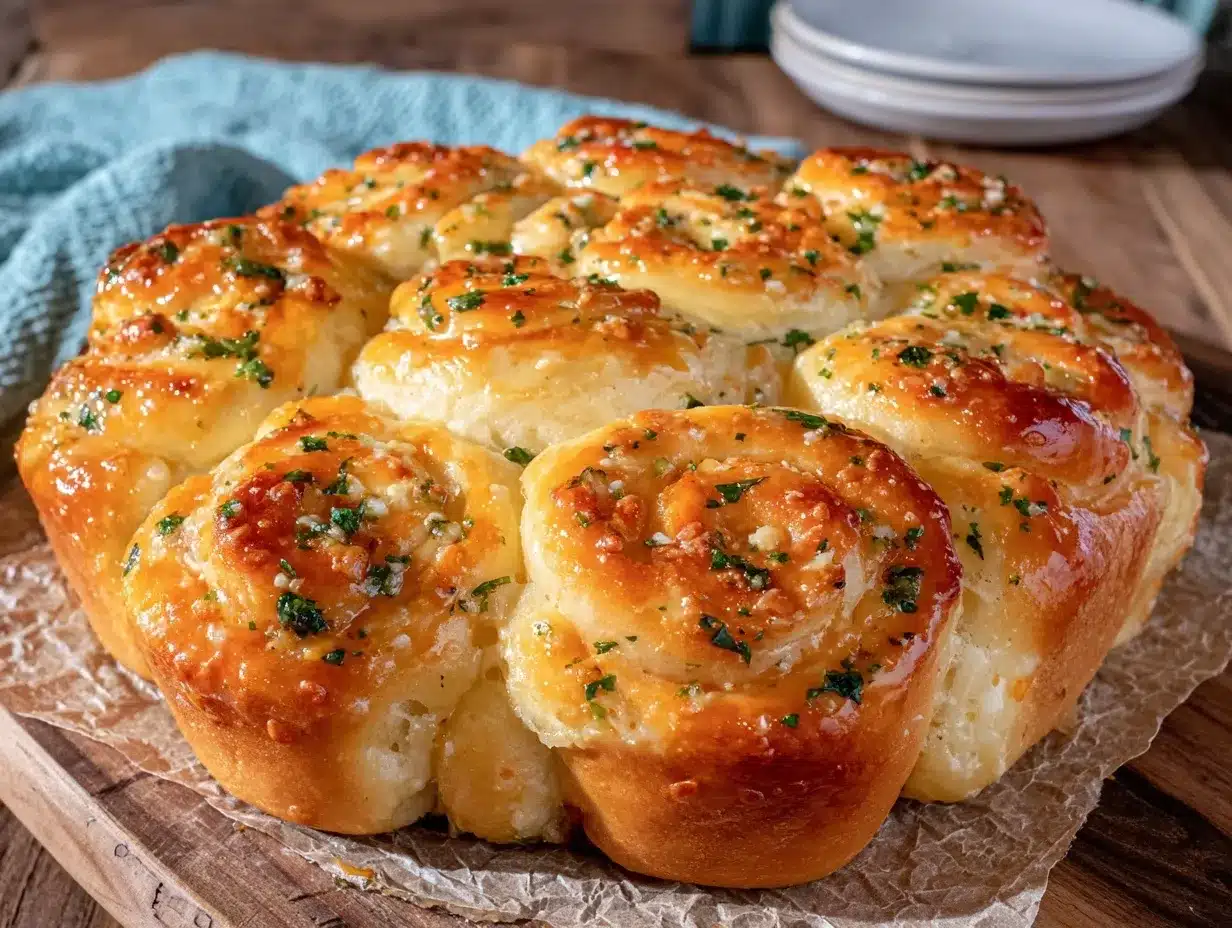
Let me just paint you a picture—imagine the aroma of freshly baked bread swirling through your kitchen, buttery garlic wafting out of the oven and making mouths water. It’s the kind of scent that gets everyone (even those “not hungry” folks) drifting in from the next room. The first time I baked these Fluffy Pull-Apart Garlic Butter Rolls, I was instantly hooked. You know that moment when you pull the pan out, the rolls golden and puffed, and you can’t help but tear into one while it’s still steaming? That’s a memory I’ll never forget—a moment where you pause, take a deep breath, and just smile because you know you’re onto something truly special.
Growing up, my grandma used to make bread from scratch every Sunday, and honestly, I always thought it was some mystical, complicated process. Now, years later, I’ve learned that a handful of simple ingredients and a little patience can create the same kind of warm, nostalgic comfort. I stumbled onto this garlic butter roll recipe on a rainy weekend, trying to recreate the pillowy rolls I remembered from those family dinners. Wish I’d had this recipe ages ago—would’ve saved me a lot of dry, dense attempts. My family couldn’t stop sneaking these off the cooling rack (and I can’t really blame them). Let’s face it, anything with garlic butter is bound to be a hit!
These rolls are dangerously easy to make and perfect for potlucks, casual weeknight dinners, or just brightening up your Pinterest board. I’ve tested them more times than I care to admit (in the name of research, of course), and they’ve become a staple for family gatherings and gifting. Each batch feels like a warm hug, and trust me, you’re going to want to bookmark this one for every cozy occasion.
Why You’ll Love These Fluffy Pull-Apart Garlic Butter Rolls
If you’ve ever wished for a bread recipe that delivers on both flavor and ease, this one’s for you. I’ve baked countless batches in my home kitchen—sometimes for a crowd, sometimes just for myself. After all that testing, here’s why these Fluffy Pull-Apart Garlic Butter Rolls are a must-try:
- Quick & Easy: These rolls come together in under two hours, including rise and bake time. Perfect for busy weeknights or last-minute cravings!
- Simple Ingredients: You don’t need anything fancy—just pantry staples like flour, yeast, butter, and garlic. No special grocery trips required.
- Perfect for Cozy Gatherings: Whether it’s a holiday meal, potluck, or just a chilly evening, they fit right in. I’ve served these at everything from Thanksgiving to casual backyard dinners (never a crumb left!).
- Crowd-Pleaser: Even picky eaters and kids come back for seconds. The pull-apart style makes them fun to share and serve.
- Unbelievably Delicious: The texture is soft, fluffy, and airy, with a buttery garlic flavor that’s just the right amount of savory. They’re comfort food at its finest.
What sets these apart? For starters, the dough is enriched with milk and a touch of sugar, which makes each roll extra tender. The garlic butter isn’t just brushed on top—it seeps into every nook and cranny as the rolls bake together, creating layers of flavor. Unlike some recipes, you don’t have to fuss with complicated shaping or endless kneading. Just a few straightforward steps, and you get bakery-worthy results at home.
Honestly, these rolls are more than just bread—they’re the kind that make you close your eyes after the first bite. Comfort food reimagined: faster, easier, and just as satisfying as the classic. Whether you’re looking to impress guests without the stress or simply turn a simple meal into something memorable, this recipe’s got your back.
What Ingredients You Will Need
This recipe uses simple, wholesome ingredients to deliver bold flavor and that signature fluffy, pull-apart texture—no fancy stuff, just the basics done right. Most of these are pantry staples, and I bet you’ve already got most of them on hand!
- For the Dough:
- All-purpose flour (3 ½ cups / 420g) – regular or bread flour works, but I prefer King Arthur for consistency.
- Whole milk (1 cup / 240ml, warm) – adds richness; use plant-based milk if you’re dairy-free.
- Active dry yeast (2 ¼ tsp / 7g) – a standard packet; instant yeast also works, just skip the proofing step.
- Granulated sugar (2 tbsp / 25g) – helps with browning and flavor.
- Unsalted butter (4 tbsp / 56g, melted) – for dough tenderness; use vegan butter if needed.
- Salt (1 tsp / 5g) – balances the flavor.
- Large egg (1, room temperature) – makes the rolls extra fluffy.
- For the Garlic Butter:
- Unsalted butter (6 tbsp / 85g, melted) – the more, the merrier!
- Fresh garlic (4 cloves, minced) – for best flavor; jarred garlic works in a pinch.
- Fresh parsley (2 tbsp, chopped) – optional, but gives a pop of color and freshness.
- Fine sea salt (½ tsp) – for sprinkling.
- For Finishing:
- Extra melted butter (as needed, for brushing)
- Grated parmesan (optional, for a cheesy twist and golden top—try BelGioioso if you want a real treat)
Ingredient Notes and Substitutions:
- You can swap all-purpose flour for bread flour, which gives a chewier texture. If you’re gluten-free, use a 1:1 gluten-free blend (Bob’s Red Mill is my go-to).
- Milk can be swapped for oat or almond milk—just keep it unsweetened.
- Don’t have fresh parsley? Dried works, or skip it altogether.
- No parmesan? Try a sprinkle of nutritional yeast for a vegan-friendly, cheesy flavor.
- If you’re out of eggs, substitute 3 tbsp plain Greek yogurt or a flaxseed egg.
- For garlic lovers, add an extra clove or two—no judgment here!
Trust me, you don’t need specialty ingredients for these Fluffy Pull-Apart Garlic Butter Rolls—just simple, good stuff that comes together for magic at the dinner table.
Equipment Needed
You won’t need a fancy bread machine or specialty gear for these garlic butter rolls. Here’s what I use every time:
- Large mixing bowl: For combining and kneading the dough. A stand mixer with a dough hook makes things easier, but you can totally mix by hand.
- Measuring cups and spoons: Accuracy helps keep those rolls light and fluffy!
- Whisk and wooden spoon: For mixing ingredients.
- 8×8 or 9×9 inch baking pan (20x20cm or 23x23cm): Square pans work best for pull-apart style. I’ve used round pans too—results are just as good.
- Pastry brush: For applying the garlic butter. In a pinch, use a clean spoon or even your fingers (been there, done that).
- Kitchen scale (optional): For precise flour measurements. I always get more consistent results this way.
- Clean kitchen towel or plastic wrap: For covering the dough during proofing.
- Baking sheet (optional): If you want more crusty edges, space the rolls out on a sheet.
If you don’t have a stand mixer, kneading by hand works perfectly (and honestly, it’s a good mini workout). For maintenance, I always oil my pans lightly to make cleaning easier. For budget-friendly options, Pyrex glass pans and OXO measuring sets are solid and last ages. You really don’t need anything fancy—just trusty kitchen basics and a little elbow grease.
Preparation Method
Ready to make the fluffiest, most irresistible garlic butter rolls you’ve ever tasted? Here’s how I do it—step by step, with all my best tips and tricks.
- Proof the yeast: Warm 1 cup (240ml) whole milk until just warm to the touch (about 110°F / 43°C—think a gentle bath, not hot). Pour into a large bowl and sprinkle 2 ¼ tsp (7g) active dry yeast and 2 tbsp (25g) sugar over the top. Let sit for 5-10 minutes until foamy. If it doesn’t foam, your yeast may be old—start over with fresh yeast.
- Mix the dough: Add 4 tbsp (56g) melted unsalted butter, 1 large egg (room temperature), and 1 tsp (5g) salt to the yeast mixture. Whisk to combine. Gradually stir in 3 ½ cups (420g) all-purpose flour. The dough should be soft and slightly sticky.
- Knead: Turn the dough onto a lightly floured surface. Knead for 8-10 minutes until smooth and elastic. If using a stand mixer, knead with the dough hook for 6-8 minutes. The dough should bounce back when poked and feel pillowy to the touch.
- First rise: Place the dough in a greased bowl, cover with a damp towel or plastic wrap. Let rise in a warm spot until doubled in size—about 45-60 minutes. If your kitchen is chilly, pop the bowl in a turned-off oven with the light on.
- Shape the rolls: Punch down the dough. Divide into 16 equal pieces (about 45g each, if you’re weighing). Shape each piece into a ball—don’t stress about perfection. Place balls snugly in your greased 8×8 or 9×9 inch pan (or arrange on a baking sheet for more crust).
- Second rise: Cover the pan and let the rolls rise again until puffed and touching—about 30-40 minutes. They should look soft and pillowy. If they spread a bit unevenly, don’t worry; they’ll bake up beautiful.
- Prepare garlic butter: Melt 6 tbsp (85g) unsalted butter. Stir in 4 minced garlic cloves, 2 tbsp chopped fresh parsley, and ½ tsp fine sea salt.
- Bake: Preheat oven to 350°F (175°C). Brush half the garlic butter over the tops of the rolls. Bake for 22-26 minutes, until golden brown and fluffy. The kitchen will smell amazing!
- Finish and serve: Brush the hot rolls with the remaining garlic butter, sprinkle with grated parmesan if you like, and a little extra parsley. Let cool for 10 minutes before pulling apart. They should be soft, steamy, and irresistible.
Preparation Notes:
- If your dough is too sticky, add flour 1 tbsp at a time. Too dry? Add a splash of warm milk.
- For perfect pull-apart texture, make sure the rolls are packed close but not squished.
- Watch for golden tops and check the bottoms for doneness; if they’re pale, bake a few minutes longer.
Personal Tip: I like to double the garlic butter and serve extra on the side for dipping. You can never have too much!
Cooking Tips & Techniques
Years of baking (and a few flops!) have taught me a thing or two about getting these Fluffy Pull-Apart Garlic Butter Rolls just right. Here’s what I’ve learned along the way:
- Don’t rush the rise: The dough needs time to get light and airy. If you’re short on time, use a warm oven (turned off) to speed things up.
- Measure flour accurately: Too much flour makes the rolls dense. I always spoon flour into my measuring cup and level it off—or better yet, use a kitchen scale.
- Watch the milk temperature: If it’s too hot, it can kill the yeast; too cold, and the dough won’t rise. I aim for “baby bath” warm.
- Use fresh yeast: Old yeast = sad, flat rolls. If your yeast doesn’t foam during proofing, toss it and start over (trust me, I learned the hard way).
- Shape gently: Over-handling the dough can make the rolls tough. I roll each ball loosely and let the oven do the magic.
- Brush with butter twice: Before baking and after. This makes the rolls extra soft and flavorful.
Common Mistakes to Avoid:
- Skipping the second rise—rolls won’t be fluffy.
- Overbaking—check the color and doneness with a gentle poke.
- Under-seasoning the garlic butter—don’t skimp on salt and garlic.
Multitasking Tips: While the dough rises, prep your garlic butter and set the table. I sometimes make a quick salad or soup to go with the rolls—makes dinner feel extra special.
Consistency Secret: I always bake a test batch before serving to guests. That way, I know my yeast is active, and I can adjust baking time for my oven’s quirks. If you get distracted and forget a step (been there!), just brush extra butter at the end. No one complains!
Variations & Adaptations
What I love about these Fluffy Pull-Apart Garlic Butter Rolls is how easy it is to tweak them for different tastes, seasons, and dietary needs. Here are a few ways to make them your own:
- Cheesy Pull-Apart Rolls: Sprinkle shredded mozzarella or cheddar between the dough balls before baking for a gooey, melty surprise. Add parmesan on top for extra flavor.
- Herbed Rolls: Mix fresh rosemary, thyme, or chives into the garlic butter. In summer, basil adds a bright pop; in winter, sage is cozy.
- Vegan & Dairy-Free: Swap in vegan butter and plant-based milk. Use a flaxseed egg (1 tbsp ground flax + 3 tbsp water) instead of the egg. No parmesan? Try nutritional yeast.
- Gluten-Free: Use a 1:1 gluten-free flour blend (I like Bob’s Red Mill). Results are slightly denser but still yummy.
- Spicy Garlic Rolls: Add a pinch of red pepper flakes to the garlic butter. My husband loves this kick!
- Whole Wheat: Substitute half the flour with whole wheat for a nutty flavor and extra fiber. Rolls will be a bit heartier but still soft.
I’ve tried swapping out parsley for cilantro in the garlic butter—surprisingly good, especially with chili alongside. The best part is experimenting and finding your favorite version. Don’t be afraid to play with flavors or adapt for allergies. These rolls are super forgiving!
Serving & Storage Suggestions
The best way to serve Fluffy Pull-Apart Garlic Butter Rolls? Fresh from the oven, warm, and with a little extra melted butter brushed on top. I like to pull them apart at the table—makes for a fun, interactive moment (especially with kids!).
- Presentation: Serve in the baking pan for rustic charm, or transfer to a bread basket lined with a cloth napkin. Sprinkle extra parsley and parmesan for a pretty finish.
- Pairings: These rolls are perfect alongside hearty soups, pasta dishes, or roasted meats. My favorite combo is with tomato basil soup or creamy chicken stew. For brunch, try with scrambled eggs and fruit.
Storage Instructions:
- Let leftovers cool completely, then wrap tightly in foil or store in an airtight container. They’ll keep fresh for 2-3 days at room temperature.
- For longer storage, freeze rolls in a zip-top bag for up to 1 month. Thaw at room temperature or microwave for 20 seconds.
- To reheat, wrap in foil and warm in a 350°F (175°C) oven for 10 minutes, or microwave individual rolls for 10-20 seconds. Brush with a little extra butter to refresh.
- Flavors develop overnight—garlic gets even richer, and rolls stay soft if stored well.
Honestly, if you’re lucky enough to have leftovers, they make great mini sandwich buns or a quick snack with cheese.
Nutritional Information & Benefits
Each Fluffy Pull-Apart Garlic Butter Roll is about 160 calories, with 5g fat, 24g carbs, and 4g protein. If you add parmesan or extra butter, bump those numbers up a bit.
Health Benefits:
- Made from scratch, so you control the ingredients—no weird additives or preservatives.
- Enriched with milk and egg for a boost of protein and calcium.
- Garlic is packed with antioxidants and may support your immune system.
- Use whole wheat flour to add fiber.
Dietary Considerations:
- Can be made dairy-free, egg-free, or gluten-free with simple swaps.
- Contains wheat, dairy, and eggs (allergens).
My personal wellness tip: Enjoy these in moderation, and pair with a veggie-heavy main for balance. Nothing beats homemade comfort food!
Conclusion
So, why try these Fluffy Pull-Apart Garlic Butter Rolls? Honestly, they’re the kind of recipe that transforms any meal into a cozy gathering—simple, delicious, and guaranteed to make people smile. The pull-apart style is perfect for sharing, and the buttery garlic flavor makes every bite irresistible.
Feel free to customize the recipe to fit your family’s tastes—add more garlic, swap the herbs, or make them gluten-free. That’s the beauty of homemade baking. These rolls have become a staple at my house because they’re just so easy and reliable. I hope they become a favorite for you too.
If you bake these, let me know! Drop a comment below, share your photos, or tag me with your own creative twists. There’s nothing better than seeing these rolls bring joy to another kitchen. Happy baking, friends—may your gatherings be cozy and your rolls always fluffy!
Frequently Asked Questions (FAQs)
Can I make Fluffy Pull-Apart Garlic Butter Rolls ahead of time?
Yes! You can shape the rolls and refrigerate overnight. Let them come to room temperature and rise before baking the next day.
What’s the best way to reheat these rolls?
Wrap them in foil and warm in a 350°F (175°C) oven for 10 minutes, or microwave individual rolls for 10-20 seconds.
Can I freeze the dough?
Absolutely. After shaping, freeze dough balls on a tray, then store in a bag. Thaw and let rise before baking.
What if I don’t have fresh garlic?
Jarred minced garlic or 1 tsp garlic powder works in a pinch. Fresh does taste better, though!
How do I make these vegan?
Use plant-based milk, vegan butter, and a flaxseed egg. Nutritional yeast adds a cheesy flavor if you skip parmesan.
Pin This Recipe!
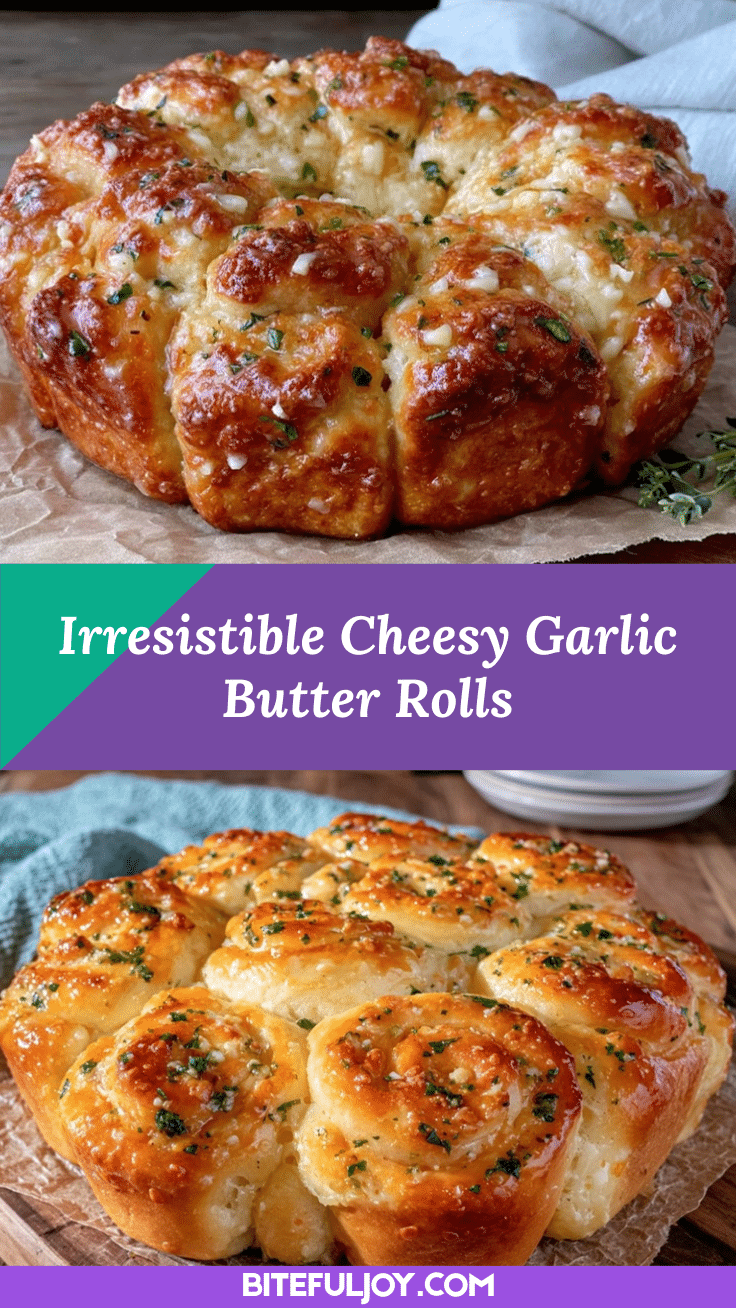
Fluffy Pull-Apart Garlic Butter Rolls
These soft, pillowy pull-apart rolls are infused with buttery garlic and baked to golden perfection. Perfect for cozy gatherings, potlucks, or weeknight dinners, they’re easy to make and guaranteed to be a crowd-pleaser.
- Prep Time: 25 minutes
- Cook Time: 25 minutes
- Total Time: 1 hour 45 minutes
- Yield: 16 rolls 1x
- Category: Bread
- Cuisine: American
Ingredients
- 3 1/2 cups all-purpose flour (420g)
- 1 cup whole milk, warm (240ml)
- 2 1/4 tsp active dry yeast (7g)
- 2 tbsp granulated sugar (25g)
- 4 tbsp unsalted butter, melted (56g)
- 1 tsp salt (5g)
- 1 large egg, room temperature
- 6 tbsp unsalted butter, melted (85g)
- 4 cloves fresh garlic, minced
- 2 tbsp fresh parsley, chopped (optional)
- 1/2 tsp fine sea salt
- Extra melted butter, for brushing
- Grated parmesan, optional, for topping
Instructions
- Warm the milk until just warm to the touch (about 110°F). Pour into a large bowl and sprinkle yeast and sugar over the top. Let sit for 5-10 minutes until foamy.
- Add melted butter, egg, and salt to the yeast mixture. Whisk to combine.
- Gradually stir in flour until the dough is soft and slightly sticky.
- Turn the dough onto a lightly floured surface and knead for 8-10 minutes until smooth and elastic (or 6-8 minutes with a stand mixer and dough hook).
- Place the dough in a greased bowl, cover, and let rise in a warm spot until doubled in size, about 45-60 minutes.
- Punch down the dough and divide into 16 equal pieces. Shape each piece into a ball and place snugly in a greased 8×8 or 9×9 inch pan.
- Cover and let the rolls rise again until puffed and touching, about 30-40 minutes.
- Prepare garlic butter by melting 6 tbsp butter and stirring in minced garlic, parsley, and sea salt.
- Preheat oven to 350°F (175°C). Brush half the garlic butter over the tops of the rolls.
- Bake for 22-26 minutes, until golden brown and fluffy.
- Brush hot rolls with remaining garlic butter, sprinkle with parmesan and extra parsley if desired.
- Let cool for 10 minutes before serving. Pull apart and enjoy!
Notes
For extra flavor, double the garlic butter and serve on the side for dipping. If dough is too sticky, add flour 1 tbsp at a time; if too dry, add a splash of warm milk. Rolls can be made vegan or gluten-free with simple swaps. For best results, use fresh yeast and measure flour accurately. Rolls can be shaped and refrigerated overnight before baking.
Nutrition
- Serving Size: 1 roll
- Calories: 160
- Sugar: 2
- Sodium: 180
- Fat: 5
- Saturated Fat: 3
- Carbohydrates: 24
- Fiber: 1
- Protein: 4
Keywords: garlic butter rolls, pull-apart bread, fluffy dinner rolls, easy bread recipe, cozy gatherings, homemade rolls, yeast rolls, comfort food


