Introduction
Let me tell you, the aroma of peppermint and vanilla wafting through my kitchen on a chilly December afternoon is pure magic. Picture this—a cloud-soft cake, bright red and snowy white, with streaks of peppermint cream running through every bite. The first time I made this festive peppermint poke cake, I was instantly hooked. I remember pausing after the first forkful, letting the cool minty sweetness melt across my tongue, and honestly, it was the kind of moment where you just stop and smile because you know you’ve stumbled onto something truly special.
This cake brings me right back to when I was knee-high to a grasshopper, helping my grandma stir bowls of batter while holiday music played in the background. She always said that peppermint makes everything taste like Christmas, and she wasn’t wrong. Years ago, I tried recreating her peppermint cake—let’s just say it took a few tries to get it right. But when I finally nailed this version, my family couldn’t stop sneaking slices off the cooling rack (and I can’t really blame them). There’s just something about the way the peppermint cream seeps into the cake, making it irresistibly moist and flavorful.
Honestly, this festive peppermint poke cake is dangerously easy and brings pure, nostalgic comfort. It’s perfect for potlucks, a sweet treat for your kids, or even to brighten up your Pinterest dessert board. I wish I’d had this recipe years ago—it would have saved a lot of last-minute holiday stress. After testing it more times than I care to admit (in the name of research, of course), it’s become a staple for family gatherings, gifting, and those moments when you want a dessert that feels like a warm hug. You’re going to want to bookmark this one.
Why You’ll Love This Festive Peppermint Poke Cake
If you’re looking for a holiday dessert that’s both showstopping and simple, you’re in the right place. I’ve baked dozens of poke cakes over the years, but this festive peppermint poke cake is my personal favorite. Here’s why:
- Quick & Easy: Comes together in under an hour, including cooling time. Perfect for busy holiday schedules and last-minute guests.
- Simple Ingredients: No need for fancy grocery runs. You probably have most of what you need—cake mix, pudding, peppermint extract, whipped topping—in your pantry right now.
- Perfect for Holiday Gatherings: Ideal for Christmas brunches, cookie swaps, or cozy dinners with friends and family.
- Crowd-Pleaser: Kids are obsessed with the fun poke cake design, and adults love the refreshing peppermint flavor. It’s always the first dessert to disappear!
- Unbelievably Delicious: The contrast of fluffy cake, creamy peppermint filling, and crunchy candy makes every slice next-level comfort food.
This isn’t just another poke cake recipe—it’s been tested (and taste-tested) by my family and friends for years. The trick is using a pudding-based filling spiked with peppermint extract, which soaks into the cake and gives it a super moist, almost tres leches vibe. Plus, the crushed peppermint candies on top add a festive crunch that you won’t find in most recipes.
Honestly, this cake isn’t just good—it’s the kind that makes you close your eyes after the first bite. Whether you’re trying to impress holiday guests without breaking a sweat or just want something special for your family, this festive peppermint poke cake is the answer. It’s comfort food with a holiday twist, healthier than traditional buttercream cakes, and so easy that you’ll wonder why you didn’t make it sooner.
What Ingredients You Will Need
This festive peppermint poke cake recipe uses simple, wholesome ingredients to deliver bold flavor and satisfying texture—without any fuss. Most are pantry staples, and a few can be swapped out to fit your needs. Here’s what you’ll need:
- For the Cake:
- 1 box white cake mix (about 15.25 oz / 432 g)
- 1 cup (240 ml) water
- 1/2 cup (120 ml) vegetable oil
- 3 large eggs (room temperature)
- 1 teaspoon vanilla extract
- 1/2 teaspoon peppermint extract (McCormick is my go-to for true mint flavor)
- Optional: Red gel food coloring (for a festive touch)
- For the Peppermint Pudding Filling:
- 1 box instant vanilla pudding mix (3.4 oz / 96 g)
- 2 cups (480 ml) cold milk (whole or 2% preferred)
- 1/2 teaspoon peppermint extract
- 2-3 drops red food coloring (for pink peppermint stripes, optional)
- For the Topping:
- 1 8-oz (226 g) tub whipped topping (Cool Whip, thawed)
- 1/2 cup (60 g) crushed peppermint candies or candy canes (use Bob’s for best crunch)
- 1/4 cup (40 g) mini chocolate chips (optional, for a chocolate-peppermint twist)
- Substitution & Sourcing Tips:
- Swap white cake mix for gluten-free if needed—Betty Crocker’s version works well.
- Use almond or oat milk for a dairy-free filling (pudding may set softer).
- Try natural food dyes if you want to avoid artificial coloring.
- Replace whipped topping with homemade whipped cream for a richer finish (just whip 1 cup cold heavy cream with 2 tablespoons powdered sugar).
- In a pinch, use peppermint extract sparingly—too much can be overpowering!
- For nut-free, skip the chocolate chips or check labels carefully.
Trust me, these simple ingredients come together for a dessert that tastes like you spent hours, but really, it’s mostly mixing, poking, and layering.
Equipment Needed

You don’t need a fancy kitchen to make this festive peppermint poke cake. Here’s what I use every time:
- 9×13-inch (23×33 cm) baking pan (glass pans work best for even baking)
- Electric mixer or whisk (hand mixer saves time, but a strong whisk and elbow grease do the trick)
- Large mixing bowls (at least two)
- Wooden spoon or spatula (for folding and scraping)
- Measuring cups and spoons (accuracy matters for the pudding)
- Drinking straw, wooden spoon handle, or chopstick (for poking holes in the cake)
- Plastic wrap or foil (for covering during chilling)
- Offset spatula or butter knife (for spreading whipped topping)
- Small zip bag and rolling pin (for crushing peppermint candies)
If you don’t have a 9×13 pan, two 8-inch (20 cm) round cake pans work—just reduce baking time slightly. I’ve used both metal and glass pans, but glass tends to keep the cake moister overnight. For specialty equipment, keep it simple. I’ve broken a few cheap spatulas over the years, so investing in a sturdy silicone one helps. For crushing candies, a zip bag and rolling pin do the job—no need for a food processor! If you’re on a tight budget, thrift store pans and hand whisks are just fine.
Preparation Method
- Prep the Oven & Pan: Preheat your oven to 350°F (175°C). Lightly grease a 9×13-inch baking pan with nonstick spray or butter. I always use parchment paper for easy removal, but honestly, it’s optional.
- Mix the Cake Batter: In a large bowl, combine 1 box of white cake mix, 1 cup water, 1/2 cup oil, and 3 eggs. Add 1 teaspoon vanilla and 1/2 teaspoon peppermint extract. If you want a red cake, add a few drops of red gel food coloring. Beat on medium speed (or whisk vigorously) for 2 minutes until smooth and light. The batter should be pale and slightly bubbly.
- Bake: Pour batter into the prepared pan. Bake for 28–32 minutes, or until a toothpick inserted in the center comes out clean. The top should be lightly golden, and you’ll smell peppermint in the air. Cool in the pan for 10 minutes, then transfer to a wire rack or leave in pan to cool completely (about 30 minutes).
- Poke the Cake: Once fully cooled, use the handle of a wooden spoon, drinking straw, or chopstick to poke holes all over the cake. Space them about 1 inch apart for best filling distribution. Don’t be shy—poke deep, all the way to the bottom! This is the secret for maximum peppermint flavor.
- Prepare the Peppermint Filling: In a medium bowl, whisk together 1 box vanilla pudding mix and 2 cups cold milk for 2 minutes (it’ll thicken quickly). Stir in 1/2 teaspoon peppermint extract and 2–3 drops red food coloring if you want a pink tint. The pudding should be glossy and pourable.
- Fill the Cake: Pour the pudding mixture slowly over the cake, making sure it seeps into every hole. Use a spatula to gently smooth the top. You’ll see streaks of color and pockets of peppermint filling—don’t worry if it looks messy, that’s part of the charm!
- Chill: Cover the cake with plastic wrap or foil and refrigerate for at least 2 hours (overnight is even better). This lets the pudding soak into the cake, making it ultra-moist.
- Add the Topping: After chilling, spread whipped topping evenly over the entire cake using an offset spatula or butter knife. Sprinkle with crushed peppermint candies and mini chocolate chips if you like. I usually add a few whole candy canes for decoration.
- Serve: Slice into squares and serve chilled. Each piece should reveal pretty pink and white stripes and crunchy peppermint bits.
Preparation Notes: If your pudding seems too thick, add a splash more milk. If you overbake the cake (we’ve all done it), drizzle a tablespoon or two of milk over the top before poking—this helps restore moisture. For extra efficiency, make the pudding while the cake is cooling. And always chill before serving—the flavors meld best when cold.
Cooking Tips & Techniques
I’ve learned a few hard lessons making peppermint poke cake over the years, so let me save you a headache or two:
- Don’t Overmix the Batter: Mix just until smooth. Overmixing can make the cake dense and tough.
- Poke Deep, Not Wide: Use a round tool (not a fork) for deep, clean holes. This lets the pudding soak in, not just pool on top.
- Chill, Chill, Chill: Seriously, don’t skip chilling! The pudding needs time to soak into the cake. I once served it warm (impatience!) and the filling just slid right out.
- Use Fresh Extracts: Old peppermint extract can taste bitter. Always check the expiration date—learned this the hard way one Christmas Eve.
- Multitasking: Make the pudding while the cake cools. Crush candies ahead of time and store in a zip bag so you’re ready for the topping.
- Consistent Slices: Chill the cake for at least two hours before slicing for neat squares.
- Troubleshooting: If your cake cracks, don’t worry! The pudding and topping cover everything. If you forget to poke enough holes, just poke a few extra before adding the pudding.
- Personal Fail: One year, I poured the pudding too fast and flooded the cake. Now I go slow, letting it drip into each hole for even soaking.
Honestly, the key to success is patience and not stressing about perfection. Even if things get a little messy, the flavor is always spot-on.
Variations & Adaptations
This festive peppermint poke cake is super flexible—here are a few ways you can make it your own:
- Gluten-Free Version: Use a gluten-free white cake mix. Betty Crocker or King Arthur Flour makes reliable options. The rest of the ingredients are naturally gluten-free.
- Dairy-Free Option: Swap regular milk for almond or oat milk in the pudding, and use a coconut-based whipped topping. The texture is a bit softer, but the flavor still shines.
- Chocolate Peppermint Poke Cake: Use chocolate cake mix instead of white and add chocolate pudding to the filling. Top with crushed peppermint and chocolate shavings for a decadent twist.
- Seasonal Berry Peppermint: Stir in fresh raspberries or strawberries to the pudding filling for spring and summer flair. It’s surprisingly refreshing!
- Allergen-Friendly: For nut allergies, make sure your candies and extracts are nut-free. For egg allergies, use an egg replacer in the cake mix (Bob’s Red Mill works well).
- Personal Favorite: I once swapped the whipped topping for a thick layer of cream cheese frosting and added a splash of peppermint extract—my family loved the tangy kick!
Don’t be afraid to experiment. The poke cake method is forgiving, and you can tailor it to fit nearly any dietary need or flavor craving.
Serving & Storage Suggestions
This festive peppermint poke cake is best served chilled, straight from the fridge. Cut it into neat squares for a Pinterest-worthy presentation—top each with extra crushed peppermint and a mini candy cane for maximum holiday cheer.
- Serving Temperature: Cold is best. If you want it a bit softer, let it sit at room temp for 10 minutes before serving.
- Presentation: Serve on a white platter or cake stand for that pop of red and white. Add some fresh mint leaves for a fancy touch (they look gorgeous next to the candy cane stripes).
- Complementary Dishes: This cake pairs perfectly with hot cocoa, peppermint mochas, or even a scoop of vanilla ice cream. It’s great alongside savory holiday brunch dishes like egg casseroles or ham.
- Storage: Cover leftovers tightly with foil or plastic wrap and refrigerate up to 5 days. The flavors actually develop more overnight, making day-two slices even tastier.
- Freezing: You can freeze the cake (without topping) for up to 2 months. Thaw overnight in the fridge, then add whipped topping and candies right before serving.
- Reheating: Not recommended—serve cold for best texture.
Honestly, this cake never lasts long enough in my house to worry about storage! If you do have extras, they make a wonderful holiday breakfast treat or a sweet midnight snack.
Nutritional Information & Benefits
Here’s a quick breakdown of the nutritional values (per slice, based on 16 servings):
- Calories: Approximately 220
- Protein: 3g
- Fat: 9g
- Carbohydrates: 32g
- Sugar: 22g
The festive peppermint poke cake is lighter than many traditional frosted cakes, thanks to the pudding-based filling and whipped topping. Peppermint extract not only provides that classic holiday taste but is also known for aiding digestion and freshening breath (bonus!). If you opt for gluten-free or dairy-free swaps, this dessert can fit most dietary needs. Just watch for possible allergens in the cake mix, pudding, and candy toppings. I love that I can indulge in a slice without feeling weighed down—plus, it’s a fun way to sneak a little holiday joy into your day!
Conclusion
So, why should you make this festive peppermint poke cake for your next holiday celebration? It’s simple, quick, and delivers all the holiday magic with minimal effort. The refreshing peppermint flavor, moist cake, and creamy pudding filling make every bite feel like Christmas morning. Plus, it’s easy to adapt for any dietary need or preference.
I love this recipe because it brings my family together—everyone gathers around for seconds, and there’s always a little friendly competition for the biggest slice. You can customize it with your favorite toppings or even make it ahead for stress-free entertaining.
Give it a try, share your results, and let me know how you made it your own. Drop a comment below, pin it to your holiday board, or tag me if you put your own twist on this cake. Wishing you sweet, peppermint-filled celebrations—this is one dessert you’ll want to keep in your holiday rotation!
Frequently Asked Questions
Can I make this festive peppermint poke cake ahead of time?
Absolutely! It actually tastes better after chilling overnight. Just add the whipped topping and crushed peppermint right before serving for best texture.
Can I use homemade cake batter instead of boxed mix?
Yes! Use your favorite homemade white cake recipe—just make sure it yields enough for a 9×13-inch pan. The poke method works with any moist cake base.
Is this cake gluten-free or dairy-free?
It can be! Swap in a gluten-free cake mix and use dairy-free milk and whipped topping. The texture changes a bit, but the flavor’s still fantastic.
How do I crush candy canes without making a mess?
Place candy canes in a zip-top bag and crush them with a rolling pin. Do it on a sturdy surface—you’ll get fine crumbs without sticky hands.
Can I freeze festive peppermint poke cake?
Yes, but freeze it without the topping. Thaw overnight in the fridge, then add whipped topping and candies before serving for best results.
Pin This Recipe!

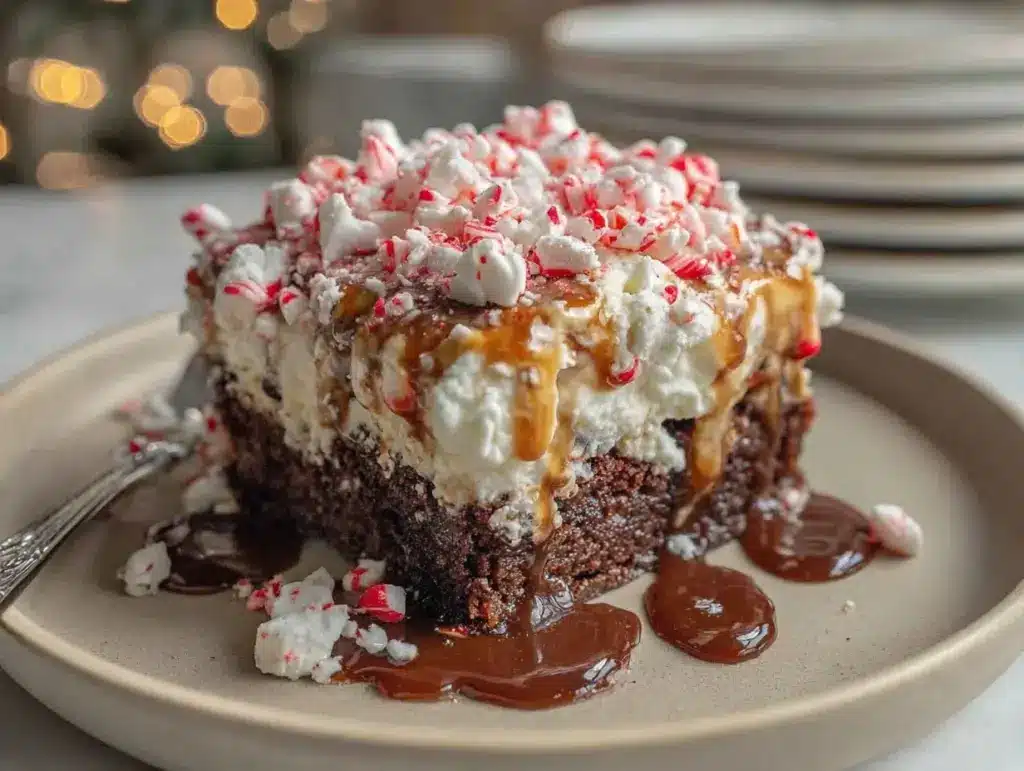
Festive Peppermint Poke Cake

This easy holiday dessert features a moist white cake infused with peppermint pudding, topped with whipped topping and crunchy peppermint candies. It’s a showstopping, crowd-pleasing treat perfect for Christmas gatherings and potlucks.
- Prep Time: 15 minutes
- Cook Time: 30 minutes
- Total Time: 2 hours 45 minutes
- Yield: 16 servings 1x
- Category: Dessert
- Cuisine: American
Ingredients
- 1 box white cake mix (about 15.25 oz)
- 1 cup water
- 1/2 cup vegetable oil
- 3 large eggs (room temperature)
- 1 teaspoon vanilla extract
- 1/2 teaspoon peppermint extract
- Red gel food coloring (optional)
- 1 box instant vanilla pudding mix (3.4 oz)
- 2 cups cold milk (whole or 2% preferred)
- 1/2 teaspoon peppermint extract
- 2–3 drops red food coloring (optional)
- 1 8-oz tub whipped topping (Cool Whip, thawed)
- 1/2 cup crushed peppermint candies or candy canes
- 1/4 cup mini chocolate chips (optional)
Instructions
- Preheat oven to 350°F (175°C). Lightly grease a 9×13-inch baking pan with nonstick spray or butter. Optional: line with parchment paper.
- In a large bowl, combine cake mix, water, oil, and eggs. Add vanilla and peppermint extracts. If desired, add red gel food coloring. Beat on medium speed or whisk for 2 minutes until smooth.
- Pour batter into prepared pan. Bake for 28–32 minutes, or until a toothpick inserted in the center comes out clean. Cool in pan for 10 minutes, then cool completely (about 30 minutes).
- Once cooled, use the handle of a wooden spoon, drinking straw, or chopstick to poke holes all over the cake, spaced about 1 inch apart.
- In a medium bowl, whisk together pudding mix and cold milk for 2 minutes until thickened. Stir in peppermint extract and red food coloring if desired.
- Pour pudding mixture slowly over the cake, ensuring it seeps into every hole. Smooth the top with a spatula.
- Cover cake with plastic wrap or foil and refrigerate for at least 2 hours (overnight is best).
- After chilling, spread whipped topping evenly over the cake. Sprinkle with crushed peppermint candies and mini chocolate chips if desired.
- Slice into squares and serve chilled.
Notes
For gluten-free, use a gluten-free cake mix. For dairy-free, use almond or oat milk and coconut-based whipped topping. Chill the cake thoroughly for best texture and flavor. If pudding is too thick, add a splash of milk. Make pudding while cake cools for efficiency. Cake can be frozen (without topping) for up to 2 months.
Nutrition
- Serving Size: 1 slice (1/16 of cak
- Calories: 220
- Sugar: 22
- Sodium: 270
- Fat: 9
- Saturated Fat: 3
- Carbohydrates: 32
- Protein: 3
Keywords: peppermint poke cake, holiday dessert, Christmas cake, easy cake recipe, festive cake, pudding cake, peppermint dessert, potluck dessert, kid-friendly cake