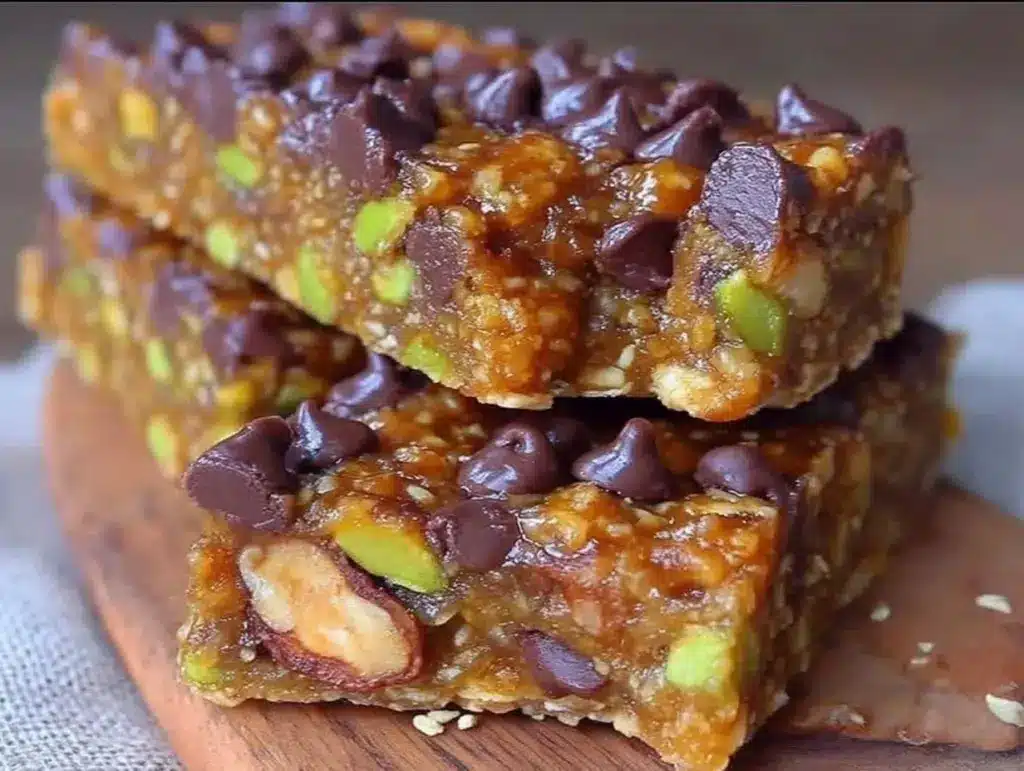
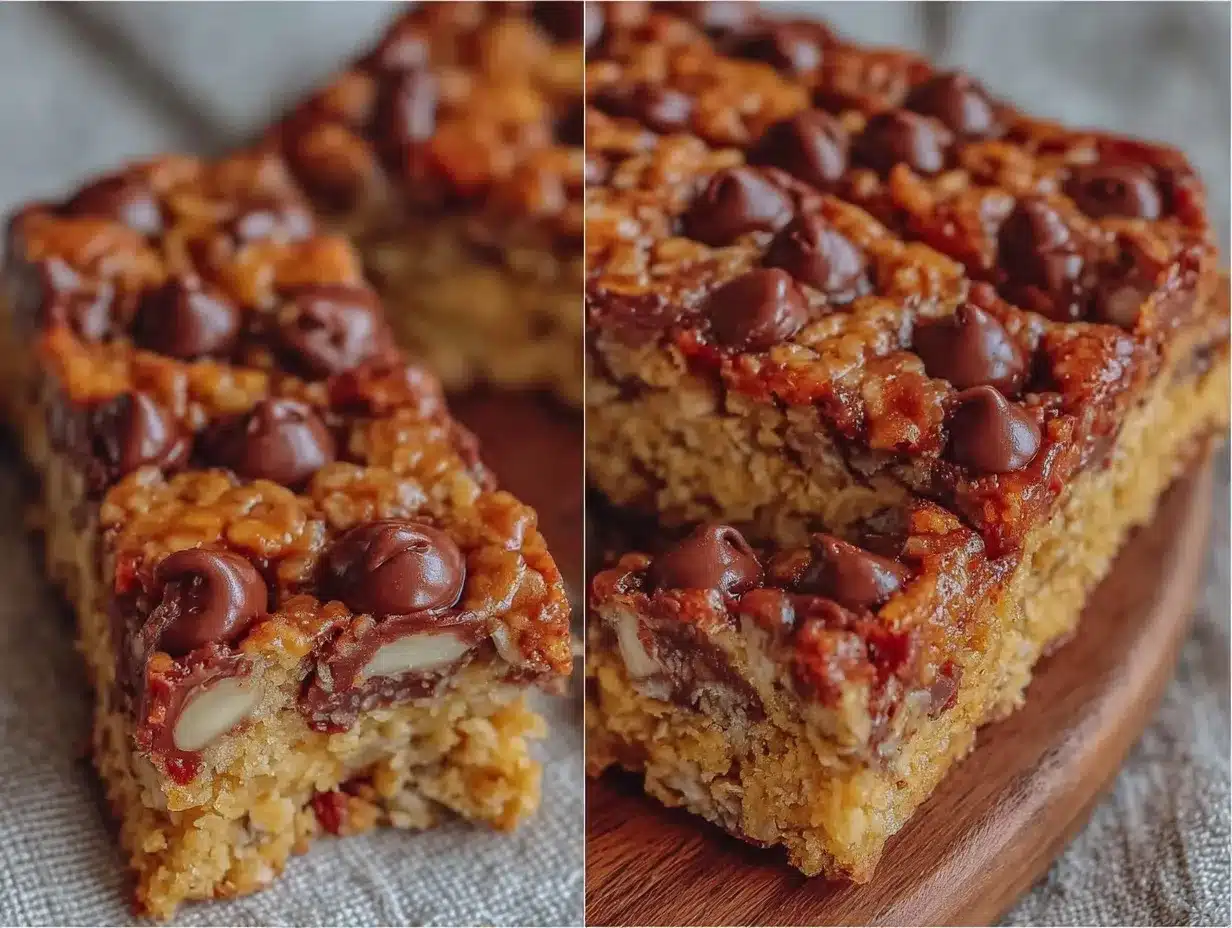
Three-time in a week and the texture still nails that chewy-but-not-too-sticky spot—honestly, I can’t explain why I kept tossing together these easy no-bake homemade granola bars with chocolate chips every single Friday afternoon. Maybe it’s the way the oats cling to the honey glaze just right or how those chocolate chips sneak into every bite without melting into a gooey mess. The kitchen smelled like toasted nuts and sweet vanilla for days, and I swear I caught myself daydreaming about the next batch before the current one even cooled completely.
It’s weird, this ritual of mixing, pressing, and chilling granola bars that takes less than 20 minutes but somehow turned into a small obsession. No baking meant no heat waves in the kitchen during the dog days of summer or the last thing I wanted after a long day. Plus, I didn’t have to wrestle with timers or ovens, which is a relief when you’re halfway through a “what’s for snack?” crisis. And those chocolate chips? They weren’t just an afterthought; they anchored the whole snack with a touch of indulgence without making it feel like dessert (though let’s be honest, they totally do).
The simplicity kept pulling me back—no complicated steps, no weird ingredients, just good, honest food that felt like a hug in bar form. I kept tweaking the ratios, swapping nuts, and even tried a dash of cinnamon that somehow made everything feel homier. The granola bars became a quiet companion for early morning hikes, mid-afternoon work slumps, and those “I should eat better” moments that somehow always end with chocolate chips.
So if you’re wondering why this recipe might stick the landing for you, it’s probably because it isn’t trying too hard. It’s the snack you make when practical meets a little bit of craving, wrapped in something you can hold in your hand. And honestly? That’s enough to keep me making these bars week after week, no fuss, just the way I like it.
Why You’ll Love This Recipe
After testing this recipe multiple times (okay, obsessively), I can vouch for why it stands out among the many granola bars out there. It’s one of those rare recipes that I feel confident sharing because it’s approachable yet reliably tasty every time.
- Quick & Easy: Under 20 minutes prep time—perfect for when you suddenly realize you need snacks for the week.
- Simple Ingredients: No fancy stuff required; pantry staples like rolled oats, honey, and chocolate chips do all the heavy lifting.
- Perfect for On-the-Go: Great for school lunches, work snacks, or a hiking trip—these bars travel well without crumbling into a mess.
- Crowd-Pleaser: My family and friends can’t get enough, and they’re always asking when the next batch is coming.
- Unbelievably Delicious: The chewiness from toasted oats combined with melty chocolate chips makes it feel a little indulgent but still wholesome.
What really makes these easy no-bake homemade granola bars with chocolate chips different? It’s the balance. The honey and nut butter bind everything smoothly without making the bars too sticky or brittle. Plus, the chocolate chips don’t just get lost; they hold their shape and add a burst of flavor exactly where you want it. I also experimented with a touch of vanilla extract, which gives the bars a warm, comforting aroma that’s hard to beat.
This recipe isn’t just a quick fix—it’s the kind of snack that makes you pause for a second and appreciate the simple things. It’s cozy, approachable, and honestly, a little addictive.
What Ingredients You Will Need
This recipe uses straightforward, wholesome ingredients to create a snack that’s both satisfying and easy to whip up. Most of these are pantry staples, so you probably have them on hand already. Plus, I’ve included some substitution tips if you want to tweak things.
- Rolled oats (2 cups / 180g) – Use old-fashioned oats for the best chewy texture; quick oats get too mushy.
- Nut butter (1 cup / 250g) – Creamy peanut butter works perfectly here, but almond or cashew butter add a nice twist.
- Honey (1/2 cup / 170g) – Acts as the natural sweetener and binder; if vegan, swap with maple syrup.
- Mini chocolate chips (3/4 cup / 130g) – I like semi-sweet for balance, but dark or milk chocolate works too.
- Vanilla extract (1 teaspoon) – Adds depth and warmth to the flavor.
- Salt (1/4 teaspoon) – Just a pinch to enhance all the flavors.
- Optional add-ins: chopped nuts (walnuts, pecans), seeds (chia, flax), or dried fruit (raisins, cranberries).
I recommend brands like Smucker’s peanut butter for smooth consistency and Enjoy Life for allergy-friendly chocolate chips. When choosing your oats, steer clear of instant varieties—they won’t give you the same satisfying bite. If you’re feeling adventurous, swapping out nut butters or including a handful of chopped nuts can elevate the texture and flavor without complicating the process.
Equipment Needed
- Mixing bowl – A large one to comfortably stir everything together.
- Rubber spatula or wooden spoon – For mixing without scratching bowls.
- 8×8-inch baking pan or similar size (about 20×20 cm) – For pressing the granola mixture into shape.
- Parchment paper – To line the pan and help lift out the bars easily.
- Measuring cups and spoons – For accuracy, especially important for sticky ingredients like honey and nut butter.
- Microwave-safe bowl or small saucepan – To gently warm the nut butter and honey.
If you don’t have a baking pan this size, any shallow dish with straight sides will do. I’ve pressed these bars into a glass Pyrex dish before and it worked just fine. Also, a silicone spatula is a great budget-friendly tool that makes scraping the bowl easier and keeps the mixture well combined. For cleanup, lining the pan with parchment paper is a lifesaver and prevents the bars from sticking.
Preparation Method
- Toast the oats (optional, 5-7 minutes): Preheat your oven to 350°F (175°C). Spread the rolled oats on a baking sheet and toast for about 5-7 minutes, stirring halfway through. This step brings out a nutty aroma and deepens the flavor, but if you’re short on time, you can skip it.
- Warm honey and nut butter (2-3 minutes): In a microwave-safe bowl, combine the honey and nut butter. Microwave in 30-second bursts, stirring in between, until smooth and pourable. Alternatively, use a small saucepan over low heat, stirring constantly to avoid scorching.
- Mix dry ingredients (2 minutes): In a large mixing bowl, combine the toasted oats (or plain oats), salt, and any optional add-ins you want to include.
- Combine wet and dry (1-2 minutes): Pour the warm honey and nut butter mixture over the oats. Add vanilla extract. Stir thoroughly with a spatula until the oats are evenly coated. This is where the magic happens—if the mixture feels too dry, add a teaspoon of honey or nut butter; too wet, add a bit more oats.
- Fold in chocolate chips (30 seconds): Let the mixture cool slightly so the chips don’t melt immediately, then gently fold them in to distribute evenly.
- Press into pan (3-5 minutes): Line your baking pan with parchment paper, leaving some overhang for easy removal. Transfer the mixture into the pan and press firmly with your hands or the back of a spatula to create an even layer. The firmer you press, the better the bars hold together.
- Chill (at least 1 hour): Place the pan in the fridge for at least one hour to set. This helps the bars firm up and makes cutting easier.
- Cut and store (5 minutes): Lift the granola slab out of the pan using the parchment paper. Use a sharp knife to slice into bars or squares. Store in an airtight container in the fridge for up to a week.
Some tips from my trial runs: Don’t skip pressing firmly; I’ve had crumbly batches when I was too gentle. Also, avoid adding chocolate chips while the mixture is hot unless you want melty swirls—cooling a bit keeps their shape perfect. And if your bars feel too sticky after chilling, pop them in the freezer for 10 minutes before slicing.
Cooking Tips & Techniques
Making perfect easy no-bake homemade granola bars with chocolate chips isn’t rocket science, but a few tricks make all the difference.
- Toasting oats: This adds depth, but be careful not to burn them. Keep an eye and stir halfway through.
- Warming nut butter and honey: Heat gently—too hot and the mixture becomes too runny, too cold and it won’t combine properly.
- Pressing the mixture: Use your palms flat or a spatula dipped in water to avoid sticking. I found that pressing in layers (press a bit, then press again after 5 minutes) helps compact the bars better.
- Chocolate chip timing: Wait until the mixture cools slightly to fold in chips or they’ll melt too much, altering texture and appearance.
- Storage: Keep the bars chilled to maintain firmness. They tend to soften at room temperature, especially in warm climates.
One rookie mistake I made was rushing the chilling time—cutting bars too soon left me with crumbly edges. Patience is key here. Also, mixing by hand rather than with a spoon gives better control over texture and ensures every oat gets coated.
Variations & Adaptations
These granola bars offer a great base to experiment with flavors and dietary tweaks. Here are some ideas I’ve played around with:
- Nut-free version: Swap nut butter with sunflower seed butter and ensure chocolate chips are nut-free certified.
- Seed-packed bars: Add a tablespoon each of chia seeds, flaxseeds, and pumpkin seeds for extra crunch and nutrition.
- Fruit twist: Mix in dried cranberries or chopped apricots for a chewy, tangy surprise.
- Spiced variation: Add 1/2 teaspoon cinnamon and a pinch of nutmeg for a warm, cozy flavor profile.
- Vegan option: Use maple syrup instead of honey and vegan-friendly chocolate chips.
I once swapped out the chocolate chips for cacao nibs, which added a bitter crunch that paired surprisingly well with the sweet honey. If you want to change up the texture, try mixing in puffed quinoa or crushed pretzels for an unexpected twist.
Serving & Storage Suggestions
These granola bars are best served chilled or at room temperature. I love packing them in my bag for a quick snack during hikes or keeping them handy for an afternoon energy boost at work. They pair nicely with a cup of tea like the Earl Grey tea cake or alongside a creamy drink like a latte.
To store, keep the bars in an airtight container in the refrigerator for up to one week. If you want to keep them longer, freeze them individually wrapped for up to three months. When ready to eat, thaw at room temperature or warm slightly in the microwave for 10 seconds for a soft, fresh-out-of-the-oven feel.
Over time, the flavors meld together more deeply, especially if you add spices or dried fruit. This makes the bars taste even better the next day, so making a batch ahead is a smart move.
Nutritional Information & Benefits
Each bar (assuming 12 bars per batch) roughly contains:
| Calories | ~180 kcal |
|---|---|
| Protein | 5g |
| Fat | 8g (mostly healthy fats) |
| Carbohydrates | 22g (includes 10g sugars) |
| Fiber | 3g |
Key ingredients like oats provide a good amount of fiber and slow-release energy, while nut butter adds healthy fats and protein for sustained fullness. Dark or semi-sweet chocolate chips offer antioxidants but keep sugar content moderate. This recipe is naturally gluten-free if you use certified gluten-free oats and can easily be adapted for vegan diets.
From a wellness standpoint, these bars strike a nice balance between wholesome and tasty—perfect for when you want a snack that feels a little indulgent but doesn’t derail your day.
Conclusion
These easy no-bake homemade granola bars with chocolate chips are more than just a quick snack; they’re a little project that keeps rewarding you bite after bite. They’re flexible enough to fit your pantry, your dietary needs, and your flavor cravings. Honestly, I love how they bring a bit of comfort without fuss, and the chocolate chips make every bar feel like a treat.
Try them as is or make them your own with different nuts, seeds, or spices. I’d love to hear how you customize this recipe or what your favorite add-ins are—sharing those little tweaks keeps this recipe alive and fresh.
So grab your mixing bowl, and let these granola bars become your new go-to snack, just like they did for me. Trust me, once you try them, you’ll understand why they became such a staple in my kitchen.
Frequently Asked Questions
Can I make these granola bars gluten-free?
Yes! Just make sure to use certified gluten-free rolled oats, as some oats can be cross-contaminated with gluten.
How long do these granola bars last?
Stored in an airtight container in the fridge, they keep well for up to one week. You can freeze them for longer storage.
Can I substitute the honey with something else?
Absolutely. Maple syrup works well as a vegan alternative, though it may make the bars a bit softer.
What can I use instead of chocolate chips?
Try cacao nibs for a less sweet crunch, dried fruit for chewiness, or chopped nuts for extra texture.
Is it necessary to toast the oats?
Not strictly, but toasting the oats adds a richer, nuttier flavor and a slightly better texture. You can skip this step if you’re in a hurry.
Pin This Recipe!
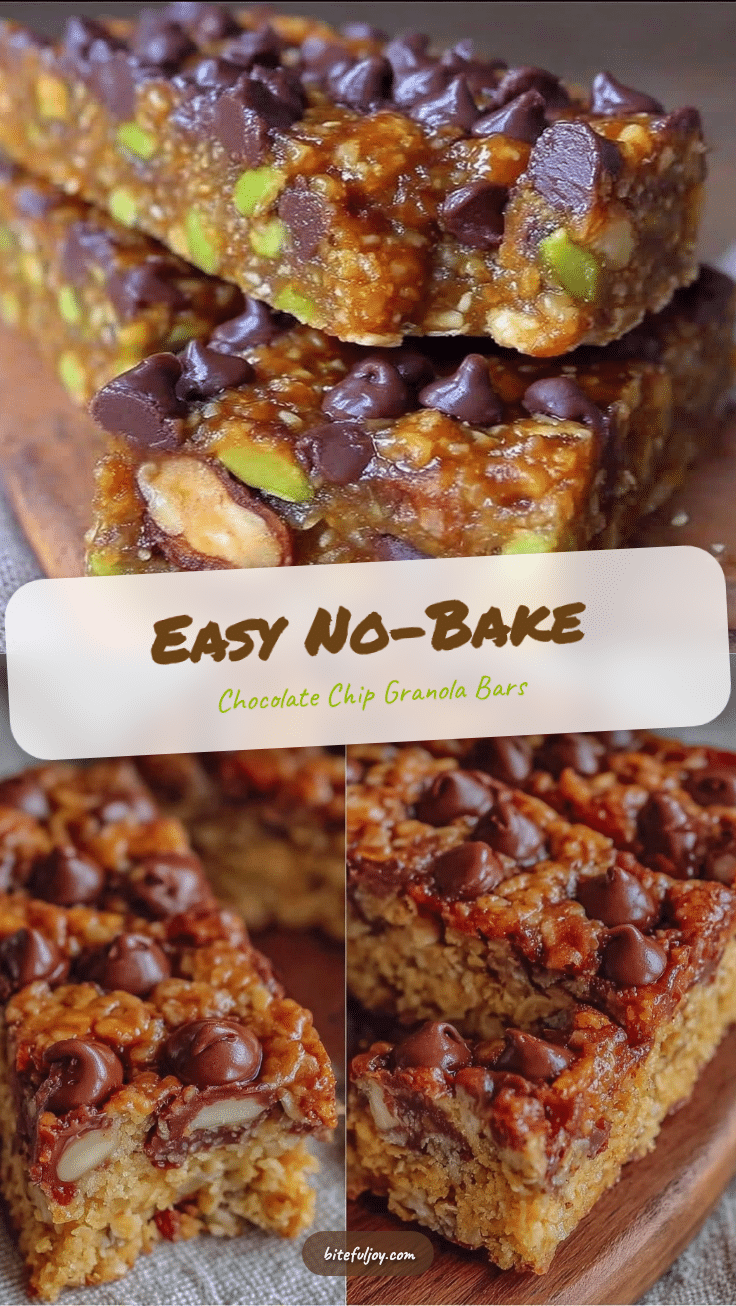
Easy No-Bake Homemade Granola Bars with Chocolate Chips

These easy no-bake granola bars combine chewy oats, nut butter, honey, and chocolate chips for a quick, delicious snack perfect for on-the-go or anytime cravings.
- Prep Time: 15 minutes
- Cook Time: 5-7 minutes (optional toasting)
- Total Time: 1 hour 20 minutes
- Yield: 12 bars 1x
- Category: Snack
- Cuisine: American
Ingredients
- 2 cups rolled oats (old-fashioned)
- 1 cup creamy peanut butter (or almond/cashew butter)
- 1/2 cup honey (or maple syrup for vegan option)
- 3/4 cup mini chocolate chips (semi-sweet, dark, or milk)
- 1 teaspoon vanilla extract
- 1/4 teaspoon salt
- Optional add-ins: chopped nuts (walnuts, pecans), seeds (chia, flax), dried fruit (raisins, cranberries)
Instructions
- Preheat oven to 350°F (175°C). Toast rolled oats on a baking sheet for 5-7 minutes, stirring halfway through (optional).
- In a microwave-safe bowl, gently warm honey and nut butter in 30-second bursts, stirring until smooth and pourable. Alternatively, warm in a small saucepan over low heat.
- In a large mixing bowl, combine toasted oats (or plain oats), salt, and any optional add-ins.
- Pour warm honey and nut butter mixture over oats. Add vanilla extract and stir thoroughly until oats are evenly coated. Adjust texture by adding more honey/nut butter if too dry or more oats if too wet.
- Let mixture cool slightly, then gently fold in chocolate chips to distribute evenly.
- Line an 8×8-inch baking pan with parchment paper, leaving overhang for easy removal. Transfer mixture into pan and press firmly with hands or spatula to create an even layer.
- Chill in the refrigerator for at least 1 hour to set.
- Lift granola slab out using parchment paper and cut into bars or squares. Store in an airtight container in the fridge for up to one week.
Notes
Press the mixture firmly into the pan to avoid crumbly bars. Fold in chocolate chips after the mixture cools slightly to prevent melting. Chill bars for at least one hour before cutting. Store bars chilled to maintain firmness; freeze for longer storage. Optional toasting of oats adds nuttier flavor but can be skipped.
Nutrition
- Serving Size: 1 bar (assuming 12 b
- Calories: 180
- Sugar: 10
- Fat: 8
- Carbohydrates: 22
- Fiber: 3
- Protein: 5
Keywords: no-bake granola bars, homemade granola bars, chocolate chip granola bars, easy snacks, healthy snacks, peanut butter granola bars, vegan granola bars option, gluten-free granola bars