“You’re in charge of the party drinks this weekend,” my friend texted me out of the blue. Honestly, I was halfway through a chaotic workday and the thought of mixing cocktails felt overwhelming. But then I remembered this fun little idea I’d been tinkering with — an easy DIY mocktail bar station that anyone could set up without breaking a sweat.
That evening, I pulled together a few simple ingredients from my pantry and fridge, slapped on some printable menu cards (which, let’s be honest, saved me from explaining every drink), and voilà — guests were mixing their own vibrant, refreshing drinks. The best part? Nobody missed the alcohol, and the mocktail bar became the unexpected hit. I hadn’t planned on it becoming my go-to party trick, but here we are, with me making it again and again.
There’s something delightfully casual yet special about setting up a mocktail bar station. It invites everyone to get a little creative, make their own perfect combo, and enjoy the moment without fuss. Plus, those printable menu cards? Game changers. They keep things organized, stylish, and approachable — even for folks who’d usually shy away from mixing drinks.
So, this recipe for an easy DIY mocktail bar station with printable menu cards stuck with me because it’s exactly that kind of simple magic: effortless, inviting, and totally adaptable for any occasion. If you’re looking for a way to impress without stress, this little setup might just be your new secret weapon.
Why You’ll Love This Recipe
This easy DIY mocktail bar station recipe has been tested countless times with friends and family — each time fine-tuned for maximum fun and minimal fuss. It’s the kind of idea that turns a regular get-together into a memorable celebration without hours of prep or complicated ingredients.
- Quick & Easy: You can have the entire station ready in under 30 minutes, perfect for those last-minute party plans or casual weekend hangouts.
- Simple Ingredients: No need to hunt down obscure mixers or syrups. This setup mostly uses pantry staples and fresh fruit you can grab anywhere.
- Perfect for Any Occasion: Whether it’s a baby shower, holiday brunch, or a summer backyard bash, this mocktail bar fits right in.
- Crowd-Pleaser: Everyone loves customizing their own drink, from kids to adults avoiding alcohol — it’s inclusive and fun.
- Unbelievably Delicious: The combination of fresh juices, sparkling water, and creative garnishes brings a fresh, vibrant flavor profile that feels festive and satisfying.
What really sets this recipe apart is the printable menu cards. They’re designed to be clear, cute, and easy to follow so guests feel confident mixing their own drinks. No one’s fumbling over complicated instructions or guessing ratios — it’s all right there. Honestly, they keep the vibe light and playful, which is exactly what a DIY mocktail bar should be.
For me, it’s not just about the drinks — it’s about creating a little corner of fun and connection at any party. Having guests talk over which mocktail to try next or swapping garnish ideas makes hosting feel less like work and more like sharing something special.
What Ingredients You Will Need
This DIY mocktail bar station uses simple, wholesome ingredients to deliver bold flavors and a satisfying variety without the fuss. Most of these are pantry staples or easy-to-find fresh items, making setup a breeze.
- Base liquids:
- Sparkling water or club soda (plain or flavored, chilled)
- Freshly squeezed citrus juices (lemon, lime, orange)
- Fruit juices (cranberry, pineapple, apple)
- Sweeteners:
- Simple syrup (homemade or store-bought; I like Monin for consistent sweetness)
- Honey or agave nectar (for a natural touch)
- Fresh fruits for garnish and muddling:
- Mint leaves (adds refreshing aroma and taste)
- Fresh berries (blueberries, raspberries, or strawberries)
- Citrus slices (lemons, limes, oranges)
- Cucumber slices (cool, crisp addition)
- Additional flavor enhancers:
- Fresh ginger slices (for a gentle kick)
- Herbs like basil or rosemary (for an aromatic twist)
- Bitters (optional, for complexity without alcohol)
- Ice:
- Crushed or cubed ice (keeps drinks chilled and refreshing)
Feel free to swap in seasonal fruits depending on the time of year — in summer, watermelon chunks or peach slices make great garnish options. For a gluten-free or vegan sweetener, agave nectar is my go-to, and coconut sugar simple syrup works nicely, too.
One tip: grab firm mint and bright citrus for the best flavor impact. The menu cards will guide everyone through simple combos like “Sparkling citrus splash” or “Minty berry fizz” so no one feels lost.
Equipment Needed
- Large trays or table space to set up your bar station
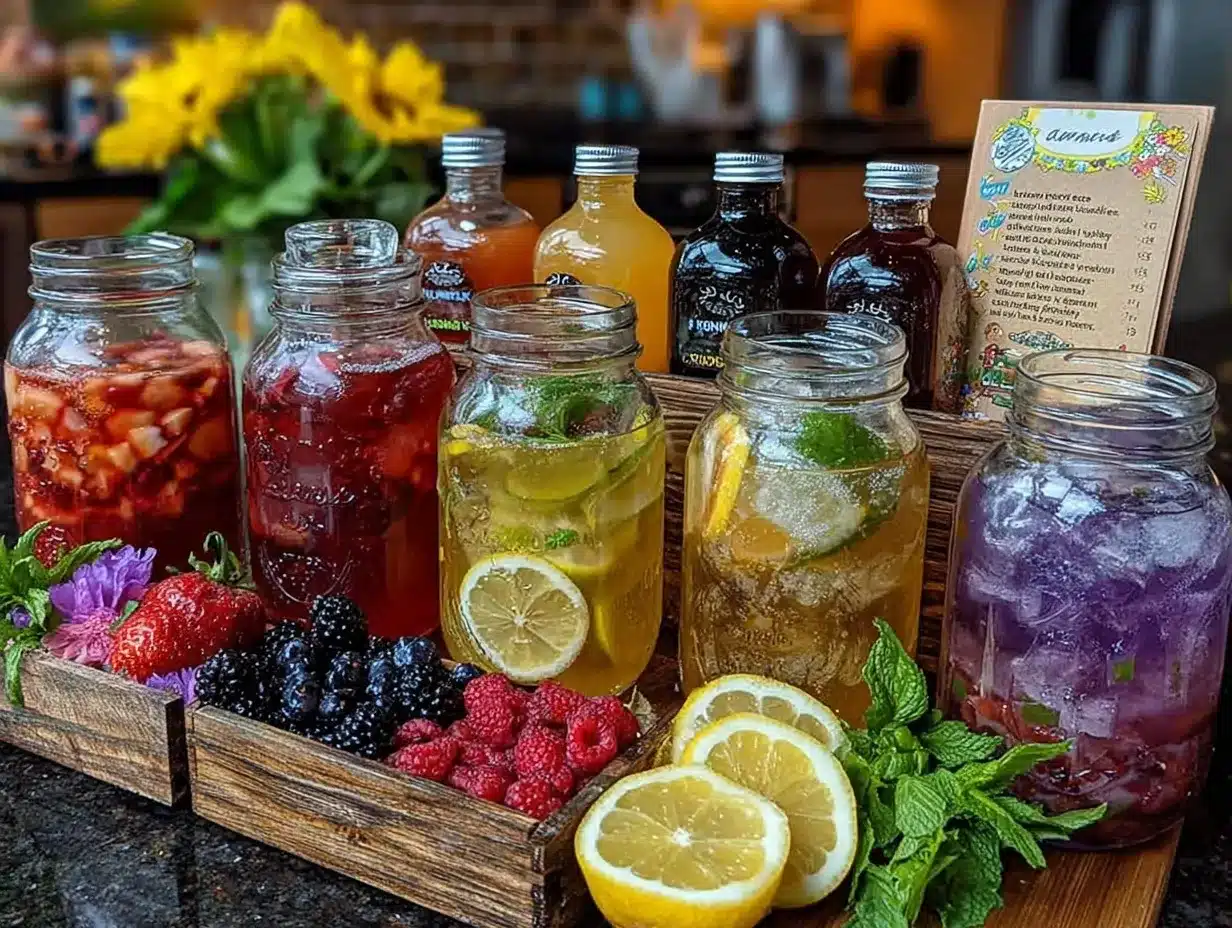
- Glass pitchers or dispensers to hold base liquids (sparkling water, juices)
- Small bowls or jars for garnishes (mint, berries, fruit slices)
- Muddler or wooden spoon (for crushing herbs and fruits)
- Measuring jiggers or small cups (helps with precise pouring)
- Stirring spoons or swizzle sticks
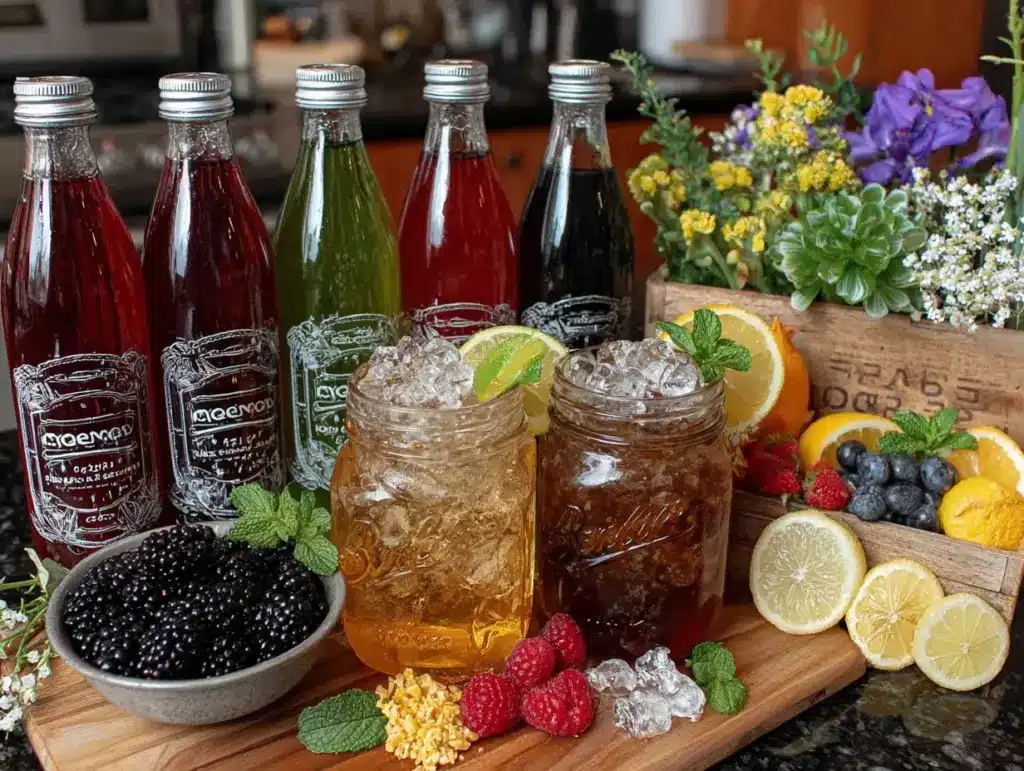
- Pretty glasses or mason jars with straws
- Printable menu cards (laminated if possible for spills)
Honestly, you don’t need fancy gear here. I’ve hosted with simple glass pitchers and even repurposed jam jars for garnishes — it adds charm. If you don’t have a muddler, a sturdy wooden spoon works just fine to release flavors from herbs and fruits.
For budget-friendly setups, thrift stores often have beautiful glassware that adds character without breaking the bank. And those printable menu cards? I recommend printing on cardstock and laminating them with clear sheets to keep them clean and reusable.
Preparation Method
- Prepare your base liquids: Pour chilled sparkling water or club soda into large pitchers. In separate pitchers, add freshly squeezed citrus juices and fruit juices. For example, combine 2 cups (480 ml) of sparkling water with 1 cup (240 ml) of lemon juice for a tangy base. Set pitchers on the station.
- Make simple syrup (if using): Combine equal parts sugar and water in a small saucepan (e.g., 1 cup/200 g sugar and 1 cup/240 ml water). Heat gently, stirring until sugar dissolves. Cool completely before adding to the bar station. This usually takes about 10 minutes, but you can make it ahead and keep it refrigerated.
- Prepare garnishes: Wash and slice fresh fruit (lemons, limes, oranges) into thin rounds. Rinse berries and mint leaves. Arrange these in small bowls or jars for easy access. Add cucumber slices and ginger slices if you like. This step takes roughly 10 minutes.
- Set up the station: Arrange pitchers, bowls of garnishes, simple syrup, and ice in a logical flow on a tray or table. Place the printable menu cards at eye level or next to the pitchers for clear guidance.
- Provide tools: Set out muddlers or spoons for guests to muddle fruits or herbs. Include measuring jiggers or small cups for precise pouring. Don’t forget stirring spoons or straws for mixing drinks.
- Explain the menu cards: The cards suggest combinations like “Citrus Mint Cooler” (sparkling water, lemon juice, mint, simple syrup) or “Berry Ginger Fizz” (sparkling water, cranberry juice, ginger, berries). This keeps guests confident and adventurous.
- Keep ice replenished: Have extra ice nearby to keep drinks chilled throughout the party.
- Enjoy the flow: Step back and watch guests experiment with flavors. Encourage mixing and matching while keeping things relaxed and fun.
One thing I learned the hard way: don’t overcrowd the station. Leave enough room so people can comfortably reach everything. Also, prepping juices fresh makes a noticeable difference in flavor — store-bought can work in a pinch, but fresh is always more vibrant.
Cooking Tips & Techniques
Here are some tricks I’ve picked up from hosting multiple DIY mocktail bars:
- Muddle lightly: When crushing mint or berries, press gently to release oils and juices without turning everything into a pulp. This keeps drinks visually appealing and fresh-tasting.
- Balance sweetness: Simple syrup is easy to overdo. Start with small amounts and let guests add more if needed. It’s easier to add than take away!
- Chill everything: Cold ingredients make a huge difference. I keep pitchers and glasses in the fridge before the party to avoid watery drinks from melting ice.
- Use clear labels: Menu cards with photos or descriptions help guests feel confident mixing their drinks. I’ve found that including a “base + garnish + sweetener” formula demystifies the process.
- Prep extras: Have extra garnishes and juice on hand. Some guests love experimenting, and running out mid-party can be a bummer.
- Multitask smartly: While guests mingle, keep an eye on ice and refill pitchers quietly. This keeps the station inviting without interrupting the flow.
One memorable mishap was forgetting to chill the simple syrup, which resulted in a lukewarm mess that dulled the flavors. Since then, I always make it ahead and refrigerate. Also, I recommend having a small trash bin nearby for used fruit and mint stems — keeps the area tidy.
Variations & Adaptations
This DIY mocktail bar station is incredibly flexible, letting you tailor it to different tastes and occasions:
- Dietary tweaks: Use agave nectar or maple syrup instead of simple syrup for a vegan-friendly option. Swap sparkling water for flavored seltzers to add excitement without extra sugar.
- Seasonal flavors: In fall or winter, add apple cider and cinnamon sticks. Summer is perfect for watermelon or peach slices to freshen things up.
- Flavor twists: Add a splash of coconut water or herbal teas brewed strong and chilled for a unique base. For a tropical vibe, pineapple juice with fresh mint is always a winner.
- Alcohol option: For adult guests who want a kick, keep a small selection of spirits on the side so they can spike their drinks if they wish.
- Personal favorite: I once set up a “Cucumber Basil Cooler” bar using cucumber slices from a light summer spread, fresh basil, lemon juice, and sparkling water. The herbaceous freshness was a total crowd-pleaser.
Serving & Storage Suggestions
Serve drinks chilled with plenty of ice in clear glasses or mason jars to show off the colorful garnishes. Adding fun straws or cocktail picks makes the drinks feel festive and special.
This mocktail bar station pairs wonderfully with light finger foods — you might find inspiration from the smoked salmon cucumber tea sandwiches or the creamy passion fruit mousse cups for a sweet finish.
If you have leftovers, store any unused juices and syrups in airtight containers in the fridge for up to 3 days. Garnishes like sliced fruit and herbs are best used fresh but can keep a day refrigerated wrapped tightly.
To reheat or refresh, give chilled pitchers a quick stir and add fresh ice before serving again. Over time, the flavors mellow a bit, so topping off with fresh citrus slices or mint can revive the drinks beautifully.
Nutritional Information & Benefits
Each mocktail is naturally low in calories, especially if you keep sweeteners minimal. For example, a typical serving made with sparkling water, fresh citrus juice, and a teaspoon of simple syrup clocks in around 50-70 calories (depending on how much syrup you use).
Key ingredients like fresh lemon and lime juice provide vitamin C and antioxidants. Mint and ginger add digestive benefits and refreshing flavor without extra calories or additives.
Because this recipe is alcohol-free, it’s suitable for all ages and those avoiding alcohol for health or personal reasons. The natural fruit juices and herbs make it a wholesome alternative to sugary sodas or heavy cocktails.
Personally, I appreciate that this mocktail bar supports mindful sipping without sacrificing flavor or fun — a balance that’s hard to beat.
Conclusion
Setting up an easy DIY mocktail bar station with printable menu cards is one of those simple hosting ideas that pays off big. It’s approachable, customizable, and invites everyone to feel like a mixologist without the stress.
Whether you’re throwing a casual brunch or a festive party, this mocktail bar makes the drink table a highlight — full of color, flavor, and smiles. I love how it brings people together around something fresh and fun, and how easy it is to adapt to any season or taste.
Give it a try and add your own twist! I’d love to hear which combinations become your favorites or how you style your station. The fun really starts when you make it your own.
Happy mixing!
FAQs
What is the easiest way to make simple syrup for the mocktail bar?
Combine equal parts sugar and water in a saucepan, heat gently while stirring until sugar dissolves, then cool completely. You can store it in the fridge for up to two weeks.
Can I prepare the mocktail bar station ahead of time?
Yes! Prep the syrups, juices, and garnishes a few hours before your party and keep them chilled. Set up the station about 15 minutes before guests arrive for freshness.
What if I don’t have a muddler? Can I still make the drinks?
Absolutely. A wooden spoon or the back of a sturdy spoon works well for gently crushing herbs and fruits to release their flavors.
How do I keep the sparkling water from going flat at the party?
Keep the sparkling water chilled and cover pitchers with a clean cloth or lid. Refill glasses with ice to maintain chill and carbonation as guests serve themselves.
Are there any kid-friendly mocktail options in this setup?
Definitely. Most of the mocktails are naturally kid-friendly since they’re alcohol-free. Just skip bitters or any optional alcohol additions, and offer lots of fruity, fun combinations for little ones.
Pin This Recipe!
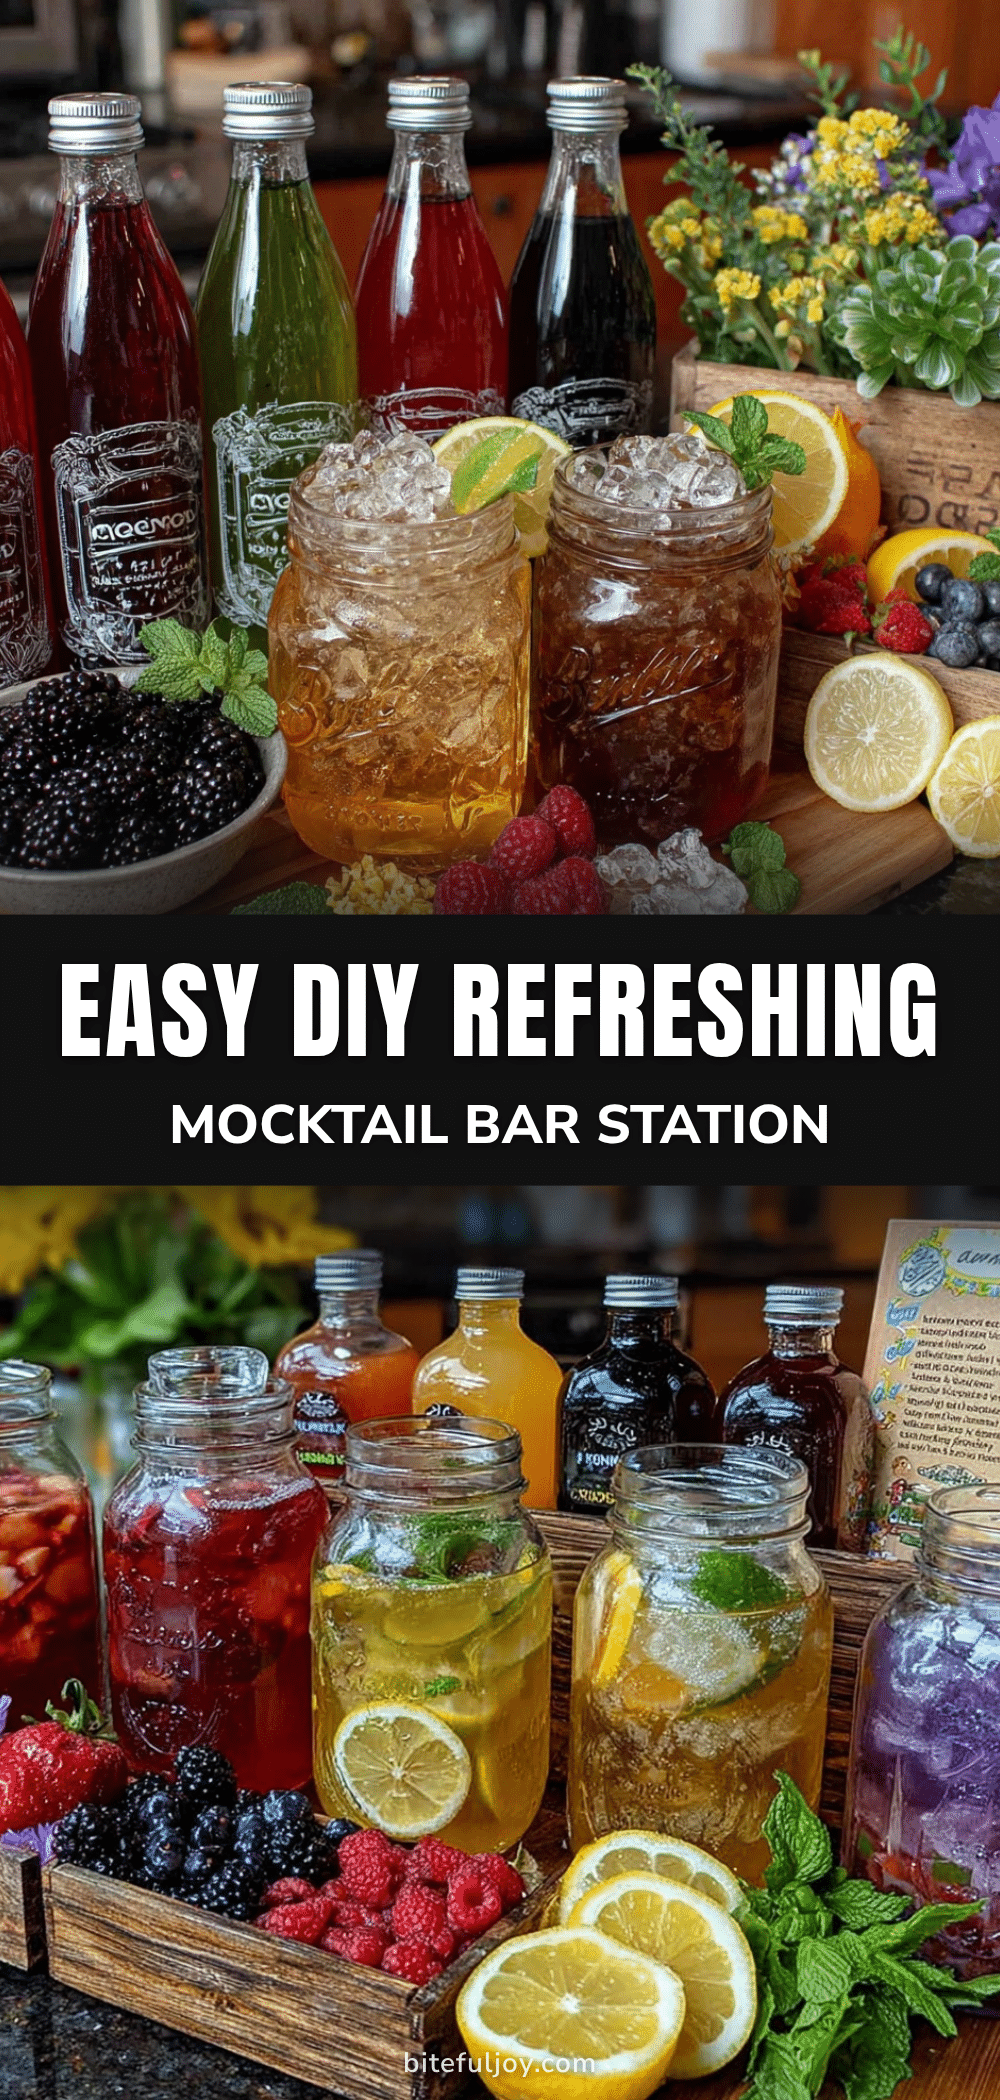
Easy DIY Mocktail Bar Station with Printable Menu Cards for Perfect Parties

An effortless and inviting DIY mocktail bar station setup that allows guests to mix their own refreshing, alcohol-free drinks using simple ingredients and printable menu cards.
- Prep Time: 20 minutes
- Cook Time: 10 minutes
- Total Time: 30 minutes
- Yield: Varies (serves multiple guests)
- Category: Beverage
- Cuisine: American
Ingredients
- Sparkling water or club soda (plain or flavored, chilled)
- Freshly squeezed citrus juices (lemon, lime, orange)
- Fruit juices (cranberry, pineapple, apple)
- Simple syrup (homemade or store-bought)
- Honey or agave nectar
- Mint leaves
- Fresh berries (blueberries, raspberries, or strawberries)
- Citrus slices (lemons, limes, oranges)
- Cucumber slices
- Fresh ginger slices
- Herbs like basil or rosemary
- Bitters (optional)
- Crushed or cubed ice
Instructions
- Pour chilled sparkling water or club soda into large pitchers. In separate pitchers, add freshly squeezed citrus juices and fruit juices. For example, combine 2 cups (480 ml) of sparkling water with 1 cup (240 ml) of lemon juice for a tangy base. Set pitchers on the station.
- Make simple syrup by combining equal parts sugar and water in a small saucepan (e.g., 1 cup sugar and 1 cup water). Heat gently, stirring until sugar dissolves. Cool completely before adding to the bar station.
- Wash and slice fresh fruit (lemons, limes, oranges) into thin rounds. Rinse berries and mint leaves. Arrange these in small bowls or jars for easy access. Add cucumber slices and ginger slices if desired.
- Arrange pitchers, bowls of garnishes, simple syrup, and ice on a tray or table in a logical flow. Place printable menu cards at eye level or next to the pitchers for clear guidance.
- Set out muddlers or spoons for guests to muddle fruits or herbs. Include measuring jiggers or small cups for precise pouring. Provide stirring spoons or straws for mixing drinks.
- Explain the menu cards which suggest combinations like “Citrus Mint Cooler” or “Berry Ginger Fizz” to keep guests confident and adventurous.
- Keep extra ice nearby to keep drinks chilled throughout the party.
- Encourage guests to experiment with flavors while keeping the atmosphere relaxed and fun.
Notes
[‘Muddle lightly to release flavors without turning ingredients into pulp.’, ‘Start with small amounts of simple syrup to balance sweetness.’, ‘Keep all ingredients chilled to avoid watery drinks.’, ‘Use clear, laminated menu cards to guide guests.’, ‘Have extra garnishes and juices on hand to replenish during the party.’, ‘Avoid overcrowding the station for easy access.’, ‘Prepare simple syrup ahead and refrigerate.’, ‘Use a wooden spoon if a muddler is not available.’, ‘Keep sparkling water covered and chilled to maintain carbonation.’]
Nutrition
- Serving Size: Approximately 8 oz (
- Calories: 5070
- Sugar: 1216
- Sodium: 1020
- Carbohydrates: 1318
- Fiber: 0.51
Keywords: mocktail, DIY mocktail bar, party drinks, alcohol-free drinks, easy mocktails, party ideas, refreshing drinks, non-alcoholic beverages


