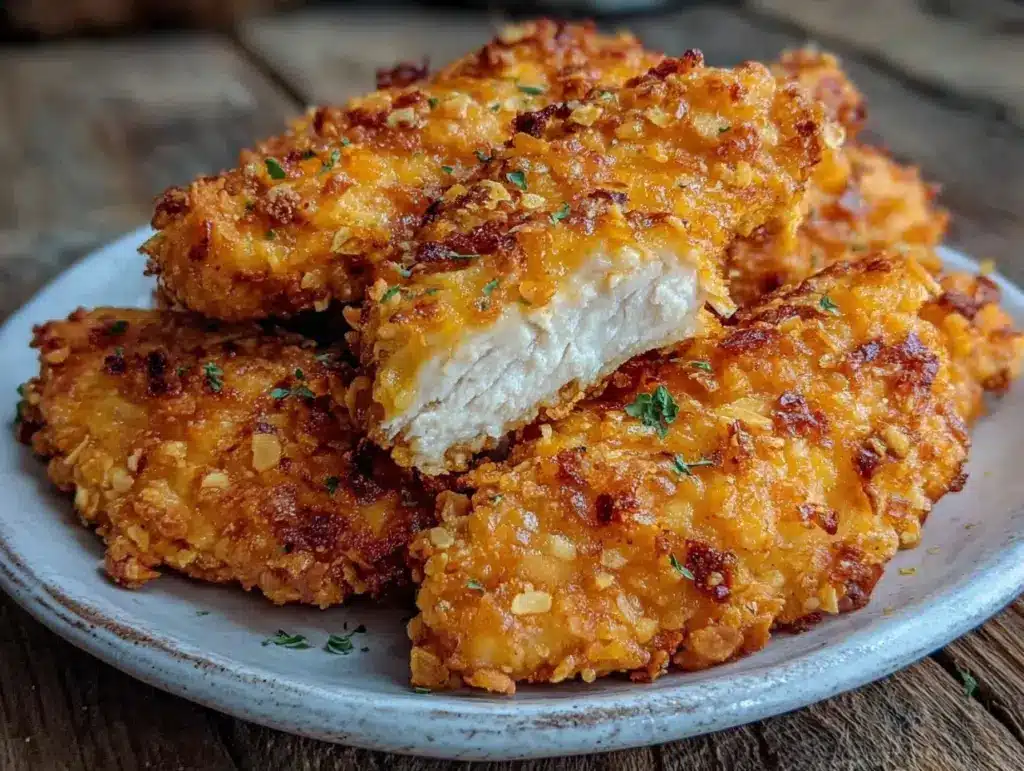
“Are you seriously telling me those are baked and not fried?” — and that was it. My sister’s disbelief hit me harder than the crunch of those chicken tenders fresh out of the oven. I’d just pulled off a batch of crispy oven-baked chicken tenders without frying, and honestly, I wasn’t sure if she’d believe me either. You know how fried chicken usually has that golden, irresistible crust that seems impossible to mimic without a deep fryer? Well, this recipe quietly breaks the rules. It’s that rare kind of dish that makes you pause, close your eyes for a second after the first bite, and wonder how you ever settled for soggy or greasy before.
That night, the kitchen smelled like a cozy diner—warm spices mingling with a hint of garlic and a whisper of smoked paprika. The sound of the oven timer ticking down was almost like a countdown to a small victory. I remember thinking, “If I can get this right, it’s a game changer,” especially since my go-to for crispy chicken tenders involved a lot of oil and messy clean-up. I’ve tried a dozen recipes, tweaking this and adjusting that, but this one nailed it. The outside is perfectly crunchy, while the inside stays juicy and tender—no frying mess, no greasy fingers, and no compromises.
It stuck with me because it’s just so straightforward and reliable. Whether it’s a quick weeknight dinner or a last-minute snack for friends dropping by, this recipe hits the spot without any fuss. Plus, no guilt about the frying part. Just crispy, crunchy, golden chicken tenders that you can feel good about serving. Honestly, this recipe isn’t about fancy tricks; it’s about good food made easy, with a little love and patience in the oven. That’s why I keep coming back to it—even when I’m tempted by my usual fried favorites. And now, I’m passing it on to you, with all the little tips I learned along the way.
Why You’ll Love This Recipe
After testing countless versions of oven-baked chicken tenders, I can say this one stands out because it’s practical, tasty, and just plain satisfying. Here’s why this recipe has earned a spot in my regular cooking rotation:
- Quick & Easy: This recipe comes together in under 30 minutes, making it perfect for busy weeknights or those times when you need to whip something up fast without compromising flavor.
- Simple Ingredients: You won’t need any fancy or hard-to-find items. Most of the ingredients are pantry staples you likely already have, so no last-minute grocery runs.
- Perfect for Any Occasion: Whether you’re hosting a casual get-together or looking for a cozy dinner, these tenders fit right in. They’re also great for kids’ lunches or snack time.
- Crowd-Pleaser: This recipe always gets raving reviews, from picky eaters to adults craving that satisfying crunch without the guilt of frying.
- Unbelievably Delicious: The breading is seasoned just right, with a crispy texture that locks in juicy, tender chicken every time.
What really sets this recipe apart is the coating technique. Instead of just tossing the chicken in breadcrumbs, I use a double-dip method with buttermilk (or a tangy yogurt substitute) that keeps the crust thick and crunchy without drying out the meat. Plus, the seasoning blend is balanced with a hint of smoked paprika and garlic powder—just enough to give it character without overwhelming the chicken’s natural flavor.
This isn’t just another oven-baked chicken tender recipe. It’s the one that makes you forget frying ever existed, honestly. From the first crunch to the last bite, it’s comfort food with a lighter spin, perfect for impressing guests or satisfying your own cravings without the mess or guilt.
What Ingredients You Will Need
This recipe uses simple, wholesome ingredients to deliver bold flavor and satisfying texture without the fuss. Here’s the rundown of what you’ll need, grouped for clarity:
- For the Chicken:
- 1.5 pounds (680 grams) chicken tenders, trimmed
- 1 cup (240 ml) buttermilk or plain Greek yogurt (adds tang and moisture)
- For the Coating:
- 1 1/2 cups (150 grams) panko breadcrumbs (I recommend Kikkoman for best crunch)
- 1/2 cup (60 grams) all-purpose flour
- 1 teaspoon garlic powder
- 1 teaspoon smoked paprika (gives a subtle smoky depth)
- 1/2 teaspoon onion powder
- 1/2 teaspoon salt (adjust to taste)
- 1/4 teaspoon black pepper
- Optional: 1/4 teaspoon cayenne pepper for a little kick
- Finishing Touch:
- Cooking spray or a light drizzle of olive oil (helps the crust crisp up beautifully)
If you’re short on buttermilk, no worries—you can mix 1 cup of milk with 1 tablespoon of lemon juice or vinegar and let it sit for 5 minutes before using. For a dairy-free version, coconut yogurt works surprisingly well, though the flavor will be a bit different but still delicious.
Seasoning-wise, feel free to swap the smoked paprika for regular paprika or even a pinch of chili powder if you want to tweak the flavor. The panko breadcrumbs are key here because they give that light, airy crunch that regular breadcrumbs just can’t match. If you want a gluten-free option, almond flour or gluten-free panko breadcrumbs work great too.
Equipment Needed
Making crispy oven-baked chicken tenders doesn’t require a fancy kitchen setup—just a few tools you probably already have. Here’s what you’ll need:
- Baking sheet (a rimmed one works best to catch any drips)
- Wire rack that fits inside the baking sheet (this helps the heat circulate around the tenders for even crisping)
- Mixing bowls (at least two—one for the wet ingredients and one for the dry coating)
- Tongs or fork (for dipping and flipping the tenders)
- Measuring cups and spoons
- Optional: Pastry brush or spray bottle for oil application (makes sure you get an even coating without drenching the tenders)
I’ve tried baking tenders directly on parchment paper too, but the wire rack method gives a better crunch since the heat can reach all sides evenly. If you don’t have a wire rack, flipping halfway through baking helps, but it’s trickier to get consistent crispiness.
For budget-friendly kitchens, disposable aluminum trays and racks can substitute in a pinch, though they’re not as sturdy or eco-friendly. Just keep an eye on the baking time, as thin trays can heat faster.
Preparation Method
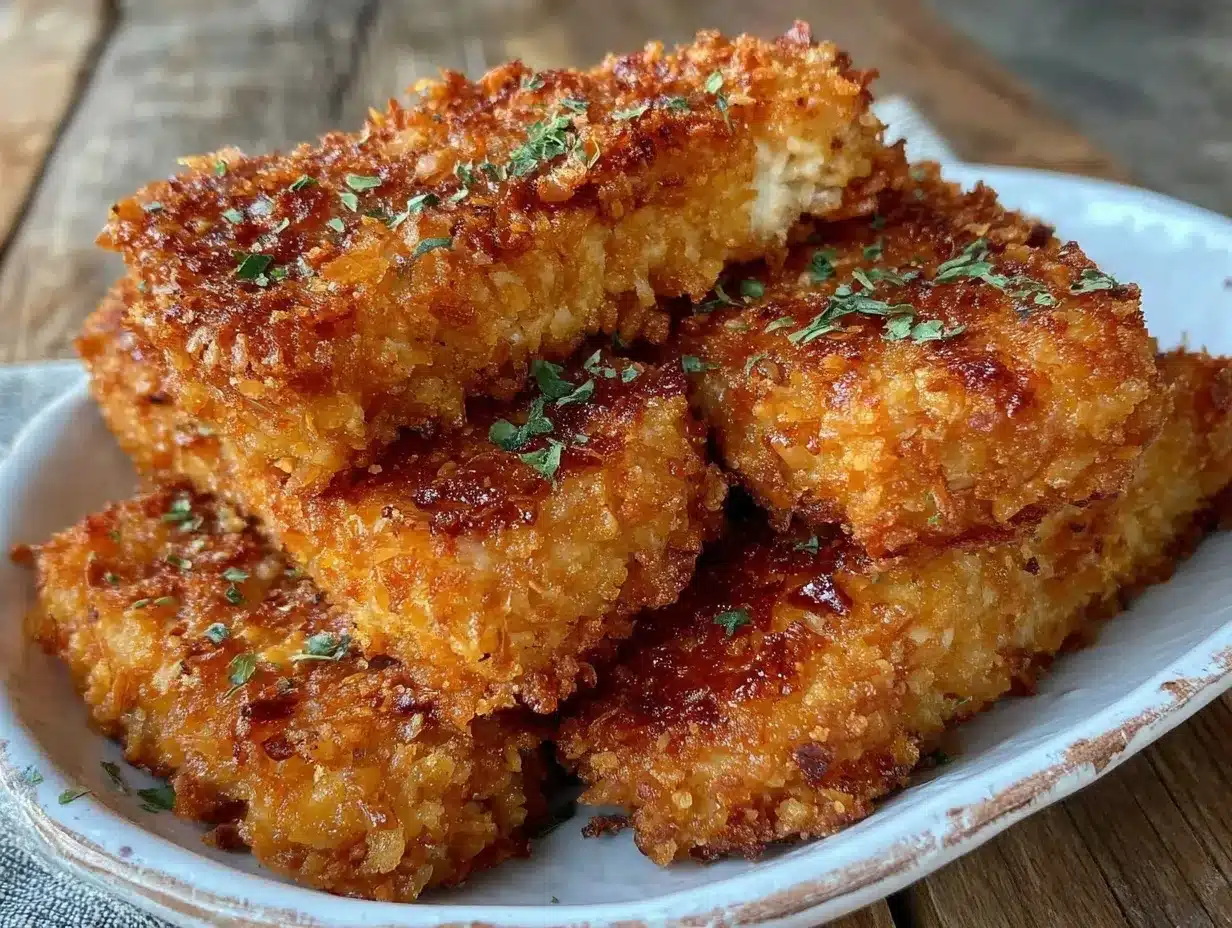
- Preheat your oven: Set it to 425°F (220°C). This high heat is key for that crispy crust without frying. Line your baking sheet with foil for easy cleanup, then place a wire rack on top.
- Prepare the chicken: Pat the chicken tenders dry with paper towels to help the coating stick better. Then, place them in a bowl with the buttermilk or Greek yogurt and stir gently to coat. Let them marinate for at least 10 minutes (up to 30 minutes if you have time) to tenderize and add moisture.
- Mix your dry coating: In a separate bowl, combine the panko breadcrumbs, flour, garlic powder, smoked paprika, onion powder, salt, pepper, and cayenne if using. Stir well to distribute the spices evenly.
- Coat the tenders: Remove each tender from the buttermilk, letting excess drip off. Press it firmly into the breadcrumb mixture, coating all sides. For extra crunch, you can double-dip by placing the coated tender back into the wet mixture and then into the dry again. Arrange the coated tenders on the wire rack, spacing them so they don’t touch.
- Final touch before baking: Lightly spray or brush the tenders with cooking spray or olive oil. This little step helps them get that restaurant-style golden crisp. Bake for 15-20 minutes, flipping halfway through, until they’re golden brown and cooked through (internal temp of 165°F or 74°C). The smell alone is worth the wait!
Pro Tip: If you notice the tenders browning too fast, lower the oven temperature by 10-15 degrees and bake a bit longer to avoid burning the crust while keeping the inside juicy.
Cooking Tips & Techniques
Getting that perfect crispy texture without frying can feel like a bit of a balancing act, but here’s what I’ve learned from trial and error:
- Don’t skip the wire rack: It’s a game changer. Baking directly on a sheet can make the tenders soggy on the bottom. The rack lets hot air circulate all around, keeping every bite crispy.
- Pat your chicken dry: Moisture is the enemy of crispness. Too wet, and the coating slides right off or gets soggy during baking.
- Use panko breadcrumbs: They create a lighter, crunchier crust compared to regular breadcrumbs. Plus, the bigger flakes brown beautifully.
- Double-dipping: It might sound extra, but dipping the tenders twice in the wet and dry mixtures builds a thicker crust that stays crunchy after baking.
- Oil application: Spraying or brushing the tenders with oil before baking gives that golden color and crackly crust, without needing a deep fryer.
- Temperature matters: Bake at 425°F (220°C) for that crisp without drying the chicken out. Lower temps lead to less crunch, higher temps risk burning.
One time, I forgot to flip the tenders halfway through baking, and the bottoms were soft and a little soggy—lesson learned. Flipping ensures even browning. Also, letting the tenders rest a few minutes after baking helps the juices redistribute, keeping them juicy inside.
Variations & Adaptations
This crispy oven-baked chicken tenders recipe is pretty flexible, so you can tailor it to different tastes and dietary needs:
- Spicy Variation: Add extra cayenne pepper or toss the finished tenders in buffalo sauce for a spicy kick that’s perfect with a cooling ranch dip.
- Gluten-Free: Swap the all-purpose flour and panko for almond flour or gluten-free breadcrumbs. The texture changes slightly but still comes out crispy and delicious.
- Herb-Infused: Mix dried Italian herbs or fresh chopped rosemary and thyme into the breadcrumb mixture for a fragrant, savory twist.
- Baking Method Swap: If you want a little more hands-off cooking, try air frying the tenders at 400°F (200°C) for 10-12 minutes, flipping halfway. The crisp is on point!
- Personal Favorite: I once tried swapping buttermilk with a mix of Greek yogurt and a splash of lemon juice for a tangier flavor. It added a slight zing and kept the chicken super tender.
Serving & Storage Suggestions
These crispy oven-baked chicken tenders are best served hot and fresh out of the oven, but they hold up well for leftovers too. Here’s how I like to serve and store them:
- Serving: Pair with classic dipping sauces like honey mustard, barbecue, or a simple garlic aioli. For a fun twist, try serving alongside a crisp slaw or warm baked fries.
- Presentation: Arrange tenders on a platter with lemon wedges and fresh herbs for a simple but inviting look. They’re also great tucked into wraps or sandwiches for a quick lunch.
- Storage: Store leftover tenders in an airtight container in the refrigerator for up to 3 days.
- Reheating: To keep the crunch, reheat in a 375°F (190°C) oven on a wire rack for 8-10 minutes rather than microwaving, which can make them soggy.
- Flavor Development: The seasoning melds a bit more after a day, so leftovers can taste even better the next day—just don’t forget to re-crisp!
If you’re looking to round out your meal, these tenders go great with a fresh side like watermelon feta mint salad or crispy baked potatoes for a satisfying, balanced plate.
Nutritional Information & Benefits
Here’s a rough nutritional breakdown per serving (about 4 tenders):
| Nutrient | Amount |
|---|---|
| Calories | 280-320 |
| Protein | 30g |
| Fat | 8-10g (mostly from olive oil) |
| Carbohydrates | 15-18g |
| Fiber | 1-2g |
| Sodium | 400-450mg (adjust salt to taste) |
Chicken tenders are a great source of lean protein, essential for muscle repair and energy. Using olive oil instead of frying oil keeps the fat content healthier, with beneficial monounsaturated fats. The spices add antioxidants, while baking avoids the extra grease and calories that come with frying.
This recipe can easily fit into gluten-free and low-carb plans with simple substitutions, making it a versatile choice for anyone watching their diet but craving comfort food.
Conclusion
Honestly, crispy oven-baked chicken tenders without frying are one of those recipes you’ll want to keep on hand for whenever cravings hit. They’re straightforward, quick, and deliver that satisfying crunch and tender juiciness every single time. I’ve loved how this recipe lets me enjoy a comfort classic without the mess or guilt of frying, and I hope you find it just as rewarding.
Feel free to tweak the spices or dipping sauces to match your mood or occasion—this recipe is a friendly blank canvas. And if you ever want to switch things up, I’ve got some great ideas in my creamy dessert recipes or the savory side dishes like spinach and feta croissant bake that pair beautifully with these tenders.
Give this recipe a try, and I’d love to hear how yours turns out or what variations you’ve made. This is the kind of recipe that’s better when shared, so don’t be shy about passing it along or dropping a comment below.
FAQs About Crispy Oven-Baked Chicken Tenders
Can I use frozen chicken tenders for this recipe?
It’s best to use fresh or fully thawed chicken tenders for even cooking. Frozen tenders can release extra moisture, making the coating less crispy.
How do I make these tenders gluten-free?
Swap the all-purpose flour and panko breadcrumbs for gluten-free flour blends and gluten-free panko or crushed rice crackers for a similar crunch.
What’s the best way to store leftover chicken tenders?
Keep them in an airtight container in the fridge for up to 3 days. Reheat in the oven on a wire rack to maintain crispiness.
Can I prepare these tenders ahead of time and bake later?
Yes! Coat the chicken tenders and place them on the wire rack, then refrigerate for up to 24 hours before baking. Just add a few extra minutes to the baking time.
What dipping sauces go well with these chicken tenders?
Popular choices include honey mustard, ranch, barbecue sauce, or spicy buffalo sauce. You can also try a creamy garlic aioli or a fresh tzatziki for a twist.
Pin This Recipe!
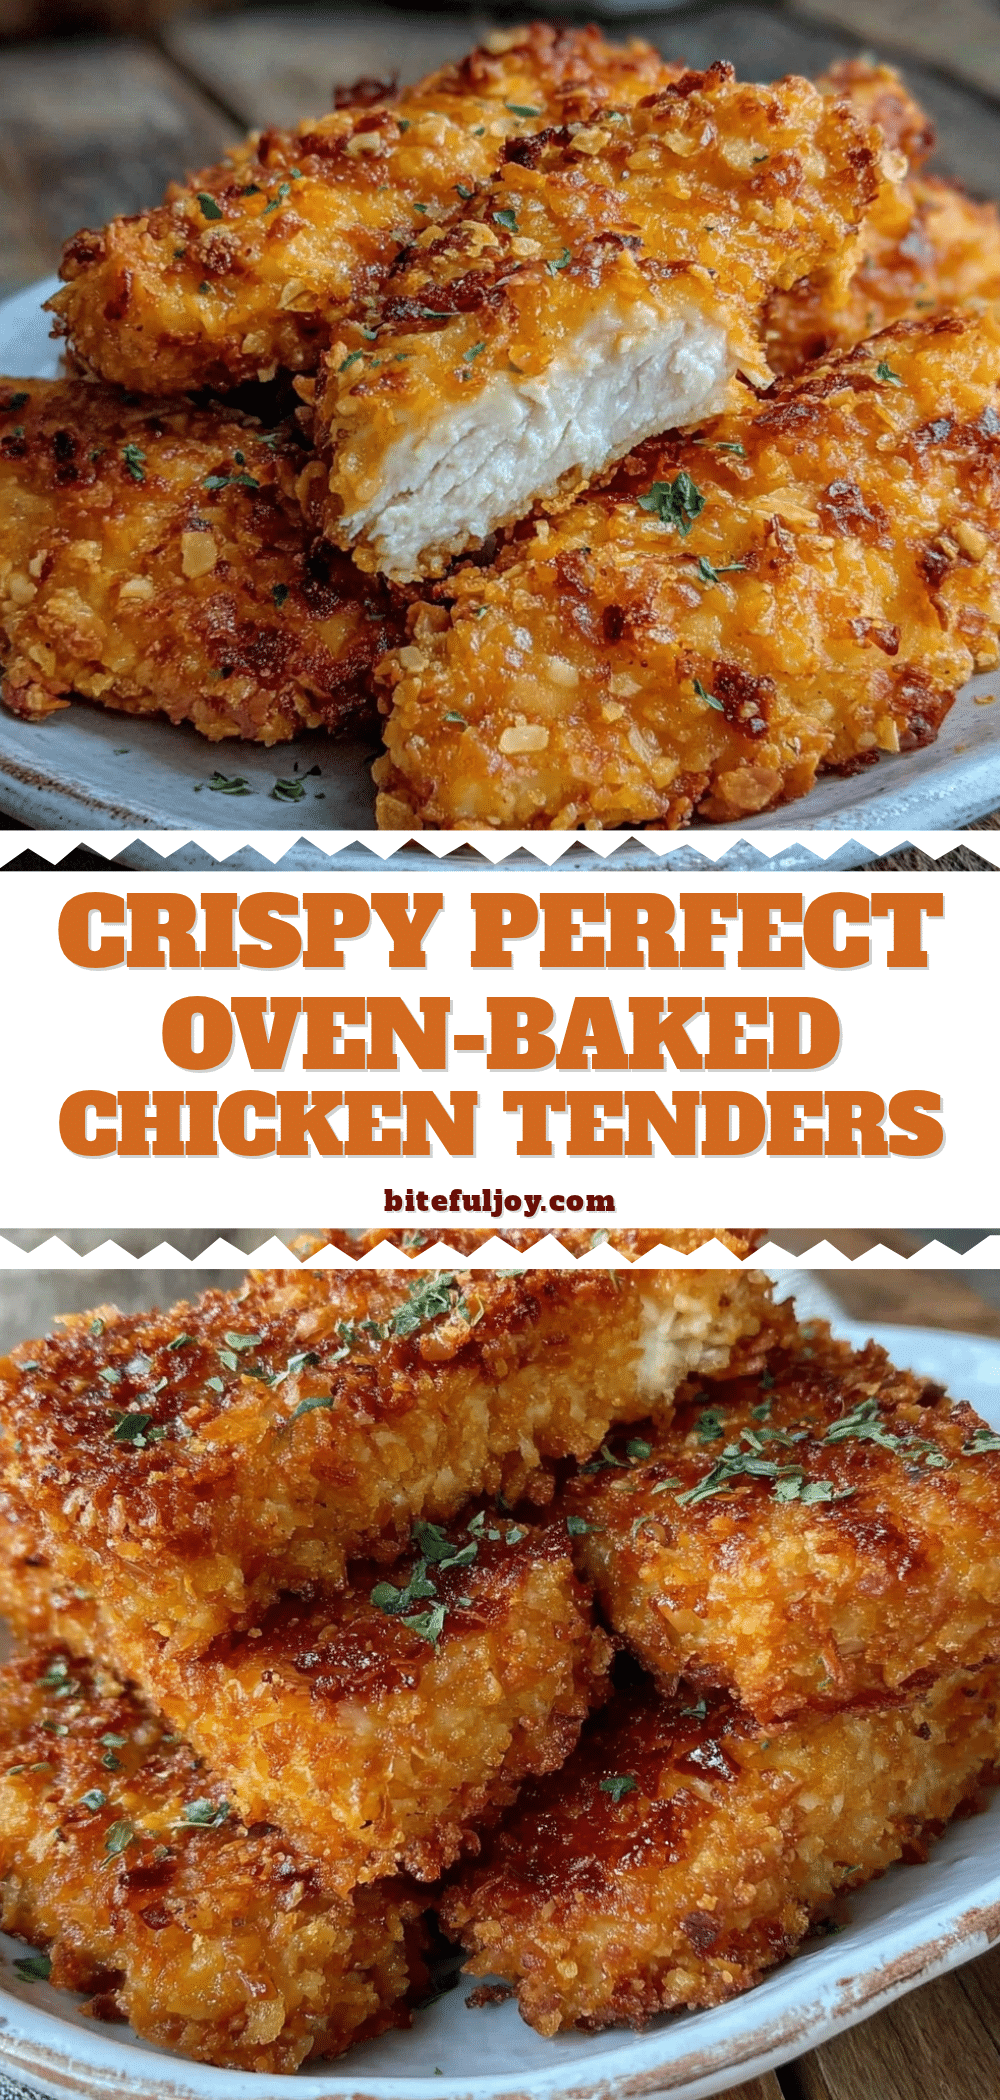
Crispy Oven-Baked Chicken Tenders Easy 5-Step Recipe Without Frying

This recipe delivers crispy, golden chicken tenders baked in the oven without frying, featuring a double-dip coating method for a thick, crunchy crust and juicy interior.
- Prep Time: 10 minutes
- Cook Time: 15-20 minutes
- Total Time: 25-30 minutes
- Yield: 4 servings 1x
- Category: Main Course
- Cuisine: American
Ingredients
- 1.5 pounds (680 grams) chicken tenders, trimmed
- 1 cup (240 ml) buttermilk or plain Greek yogurt
- 1 1/2 cups (150 grams) panko breadcrumbs
- 1/2 cup (60 grams) all-purpose flour
- 1 teaspoon garlic powder
- 1 teaspoon smoked paprika
- 1/2 teaspoon onion powder
- 1/2 teaspoon salt
- 1/4 teaspoon black pepper
- Optional: 1/4 teaspoon cayenne pepper
- Cooking spray or a light drizzle of olive oil
Instructions
- Preheat your oven to 425°F (220°C). Line a baking sheet with foil and place a wire rack on top.
- Pat the chicken tenders dry with paper towels. Place them in a bowl with buttermilk or Greek yogurt and stir gently to coat. Marinate for at least 10 minutes, up to 30 minutes.
- In a separate bowl, combine panko breadcrumbs, flour, garlic powder, smoked paprika, onion powder, salt, black pepper, and cayenne pepper if using. Stir well.
- Remove each tender from the wet mixture, letting excess drip off. Press firmly into the breadcrumb mixture to coat all sides. For extra crunch, double-dip by returning the coated tender to the wet mixture and then into the dry coating again. Arrange tenders on the wire rack, spacing them apart.
- Lightly spray or brush the tenders with cooking spray or olive oil. Bake for 15-20 minutes, flipping halfway through, until golden brown and cooked through (internal temperature 165°F or 74°C).
Notes
Use a wire rack to ensure even crisping and avoid soggy bottoms. Pat chicken dry before coating to help the crust stick. Double-dipping in wet and dry mixtures builds a thicker crust. Spray or brush with oil before baking for golden color. If browning too fast, reduce oven temperature slightly and bake longer. Flip tenders halfway through baking for even crispness. Reheat leftovers in the oven on a wire rack to maintain crunch.
Nutrition
- Serving Size: About 4 chicken tend
- Calories: 280320
- Sugar: 12
- Sodium: 400450
- Fat: 810
- Saturated Fat: 1.52
- Carbohydrates: 1518
- Fiber: 12
- Protein: 30
Keywords: crispy chicken tenders, oven-baked chicken, healthy chicken tenders, easy chicken recipe, no-fry chicken tenders, panko chicken tenders