
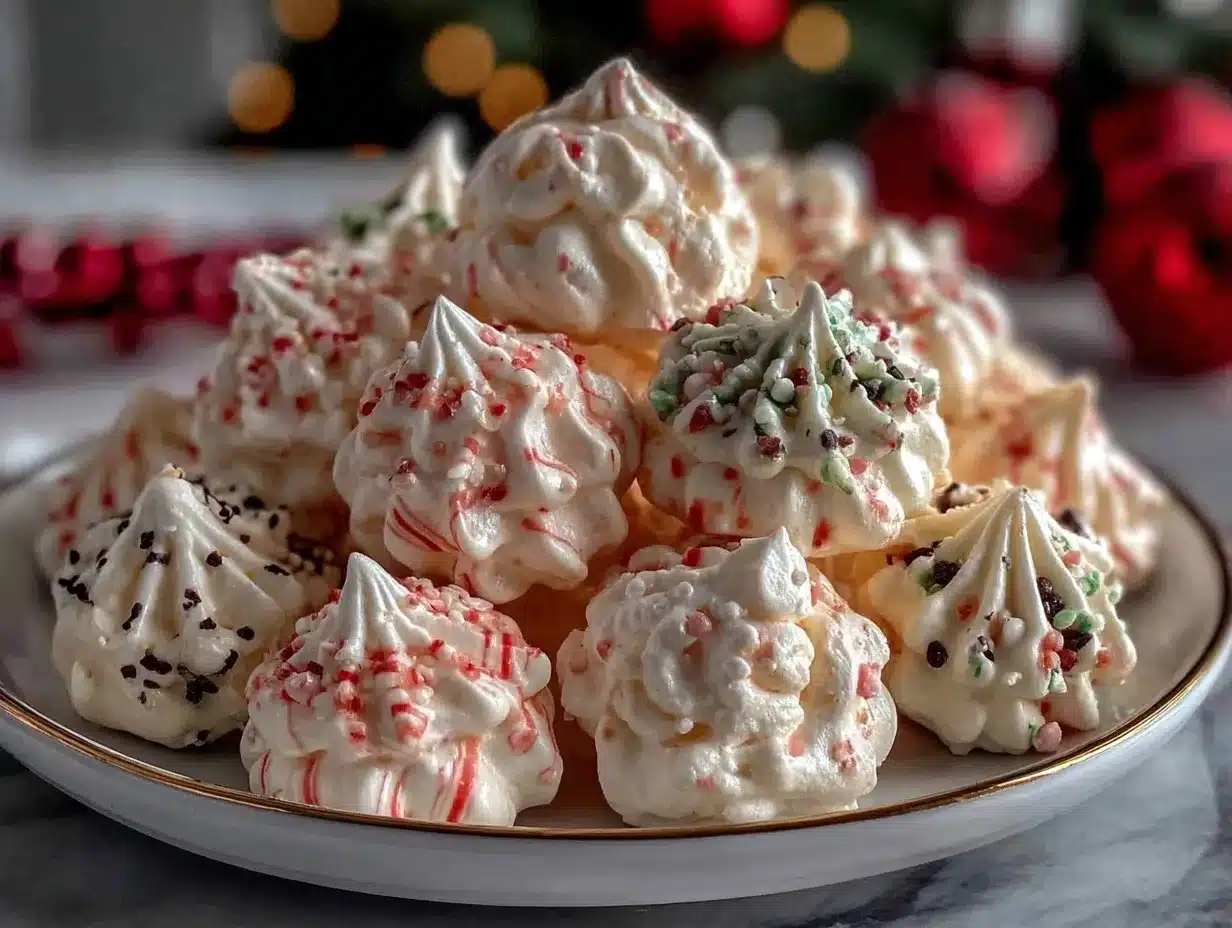
Let me paint you a picture: the air tinged with sugar, the gentle sound of whisks beating, and the sight of glossy, cloud-like peaks ready to be transformed into crispy meringue kisses. The first time I pulled these little beauties out of the oven, the whole kitchen was filled with a sweet, almost magical aroma that instantly made me think of Christmas morning. The kind of moment where you pause, take a deep breath, and just smile because you know you’re onto something truly special.
Years ago, when I was knee-high to a grasshopper, my grandma had a secret stash of melt-in-your-mouth meringues she’d whip up every holiday season. I’d sneak into the pantry, hoping to snag a few before the grownups noticed. Fast forward, and I found myself obsessed with recreating those impossibly light, crisp meringue kisses—adding my own festive twist. If only I’d discovered how dangerously easy these were to make back then!
Honestly, the reactions are priceless. My family can’t stop sneaking them off the cooling rack (and, let’s face it, neither can I). Friends beg for the recipe after every holiday party, and my kids love helping pipe the colorful swirls. They’re perfect for gifting, setting out at potlucks, or brightening up your Pinterest-worthy Christmas cookie board.
You know what? After testing this recipe more times than I care to admit (in the name of research, of course), I can say these crispy meringue kisses have become a staple for family gatherings, cookie exchanges, and cheerful holiday gifting. They’re pure, nostalgic comfort—like a warm hug in bite-sized form. You’re going to want to bookmark this one!
Why You’ll Love This Crispy Meringue Kisses Recipe
Let’s talk about why these crispy meringue kisses are the ultimate Christmas treat for holiday baking. After years of tweaking and swirling, I’ve landed on a recipe that’s not just good—it’s the kind that makes you close your eyes after the first bite.
- Quick & Easy: Comes together in under an hour (most of it is hands-off baking time). Perfect for busy weeknights or last-minute holiday cravings.
- Simple Ingredients: No fancy grocery trips—egg whites, sugar, and a touch of flavor are all you need. Chances are, your kitchen is already stocked!
- Perfect for Festive Occasions: Whether you’re hosting Christmas brunch, prepping for a cookie exchange, or just need something sweet to nibble on during a cozy holiday movie night, these fit the bill.
- Crowd-Pleaser: Kids love the colorful swirls, adults love the crisp texture and light sweetness. They disappear faster than you’d believe!
- Unbelievably Delicious: Crisp on the outside, melt-in-your-mouth in the center, with a hint of vanilla and almond (or peppermint if you’re feeling festive). These aren’t just another meringue—they’re the best version I’ve ever tasted.
What really sets this recipe apart is the technique. Whipping the egg whites to stiff peaks and adding sugar gradually guarantees a glossy, stable meringue (trust me, this is key). A dash of cream of tartar helps hold everything together, and using superfine sugar means the texture stays perfectly crisp without a hint of graininess.
If you’re after a treat that delivers on nostalgic comfort but feels totally modern—healthier, faster, and with zero stress—these crispy meringue kisses are for you. They’re the kind of recipe that makes holidays feel extra special and lets you impress your guests without breaking a sweat.
So, whether you’re an old pro or just starting your holiday baking journey, you’re about to discover a dessert that’s as delightful to make as it is to eat. Get ready to add a little magic to your Christmas table!
What Ingredients You Will Need
This recipe uses simple, wholesome ingredients to deliver bold flavor and a satisfyingly crisp texture—without any holiday fuss. Most are pantry staples, and you’ll be amazed how a few basics transform into something so special.
- For the meringue:
- 4 large egg whites (room temperature for best volume)
- 1 cup (200g) superfine granulated sugar (caster sugar works wonders—Dixie Crystals or Domino are my go-tos)
- ¼ teaspoon cream of tartar (stabilizes the meringue, don’t skip it!)
- ¼ teaspoon pure vanilla extract (adds warmth and depth)
- ⅛ teaspoon almond extract (optional, for a subtle nutty note)
- Pinch of salt (balances the sweetness)
- For festive flair:
- Gel food coloring (red and green for Christmas, or any colors you fancy—AmeriColor is reliable and vibrant)
- Edible glitter or sprinkles (optional, for a little holiday sparkle)
Tried-and-true tips: Use eggs that aren’t super fresh (a few days old whip better). If you can’t find superfine sugar, pulse regular granulated sugar in a food processor for a few seconds. For vanilla, Nielsen-Massey always delivers lovely flavor. And if you want a peppermint twist, swap almond extract for a tiny drop of peppermint extract.
Substitutions: Dairy-free? No worries—these kisses are naturally dairy-free. For a nut-free version, skip the almond extract. Want a touch of citrus? Add a little grated lemon zest. You can even use pasteurized egg whites from a carton, though I find fresh eggs give more volume.
Seasonal swaps: In spring, try pastel colors instead of Christmas reds and greens. For Halloween, go with orange and black (just don’t overdo the black coloring—it can taste bitter!).
Keep your ingredients at room temperature before starting. It really makes a difference in getting that lovely, fluffy volume. Ready to whip up some holiday magic?
Equipment Needed
- Electric stand mixer or hand mixer (stand mixer with whisk attachment is my personal favorite—saves your arms and gets perfect peaks!)
- Large mixing bowl (glass or stainless steel; plastic can hold onto fat, which kills meringue)
- Rubber spatula (for folding and scraping down the bowl)
- Piping bag with a star or round tip (Wilton #1M or Ateco #806 work great)
- Baking sheets (heavy-duty, if possible—cheap ones tend to warp)
- Parchement paper (prevents sticking and makes cleanup a breeze)
- Small bowls (for mixing food coloring)
- Toothpicks or thin skewers (for swirling colors)
If you don’t have a piping bag, just snip the corner off a sturdy zip-top plastic bag. Star tips make those classic swirls, but round tips or even just the bag itself work fine. For best results, make sure mixing bowls and beaters are squeaky clean (any grease ruins meringue). I always wipe mine down with a little vinegar first—old baker’s trick!
Baking sheets are easy to find at bargain stores if you need extras for holiday batch baking. And parchment paper is a must—trust me, nothing sticks quite like meringue! It’s worth keeping a roll in your pantry.
Preparation Method
- Prep your equipment and ingredients:
- Preheat your oven to 225°F (110°C). Line two baking sheets with parchment paper and set aside.
- Separate 4 large eggs, placing the whites in a clean, dry bowl. (Make sure no yolk sneaks in—a single drop of fat can ruin the whole batch!)
- Let egg whites come to room temperature—about 20 minutes. This helps them whip up higher.
- Whip the egg whites:
- Add the egg whites and a pinch of salt to your mixer bowl.
- Beat on medium speed until foamy (about 2 minutes). Sprinkle in cream of tartar.
- Increase speed to medium-high and continue beating until soft peaks form—when you lift the whisk, the whites should curl over slightly.
- Gradually add sugar:
- With mixer running, add sugar a tablespoon at a time. Take it slow—rushing leads to gritty meringue.
- Continue beating until stiff, glossy peaks form (about 7–10 minutes). The mixture should be shiny and hold its shape. If you rub a little between your fingers, there should be no graininess.
- Add vanilla extract and almond extract, mixing just until combined.
- Color and pipe:
- If using colors, gently divide meringue into bowls. Fold in gel coloring with a toothpick for streaks, or whisk for solid color.
- Spoon meringue into a piping bag fitted with your chosen tip. (If using multiple colors, layer in the bag for a swirled effect.)
- Pipe kisses onto parchment-lined sheets, about 1 inch apart. Each should be about 1 inch wide and 1½ inches tall.
- Bake:
- Bake in the center of the oven for 60–75 minutes. Don’t open the door! Meringues should look dry and easily lift off the paper.
- Turn off the oven and let the kisses cool inside for 1 hour for maximum crispness.
- Finishing touches:
- Sprinkle with edible glitter or colored sugar if desired.
- Let cool completely before storing or serving.
Troubleshooting: If meringues look sticky or chewy, they may need a longer bake. Humidity is the enemy—try baking on a dry day. If the meringue won’t whip, double-check your bowl for grease and start with fresh egg whites.
Personal tip: I always pipe a few test kisses first. If the meringue slumps or spreads, whip it a bit longer before finishing the batch. And don’t stress about perfect shapes—wonky ones taste just as good!
Cooking Tips & Techniques
Over the years, I’ve learned a few tricks for foolproof crispy meringue kisses. These little details make all the difference, especially when holiday baking gets hectic.
- Room temperature eggs whip higher: Cold eggs just don’t get that volume. If you forget, place eggs in warm water for 5 minutes.
- Superfine sugar is key: Regular sugar can leave your meringue gritty. Either buy caster sugar or blitz granulated sugar in a food processor.
- Add sugar slowly: I know it’s tempting to rush, but patience gives you those glossy, stable peaks. Sprinkle in sugar spoonful by spoonful.
- Clean equipment: Even a hint of grease will deflate your egg whites. I wipe everything down with vinegar and let it dry before starting.
- Humidity matters: Meringues hate moisture. If it’s raining, bake a little longer or wait for a dry day. Store finished kisses in an airtight container with a packet of silica gel if you have one.
- Don’t overbake: They should be dry but not brown. If they start to turn color, reduce oven temp slightly.
One time, I tried to bake these with a friend on a humid July afternoon—let’s just say, they ended up chewy and sticky! Learned my lesson and now I check the weather before whipping up a batch. Multitasking helps: while the meringues bake, I prep gift bags or write holiday cards. And if you’re piping with kids, expect a little mess and lots of giggles.
The best part? Once you master the basics, you can whip up a batch of crispy meringue kisses anytime. Holidays or not, they always bring a little joy to the table!
Variations & Adaptations
Crispy meringue kisses are endlessly customizable. Here are my favorite tweaks to keep things fresh and fun:
- Dietary swaps: For a nut-free version, skip the almond extract. For vegan meringue kisses, use aquafaba (the liquid from canned chickpeas) in place of egg whites—works surprisingly well!
- Flavor twists: For peppermint meringue kisses, swap almond extract with ¼ teaspoon peppermint extract and top with crushed candy canes. For citrus, add finely grated lemon or orange zest.
- Seasonal colors: Try lighter pastels for Easter, deep blues and silvers for Hanukkah, or spooky orange and black for Halloween.
- Baking method: If your oven runs hot, bake at 200°F (95°C) and add 10 minutes to the baking time. For smaller kisses, reduce bake time by 10 minutes.
- Allergen substitutions: Aquafaba is a game-changer for egg allergies. For food coloring sensitivities, use natural color powders like beet or spirulina.
One year, I made a batch with peppermint swirls and crushed candy canes for a school bake sale—those disappeared in a flash! You can even sandwich two kisses with chocolate ganache for an extra-decadent treat.
Don’t be afraid to experiment. Make them your own, and let your creativity shine!
Serving & Storage Suggestions
These crispy meringue kisses are best enjoyed at room temperature, where their texture is perfectly crisp and light. I love piling them high on a festive platter or tucking them into clear gift bags tied with a ribbon for instant holiday charm.
Pair them with hot cocoa, spiced tea, or your favorite coffee for a cozy treat. They also make a gorgeous addition to a Christmas dessert buffet alongside cookies and fudge.
To store, place meringue kisses in an airtight container at room temperature—they’ll stay crisp for up to 2 weeks. If your house is humid, toss in a food-safe silica gel pack to help with moisture. Freezing isn’t recommended, as they can lose their texture, but you can refrigerate them if absolutely necessary (just bring to room temp before serving).
Reheating isn’t needed, but if they go a bit soft, pop them in a 200°F (95°C) oven for 10 minutes to re-crisp. Over time, the flavors mellow and deepen, making them even more irresistible. Honestly, if you hide a jar for yourself, I won’t tell!
Nutritional Information & Benefits
Each crispy meringue kiss is naturally low in fat, gluten-free, and dairy-free—making them a sweet treat almost everyone can enjoy. Here’s a general breakdown per serving (about 3 kisses):
- Calories: 30
- Fat: 0g
- Carbohydrates: 7g
- Protein: 0.5g
- Sodium: 8mg
Egg whites offer a light source of protein, and because these kisses use no butter or oil, they’re lighter than most Christmas cookies. The recipe is suitable for gluten-sensitive folks and those avoiding dairy.
Potential allergens include eggs (unless using aquafaba) and the optional almond extract. Always check your food coloring ingredients if you have sensitivities. As someone who tries to balance holiday indulgence with wellness, I appreciate having a guilt-free sweet on the table!
Conclusion
If you’re searching for an easy, festive treat that’s guaranteed to impress, these crispy meringue kisses are holiday magic in bite-sized form. Not only are they simple to make and endlessly customizable, they’re also a nostalgic comfort food that brings a smile to every table.
Feel free to swap flavors, try new colors, or experiment with fillings—this recipe is yours to play with. Personally, I love how they brighten up my holiday dessert spread and make gifting a little more joyful.
Give these a whirl, then let me know in the comments how you’ve adapted them or what festive spins you tried. Share your batches on social media, tag me, or pass the recipe to a friend—let’s spread a little sweetness this season!
Happy baking, and may your holidays be filled with delicious crispy meringue kisses and plenty of cheer!
Frequently Asked Questions
How do I prevent my meringue kisses from cracking in the oven?
Cracks usually happen if your oven is too hot or if you open the door during baking. Bake at a low temperature (225°F/110°C) and avoid opening the oven. Let them cool slowly inside the oven for best results.
Can I make crispy meringue kisses ahead of time for Christmas?
Absolutely! They keep well in an airtight container for up to 2 weeks. You can make them in advance and store until your holiday party or gifting day.
What’s the best way to add color to meringue kisses?
Gel food coloring works best—it’s vibrant and doesn’t affect the texture. Add it gently with a toothpick for streaks or mix fully for solid colors.
Why did my meringue kisses turn sticky after baking?
Humidity is usually the culprit. Try baking on a dry day and store finished kisses in a sealed container. If they get sticky, a quick reheat in a low oven (200°F/95°C) can restore crispness.
Can I use carton egg whites for this recipe?
You can, but fresh egg whites whip up better and give more volume. If using carton egg whites, make sure they’re pure and not pasteurized with additives.
Pin This Recipe!
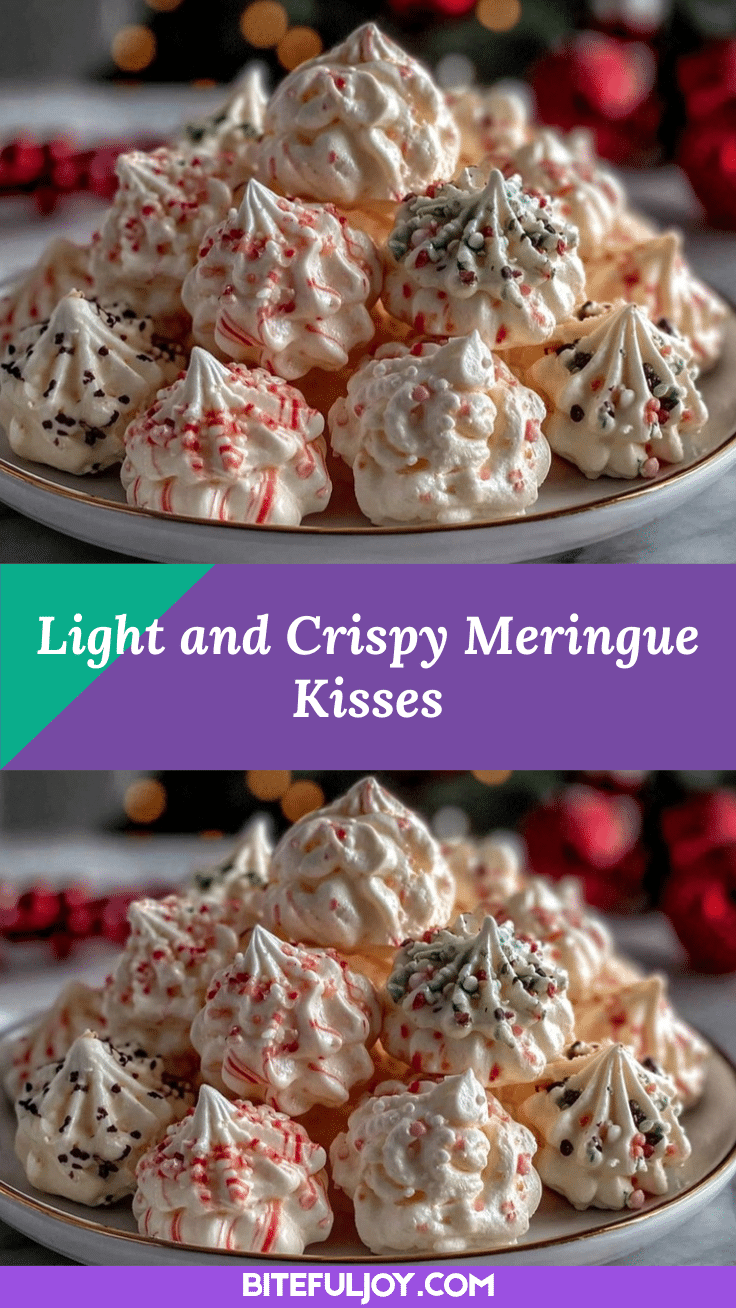
Crispy Meringue Kisses

These crispy meringue kisses are light, melt-in-your-mouth treats perfect for holiday baking. With a crisp exterior and a soft center, they’re easy to make, endlessly customizable, and ideal for gifting or festive gatherings.
- Prep Time: 20 minutes
- Cook Time: 75 minutes
- Total Time: 1 hour 35 minutes
- Yield: 48 kisses (about 16 servings of 3 kisses each) 1x
- Category: Dessert
- Cuisine: American
Ingredients
- 4 large egg whites, room temperature
- 1 cup (200g) superfine granulated sugar (caster sugar)
- 1/4 teaspoon cream of tartar
- 1/4 teaspoon pure vanilla extract
- 1/8 teaspoon almond extract (optional)
- Pinch of salt
- Gel food coloring (red and green, or colors of choice)
- Edible glitter or sprinkles (optional)
Instructions
- Preheat oven to 225°F (110°C). Line two baking sheets with parchment paper.
- Separate 4 large eggs, placing whites in a clean, dry bowl. Let egg whites come to room temperature for about 20 minutes.
- Add egg whites and a pinch of salt to mixer bowl. Beat on medium speed until foamy (about 2 minutes). Sprinkle in cream of tartar.
- Increase speed to medium-high and beat until soft peaks form.
- With mixer running, add sugar a tablespoon at a time. Continue beating until stiff, glossy peaks form (about 7–10 minutes).
- Add vanilla extract and almond extract (if using), mixing just until combined.
- If using colors, gently divide meringue into bowls. Fold in gel coloring with a toothpick for streaks, or whisk for solid color.
- Spoon meringue into a piping bag fitted with a star or round tip. Pipe kisses onto parchment-lined sheets, about 1 inch apart and 1½ inches tall.
- Bake in the center of the oven for 60–75 minutes. Do not open the oven door.
- Turn off oven and let kisses cool inside for 1 hour.
- Sprinkle with edible glitter or colored sugar if desired.
- Let cool completely before storing or serving.
Notes
Use room temperature eggs for best volume. Superfine sugar prevents gritty texture—pulse regular sugar in a food processor if needed. Clean equipment thoroughly to avoid deflating meringue. Avoid baking on humid days for crisp results. Store in airtight container up to 2 weeks. For nut-free, omit almond extract. For vegan, substitute aquafaba for egg whites.
Nutrition
- Serving Size: 3 kisses
- Calories: 30
- Sugar: 7
- Sodium: 8
- Carbohydrates: 7
- Protein: 0.5
Keywords: meringue kisses, Christmas cookies, holiday baking, gluten-free dessert, dairy-free treat, easy meringue, festive cookies, edible gifts


