Let me tell you, the very first whiff of those Creamy Christmas Cheesecake Bars baking in my kitchen hit me like a memory-packed snowstorm—sweet cream cheese mingling with the tang of cherries and that irresistible, buttery streusel topping. You know how some holiday treats just smell like magic? These bars do. The scent alone takes me back to chilly December afternoons when I was knee-high to a grasshopper, waiting for my grandma to pull something special from her old oven (the kind that rattled a little when she opened it). The first time I made these cheesecake bars, I remember pausing mid-slice, fork in hand, just to soak it all in—because honestly, it felt like I’d stumbled onto the kind of recipe that instantly makes a day brighter.
This recipe isn’t some fancy, fussy thing—it’s a hug in dessert form, packed with nostalgic comfort and holiday cheer. I first tried to recreate something like this after a neighborhood holiday bake sale, where a sweet red-topped bar disappeared faster than I could blink. That memory stuck, and I just had to try my hand at it, wishing I’d had the recipe years ago for every Christmas potluck or snowy movie night. My family couldn’t stop sneaking bites straight from the cooling rack (and let’s face it, neither could I). There’s always that moment when someone tries one, closes their eyes, and you know you’ve got a winner.
I’ve tested these Creamy Christmas Cheesecake Bars a dozen times—really, in the name of research, of course! They’ve become a staple for holiday gatherings, cookie exchanges, and edible gifts for neighbors. Every time I bake them, it feels like a little celebration. If you’re looking for something festive, easy, and sure to please, you’re going to want to bookmark this one. It’s dangerously easy to whip up and delivers pure, creamy bliss every single time.
Why You’ll Love These Creamy Christmas Cheesecake Bars
When it comes to unforgettable holiday desserts, these Creamy Christmas Cheesecake Bars with Festive Cherry & Streusel Topping have my heart (and my family’s, too). Years of baking, taste-testing, and tweaking have turned this recipe into a true crowd-pleaser. Here’s why you’ll love it as much as we do:
- Quick & Easy: Comes together in under an hour—perfect for busy holiday schedules or last-minute guests.
- Simple Ingredients: No need for specialty grocery runs; you probably have everything you need in your pantry or fridge right now.
- Perfect for Holiday Gatherings: Whether you’re hosting a Christmas brunch, adding to a potluck spread, or gifting a homemade treat, these bars fit right in.
- Crowd-Pleaser: Kids, grandparents, and picky eaters all ask for seconds (and sometimes thirds!).
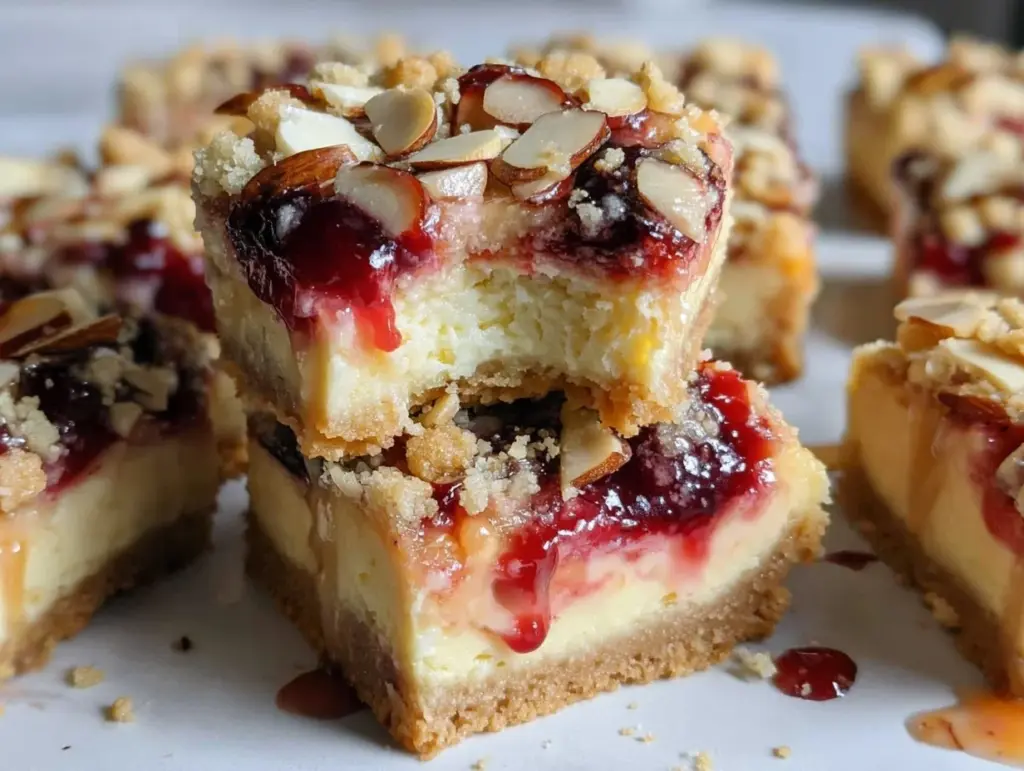
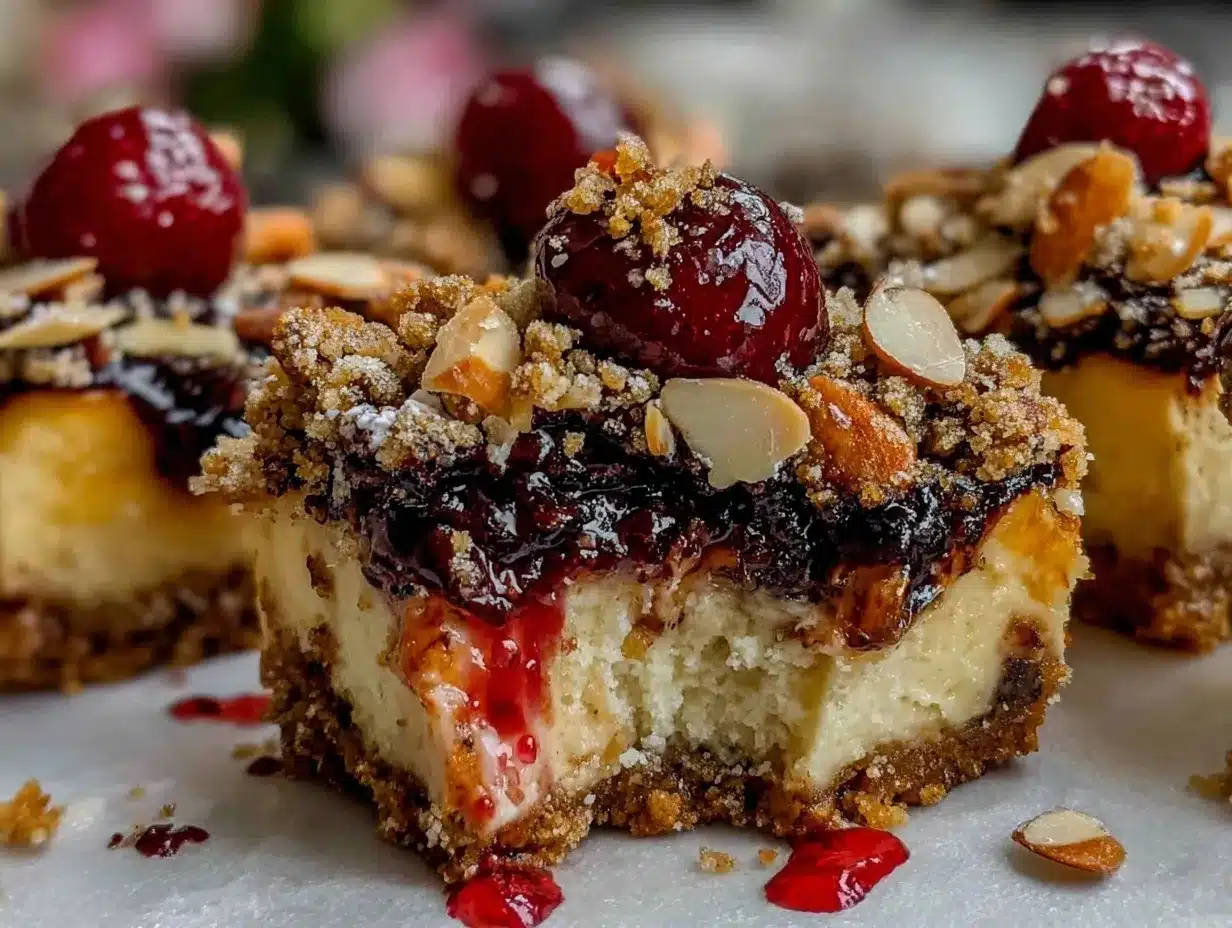
- Unbelievably Delicious: The creamy cheesecake layer, tart cherry topping, and golden streusel combine for the ultimate festive bite.
What sets my version apart? I use a secret step—blending the cream cheese filling until it’s ultra-smooth, with just the right amount of vanilla and lemon for brightness. The streusel isn’t just a crumbly afterthought; it’s rich, buttery, and spiked with a hint of cinnamon for a cozy finish. And the cherries? Oh, they’re the jewel on top. I’ve tried every variation under the sun, and this is the formula that gets raves every single time.
These bars aren’t just another holiday dessert—they’re the kind that make you sigh with happiness after the first bite. The perfect balance of creamy, tart, and crunchy, with a hint of festive sparkle. They’re comfort food, upgraded for the season, but still easy enough for anyone to make. If you want to impress without breaking a sweat, or just want to treat yourself to something special, this is the recipe. Trust me: it’s so good, you’ll want to make it all year round.
What Ingredients You Will Need
This recipe uses simple, wholesome ingredients to deliver bold flavor and satisfying texture without the fuss. Most of these are pantry staples, and the best part? You can easily swap a few to match what you have on hand or your dietary preferences.
For the crust:
- 1 1/2 cups (180g) graham cracker crumbs (about 12 whole crackers, finely crushed)
- 1/4 cup (50g) granulated sugar
- 6 tablespoons (85g) unsalted butter, melted (adds richness and helps the crust hold together)
For the cheesecake filling:
- 16 oz (450g) cream cheese, softened (full-fat for best texture—Philadelphia is my go-to)
- 1/2 cup (100g) granulated sugar
- 2 large eggs, room temperature
- 1 teaspoon vanilla extract (real vanilla adds depth)
- 1 tablespoon lemon juice (fresh is best, lifts the flavor)
- 2 tablespoons (16g) all-purpose flour (helps set the filling)
For the cherry topping:
- 1 can (21 oz/595g) cherry pie filling (or homemade, if you prefer)
- Optional: 1 cup (150g) fresh or frozen tart cherries, pitted (for extra texture and tartness)
For the streusel topping:
- 1/2 cup (60g) all-purpose flour
- 1/4 cup (30g) rolled oats (adds crunch, use gluten-free if needed)
- 1/3 cup (65g) brown sugar, packed
- 1/2 teaspoon ground cinnamon
- 1/4 cup (55g) unsalted butter, cold and cubed
Ingredient Notes & Substitutions:
- For a gluten-free version, swap graham crackers and flour for gluten-free alternatives. I like using almond flour for the crust sometimes.
- If you want to make these bars dairy-free, use a plant-based cream cheese and vegan butter. The texture changes a bit, but the flavor is still lovely.
- Don’t have cherry pie filling? Raspberry or cranberry pie filling works beautifully for a festive twist.
- If you prefer less sugar, you can reduce it in the filling and streusel without sacrificing taste. Just be sure the crust still holds together.
These ingredients come together like holiday magic, each layer bringing its own flavor and texture. If you’re feeling fancy, sprinkle some chopped pecans into the streusel for added crunch—my uncle swears by it!
Equipment Needed
Good news: you don’t need a fancy kitchen setup for these Creamy Christmas Cheesecake Bars. Here’s what I use every time:
- 9×13-inch (23x33cm) baking pan: Standard size, but you can use a slightly smaller pan for thicker bars.
- Mixing bowls: At least two—one for crust, one for cheesecake filling. I use glass bowls because they’re easy to clean.
- Electric mixer or stand mixer: This makes the cream cheese filling smooth as silk. A sturdy whisk and some elbow grease work too, but a mixer is easier.
- Spatula: For spreading layers evenly. Silicone ones don’t scratch your pan.
- Measuring cups and spoons: Precision matters for cheesecake! I love my set from OXO (but any will do).
- Food processor (optional): For crushing graham crackers. You can also use a zip-top bag and rolling pin—old-school, but effective.
- Knife and cutting board: For slicing bars neatly once cooled.
If you’re missing a mixer, don’t sweat it—you can use a wooden spoon and some patience. For the crust, a glass jar or mug can press crumbs just fine. Just make sure your pan is lined well with parchment for easy removal (trust me, learned this the hard way). For specialty equipment, keep them clean and dry—nothing ruins a good cheesecake like a rusty pan! Budget-wise, you don’t need anything fancy. This recipe is all about making magic with what you’ve got.
Preparation Method
- Prep your pan: Line a 9×13-inch (23x33cm) baking pan with parchment paper, leaving a little overhang for easy lifting later. (This trick saves you from stuck bars—learned by experience.)
-
Make the crust: In a medium bowl, combine 1 1/2 cups (180g) graham cracker crumbs, 1/4 cup (50g) sugar, and 6 tablespoons (85g) melted butter. Mix until crumbs are moistened and sandy. Press firmly into the bottom of your prepared pan. I use the bottom of a measuring cup for even pressure.
Time: 5 minutes
Tip: A too-loose crust will crumble—press it tight, especially at the edges. -
Pre-bake the crust: Bake at 350°F (175°C) for 10 minutes until fragrant and lightly golden. Set aside to cool slightly.
Sensory cue: The crust should smell nutty and look set (not wet). -
Prepare the cheesecake filling: In a large bowl, beat 16 oz (450g) cream cheese until smooth. Add 1/2 cup (100g) sugar, 2 eggs, 1 tsp vanilla, 1 tbsp lemon juice, and 2 tbsp (16g) flour. Mix until creamy and lump-free. Scrape sides often for a silky finish.
Time: 5-7 minutes
Warning: Don’t overmix—too much air makes cracks. -
Spread the filling: Pour cheesecake mixture over the cooled crust, spreading evenly with a spatula.
Tip: Tap the pan gently on the counter to release air bubbles. -
Add cherry topping: Dollop 1 can (21 oz/595g) cherry pie filling (and optional 1 cup (150g) extra cherries) over the cheesecake layer. Gently swirl with a butter knife for pretty ribbons, or spread evenly for a classic look.
Personal note: My kids love helping with this part—it’s messy, but fun! -
Make the streusel: In a small bowl, combine 1/2 cup (60g) flour, 1/4 cup (30g) oats, 1/3 cup (65g) brown sugar, and 1/2 tsp cinnamon. Cut in 1/4 cup (55g) cold butter with your fingers or a pastry cutter until crumbly. Sprinkle evenly over the cherry layer.
Tip: Don’t overmix—clumps are good! -
Bake: Return pan to oven and bake at 350°F (175°C) for 30-35 minutes. Bars are done when edges are set and center is just slightly jiggly.
Sensory cue: Streusel should be golden and cherries bubbling.
Warning: Overbaking dries the filling—watch closely in the last 5 minutes. -
Cool completely: Let bars cool in the pan for 1 hour, then refrigerate at least 2 hours (overnight is best) for clean slices.
Tip: Patience pays off—warm cheesecake is mushy! -
Slice and serve: Lift bars from pan using parchment overhang. Cut into squares with a sharp knife, wiping between cuts for neat edges.
Time: Slicing takes about 5 minutes (kids love this job, too).
Personal tip: If you’re gifting, wrap individual bars in wax paper for easy sharing.
Cooking Tips & Techniques
After years of baking (and a few cheesecake mishaps), I’ve learned a thing or two about making these Creamy Christmas Cheesecake Bars foolproof.
- Room temperature ingredients are key: Softened cream cheese blends smoother, and eggs mix in without lumps. Cold ingredients can give you a lumpy filling (happened to me more times than I’d like to admit).
- Don’t skip pre-baking the crust: It keeps the base crisp and prevents sogginess. Once, I rushed and ended up with a mushy bottom—never again!
- Gentle mixing: Overmixing the filling can add too much air and cause cracks. Just mix until everything’s combined and creamy.
- Swirling the cherry layer: Use a butter knife or the back of a spoon to create pretty patterns. Don’t go overboard—you want streaks, not full blending.
- Streusel texture: Clumps are your friend! If your butter is too warm, chill the streusel mixture for a few minutes before topping.
- Baking time: Check at 30 minutes. The edges should be set, and the center just a bit wobbly. Overbaking dries out your bars.
- Cool and chill: Let bars cool in the pan, then refrigerate. Slicing is much easier when completely cold. If you’re in a hurry, pop the pan in the freezer for 30 minutes.
- Multitasking: While the crust pre-bakes, prep your filling and streusel to save time.
- Consistency: Use the same brands of cream cheese and butter for best results. I stick with Philadelphia and Challenge Butter—my tried-and-true combo.
Learned from experience: if your cheesecake cracks, don’t panic. Streusel covers everything! And if the bars seem too soft, let them chill longer. The flavor actually improves overnight.
Variations & Adaptations
One of the best things about these Creamy Christmas Cheesecake Bars is how easy they are to customize. Whether you want to switch up flavors or adapt for dietary needs, here are my favorite spins:
- Gluten-Free Version: Use gluten-free graham crackers and swap the flour in both filling and streusel for almond flour or a trusted GF blend. The texture stays creamy, and the crust is just as crisp.
- Berry Lovers: Sub the cherry pie filling for raspberry or cranberry sauce. In summer, I swap in fresh blueberries and lemon zest for a sunny twist—so good!
- Nutty Streusel: Add 1/2 cup (60g) chopped pecans or walnuts to the streusel for extra crunch and flavor. My dad loves this version at Thanksgiving.
- Dairy-Free Adaptation: Use plant-based cream cheese and a vegan butter alternative. The bars come out a little softer, but the flavor is still festive.
- Mini Cheesecake Cups: Bake in muffin tins for individual servings—just reduce the bake time to 18-20 minutes.
Personal twist: I once layered in a bit of orange zest to the filling and topped with cranberry sauce. The citrus kick paired with the tart berries was a hit at our holiday party. Honestly, don’t be afraid to experiment—this recipe is forgiving, and it’s fun to make it your own.
Serving & Storage Suggestions
Serve these Creamy Christmas Cheesecake Bars chilled, straight from the fridge. I love plating them on a festive platter with a sprinkle of powdered sugar or a few fresh cherries for color. For fancy occasions (or Pinterest-worthy photos), drizzle with melted white chocolate or add a sprig of mint.
They pair perfectly with hot cocoa, mulled wine, or a strong cup of coffee—especially on a snowy morning. If you’re hosting brunch, set them out alongside savory quiche or fruit salad. They make a sweet ending to any holiday meal.
Storage is easy: keep bars in an airtight container in the fridge for up to 5 days. The flavors meld and deepen after a day, so leftovers taste even better. For longer storage, freeze individual bars (wrap in wax paper and place in a zip-top bag). Thaw overnight in the fridge, then enjoy. Reheating isn’t needed—cold is best, but if you like them warm, zap for 10 seconds in the microwave (just enough to take the chill off, not melt the filling).
Tip: Don’t stack bars directly—layer with parchment to prevent sticking. This keeps them picture-perfect for serving or gifting.
Nutritional Information & Benefits
Each Creamy Christmas Cheesecake Bar (based on a batch cut into 16 squares) packs about 250 calories, with 16g fat, 28g carbs, and 4g protein per serving. Key ingredients like cream cheese and cherries bring a boost of calcium and antioxidants. The oats add a touch of fiber, while the cherries offer vitamin C and a festive pop of color.
If you’re gluten-sensitive, the gluten-free swaps work well. For lower sugar, reduce the added sugar in the filling and streusel. These bars do contain dairy, eggs, and wheat (unless using substitutions), so watch out for allergens if sharing.
From a wellness perspective, I see these as a holiday treat—satisfying, comforting, and packed with real ingredients. The portion-controlled squares help keep indulgence in check. And let’s be honest, homemade desserts always feel better than store-bought!
Conclusion
If you’re searching for a festive, creamy, and downright irresistible treat, these Creamy Christmas Cheesecake Bars with Festive Cherry & Streusel Topping are worth every bite. They’re easy enough for beginners, customizable for different tastes, and proven to wow a crowd—trust me, I’ve tested that theory more times than I can count.
Don’t be afraid to make these bars your own. Swap the cherries, add nuts, or tweak the crust to suit your cravings. What matters most is sharing a little sweetness with people you love. Personally, this recipe holds a special spot in my holiday traditions—because nothing beats the look on someone’s face when they take that first bite and smile.
If you give these bars a try, I’d love to hear how you twist them for your family. Drop a comment below, share your photos, or tell me your favorite variation. Happy baking, and may your holidays be filled with creamy, cherry-studded joy!
FAQs
Can I use fresh cherries instead of canned pie filling?
Absolutely! Just cook down about 2 cups (300g) pitted, chopped cherries with a little sugar and cornstarch until thickened. Let cool before spreading on the cheesecake layer.
Do the bars need to be refrigerated?
Yes, for best texture and food safety, keep them chilled in the fridge. They slice cleaner and taste even better when cold.
Can I make these Creamy Christmas Cheesecake Bars ahead of time?
You bet! Bake, cool, and refrigerate overnight. They’re perfect for prepping a day or two before your event.
How do I prevent the cheesecake layer from cracking?
Use room temperature ingredients, mix gently, and don’t overbake. If cracks happen, the streusel topping hides them beautifully!
Can I freeze these cheesecake bars?
Yes—freeze individual squares in wax paper and a zip-top bag. Thaw in the fridge before serving for best texture.
Pin This Recipe!
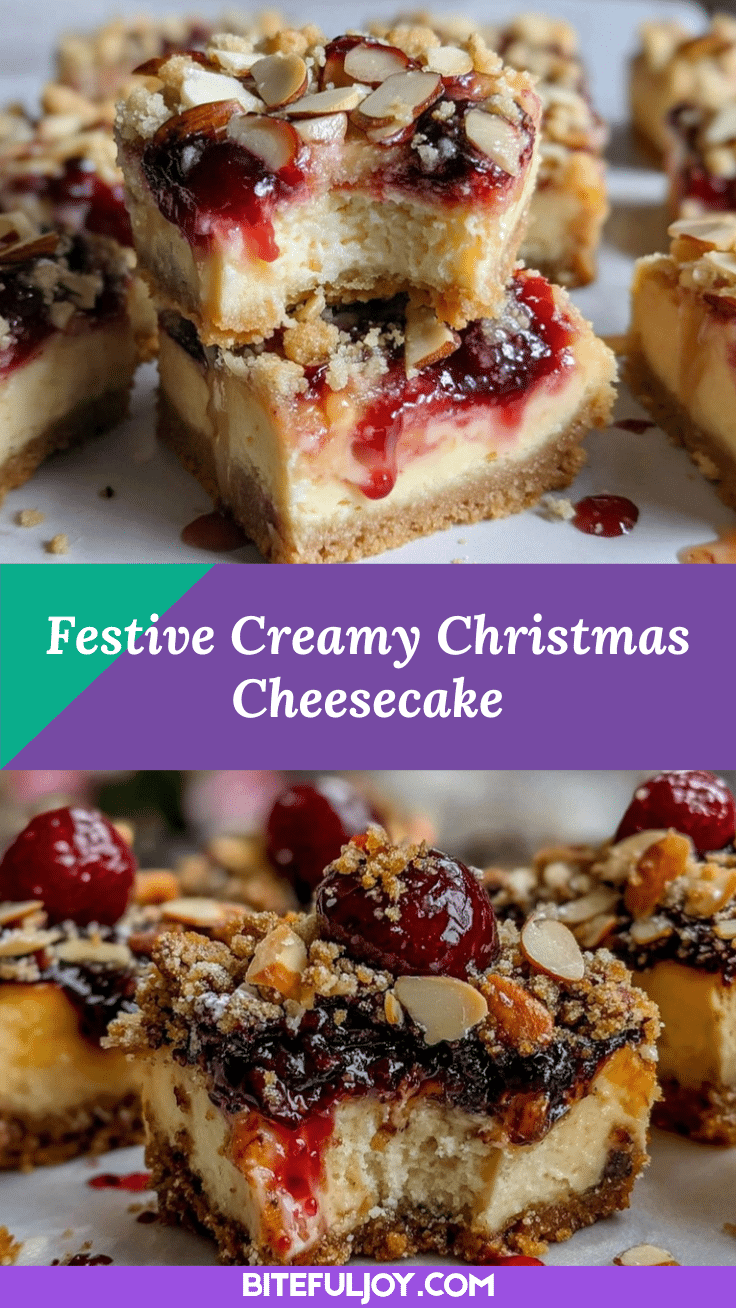
Creamy Christmas Cheesecake Bars – Easy Festive Cherry Streusel Recipe

These creamy cheesecake bars feature a buttery graham cracker crust, smooth vanilla-lemon cheesecake filling, festive cherry topping, and a cozy cinnamon streusel. Perfect for holiday gatherings, cookie exchanges, or edible gifts, they’re easy to make and guaranteed to wow a crowd.
- Prep Time: 20 minutes
- Cook Time: 40 minutes
- Total Time: 3 hours (includes cooling and chilling)
- Yield: 16 bars 1x
- Category: Dessert
- Cuisine: American
Ingredients
- 1 1/2 cups graham cracker crumbs (about 12 whole crackers, finely crushed)
- 1/4 cup granulated sugar
- 6 tablespoons unsalted butter, melted
- 16 oz cream cheese, softened
- 1/2 cup granulated sugar
- 2 large eggs, room temperature
- 1 teaspoon vanilla extract
- 1 tablespoon lemon juice
- 2 tablespoons all-purpose flour
- 1 can (21 oz) cherry pie filling (or homemade)
- Optional: 1 cup fresh or frozen tart cherries, pitted
- 1/2 cup all-purpose flour
- 1/4 cup rolled oats
- 1/3 cup brown sugar, packed
- 1/2 teaspoon ground cinnamon
- 1/4 cup unsalted butter, cold and cubed
Instructions
- Line a 9×13-inch baking pan with parchment paper, leaving an overhang for easy lifting.
- In a medium bowl, mix graham cracker crumbs, granulated sugar, and melted butter until sandy. Press firmly into the bottom of the prepared pan.
- Pre-bake the crust at 350°F for 10 minutes until lightly golden and fragrant. Set aside to cool slightly.
- In a large bowl, beat cream cheese until smooth. Add sugar, eggs, vanilla, lemon juice, and flour. Mix until creamy and lump-free.
- Pour cheesecake mixture over cooled crust and spread evenly. Tap pan gently to release air bubbles.
- Dollop cherry pie filling (and optional extra cherries) over cheesecake layer. Swirl gently with a butter knife or spread evenly.
- In a small bowl, combine flour, oats, brown sugar, and cinnamon. Cut in cold butter until crumbly. Sprinkle streusel evenly over cherry layer.
- Bake at 350°F for 30-35 minutes, until edges are set and center is slightly jiggly. Streusel should be golden and cherries bubbling.
- Cool bars in pan for 1 hour, then refrigerate at least 2 hours (overnight is best) for clean slices.
- Lift bars from pan using parchment overhang. Cut into squares with a sharp knife, wiping between cuts for neat edges. Serve chilled.
Notes
Use room temperature ingredients for a smooth filling. Pre-bake the crust to prevent sogginess. Don’t overmix the cheesecake layer to avoid cracks. Streusel topping hides imperfections. Bars slice best when fully chilled. For gluten-free, use GF graham crackers and flour. For dairy-free, use plant-based cream cheese and butter.
Nutrition
- Serving Size: 1 bar (1/16 of recip
- Calories: 250
- Sugar: 18
- Sodium: 180
- Fat: 16
- Saturated Fat: 9
- Carbohydrates: 28
- Fiber: 1
- Protein: 4
Keywords: cheesecake bars, Christmas dessert, cherry streusel, holiday baking, easy cheesecake, festive bars, potluck dessert, edible gifts


