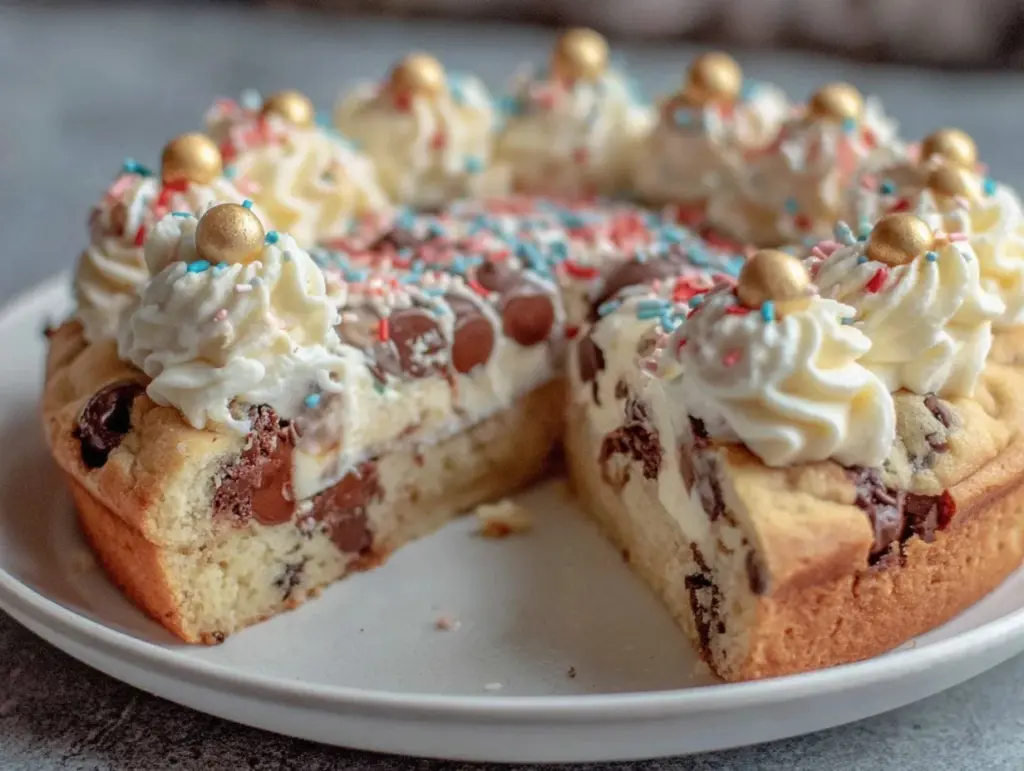
There’s just something magical about walking into a room and seeing a giant Congratulations Banner Cookie Cake, decked out in cheerful colors, sweet vanilla aroma swirling in the air, and that inviting golden-brown crust practically begging you to sneak a bite. The first time I baked this cookie cake, the smell alone brought my kids running from the backyard—faces smeared with dirt and all—just to peek in the oven. You know, it’s that buttery, nostalgic scent that makes you wonder why you ever bothered with regular cake in the first place.
I’ll never forget that moment—the timer dinged, I pulled the pan out, and the whole kitchen went quiet for a split second (a rare feat in my house, trust me). The colorful sprinkle “banner” on top shimmered in the afternoon sunlight, and I couldn’t help but smile. It was the kind of moment where you pause, take a deep breath, and just grin because you know you’ve got something special on your hands.
This recipe has roots in my chaotic family gatherings—think cousins running wild, laughter bouncing off the walls, and always, always someone asking, “Did Auntie bring the cookie cake?” Years ago, I tried to recreate a bakery treat from a neighborhood birthday party, and let’s just say, after a few failed (and hilariously lopsided) attempts, this version finally became a staple for every celebration. Honestly, I wish I’d cracked the code sooner—you haven’t lived until you’ve tasted a homemade Congratulations Banner Cookie Cake, warm and chewy, with chocolate chunks melting just so.
My family couldn’t stop sneaking pieces off the cooling rack (and I can’t say I blame them). It’s dangerously easy, pure comfort, and the kind of sweet treat that brightens up any party table or Pinterest board. Whether it’s for a graduation, job promotion, or just surviving the week, this cookie cake brings people together. I’ve tested it more times than I care to admit (in the name of research, of course), and it’s never let me down. If you’re looking for a dessert that feels like a warm hug and practically shouts “you did it!”—you’re going to want to bookmark this one.
Why You’ll Love This Congratulations Banner Cookie Cake
I’ve made dozens of cookie cakes over the years in my home kitchen and for plenty of friends’ celebrations, so when I say this is the best Congratulations Banner Cookie Cake recipe, I mean it. Here’s why you’ll want to make it part of your party tradition:
- Quick & Easy: Comes together in under 40 minutes—great for those “oh no, I forgot to bake something!” moments.
- Simple Ingredients: No need for fancy ingredients. You’ll find everything at your local grocery store (or already in your pantry).
- Perfect for Any Occasion: Birthdays, graduations, promotions, or just celebrating a little win—this cake fits the bill every time.
- Crowd-Pleaser: Kids love the sprinkles and chocolate chips, grown-ups go for the chewy edges and buttery center.
- Unbelievably Delicious: The combo of crisp edges, soft chewy middle, and creamy frosting is pure bliss. It’s the kind of dessert that has people asking for seconds (and the recipe!).
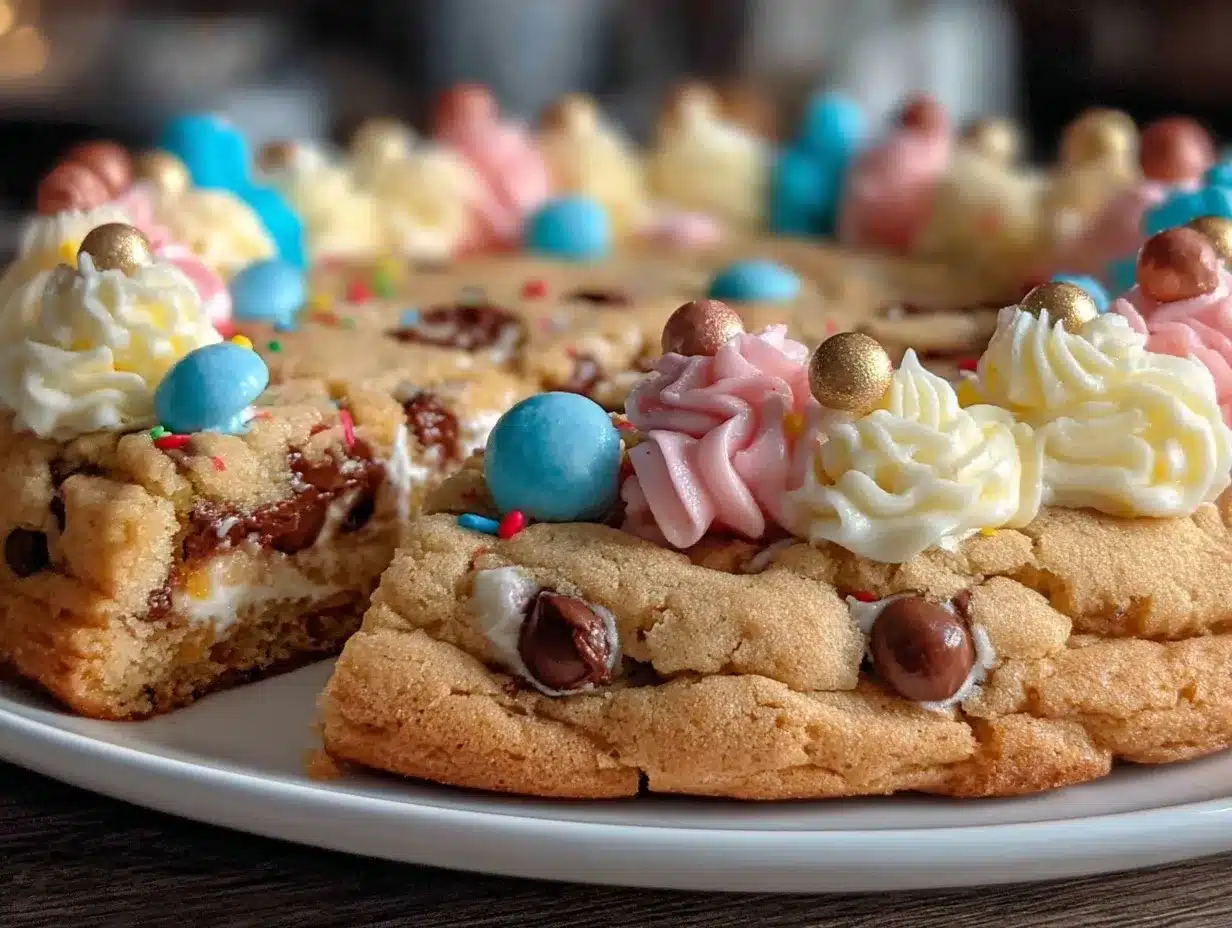
So what makes this banner cookie cake different? For starters, we use a touch of cornstarch for that perfect, soft bite—no dry, crumbly cookies here. The cookie dough is pressed (not spread) into a round pan, which gives you those bakery-style edges. The frosting banner is piped on top in whatever color fits your party theme, and it’s ridiculously fun to personalize with a simple piping bag and a few sprinkles.
This isn’t just about taste (though that’s a big part of it). It’s about creating a centerpiece that feels celebratory and personal. When you slice into that giant cookie and see everyone’s faces light up, you know you’ve made something special. For me, this recipe is pure comfort food but with a festive twist. It’s easy enough for beginner bakers, and impressive enough that it always steals the show. Whether you’re baking for a crowd or just want to make Tuesday feel a little brighter, this Congratulations Banner Cookie Cake recipe is the kind of treat you’ll want to make again and again.
What Ingredients You Will Need
This Congratulations Banner Cookie Cake uses simple, everyday ingredients to create a crowd-pleasing dessert with loads of flavor and a soft, chewy texture. Most of what you need is probably already in your kitchen, which means less running around and more celebrating!
- For the Cookie Cake:
- All-purpose flour – 2 1/4 cups (280g) (I love King Arthur for consistent results)
- Cornstarch – 1 tablespoon (makes the cookie extra soft)
- Baking soda – 1 teaspoon
- Salt – 1/2 teaspoon
- Unsalted butter, softened – 1 cup (226g) (let it sit out for at least 30 minutes)
- Light brown sugar – 1 cup (200g), packed (adds caramel-y depth)
- Granulated sugar – 1/2 cup (100g)
- Large eggs – 2, room temperature
- Pure vanilla extract – 2 teaspoons
- Chocolate chips – 1 1/2 cups (270g) (use mini chips for more even chocolatey goodness)
- Colorful sprinkles – 1/3 cup (for that “banner” effect—use classic jimmies or confetti style)
- For the Banner Frosting:
- Unsalted butter, softened – 1/2 cup (113g)
- Powdered sugar – 2 cups (240g), sifted
- Heavy cream or milk – 2-3 tablespoons (for piping consistency)
- Vanilla extract – 1 teaspoon
- Pinch of salt
- Gel food coloring – any colors you like for your celebration (I usually go with yellow or blue for birthdays, red for graduations)
Ingredient Tips:
- If you need it gluten-free, swap the flour for a measure-for-measure gluten-free blend (I’ve had good luck with Bob’s Red Mill).
- For dairy-free, use plant-based butter and a splash of oat milk in the frosting.
- Mini chocolate chips distribute better, but regular ones work too.
- If you want a nutty twist, add 1/2 cup chopped toasted pecans or walnuts to the dough.
- Don’t skip the cornstarch—it’s the secret to a melt-in-your-mouth texture.
Honestly, the only “fancy” thing here is the gel food coloring, but even that’s optional. You can keep it classic with white frosting, or let the kids pick the colors. This recipe is as flexible as your pantry allows, and it turns out delicious every time.
Equipment Needed
- 9-inch or 10-inch round cake pan (a springform pan makes it super easy to remove, but a regular one works fine with parchment paper)
- Mixing bowls – one large, one medium
- Electric hand mixer or stand mixer (either works, but you can do it by hand if you’re feeling strong!)
- Measuring cups and spoons
- Silicone spatula (for scraping every last bit of dough)
- Parchment paper – to line the pan and make clean-up a breeze
- Piping bag and round tip (for the banner frosting; you can also use a zip-top bag with the corner snipped off)
- Offset spatula or butter knife (to spread the dough evenly)
If you don’t have a round cake pan, you can use a square one—the cookie will just have a different party vibe! In a pinch, even a rimmed baking sheet works for a thinner, larger cookie cake. I’ve used a regular zip-top bag as a piping bag plenty of times (just snip a small corner), and it works like a charm. For easy cleanup, parchment paper is your best friend—no stuck-on cookie bits here! If you’re using a nonstick cake pan, a little cooking spray helps, but I always recommend parchment as backup. For the mixer, hand or stand does the trick, but a good old wooden spoon and some elbow grease get you there too (that’s how my grandma did it, after all).
Preparation Method
-
Preheat and Prep:
- Set your oven to 350°F (175°C). Line a 9–10-inch round cake pan with parchment paper and lightly grease the sides. This keeps your cookie cake from sticking—trust me, you don’t want to wrestle it out of the pan later!
-
Mix the Dry Ingredients:
- In a medium bowl, whisk together 2 1/4 cups (280g) flour, 1 tablespoon cornstarch, 1 teaspoon baking soda, and 1/2 teaspoon salt. Set aside.
-
Cream the Butter and Sugars:
- In a large bowl, beat 1 cup (226g) softened butter, 1 cup (200g) packed brown sugar, and 1/2 cup (100g) granulated sugar until light and fluffy, about 2-3 minutes. If you’re using a hand mixer, start on low to avoid a sugar shower!
-
Add the Eggs and Vanilla:
- Beat in 2 large eggs, one at a time, scraping down the sides. Add 2 teaspoons vanilla extract and mix until combined. The batter should look smooth and creamy.
-
Combine Wet and Dry:
- Gradually add the dry ingredients to the wet mixture. Mix on low or by hand until just combined—don’t overmix, or the cookie will be tough. The dough should be thick and a little sticky.
-
Fold in the Good Stuff:
- Stir in 1 1/2 cups (270g) chocolate chips and 1/3 cup sprinkles. Save a handful of chocolate chips to press on top if you want a bakery look.
-
Press Into Pan:
- Using a spatula or clean hands, press the dough evenly into your prepared pan. It might seem thick, but it will spread as it bakes. Add extra chips or sprinkles on top if you like.
-
Bake:
- Bake for 22–28 minutes, until the edges are golden brown and the center looks set but still soft. My oven likes 25 minutes, but check early—every oven is different. The top might crack a little (that’s okay!).
-
Cool Completely:
- Let the cookie cake cool in the pan for 15–20 minutes, then lift out using the parchment paper. Cool fully on a wire rack before decorating, or the frosting will melt right off!
-
Make the Banner Frosting:
- Beat 1/2 cup (113g) butter until creamy. Gradually add 2 cups (240g) powdered sugar, beating well. Add 2–3 tablespoons cream or milk, 1 teaspoon vanilla, and a pinch of salt. Beat until fluffy and smooth. Divide and dye with gel food coloring as you like.
-
Decorate:
- Use a piping bag with a round tip (or a zip-top bag) to pipe a “banner” across the cake. Write “Congratulations!” or any message you like. Scatter extra sprinkles for a festive finish.
-
Slice and Serve:
- Cut into wedges or squares. Serve at room temperature for the best texture.
Troubleshooting: If your cookie cake seems too brown after 20 minutes, tent with foil. If it’s still raw in the middle after 28 minutes, give it 2–3 more minutes, but don’t overbake—soft is good! If the frosting is too stiff, add another tablespoon of cream.
Personal note: I always save a few sprinkles for my kids to help with decorating (and for a little “taste test” along the way).
Cooking Tips & Techniques
Over the years, I’ve learned a few tricks to guarantee cookie cake success every time. Here’s what I wish I’d known when I started baking Congratulations Banner Cookie Cakes:
- Room Temperature Ingredients: Let your butter and eggs sit out before starting. Cold ingredients don’t mix as well and can lead to uneven baking.
- Don’t Overmix: Once the flour goes in, mix just until combined. Overmixing makes the cookie tough instead of chewy.
- Even Dough Spreading: Press dough into the pan with slightly damp hands or a spatula. This helps spread the dough without sticking and keeps the surface smooth for decorating.
- Check for Doneness: Every oven is quirky. Start checking around 22 minutes—the edges should be golden and the middle still soft. The cookie will keep firming up as it cools.
- Cool Before Frosting: If you try to frost a warm cookie, it’ll melt and slide off. Wait until it’s completely cool (I know, it’s tough to wait!), then decorate your banner.
- Personal Fails: I’ve forgotten to line the pan—big mistake. The cookie stuck and broke apart. Always use parchment!
- Double Batch Tip: For a crowd, double the recipe and bake in a 13×18-inch rimmed baking sheet. Just reduce baking time by 5 minutes and watch closely.
- Banner Piping: If you’re new to piping, practice on parchment paper first. Or just go freehand—imperfections make it charming!
As for multitasking, I like to make the frosting while the cake bakes. It saves time and, honestly, gives me a reason to lick the spatula. Consistency comes down to two things: measuring your flour (spooned and leveled, not packed) and not overbaking. If you stick to those, you’ll nail this Congratulations Banner Cookie Cake every time.
Variations & Adaptations
This cookie cake is a celebration chameleon—it adapts to whatever your party (or pantry) needs. Here are some of my favorite twists:
- Gluten-Free: Swap the flour for a 1:1 gluten-free blend. I use Bob’s Red Mill or King Arthur’s. It turns out just as chewy and delicious.
- Vegan/Dairy-Free: Use plant-based butter and replace eggs with flax eggs (1 tablespoon ground flaxseed + 2.5 tablespoons water per egg, let sit 5 minutes). Use oat milk in the frosting. The results are surprisingly rich and satisfying.
- Flavor Variations: Try butterscotch chips instead of chocolate, or a mix of white and dark chocolate. For a citrus twist, add 1 tablespoon orange zest to the dough and top the banner with a light lemon glaze.
- Seasonal Touches: In spring, toss in pastel sprinkles and use pale pink or green for the banner. For fall, use orange and brown sprinkles, and add a dash of cinnamon to the dough.
- Nut-Free Option: Skip nuts and use allergy-friendly chocolate chips (like Enjoy Life brand).
- Other Baking Methods: You can bake this as bars in a 9×13-inch pan—reduce baking time by 3–5 minutes. For tiny celebrations, halve the recipe and bake in a 6-inch pan.
One of my favorite personal spins is to use peanut butter chips and rainbow nonpareils for a “confetti” effect—my kids call it the “party explosion” cake. The beauty of this recipe is that it’s your blank canvas. Mix and match colors and add-ins to suit the occasion or your cravings!
Serving & Storage Suggestions
For the best party wow-factor, serve your Congratulations Banner Cookie Cake at room temperature, right on a pretty cake stand or wooden board. If you want clean slices, use a sharp serrated knife (wipe it between cuts for perfect pieces—trust me, it’s worth it for those Instagram moments).
This cookie cake pairs perfectly with a cold glass of milk, hot coffee, or, for the grown-ups, a celebratory glass of bubbly. Add a scoop of vanilla ice cream for extra indulgence—especially if you warm individual slices for 10 seconds in the microwave. It’s pure bliss!
Storage: Cover the cookie cake with foil or plastic wrap and keep at room temperature for up to 3 days. For longer storage, refrigerate up to a week. You can also freeze slices (separated by parchment paper) in a zip-top bag for up to 2 months. Thaw at room temp or microwave for a few seconds before serving.
Honestly, the flavors get even better on day two—the cookie gets softer and the vanilla notes really shine. If you’re prepping ahead for a party, bake the cake the night before, then decorate the next day for best results.
Nutritional Information & Benefits
An average slice of this Congratulations Banner Cookie Cake (assuming 12 servings) is about 350 calories, with 4g protein, 18g fat, and 42g carbs. The recipe is rich in comforting carbs and provides a little protein from the eggs and butter. You do get a bit of calcium from the dairy, and if you use dark chocolate chips, you’ll sneak in some antioxidants.
For those with dietary needs, you can easily make this cookie cake gluten-free or dairy-free with just a couple of swaps. Allergy note: The standard recipe contains wheat, dairy, and eggs—be sure to check all your ingredient labels if you’re baking for guests with allergies. From a wellness perspective, I’m all about balance—this is a treat meant to be enjoyed and shared, and honestly, sometimes a sweet celebration is good for the soul!
Conclusion
When you need a show-stopping dessert that’s as fun to make as it is to eat, this Congratulations Banner Cookie Cake is the answer. It’s easy, customizable, and brings out the “wow” at any celebration—without the stress (or a mountain of dirty pans). You can personalize it for any occasion, tweak the flavors, and trust it’ll disappear fast—my family can vouch for that!
Bake this cookie cake your way—try new colors, swap in your favorite add-ins, and let your creativity shine. For me, it’s the recipe I come back to whenever I want to make someone feel extra special. If you try it, I’d love to hear how it turned out or what twists you gave it. Leave a comment, share your party photos, or tag me on social—I can’t wait to see your celebrations!
So preheat your oven, grab those sprinkles, and get ready to bake some happiness. You’ve got this—and you’re about to make a whole room full of people smile. Congratulations!
Frequently Asked Questions
How do I keep my cookie cake from sticking to the pan?
Line your pan with parchment paper and lightly grease the sides. The cookie lifts out easily and keeps its shape. If you don’t have parchment, use a generous coat of nonstick spray and let the cake cool before removing.
Can I make the Congratulations Banner Cookie Cake ahead of time?
Absolutely! Bake the cookie cake the night before, store it covered at room temperature, and decorate the next day. The flavor actually improves after a few hours as the cookie softens.
What if I don’t have a piping bag for the banner?
No worries—a zip-top bag with the corner snipped off works perfectly. You can also use a spoon and butter knife to spread the frosting and write your message. It’ll look homemade and charming!
Can I freeze leftovers?
Yes! Slice the cookie cake, wrap pieces in parchment, and freeze in a zip-top bag for up to 2 months. Thaw at room temperature or microwave for a quick treat.
How do I make this cookie cake gluten-free?
Just swap the all-purpose flour for a measure-for-measure gluten-free blend like Bob’s Red Mill. The texture stays chewy and delicious—no one will guess it’s gluten-free!
Pin This Recipe!
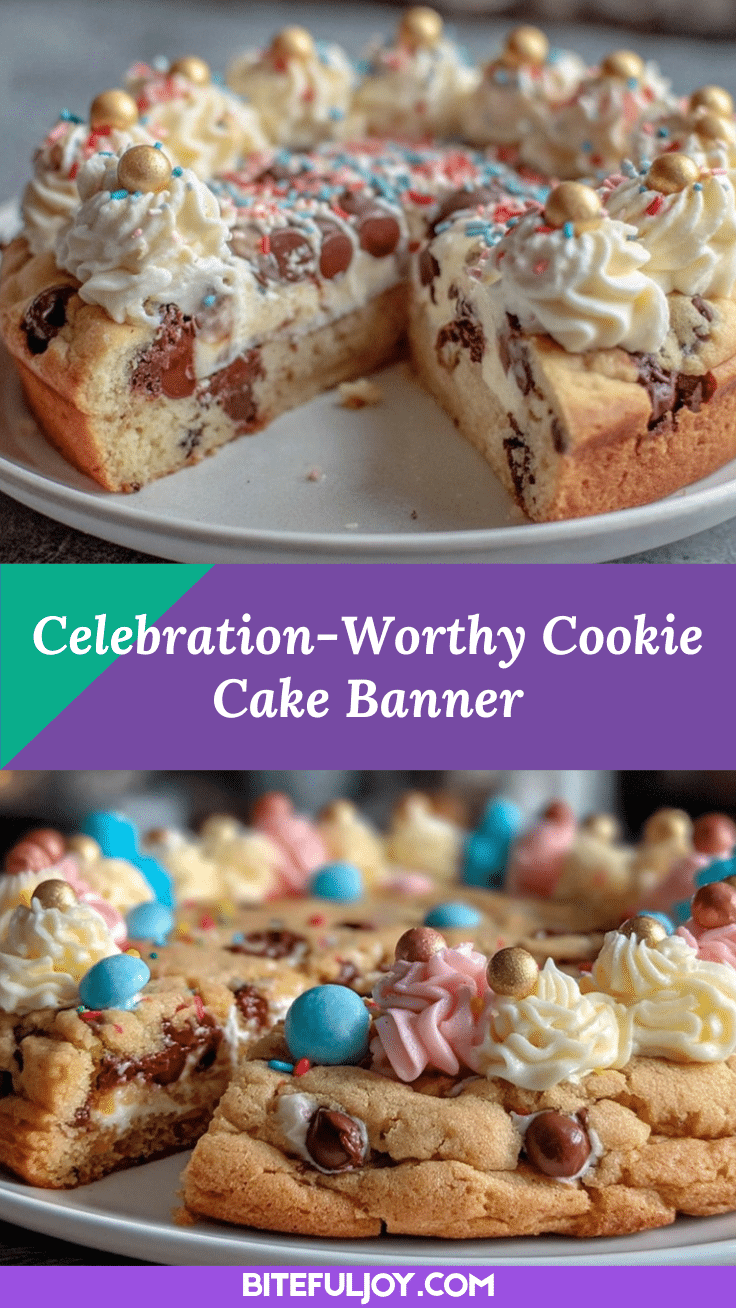
Congratulations Banner Cookie Cake

A festive, chewy cookie cake decorated with a colorful frosting banner and sprinkles—perfect for graduations, promotions, birthdays, or any celebration. Quick to make, crowd-pleasing, and easily customizable for dietary needs.
- Prep Time: 15 minutes
- Cook Time: 25 minutes
- Total Time: 40 minutes
- Yield: 12 servings 1x
- Category: Dessert
- Cuisine: American
Ingredients
- 2 1/4 cups (280g) all-purpose flour
- 1 tablespoon cornstarch
- 1 teaspoon baking soda
- 1/2 teaspoon salt
- 1 cup (226g) unsalted butter, softened
- 1 cup (200g) light brown sugar, packed
- 1/2 cup (100g) granulated sugar
- 2 large eggs, room temperature
- 2 teaspoons pure vanilla extract
- 1 1/2 cups (270g) chocolate chips (mini or regular)
- 1/3 cup colorful sprinkles
- For the Banner Frosting:
- 1/2 cup (113g) unsalted butter, softened
- 2 cups (240g) powdered sugar, sifted
- 2–3 tablespoons heavy cream or milk
- 1 teaspoon vanilla extract
- Pinch of salt
- Gel food coloring (any colors you like)
Instructions
- Preheat oven to 350°F (175°C). Line a 9–10-inch round cake pan with parchment paper and lightly grease the sides.
- In a medium bowl, whisk together flour, cornstarch, baking soda, and salt. Set aside.
- In a large bowl, beat softened butter, brown sugar, and granulated sugar until light and fluffy (2-3 minutes).
- Beat in eggs one at a time, then add vanilla extract and mix until smooth.
- Gradually add dry ingredients to wet mixture, mixing on low or by hand until just combined.
- Fold in chocolate chips and sprinkles. Reserve a handful of chips for topping if desired.
- Press dough evenly into prepared pan. Add extra chips or sprinkles on top if you like.
- Bake for 22–28 minutes, until edges are golden brown and center is set but still soft.
- Cool in pan for 15–20 minutes, then lift out using parchment paper. Cool completely on a wire rack before decorating.
- For the banner frosting: Beat butter until creamy. Gradually add powdered sugar, then cream or milk, vanilla, and salt. Beat until fluffy and smooth. Divide and color with gel food coloring as desired.
- Pipe a banner across the cooled cookie cake using a piping bag or zip-top bag. Write your message and scatter extra sprinkles.
- Slice into wedges or squares and serve at room temperature.
Notes
For gluten-free, use a 1:1 gluten-free flour blend. For dairy-free, use plant-based butter and oat milk. Don’t overmix the dough for best texture. Cool completely before frosting. Double the recipe for a crowd and bake in a rimmed baking sheet. Practice piping on parchment if you’re new to decorating.
Nutrition
- Serving Size: 1 slice (1/12 of cak
- Calories: 350
- Sugar: 28
- Sodium: 180
- Fat: 18
- Saturated Fat: 11
- Carbohydrates: 42
- Fiber: 1
- Protein: 4
Keywords: cookie cake, party dessert, congratulations, celebration, banner cake, easy dessert, chewy cookie, birthday, graduation, chocolate chip, sprinkles


