Introduction
Let me set the scene for you: the crisp scent of peppermint mingling with warm, buttery sugar wafting through my kitchen—honestly, it’s like Christmas morning packed into a single bite. The first time I made these tender peppermint snickerdoodles, I was just trying to recreate the nostalgic comfort of my grandma’s classic snickerdoodle recipe, but with a wintry twist that screams holiday cheer. I remember standing in my kitchen, a dusting of flour on my nose (classic), watching my little ones sneak spoonfuls of dough off the mixing paddle. You know, the kind of moment where you pause, take a deep breath, and just smile because you know you’re onto something truly special.
Back when I was knee-high to a grasshopper, holiday baking meant trays of cookies piled high and the peppermint candies that seemed to appear in every corner of the house. So blending those two flavors together just felt right—like a hug from my childhood and a dash of grown-up fun. The first batch disappeared before they even cooled, much to my family’s delight (and, let’s face it, a little frustration for me). My husband claims these are “dangerously easy” to eat, and honestly, he’s not wrong. The soft, pillowy texture and cool minty snap? Pure, nostalgic comfort.
These peppermint snickerdoodles are perfect for potlucks, sweet treats for your kids, or if you want to brighten up your Pinterest cookie board with something that just looks as festive as it tastes. I wish I’d discovered this peppermint snickerdoodle recipe years ago—could’ve saved myself from a few bland cookie swaps! Trust me, I’ve tested this recipe more times than I’d care to admit (in the name of research, of course), and it’s become a staple for family gatherings and holiday gifting. It truly feels like a warm hug on a frosty day, and you’re going to want to bookmark this one for every December to come.
Why You’ll Love This Recipe
Let’s be real—holiday baking can get a little overwhelming with all the planning, shopping, and cleaning. But this peppermint snickerdoodle recipe makes everything easier, tastier, and just a bit more magical. I’ve baked these cookies countless times for parties, bake sales, and cozy nights in, and I can say with confidence (and a little bit of pride) that you’ll love them for more reasons than one. Here’s why this recipe stands out:
- Quick & Easy: Comes together in under 30 minutes, so you can whip up a batch even on a busy weeknight or when last-minute guests pop by.
- Simple Ingredients: No fancy or hard-to-find items—just pantry staples like flour, sugar, butter, and a bit of peppermint extract. (You probably have everything already!)
- Perfect for Holiday Parties: These cookies look gorgeous on a festive platter, and their sparkly peppermint-sugar coating is irresistible for kids and adults alike.
- Crowd-Pleaser: They disappear fast—honestly, I’ve had folks ask for the recipe after just one bite. Even picky eaters have gone back for seconds!
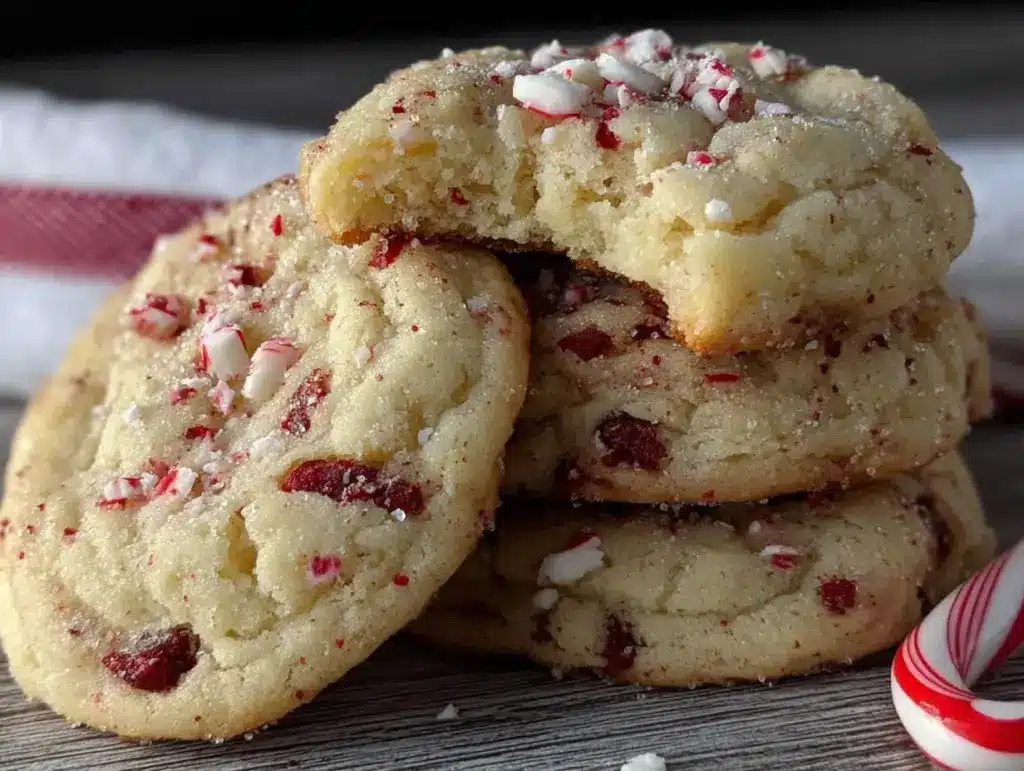
- Unbelievably Delicious: The combination of a soft, tender center with a crisp, sugary edge and cool peppermint flavor is pure comfort food. The texture is next-level—think classic snickerdoodle meets winter wonderland.
What makes this peppermint snickerdoodle recipe different? Well, I use a little cream of tartar for that iconic tang and chewy texture, and I blend peppermint extract right into the dough (so you get minty flavor in every bite, not just from the topping). Plus, rolling the cookies in a mix of crushed peppermint candies and cinnamon sugar gives them that sparkly, crunchy finish you just can’t get anywhere else.
For me, this recipe isn’t just another cookie—it’s the kind that makes you close your eyes after the first bite and savor the moment. It’s holiday comfort, reimagined for busy bakers who still want all the soul-soothing satisfaction without the fuss. Whether you’re aiming to impress guests or just want to make your own family smile, these peppermint snickerdoodles are the answer. I promise, they’ll leave you feeling festive and maybe even a bit nostalgic.
What Ingredients You Will Need
This peppermint snickerdoodle recipe uses simple, wholesome ingredients to deliver bold flavor and a satisfyingly soft texture—no complicated grocery runs required. Most of these are pantry staples, and you can swap a few items if needed without sacrificing that classic snickerdoodle charm.
- For the Cookie Dough:
- 2 3/4 cups (345g) all-purpose flour (King Arthur is my favorite for cookies!)
- 1 1/2 teaspoons cream of tartar (adds tang and chewiness)
- 1/2 teaspoon baking soda
- 1/4 teaspoon salt
- 1 cup (226g) unsalted butter, softened (room temperature is key for easy mixing)
- 1 1/2 cups (300g) granulated sugar
- 2 large eggs (room temperature helps make the dough fluffier)
- 1 teaspoon pure vanilla extract
- 1 teaspoon peppermint extract (McCormick or Watkins are both solid choices)
- For the Peppermint Sugar Coating:
- 1/4 cup (50g) granulated sugar
- 1 teaspoon ground cinnamon (optional, but I love the classic snickerdoodle touch)
- 1/4 cup (30g) crushed peppermint candies or candy canes (bash ’em in a zip bag with a rolling pin for perfect bits!)
Want to make it gluten-free? Swap the all-purpose flour for a 1:1 gluten-free baking blend (Bob’s Red Mill works beautifully). If dairy’s an issue, use a vegan butter like Earth Balance. For egg-free cookies, a flaxseed egg (1 tablespoon flaxseed meal + 2.5 tablespoons water) actually works pretty well here—just don’t expect quite the same chewy texture.
When peppermint extract isn’t available, you can use pure mint extract, but start with half the amount and taste the dough before adding more. For the peppermint sugar coating, crushed white chocolate chips make a fun swap if you want a creamy twist instead of the classic candy crunch. In summer, I’ve even skipped the candy canes and added lemon zest for a sunny snickerdoodle (not exactly festive, but really good!).
If you like a stronger mint flavor, add an extra 1/2 teaspoon peppermint extract—or for a more subtle approach, stick with the original amount and let the topping do the talking. I recommend sifting the flour for the smoothest dough, and always use fresh baking soda and cream of tartar for the best rise and texture.
All in all, these ingredients come together for cookies that taste like a holiday dream. Simple, flexible, and packed with cheer!
Equipment Needed

- Large mixing bowl (stainless steel or glass—doesn’t matter, just make sure it’s big enough for easy stirring)
- Medium bowl (for rolling the cookies in peppermint sugar)
- Electric mixer (stand mixer or hand mixer both work; you can mix by hand in a pinch, but it’ll take some muscle)
- Baking sheets (rimmed preferred for easy cleanup)
- Parchment paper or silicone baking mats (Silpat mats are a lifesaver—no sticking, no burning)
- Measuring cups and spoons (I love the stainless steel sets—easy to clean, super accurate)
- Cookie scoop (optional, but helps make perfectly round cookies; a tablespoon works too)
- Wire cooling rack (lets the cookies cool evenly and stops sogginess)
- Rolling pin and zip-top bag (for crushing peppermint candies—kids love helping with this part!)
If you don’t have a mixer, just use a sturdy wooden spoon and some elbow grease. For cookie scoops, I’ve used everything from old ice cream scoops to plain spoons, and honestly, they all work. For baking sheets, cheap aluminum pans from the grocery store do the job, but thicker, heavy-duty ones bake more evenly.
Trust me, parchment paper is worth it—no stuck cookies, and you can just slide them off for cooling. If your wire cooling rack is a little rusty (mine is, from years of use), just put a sheet of paper towel underneath to catch any crumbs. Maintenance tip: wash your silicone mats with warm water and baking soda after every use; keeps them non-stick and odor-free!
Preparation Method
- Preheat and Prep: Set your oven to 350°F (175°C). Line two baking sheets with parchment paper or silicone baking mats. This helps the cookies bake evenly and prevents sticking.
- Mix Dry Ingredients: In a large bowl, whisk together 2 3/4 cups (345g) flour, 1 1/2 teaspoons cream of tartar, 1/2 teaspoon baking soda, and 1/4 teaspoon salt. Make sure everything’s well combined—clumps of cream of tartar aren’t fun!
- Cream Butter and Sugar: In another large bowl (or stand mixer), beat 1 cup (226g) unsalted butter and 1 1/2 cups (300g) sugar until light and fluffy, about 2-3 minutes. The mixture should look pale and feel airy. If it’s still grainy, keep mixing.
- Add Eggs and Flavorings: Beat in 2 large eggs, one at a time. Add 1 teaspoon vanilla extract and 1 teaspoon peppermint extract. Scrape down the sides of the bowl as you go. The dough will smell so good at this point—it’s hard not to sneak a taste!
- Combine Wet and Dry: Gradually add the flour mixture to the butter mixture, mixing on low speed until just combined. Don’t overmix—otherwise, the cookies might get tough. The dough should be soft but not sticky. If it feels too wet, add an extra tablespoon of flour.
- Prepare Peppermint Sugar Coating: In a medium bowl, mix 1/4 cup (50g) sugar, 1 teaspoon cinnamon (optional), and 1/4 cup (30g) crushed peppermint candies. Use a fork to blend it all together. The bits of candy should be small—think confetti, not gravel.
- Shape the Cookies: Scoop out tablespoon-sized portions of dough (about 1 ounce/28g each) and roll into balls. Roll each ball generously in the peppermint sugar mixture to coat. Place them on your prepared baking sheets, about 2 inches (5 cm) apart.
- Bake: Bake in preheated oven for 9-11 minutes. The edges should be set but the centers will look slightly underbaked—this is what keeps them soft! If you like crisper cookies, add another minute.
- Cool: Let cookies sit on the baking sheet for 2-3 minutes before transferring to a wire rack. They’ll firm up as they cool. (Honestly, the hardest part is waiting!)
Troubleshooting Tips: If your dough spreads too much, chill it for 30 minutes before baking; warm dough means flat cookies. If the peppermint candies melt and pool, use slightly bigger bits next time, or sprinkle some on top mid-bake. For extra minty flavor, drizzle with a tiny bit of melted white chocolate mixed with peppermint extract after cooling.
Personal Efficiency Hack: Line up your cookie dough balls on the baking sheet, then roll them all at once in the peppermint sugar—less mess, and you get a more even coating. Use two spoons to handle sticky dough if needed. And don’t worry if your cookies aren’t perfectly round; that’s the homemade charm!
There you have it—peppermint snickerdoodles, baked and ready for holiday cheer!
Cooking Tips & Techniques
Over the years, I’ve picked up a few tricks that make these peppermint snickerdoodles turn out just right every time—plus a couple of hard-learned lessons from my own kitchen flops.
- Chill the Dough (if needed): If your kitchen is warm or you notice the dough is too soft, pop it in the fridge for 30-45 minutes. It’ll help prevent spreading and give you thicker, chewier cookies.
- Don’t Overmix: Once you add the dry ingredients to the wet, mix just until combined. Overmixing leads to tough cookies (learned that the hard way after one batch came out like hockey pucks).
- Use a Cookie Scoop: This makes each cookie uniform in size, so they bake evenly. If you don’t have one, a tablespoon works, but keep them as close to the same size as possible.
- Crushing Peppermint Candies: Put your candies in a zip-top bag and use a rolling pin or meat mallet. Don’t crush them too finely—bigger pieces add crunch, but too big and they’ll melt into sticky puddles. Aim for pea-sized bits.
- Watch the Bake Time: Peppermint snickerdoodles bake fast. Start checking at 9 minutes. The edges should set, but centers will look soft. They’ll firm up as they cool, so don’t wait for a golden color.
- Multitasking: While the first tray bakes, shape and roll the next batch. Keeps things moving and makes cleanup easier.
One mistake I made once was leaving the cookies on the sheet for too long—ended up with soggy bottoms! So, let them cool for just a couple minutes, then transfer to a rack. Consistency tip: weigh your flour for the best results (too much = dry cookies, too little = thin ones). And don’t skimp on the peppermint extract—the flavor really shines through in every bite.
Last but not least, always taste your dough before baking. I know, technically we’re not supposed to eat raw dough, but a tiny taste tells you if you want more mint or cinnamon. That’s real home baking, right?
Variations & Adaptations
Cookies aren’t one-size-fits-all, and this peppermint snickerdoodle recipe is no exception. Here are some fun ways to customize, adapt, or change things up to suit your crowd (or just your mood):
- Gluten-Free: Swap the all-purpose flour for a 1:1 gluten-free baking mix. Bob’s Red Mill and Cup4Cup both work really well—just expect slightly lighter cookies.
- Dairy-Free: Use vegan butter (Earth Balance is my go-to) and dairy-free chocolate chips if you want an extra bit of sweetness. The texture stays soft, and the flavor is still rich.
- Holiday Chocolate Peppermint: Fold in 1/2 cup (90g) mini chocolate chips to the dough before shaping for a chocolatey surprise. You can also drizzle cooled cookies with melted chocolate for a pretty finish.
- Seasonal Citrus Twist: Skip the peppermint extract, add 1 tablespoon freshly grated orange zest to the dough, and roll the cookies in orange-sugar instead of peppermint. It’s a lovely change for spring or summer!
- Low-Sugar: Substitute half the sugar with coconut sugar for a deeper flavor and a lower glycemic option. Cookies will be a bit darker but still delicious.
If you need nut-free cookies, just double-check your peppermint candies and extracts for possible cross-contamination. For egg-free, try a flaxseed egg (1 tablespoon flaxseed meal + 2.5 tablespoons water, let sit for 5 minutes). I’ve made a batch this way for a vegan friend, and while they’re a tad less chewy, the flavor is still spot on.
Last winter, I tried adding crushed freeze-dried strawberries to the coating for a pink, berry-peppermint version—honestly, it was a hit with my daughter, who’s obsessed with anything pink. Don’t be afraid to play around and make these cookies your own!
Serving & Storage Suggestions
These peppermint snickerdoodles are best served just slightly warm, when the centers are still soft and the peppermint coating has a gentle crunch. Pile them high on a festive platter, sprinkle with extra crushed candy for sparkle, and watch them disappear!
Pair with hot cocoa, peppermint mocha, or even a glass of cold milk—perfect for cozy evenings, holiday brunches, or dessert buffets. They also make a beautiful addition to cookie trays for gifting; just wrap in cellophane or pop into a pretty tin.
To store, place cooled cookies in an airtight container. They’ll keep at room temperature for up to 5 days (if they last that long!). For longer storage, freeze in layers separated by wax paper for up to 2 months. Thaw at room temperature—no need to reheat, but you can warm in the microwave for 10 seconds if you like.
Over time, the peppermint flavor intensifies, so if you love a strong minty note, let them sit a day before serving. If the cookies lose their crunch, pop them in a low oven (300°F/150°C) for 3-5 minutes to refresh. Pro tip: add a slice of bread to the container to keep cookies soft!
Nutritional Information & Benefits
Each peppermint snickerdoodle is approximately 120 calories, with about 5g fat, 18g carbs, and 2g protein. They’re naturally nut-free (unless you use chocolate chips), and you can make them gluten-free or dairy-free with simple swaps.
Key ingredients like peppermint candy offer a little boost of flavor without tons of extra sugar, and using real butter gives you that satisfying, homemade taste. The cookies are a nice treat for occasional indulgence, and making them at home means you control the ingredients (no preservatives or weird additives).
If you’re watching your sugar, try using coconut sugar or a natural sweetener. Be aware of potential allergens: wheat, eggs, and dairy are standard, but adaptations are easy. For wellness, I love pairing these with fresh fruit or a cup of herbal tea—it’s a sweet treat that feels festive and comforting.
Conclusion
So there you have it—peppermint snickerdoodles, your new go-to festive holiday cookie. They’re soft, chewy, packed with minty flavor, and honestly, they just make the whole house smell like Christmas. Whether you’re baking for a big party or just a cozy night in, these cookies deliver pure joy with every bite.
Feel free to adapt the recipe to suit your family’s tastes, swap in your favorite mix-ins, or tweak the mint to cinnamon ratio. What I love most is how easy these are to make, yet they look and taste like you spent hours in the kitchen. It’s the kind of recipe you’ll come back to year after year (I know I do—my family wouldn’t let me skip them!).
If you try these peppermint snickerdoodles, let me know in the comments below—share your twists, holiday memories, or even your baking flops (we’ve all been there!). Pin, share, and spread the cookie love. Wishing you a season full of sweet, minty moments and plenty of smiles!
FAQs
Can I make peppermint snickerdoodles ahead of time?
Absolutely! You can prepare the dough and chill it for up to 2 days before baking, or freeze shaped dough balls for up to 2 months. Bake from frozen, just add 2 minutes to the bake time.
Can I use mint extract instead of peppermint?
Yes, but start with half the amount since mint extract is stronger and slightly different in flavor. Taste your dough before adding more.
How do I prevent my cookies from spreading too much?
If your dough is too soft, chill it for 30 minutes before baking. Make sure your butter isn’t melted, and measure the flour accurately.
Can I make these cookies gluten-free?
Definitely! Use a 1:1 gluten-free baking flour blend. The texture will be a little lighter, but the flavor stays festive and delicious.
Do peppermint snickerdoodles freeze well?
Yes—they freeze beautifully! Store cooled cookies in layers with wax paper in an airtight container. Thaw at room temperature before serving.
Pin This Recipe!
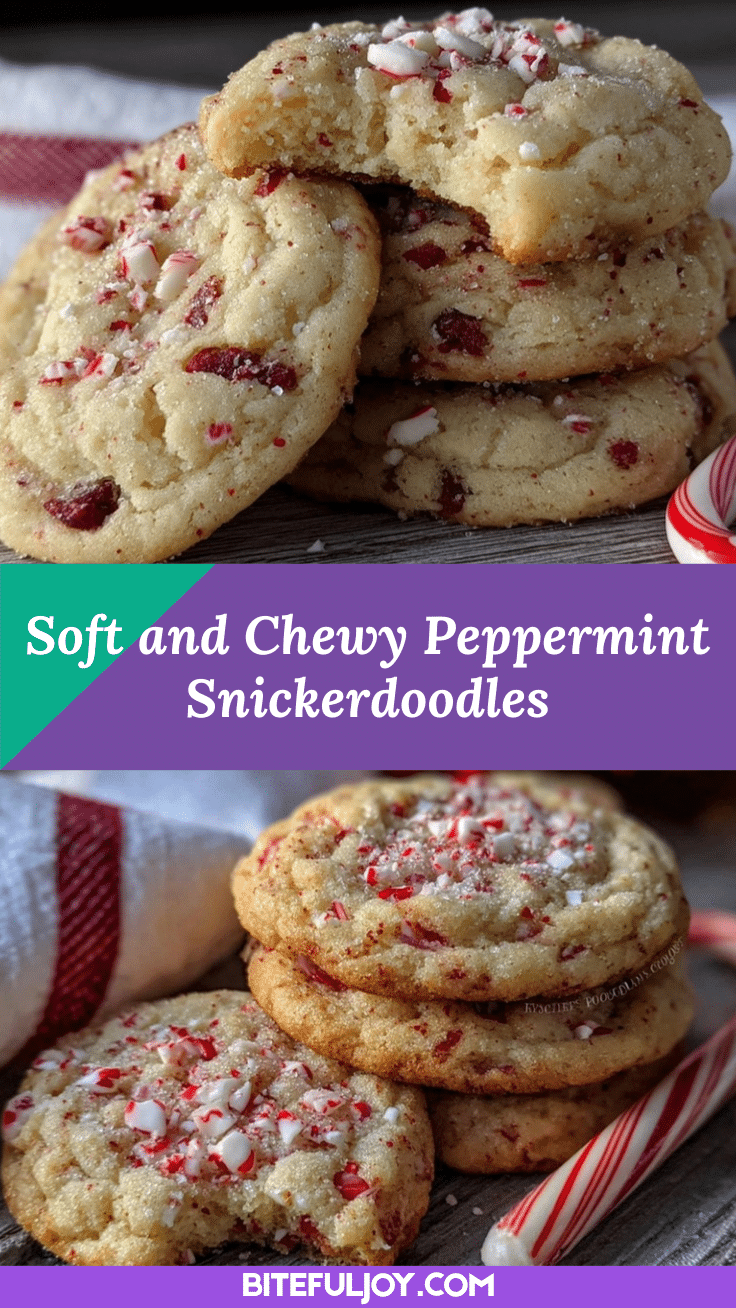
Peppermint Snickerdoodles: Easy Festive Cookies for Holiday Parties

Soft, chewy snickerdoodles with a festive twist of peppermint, coated in sparkly peppermint-cinnamon sugar. Perfect for holiday parties, gifting, or cozy nights in—these cookies deliver nostalgic comfort and minty cheer in every bite.
- Prep Time: 15 minutes
- Cook Time: 10 minutes
- Total Time: 25 minutes
- Yield: 24 cookies 1x
- Category: Dessert
- Cuisine: American
Ingredients
- 2 3/4 cups all-purpose flour
- 1 1/2 teaspoons cream of tartar
- 1/2 teaspoon baking soda
- 1/4 teaspoon salt
- 1 cup unsalted butter, softened
- 1 1/2 cups granulated sugar
- 2 large eggs
- 1 teaspoon pure vanilla extract
- 1 teaspoon peppermint extract
- 1/4 cup granulated sugar (for coating)
- 1 teaspoon ground cinnamon (optional, for coating)
- 1/4 cup crushed peppermint candies or candy canes (for coating)
Instructions
- Preheat oven to 350°F (175°C). Line two baking sheets with parchment paper or silicone baking mats.
- In a large bowl, whisk together flour, cream of tartar, baking soda, and salt until well combined.
- In another large bowl or stand mixer, beat butter and sugar until light and fluffy, about 2-3 minutes.
- Beat in eggs one at a time, then add vanilla and peppermint extracts. Scrape down sides as needed.
- Gradually add dry ingredients to wet ingredients, mixing on low speed until just combined. Do not overmix.
- In a medium bowl, mix sugar, cinnamon (if using), and crushed peppermint candies for the coating.
- Scoop tablespoon-sized portions of dough and roll into balls. Coat each ball generously in peppermint sugar mixture.
- Place coated dough balls on prepared baking sheets, about 2 inches apart.
- Bake for 9-11 minutes, until edges are set but centers look slightly underbaked.
- Let cookies cool on baking sheet for 2-3 minutes, then transfer to wire rack to cool completely.
Notes
Chill dough for 30 minutes if too soft to prevent spreading. For gluten-free, use a 1:1 baking blend. Vegan butter and flaxseed egg work for dairy-free and egg-free adaptations. For extra mint flavor, add 1/2 teaspoon more peppermint extract. Cookies freeze well for up to 2 months. Let cookies cool just a few minutes on the sheet to avoid soggy bottoms.
Nutrition
- Serving Size: 1 cookie
- Calories: 120
- Sugar: 10
- Sodium: 60
- Fat: 5
- Saturated Fat: 3
- Carbohydrates: 18
- Protein: 2
Keywords: peppermint snickerdoodles, holiday cookies, Christmas cookies, festive dessert, easy cookie recipe, mint cookies, snickerdoodle variation


