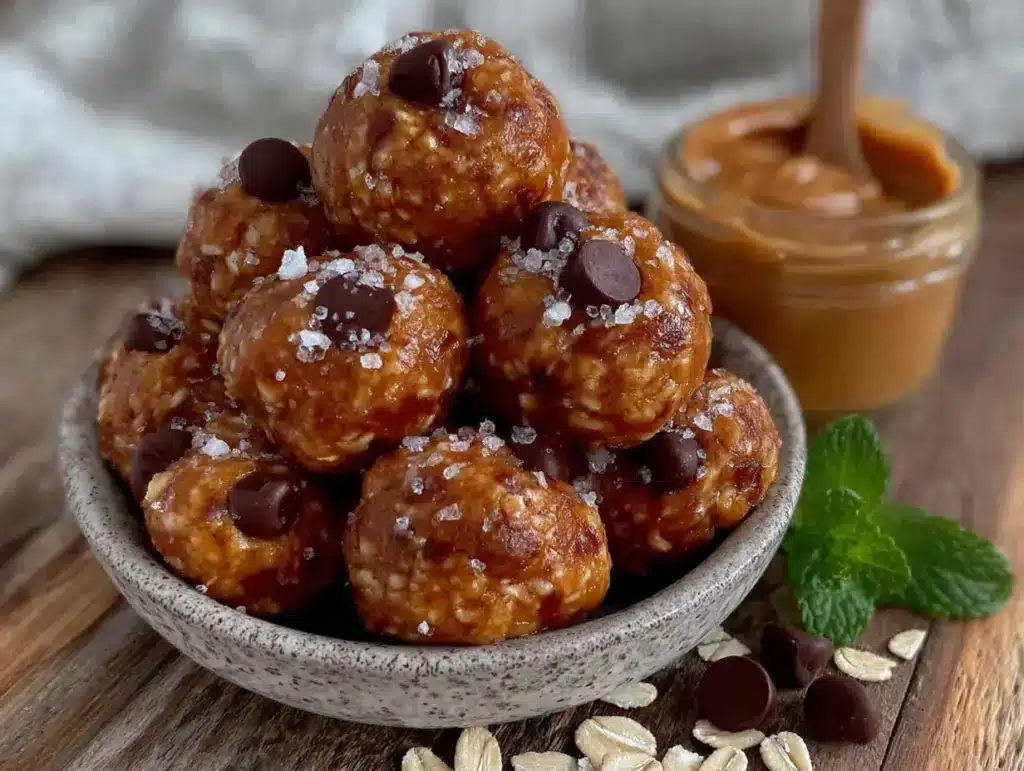
That first bite—the one where the oats soften against the peanut butter and the chocolate chips hit your tongue just right—still takes me straight back to my tiny apartment kitchen. I was standing over the counter, staring at a bowl of ingredients I’d thrown together in desperation. It was three in the afternoon, I had a deadline looming, and my stomach was making noises that my coworkers could probably hear through the phone. I needed something fast, something that wouldn’t require turning on the oven, and something that actually tasted good. Not just edible, but good.
I’d been experimenting with snack recipes for weeks, trying to find that perfect balance between satisfying and healthy. Most of them ended up either tasting like cardboard or taking way too long to make. But this one? This one stuck. I remember rolling the first ball between my palms and thinking, “This is way too simple to work.” Then I ate three of them in a row and had to stop myself from eating the entire batch. That’s when I knew I had something worth sharing.
These Easy No-Bake Peanut Butter Oat Energy Bites have been my go-to ever since. They’re the kind of recipe that feels almost too easy to be real, but they deliver every single time. No oven, no mixer, no complicated steps—just a bowl, a spoon, and ten minutes of your time. Honestly, they’ve saved me from more hangry moments than I can count. And the best part? They actually keep you full, not just temporarily satisfied. So let’s make some.
Why You’ll Love This Recipe
Let’s be real for a second—finding a snack that’s both quick to make and actually good for you feels like searching for a unicorn. Most healthy snacks either require a ton of prep or taste like punishment. These energy bites are the exception. They’re the snack you’ll actually look forward to eating, not one you force down because you’re trying to be good.
- Quick & Easy: We’re talking ten minutes from start to finish. That’s faster than driving to the store and buying something pre-made. Seriously, by the time you finish reading this paragraph, you could already be rolling your first batch.
- Simple Ingredients: You probably have everything you need in your pantry right now. Oats, peanut butter, honey, chocolate chips—these are staples in most kitchens. No fancy health food store trips required.
- Perfect for Busy Days: Whether you’re running between meetings, chasing kids around the house, or just need something to grab on your way out the door, these bites have your back. They’re portable, mess-free, and don’t need refrigeration for hours.
- Crowd-Pleaser: I’ve brought these to potlucks, playdates, and even work meetings. They disappear fast. Kids love them, adults love them, and nobody ever guesses they’re actually good for you.
- Unbelievably Delicious: Here’s the thing—these aren’t just “healthy” cookies that taste like compromise. They’re genuinely delicious. The peanut butter and honey create this perfect sweet-salty combo, and the oats give them a satisfying chewiness that keeps you coming back for more.
What makes this recipe different from every other energy bite out there? It’s the texture. I’ve tested so many versions, and most of them end up either too dry or too sticky. This one hits that sweet spot where they hold together perfectly but still feel soft and tender. The secret is letting the mixture sit for a few minutes before rolling—it gives the oats time to absorb the moisture and creates that perfect consistency. Trust me, it makes all the difference.
What Ingredients You Will Need
This recipe uses simple, wholesome ingredients that work together to create something way more satisfying than the sum of its parts. No weird additives, no obscure superfoods—just real food that tastes good and fuels your body right.
- Old-Fashioned Rolled Oats (2 cups / 180g): These are the backbone of the recipe. Old-fashioned oats give the best texture—they’re chewy without being tough. Quick oats work in a pinch, but they’ll make the bites softer and less structured. I prefer Quaker or Bob’s Red Mill for consistent results.
- Creamy Peanut Butter (1 cup / 240g): Natural peanut butter works best here, but make sure it’s well-stirred. The kind with just peanuts and salt is ideal. If you use the processed stuff with added sugar and oil, the texture might be off. I’ve had great luck with Smucker’s Natural or Justin’s. For a different flavor, try almond butter or cashew butter—they all work beautifully.
- Honey (1/2 cup / 120ml): Honey adds sweetness and helps bind everything together. Maple syrup works as a substitute, though it’ll give a slightly different flavor. If you’re vegan, agave nectar is a great option too. Just avoid artificial sweeteners—they won’t provide the same binding properties.
- Mini Chocolate Chips (1/3 cup / 60g): These are optional but highly recommended. The little pockets of melted chocolate make every bite feel like a treat. I use semi-sweet mini chips because they distribute more evenly, but dark chocolate or milk chocolate work too. If you’re dairy-free, Enjoy Life makes excellent options.
- Ground Flaxseed (2 tablespoons / 14g): This is my secret ingredient. Flaxseed adds fiber, omega-3s, and helps bind the mixture together. You can skip it if you don’t have any, but I really recommend including it. It adds a subtle nuttiness without changing the flavor.
- Vanilla Extract (1 teaspoon): Just a splash elevates the whole thing. Pure vanilla extract is best, but imitation works in a pinch. It rounds out the flavors and makes everything taste more “baked,” even though there’s no oven involved.
- Pinch of Salt (optional): If your peanut butter is unsalted, add a small pinch of salt. It balances the sweetness and makes the peanut butter flavor pop.
Equipment Needed
You don’t need much for this recipe, which is honestly one of my favorite things about it. Here’s what you’ll need:
- Large Mixing Bowl: Any bowl will do, but a wider one makes mixing easier. I use a ceramic bowl because it doesn’t slide around on the counter.
- Wooden Spoon or Rubber Spatula: For mixing everything together. A sturdy spoon works best—the mixture gets thick toward the end.
- Measuring Cups and Spoons: Standard set for accuracy. I’ve learned the hard way that eyeballing ingredients in energy bites can lead to disaster.
- Cookie Scoop (optional but helpful): A 1-tablespoon scoop makes perfectly uniform balls. If you don’t have one, just use your hands—it’s actually kind of therapeutic.
- Parchment Paper or Baking Sheet: To place the rolled bites on while they set. A plate works fine too.
- Airtight Container: For storage. Glass or plastic both work—just make sure it seals well.
If you don’t have a cookie scoop, don’t worry. I actually prefer rolling them by hand because you can feel the texture and adjust if needed. Just lightly wet your hands first to prevent sticking—it makes a world of difference.
Preparation Method
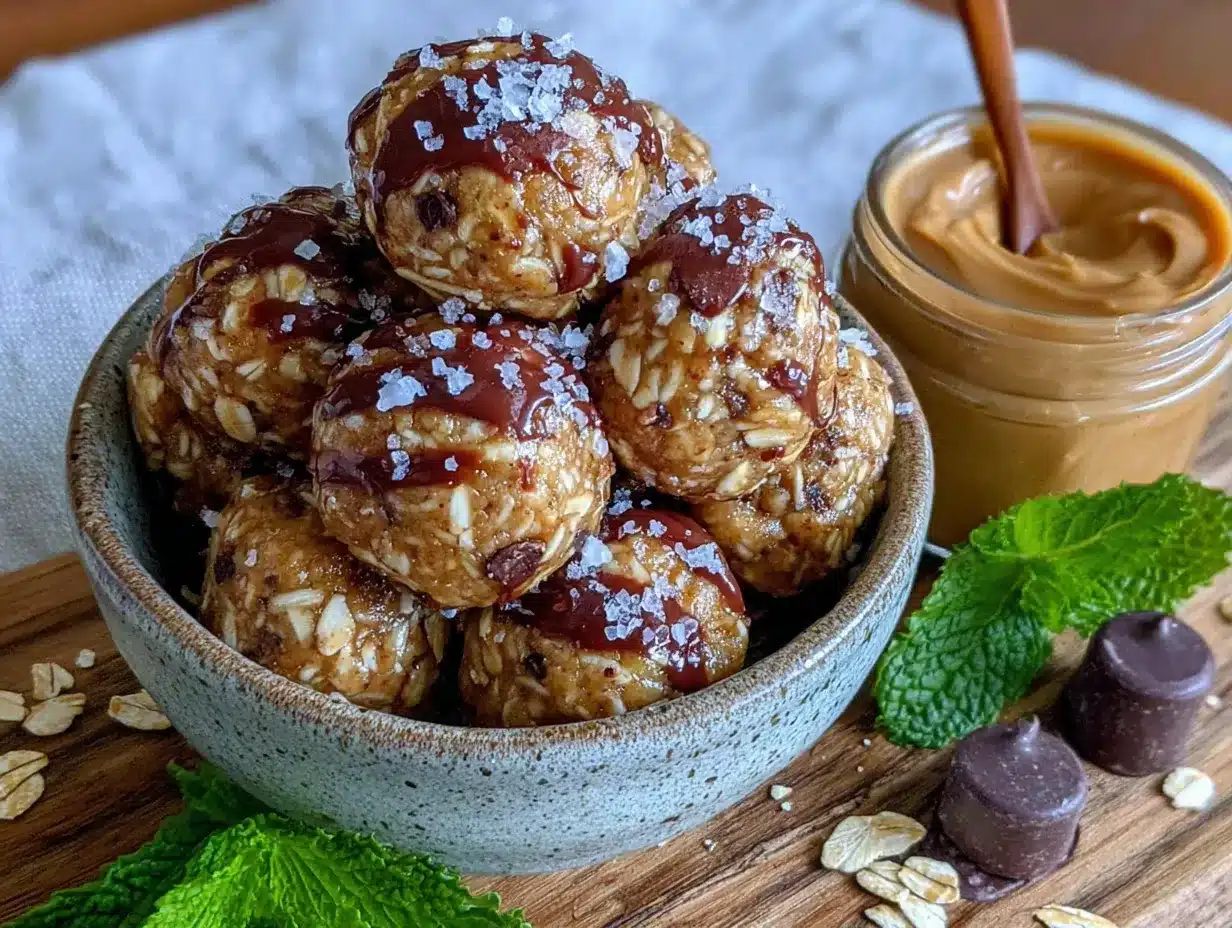
Alright, let’s get rolling. This part is so simple you’ll barely believe it. Follow these steps, and you’ll have a batch of energy bites ready in no time.
- Combine the dry ingredients. In your large mixing bowl, add the 2 cups of rolled oats, the 2 tablespoons of ground flaxseed, and the pinch of salt if you’re using it. Give them a quick stir to distribute everything evenly. This step takes about 30 seconds, but it ensures you don’t get pockets of flaxseed in your final bites.
- Add the wet ingredients. Pour in the 1 cup of peanut butter, the 1/2 cup of honey, and the 1 teaspoon of vanilla extract. Don’t dump them all in one spot—try to distribute them a bit so mixing is easier. The mixture will look messy at first, and that’s totally fine.
- Mix until combined. Start stirring with your wooden spoon or spatula. At first, it’ll feel like the wet and dry ingredients are fighting each other. Keep going. As you stir, the oats will start absorbing the moisture, and everything will come together. This usually takes about 2 minutes of consistent mixing. You’ll know it’s ready when the mixture holds together when pressed between your fingers.
- Add the chocolate chips. Fold in the 1/3 cup of mini chocolate chips. Make sure they’re evenly distributed throughout the mixture. If you add them too early, they might get crushed during mixing, so wait until the end.
- Let the mixture rest (crucial step!). Here’s the trick that makes these bites perfect—let the mixture sit for 5 minutes before rolling. This gives the oats time to absorb the liquid and soften slightly. If you skip this step, your bites might be too dry or crumbly. I learned this the hard way after making a batch that fell apart immediately.
- Roll into balls. Using your hands or a cookie scoop, form the mixture into 1-inch balls. If the mixture feels too sticky, lightly wet your hands with water. If it feels too dry, add a tablespoon of honey or peanut butter. You should get about 20-24 bites from this recipe.
- Place on parchment paper. As you roll each ball, place it on the parchment-lined baking sheet or plate. Don’t worry about spacing—they won’t spread or change shape.
- Chill for 15-30 minutes. Pop the tray in the refrigerator to let them firm up. This step is optional but recommended. The chilling helps them hold their shape better and makes the texture even more satisfying.
- Transfer to storage container. Once they’re firm, move them to an airtight container. They’re ready to eat immediately, but they get even better after a few hours in the fridge.
Cooking Tips & Techniques
I’ve made these energy bites more times than I can count, and I’ve definitely learned a few things along the way. Here are my best tips to make sure yours turn out perfect every time.
Don’t overmix. I know I said to mix until combined, but there’s a fine line. Overmixing can make the oats break down too much, resulting in a gummy texture. Stop as soon as everything comes together evenly.
Adjust consistency as needed. Different brands of peanut butter have different moisture levels. If your mixture seems too dry and crumbly, add another tablespoon of honey or a splash of milk. If it’s too wet and sticky, add a few more oats. Trust your instincts—you’re looking for a texture similar to cookie dough.
Use room temperature ingredients. Cold peanut butter is harder to mix and won’t incorporate as smoothly. Let it sit out for 10-15 minutes before starting if you keep it in the fridge. Same goes for honey if it’s crystallized—warm it slightly in the microwave for 10 seconds.
Make them ahead. These are actually better the next day. The flavors meld together overnight, and the texture becomes perfectly soft and chewy. I often make a double batch on Sunday so I have snacks ready for the whole week.
Keep your hands cool. If the mixture starts getting too sticky while you’re rolling, run your hands under cold water and dry them off. The warmth from your hands can soften the peanut butter and make everything messier.
I once made a batch where I forgot the honey entirely. Talk about a disaster—they were basically just oat-and-peanut-butter crumbles. But you know what? They still tasted pretty good sprinkled over yogurt. So even if something goes wrong, don’t throw it out. Find a way to repurpose it.
Variations & Adaptations
One of the best things about this recipe is how customizable it is. Here are some of my favorite variations, all tested and approved:
- Chocolate Peanut Butter: Swap 2 tablespoons of the oats for unsweetened cocoa powder. You’ll get a rich, chocolatey version that tastes like a healthier take on a peanut butter cup.
- Coconut Craze: Add 1/3 cup of unsweetened shredded coconut to the mixture. Toast it first for extra flavor—just spread it on a baking sheet and bake at 350°F for 5 minutes, watching carefully so it doesn’t burn.
- Crunchy Nut: Replace the mini chocolate chips with chopped almonds, pecans, or walnuts. This adds a satisfying crunch and makes them feel even more substantial. I love this version for post-workout snacks.
- Dried Fruit: Swap the chocolate chips for dried cranberries, chopped apricots, or raisins. The tartness of dried fruit balances the sweet peanut butter perfectly. Just make sure the fruit isn’t too hard—if it is, soak it in warm water for 10 minutes and pat dry before adding.
- Protein Boost: Add a scoop of your favorite protein powder. Start with 2 tablespoons and adjust from there. You might need to add an extra tablespoon of honey or milk to balance the dryness. Chocolate or vanilla protein powder works best.
- Spiced Version: Add 1/2 teaspoon of cinnamon, a pinch of nutmeg, and a dash of ginger. This gives them a cozy, almost dessert-like flavor that’s perfect for fall.
I once tried a version with crunchy peanut butter and dried cherries, thinking it would be amazing. It was okay, but the cherry pieces were too hard and kept falling out. Lesson learned—if you’re adding dried fruit, chop it into small pieces first so it incorporates better.
Serving & Storage Suggestions
These energy bites are incredibly versatile when it comes to serving. Here’s how I like to enjoy them:
Straight from the fridge. Cold energy bites are my favorite. They’re firm, chewy, and super satisfying. I grab one or two whenever I need a quick pick-me-up between meals.
At room temperature. If you’re packing them for a picnic or road trip, they’re perfectly fine at room temperature for several hours. Just keep them out of direct sunlight, especially if it’s warm out.
Pair them with coffee or tea. These bites are amazing alongside your morning coffee or afternoon tea. The sweetness complements the bitterness of coffee beautifully. They also pair well with a crispy brioche French toast for a more indulgent breakfast spread.
Crumbled over yogurt. If you want to switch things up, crumble a couple of bites over Greek yogurt. It’s like having a parfait without any extra effort. This works especially well with the coconut variation.
Storage: Keep your energy bites in an airtight container in the refrigerator. They’ll stay fresh for up to two weeks—though in my house, they never last that long. You can also freeze them for up to three months. Just layer them between sheets of parchment paper in a freezer-safe container. Thaw in the fridge overnight or at room temperature for 15 minutes.
Flavor development: Here’s something interesting—these bites actually taste better after a day or two in the fridge. The flavors meld together, and the texture becomes more uniform. So don’t be disappointed if they don’t taste perfect right away. Give them time to work their magic.
Nutritional Information & Benefits
Per serving (2 bites, approximately 40g):
| Nutrient | Amount |
|---|---|
| Calories | 210 |
| Total Fat | 11g |
| Saturated Fat | 2.5g |
| Carbohydrates | 25g |
| Fiber | 4g |
| Sugar | 12g |
| Protein | 7g |
These numbers are estimates and can vary based on the specific brands you use.
Health benefits: These energy bites are packed with good-for-you ingredients. The oats provide complex carbohydrates for sustained energy, while the peanut butter offers protein and healthy fats that keep you full. Flaxseed adds omega-3 fatty acids and extra fiber, which supports digestive health. The honey gives you a quick energy boost without the crash you get from processed sugar.
Dietary considerations: This recipe is naturally vegetarian and can easily be made vegan by using maple syrup instead of honey. For a gluten-free version, make sure you use certified gluten-free oats—regular oats are often processed in facilities that handle wheat. If you have nut allergies, you can substitute sunflower seed butter for the peanut butter, though the flavor will be different.
I personally love these as a pre-workout snack. The combination of carbs and protein gives me just enough energy to get through a run without feeling weighed down. Plus, they’re way more satisfying than a granola bar.
Conclusion
These Easy No-Bake Peanut Butter Oat Energy Bites are proof that simple doesn’t mean boring. With just a handful of ingredients and ten minutes of your time, you can have a batch of snacks that are delicious, nutritious, and endlessly customizable. Whether you’re looking for a quick breakfast option, a post-workout refuel, or a healthy treat to satisfy your sweet tooth, these bites deliver every single time.
What I love most about this recipe is how forgiving it is. You can swap ingredients, adjust the sweetness, add mix-ins—pretty much anything goes. So don’t be afraid to experiment and make them your own. That’s the beauty of cooking, right? Taking something simple and making it yours.
I’d love to hear how your batch turns out. Did you try any fun variations? Did you add something unexpected that worked? Drop a comment below and let me know. And if you’re looking for more easy, no-fuss recipes, check out my creamy passion fruit mousse cups for another no-bake treat that’s perfect for entertaining. Happy snacking!
Frequently Asked Questions
Can I use quick oats instead of rolled oats?
Yes, you can, but the texture will be different. Quick oats are more finely processed, so they absorb moisture faster and create a softer, less chewy bite. If that sounds good to you, go for it. Just reduce the resting time to 2-3 minutes before rolling.
How long do these energy bites last at room temperature?
They’re fine at room temperature for up to 8 hours, making them perfect for packed lunches or road trips. If you’re keeping them out longer than that, I’d recommend refrigerating them to maintain the best texture and prevent spoilage.
Can I make these without peanut butter?
Absolutely. You can substitute any nut or seed butter—almond butter, cashew butter, sunflower seed butter, or even tahini all work well. Just keep in mind that different butters have different consistencies, so you might need to adjust the amount slightly. Start with 3/4 cup and add more if needed.
Why are my energy bites falling apart?
This usually happens when the mixture is too dry. The fix is simple—add another tablespoon of honey or peanut butter and mix again. Also, make sure you’re letting the mixture rest for at least 5 minutes before rolling. That resting time is crucial for the oats to absorb moisture and help everything stick together.
Can I freeze these energy bites?
Yes, they freeze beautifully. Place them in a single layer on a baking sheet and freeze for an hour, then transfer to a freezer-safe bag or container. They’ll keep for up to three months. Thaw in the refrigerator overnight or at room temperature for about 15 minutes before eating.
Pin This Recipe!

Easy No-Bake Peanut Butter Oat Energy Bites: Best 10-Minute Recipe

These Easy No-Bake Peanut Butter Oat Energy Bites are proof that simple doesn’t mean boring. With just a handful of ingredients and ten minutes of your time, you can have a batch of snacks that are delicious, nutritious, and endlessly customizable.
- Prep Time: 10 minutes
- Cook Time: 0 minutes
- Total Time: 10 minutes
- Yield: 20-24 bites 1x
- Category: Snack
- Cuisine: American
Ingredients
- 2 cups (180g) old-fashioned rolled oats
- 1 cup (240g) creamy peanut butter
- 1/2 cup (120ml) honey
- 1/3 cup (60g) mini chocolate chips
- 2 tablespoons (14g) ground flaxseed
- 1 teaspoon vanilla extract
- Pinch of salt (optional)
Instructions
- Combine the dry ingredients. In your large mixing bowl, add the 2 cups of rolled oats, the 2 tablespoons of ground flaxseed, and the pinch of salt if you’re using it. Give them a quick stir to distribute everything evenly.
- Add the wet ingredients. Pour in the 1 cup of peanut butter, the 1/2 cup of honey, and the 1 teaspoon of vanilla extract. Don’t dump them all in one spot—try to distribute them a bit so mixing is easier.
- Mix until combined. Start stirring with your wooden spoon or spatula. Keep going until the mixture holds together when pressed between your fingers, about 2 minutes.
- Add the chocolate chips. Fold in the 1/3 cup of mini chocolate chips until evenly distributed.
- Let the mixture rest (crucial step!). Let the mixture sit for 5 minutes before rolling to allow the oats to absorb the liquid and soften slightly.
- Roll into balls. Using your hands or a cookie scoop, form the mixture into 1-inch balls. You should get about 20-24 bites.
- Place on parchment paper. As you roll each ball, place it on the parchment-lined baking sheet or plate.
- Chill for 15-30 minutes. Pop the tray in the refrigerator to let them firm up. This step is optional but recommended.
- Transfer to storage container. Once they’re firm, move them to an airtight container.
Notes
Let the mixture rest for 5 minutes before rolling to achieve the perfect texture. If the mixture is too sticky, lightly wet your hands with water. If too dry, add a tablespoon of honey or peanut butter. These bites taste even better after a day or two in the fridge as flavors meld together.
Nutrition
- Serving Size: 2 bites (approximate
- Calories: 210
- Sugar: 12
- Fat: 11
- Saturated Fat: 2.5
- Carbohydrates: 25
- Fiber: 4
- Protein: 7
Keywords: energy bites, no-bake, peanut butter, oats, healthy snack, quick snack, gluten-free option, vegan option