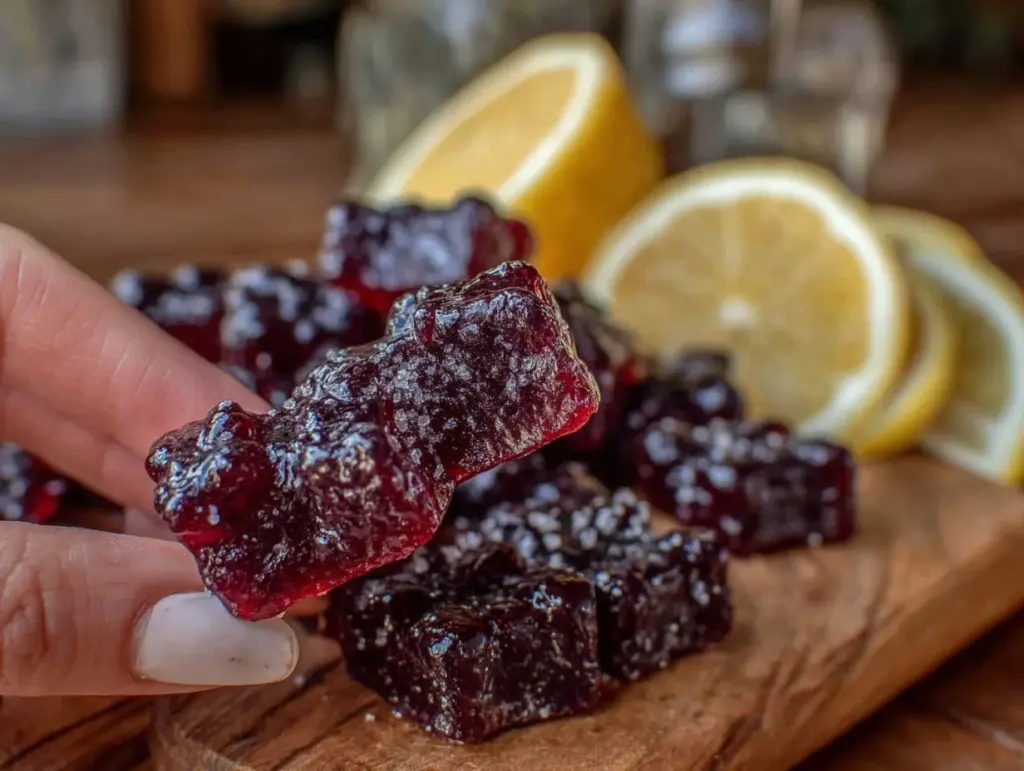
I remember that exact moment when my youngest scrunched up her nose after trying my first batch of elderberry gummies. Honestly, I was half expecting the reaction, but also hoping the tangy lemon and a hint of honey might win her over. Turns out, the secret to making healthy elderberry gummies that kids actually want to eat isn’t just the elderberries themselves — it’s all about balancing that natural tartness with familiar flavors and a little zinc boost to support their immunity.
Creating these Healthy Elderberry Gummies with Lemon and Zinc for Kids’ Immunity started as a bit of a kitchen experiment during a particularly sniffly winter. I wanted something better than store-bought syrups loaded with sugar and preservatives, something I could feel good about handing over as a daily treat. The texture had to be soft enough for little mouths but firm enough to hold shape, and the flavor needed to be inviting, not medicinal.
After tweaking the recipe several times, adding a splash of fresh lemon juice and a measured dose of zinc, these gummies finally hit the sweet spot. They bring together the rich antioxidants of elderberries, the bright zing of lemon, and the immune-supportive power of zinc — all wrapped up in a fun, chewy bite.
What I love most is how this recipe fits seamlessly into our routine without any fuss. It’s not just about fighting off colds; it’s a little moment of care in a gummy form, and honestly, that’s what’s made it stick around in our kitchen. If you’ve ever wished your kids would actually look forward to their daily vitamins (without the battle), this might just be your new go-to.
Why You’ll Love This Healthy Elderberry Gummies Recipe
After countless trials, I can say this recipe really works — both as a tasty snack and an immunity booster. Here’s why it shines:
- Quick & Easy: Ready in under 30 minutes, perfect for busy parents juggling everything.
- Simple Ingredients: No weird chemicals or fillers; just pantry staples and wholesome additions.
- Perfect for Daily Wellness: Great for keeping the little ones’ immune systems in check during cold seasons or post-school germs.
- Crowd-Pleaser: Even my picky eater asks for seconds — no bitter aftertaste here!
- Unbelievably Delicious: The lemon juice cuts through the elderberry’s earthiness, making every gummy a bright, tangy treat.
This isn’t your run-of-the-mill gummy recipe. The trick lies in the fresh lemon juice and a touch of zinc powder — not just for health but to round out the flavor profile beautifully. Plus, the use of grass-fed gelatin gives it a smooth, bouncy texture that’s way better than store-bought options.
Honestly, these gummies feel like a little act of love, something that makes boosting kids’ immunity feel less like a chore and more like a daily treat they actually enjoy.
What Ingredients You Will Need
This recipe uses simple, wholesome ingredients to deliver bold flavor and satisfying texture without the fuss. Most of these are pantry favorites or easy to find at your local health store.
- 1 cup elderberry syrup (homemade or store-bought; I recommend a quality brand like Gaia Herbs for potency)
- 1/4 cup fresh lemon juice (about 1-2 lemons, freshly squeezed for bright flavor)
- 2 tablespoons raw honey (adjust based on sweetness preference; local honey adds extra benefits)
- 2 tablespoons grass-fed gelatin powder (Vital Proteins or Great Lakes are my go-to for clean gelatin)
- 1/4 teaspoon zinc gluconate powder (carefully measured; zinc is essential for immune function but should be dosed properly)
- 1/2 cup filtered water (to bloom the gelatin)
- Optional: 1/2 teaspoon vanilla extract (adds a subtle warmth to the flavor)
For substitutions: You can swap honey with maple syrup or agave if you prefer a vegan option, but keep in mind this may affect the flavor slightly. If you need a gluten-free or paleo-friendly choice, the gelatin is naturally compliant, just check your brand. Zinc powder can be found at health food stores or online, but always measure carefully — a little goes a long way!
In summer, you might try swapping lemon for fresh orange juice for a sweeter, less tart gummy. I’ve also experimented adding a smidge of elderflower syrup for a floral note, which was delightful but a bit more adult in flavor.
Equipment Needed
- Silicone gummy molds — these make shaping easy and ensure gummies pop out cleanly. I prefer molds with fun shapes to make it more appealing for kids.
- Small saucepan — for gently warming the elderberry syrup mixture.
- Whisk — to blend gelatin smoothly without lumps.
- Measuring spoons and cups — precise measurement is key, especially for zinc powder.
- Dropper or small spoon — helpful for filling molds without spills.
If you don’t have silicone molds, mini muffin tins lined with parchment paper can work as a substitute, although the gummy texture might not be as uniform. I’ve tried plastic molds before, but silicone is hands-down easier to clean and reuse.
Maintaining your molds is pretty straightforward: rinse immediately after use and avoid abrasive scrubbers to keep them smooth and non-stick.
Preparation Method
- Bloom the gelatin: Pour ½ cup (120 ml) of filtered water into a medium bowl. Sprinkle 2 tablespoons (24 g) of grass-fed gelatin evenly over the water’s surface. Let it sit for 5 minutes to absorb and swell — this step is crucial for smooth gummies.
- Warm the elderberry syrup mixture: In a small saucepan, combine 1 cup (240 ml) elderberry syrup, ¼ cup (60 ml) fresh lemon juice, and 2 tablespoons (42 g) raw honey. Warm on low heat, stirring gently until honey dissolves and mixture is hot but not boiling (about 3-4 minutes).
- Add the gelatin: Remove saucepan from heat. Whisk in the bloomed gelatin thoroughly until completely dissolved, about 1-2 minutes. The mixture should be smooth and slightly thickened.
- Incorporate zinc and optional vanilla: Quickly whisk in ¼ teaspoon (about 1 g) zinc gluconate powder and ½ teaspoon (2.5 ml) vanilla extract if using. Mix well to evenly distribute.
- Fill the molds: Using a dropper or small spoon, carefully fill your silicone gummy molds with the mixture. Work quickly before the gelatin starts to set.
- Chill and set: Place molds in the refrigerator for at least 1 hour, or until gummies are firm to the touch. Avoid freezing, as it can alter texture.
- Unmold and store: Gently pop gummies out of molds and transfer to an airtight container. Store in the fridge, where they’ll keep for up to 2 weeks.
Pro tip: If your mixture thickens too fast while filling molds, briefly warm it over low heat again—just don’t let it boil. Also, if you notice any clumps of gelatin, whisk vigorously or strain to smooth it out before pouring.
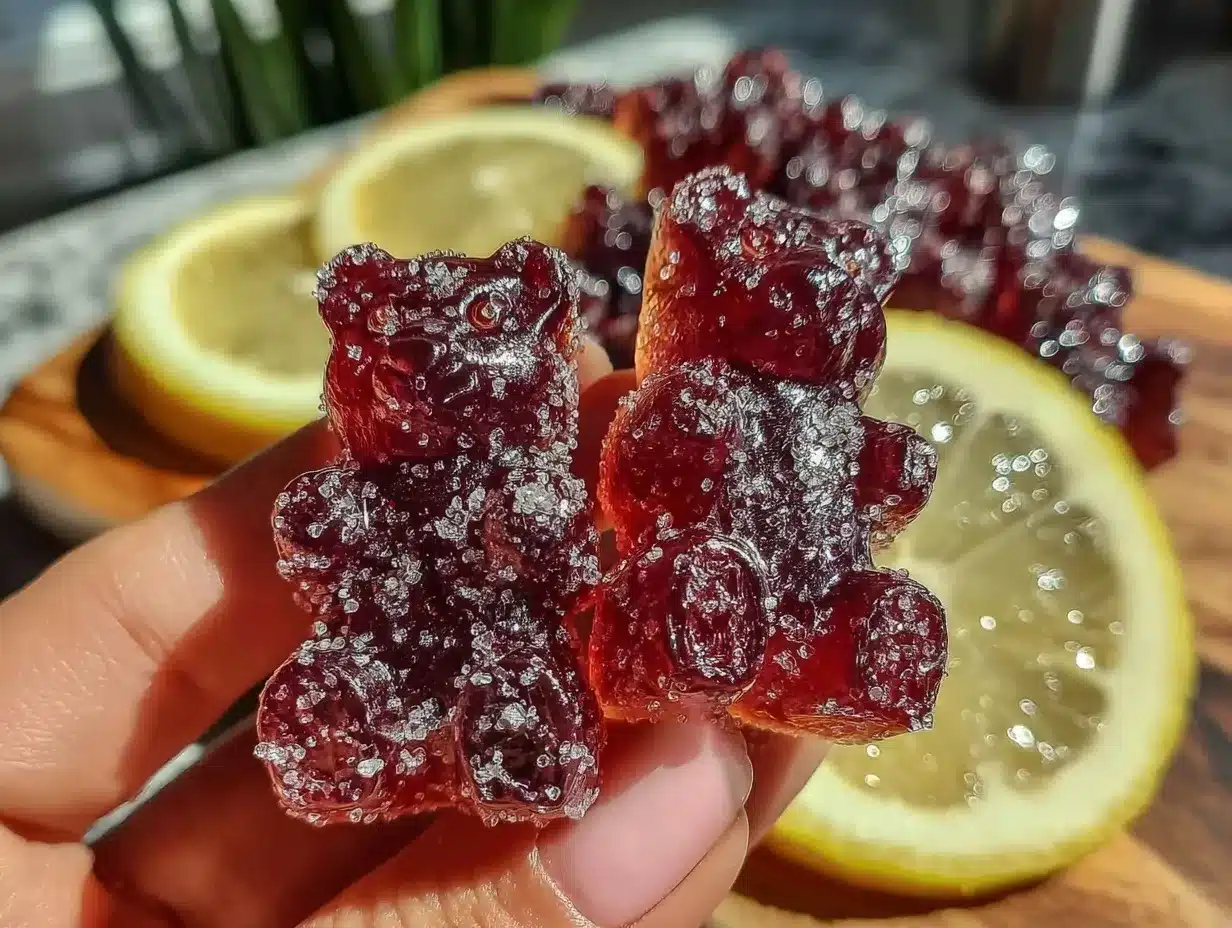
The aroma when warm is a lovely mix of tart berries and citrus, and the texture once set is delightfully chewy but not rubbery — just the way kids love it.
Cooking Tips & Techniques
Getting the perfect gummy texture is all about attention to detail:
- Gelatin blooming is non-negotiable: Skipping this step leads to grainy, uneven gummies — trust me, I learned this the hard way.
- Gentle heat is key: Too much heat can kill the beneficial properties of elderberry syrup and alter the gelatin’s ability to set properly.
- Measure zinc carefully: Too much zinc can cause a metallic taste or upset tummies, so a precise ¼ teaspoon is just right for kids.
- Work quickly when filling molds: Gelatin starts setting soon after mixing with hot liquid — have your molds ready and fill fast to avoid lumps or uneven shapes.
- Chill fully before unmolding: Patience here rewards you with clean edges and perfect chewiness.
In my early attempts, I sometimes overheated the syrup mixture, which made the gummies stiff and less pleasant. Now, I keep the heat low and steady, stirring constantly. Also, I learned to trust quality ingredients — cheaper gelatin or syrup can change the whole experience.
Multi-tasking tip: While the gelatin is blooming, you can squeeze fresh lemons and prep your molds, so everything flows smoothly.
Variations & Adaptations
Here are a few ways to customize these elderberry gummies to suit different needs and preferences:
- Vegan option: Swap gelatin for agar-agar powder, but note the texture will be less chewy and more jelly-like. Adjust the agar-agar amount per package instructions.
- Flavor twists: Add a splash of fresh orange or grapefruit juice instead of lemon for a sweeter or more complex citrus note. Or mix in a teaspoon of cinnamon for a warming spice touch.
- Boosting nutrients: Stir in a teaspoon of vitamin C powder or a pinch of turmeric for extra immune support, just be mindful of the flavor changes.
- Allergen-friendly: This recipe is naturally gluten-free and dairy-free. For honey allergies, maple syrup is a good substitute.
- Texture variation: For softer gummies, reduce gelatin by 1 tablespoon; for firmer gummies, add an extra half tablespoon.
One of my favorite tweaks was adding a little elderflower syrup alongside the elderberry — it gave a subtle floral lift that my older kids really enjoyed. I also adapted this recipe into mini gummy bears for birthday party favors, which was a hit.
Serving & Storage Suggestions
Serve these gummies chilled or straight from the fridge — the cool temperature keeps them firm and refreshing. I like to pack a few in my kids’ lunchboxes or keep a stash in the fridge for after-school snacks.
They pair surprisingly well with a warm cup of herbal tea, like chamomile or lemon balm, especially when unwinding after a busy day. If you want to sneak in more vitamin C, try serving alongside a freshly squeezed orange juice or a cozy mug of Earl Grey tea cake for a wellness-themed snack break.
Store the gummies in an airtight container in the refrigerator for up to two weeks. Avoid heat and humidity, which can cause them to soften or stick together. If you do want to keep them longer, freezing is possible but I find it slightly changes the texture — the gummies become a bit more crumbly once thawed.
Flavors actually deepen a bit after a day or two in the fridge, so sometimes I make a batch ahead to enjoy the mellowed taste later.
Nutritional Information & Benefits
Each serving (about 3 gummies) roughly contains:
| Nutrient | Amount |
|---|---|
| Calories | 35-40 kcal |
| Protein | 2-3 grams (from gelatin) |
| Sugar | 5-6 grams (from honey and elderberry syrup) |
| Zinc | 2 mg (about 20% of daily kids’ value) |
| Vitamin C | Variable (from lemon juice) |
Elderberries offer antioxidants that support immune health, while lemon juice adds vitamin C and fresh flavor. Zinc is a critical mineral for fighting infections and supporting normal growth. The gelatin provides collagen, which benefits skin and joint health — a bonus even kids don’t realize!
This recipe is gluten-free, dairy-free, and can easily be made vegan. Just note that vegan substitutes will alter the texture.
From a wellness perspective, these gummies provide a manageable, tasty way to support kids’ defenses during cold and flu seasons without resorting to sugary candies or artificial supplements.
Conclusion
Making these Healthy Elderberry Gummies with Lemon and Zinc for Kids’ Immunity became more than just a recipe for me — it turned into a little ritual of care during hectic seasons. They’re easy to whip up, packed with thoughtful ingredients, and most importantly, my kids love them without complaint.
Feel free to tweak the lemon or honey levels to suit your family’s taste buds. I’m confident once you try them, you’ll have a new favorite way to support your kids’ immune health with a treat that feels special, not medicinal.
If you give these gummies a try, I’d love to hear how you customize them! Share your thoughts and tweaks in the comments below — it’s always fun to swap ideas with fellow home cooks.
Here’s to healthier, happier snack times with a little natural goodness packed in every bite.
Frequently Asked Questions
Can I use store-bought elderberry syrup for this recipe?
Yes, you can use a good-quality store-bought elderberry syrup. Just check the ingredients to avoid added sugars or artificial additives. I recommend brands like Gaia Herbs or Sambucol for reliable potency.
How should I dose these gummies for my kids?
Typically, 2-3 gummies per day is a safe and effective dose for children. Be cautious with zinc amounts and consult your pediatrician if unsure, especially for younger kids.
Can I make these gummies without zinc powder?
Absolutely. The zinc adds immune support but is optional. If you skip it, you may want to slightly increase the lemon juice for flavor balance.
What’s the best way to store these gummies?
Store them in an airtight container in the refrigerator for up to two weeks. Avoid heat and humidity to keep their texture firm and fresh.
Are these gummies suitable for vegans?
Not as-is, since gelatin is animal-derived. You can substitute with agar-agar powder, but expect a different texture and a jelly-like consistency instead of chewy gummies.
Pin This Recipe!
Healthy Elderberry Gummies Recipe with Lemon and Zinc for Kids Immunity Boost

These healthy elderberry gummies combine elderberry syrup, fresh lemon juice, honey, and zinc to create a tasty, chewy treat that supports kids’ immunity. The recipe balances natural tartness with familiar flavors and a smooth texture kids love.
- Prep Time: 10 minutes
- Cook Time: 10 minutes
- Total Time: 1 hour 20 minutes
- Yield: About 30 gummies 1x
- Category: Snack
- Cuisine: American
Ingredients
- 1 cup elderberry syrup (homemade or store-bought)
- 1/4 cup fresh lemon juice (about 1–2 lemons)
- 2 tablespoons raw honey
- 2 tablespoons grass-fed gelatin powder
- 1/4 teaspoon zinc gluconate powder
- 1/2 cup filtered water
- Optional: 1/2 teaspoon vanilla extract
Instructions
- Pour 1/2 cup (120 ml) filtered water into a medium bowl. Sprinkle 2 tablespoons (24 g) grass-fed gelatin evenly over the water’s surface. Let sit for 5 minutes to bloom.
- In a small saucepan, combine 1 cup (240 ml) elderberry syrup, 1/4 cup (60 ml) fresh lemon juice, and 2 tablespoons (42 g) raw honey. Warm on low heat, stirring gently until honey dissolves and mixture is hot but not boiling (about 3-4 minutes).
- Remove saucepan from heat. Whisk in the bloomed gelatin thoroughly until completely dissolved, about 1-2 minutes, until smooth and slightly thickened.
- Quickly whisk in 1/4 teaspoon (about 1 g) zinc gluconate powder and 1/2 teaspoon (2.5 ml) vanilla extract if using. Mix well to evenly distribute.
- Using a dropper or small spoon, carefully fill silicone gummy molds with the mixture. Work quickly before gelatin starts to set.
- Place molds in the refrigerator for at least 1 hour, or until gummies are firm to the touch. Avoid freezing.
- Gently pop gummies out of molds and transfer to an airtight container. Store in the fridge for up to 2 weeks.
Notes
Blooming the gelatin is essential for smooth gummies. Use gentle heat to preserve elderberry benefits. Measure zinc powder carefully to avoid metallic taste. Work quickly when filling molds as gelatin sets fast. Store gummies in airtight container in fridge up to 2 weeks. For vegan option, substitute gelatin with agar-agar powder but expect different texture.
Nutrition
- Serving Size: About 3 gummies
- Calories: 3540
- Sugar: 56
- Carbohydrates: 56
- Protein: 23
Keywords: elderberry gummies, kids immunity, lemon gummies, zinc gummies, healthy snacks, elderberry syrup, homemade gummies, immune booster, gelatin gummies