That unmistakable crackle of Rice Krispies hitting the warm, buttery marshmallow mix — it pulls me back to the slow afternoons of my childhood kitchen, where time seemed to stretch as long as the sticky strands we’d pull apart. It wasn’t about rushing; it was about the quiet anticipation of that first sweet bite. The kitchen smelled faintly of vanilla and melted sugar, and the colorful M&Ms scattered throughout felt like little bursts of joy hiding in every square. Honestly, these Easy No-Bake Rice Krispie Treats with M&Ms have this way of wrapping simple ingredients into a comforting hug, reminding me of carefree moments when a snack was pure magic.
Back then, I’d help stir the marshmallow mix, fingers itching to sneak a candy or two, knowing full well the treat’s perfect balance of crispy and chewy was irresistible. It stuck with me — not just as a recipe, but as a quiet ritual that could bring smiles anytime. What’s lovely about these no-bake treats is how they make the whole process feel effortless, almost meditative, letting you focus on the little things: the snap of the cereal, the pop of the candies, the ease of no oven fuss.
There’s no rush here, just simple, honest fun — a reason why this recipe keeps me coming back, whether for a last-minute snack or a colorful addition to a casual gathering. It’s that kind of recipe you trust to deliver, with a little sparkle from the M&Ms that somehow makes it feel like a celebration tucked into each bite.
And that’s the quiet promise of these Easy No-Bake Rice Krispie Treats with M&Ms — a trustworthy, joyful classic that never feels tired or complicated.
Why You’ll Love This Recipe
From countless batches tested in my own kitchen (and shared with friends who absolutely insist I bring them again), this Easy No-Bake Rice Krispie Treats with M&Ms recipe has earned its spot as a go-to snack with some serious perks:
- Quick & Easy: Ready in about 15 minutes — perfect for those moments when you want something sweet without the wait.
- Simple Ingredients: Just a handful of pantry staples and M&Ms, no fancy trips or hard-to-find items needed.
- Perfect for Any Occasion: Whether it’s a kid’s birthday party, a casual potluck, or a cozy evening snack, this recipe fits right in.
- Crowd-Pleaser: The colorful candies add a fun twist that kids love, and adults appreciate the nostalgic crunch.
- Unbelievably Delicious: The chewy marshmallow base combined with crispy cereal and chocolatey M&Ms is comfort food at its finest.
What sets this recipe apart? It’s the balance — not too sugary, with enough chew and snap to keep things interesting. Plus, mixing in M&Ms rather than plain chocolate chips adds that little pop of color and flavor surprise in every bite. It’s not just another Rice Krispie treat; it’s a fun, updated twist on a classic that feels both familiar and fresh. Honestly, it’s the kind of snack that makes you pause, smile, and maybe even remember your own messy kitchen adventures.
What Ingredients You Will Need
This recipe keeps it straightforward, using simple, wholesome ingredients that come together effortlessly to create a flavorful, textured treat. Most are pantry staples, which means you can whip these up anytime without a fuss.
- Rice Krispies cereal: 6 cups (about 150g) — the crispy base that gives the treats their signature crunch. I like using classic Kellogg’s Rice Krispies to get that perfect snap.
- Mini marshmallows: 4 cups (about 200g) — these melt down smoothly and hold everything together with that chewy, gooey texture.
- Unsalted butter: 3 tablespoons (about 42g), softened — adds richness and helps melt the marshmallows evenly.
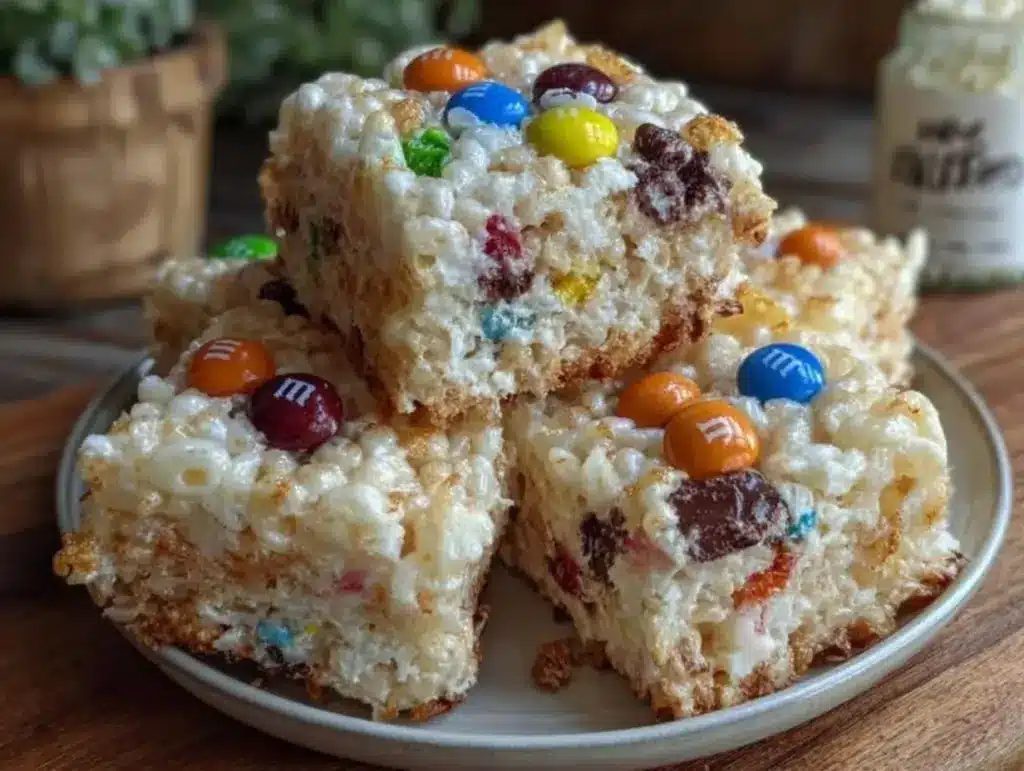
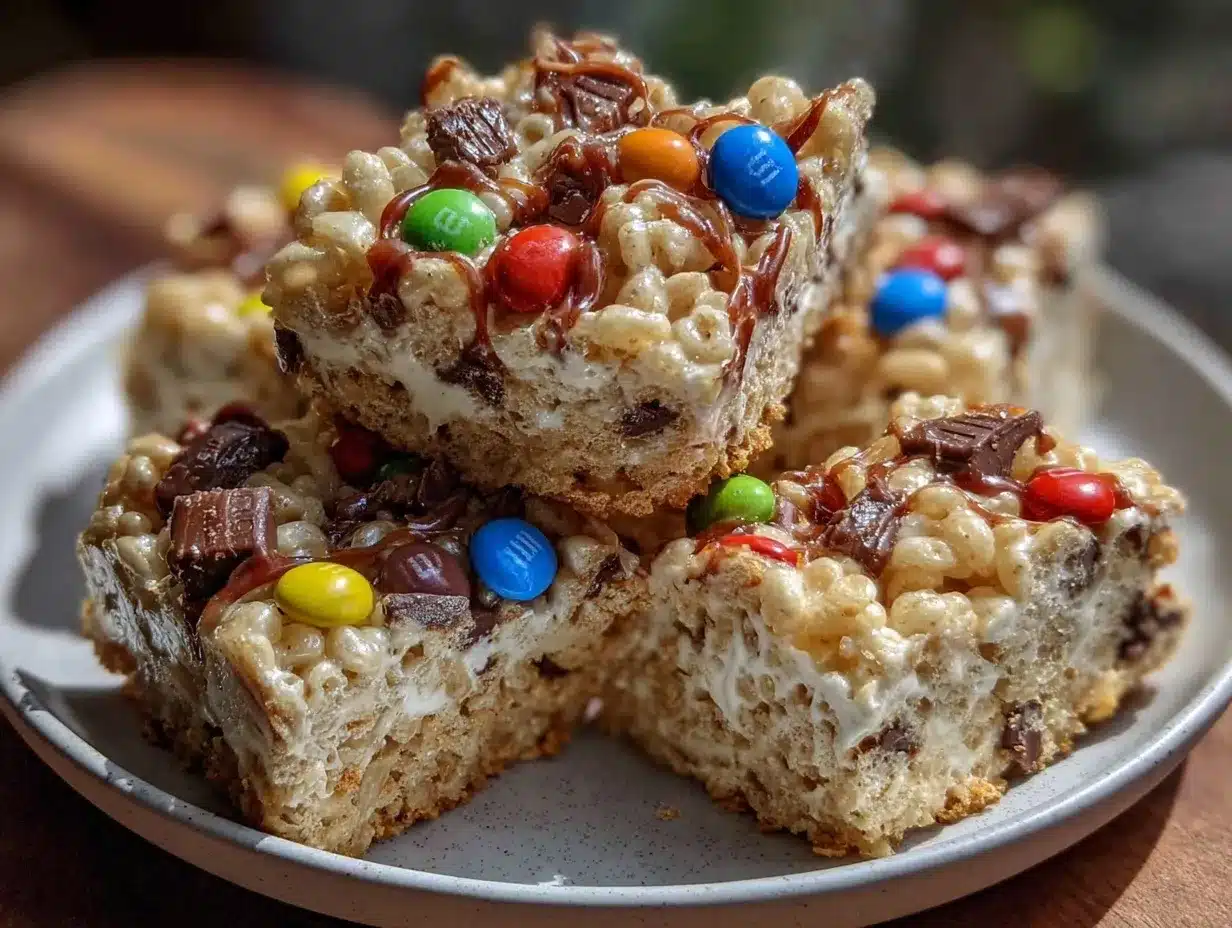
- M&Ms: 1 cup (about 150g) — the star of the twist, adding bursts of chocolate and color throughout. You can use plain, peanut, or even seasonal varieties.
- Vanilla extract: 1 teaspoon — just a touch for warmth and depth.
Substitution tips: Use almond butter instead of butter for a nutty variation, or swap mini marshmallows with regular-sized ones if that’s what you have on hand (just adjust melting time slightly). For gluten-free needs, check that your Rice Krispies are certified gluten-free or substitute with a similar crispy cereal.
Equipment Needed
- Large mixing bowl: For combining the cereal and melted marshmallow mixture. A heatproof bowl works best if melting marshmallows over the stovetop.
- Medium saucepan: To melt butter and marshmallows gently. A nonstick pan helps prevent sticking and scorching.
- Wooden spoon or heat-resistant spatula: Essential for stirring the hot marshmallow mixture without melting the handle.
- 9×13-inch baking pan or similar: For shaping the treats. I usually line it with parchment paper or lightly grease it to make removal easier.
- Measuring cups and spoons: For accuracy in ingredients.
If you don’t have a saucepan, you can melt the butter and marshmallows in a microwave-safe bowl using short bursts, stirring frequently. Just be careful not to overheat. For spreading the mixture evenly in the pan, a buttered spatula or wax paper square helps smooth the surface without sticking.
Preparation Method
- Prepare your pan: Lightly grease a 9×13-inch (23×33 cm) baking pan or line it with parchment paper for easy removal. Set aside.
- Melt butter and marshmallows: In a medium saucepan over low heat, melt 3 tablespoons (42g) of unsalted butter until just melted (about 2 minutes). Add 4 cups (200g) mini marshmallows and stir continuously until completely melted and smooth (around 4-5 minutes). Be patient here — low heat prevents burning.
- Add vanilla: Remove the saucepan from heat and stir in 1 teaspoon of vanilla extract. This little addition brings a cozy warmth to the flavor.
- Mix in the cereal: Immediately pour the 6 cups (150g) of Rice Krispies cereal into the melted marshmallow mixture. Use a wooden spoon or spatula to fold gently but thoroughly, making sure all cereal pieces are coated.
- Incorporate M&Ms: Add 1 cup (150g) of M&Ms and fold them in carefully. You want them evenly distributed but not crushed.
- Transfer to pan: Quickly pour the mixture into the prepared pan. Using a buttered spatula or wax paper, press the mixture evenly into the pan. Don’t press too hard — you want the treats to stay light and crispy, not dense.
- Cool and set: Let the treats cool at room temperature for about 30 minutes until firm. If you’re in a hurry, you can pop them in the fridge for 15-20 minutes.
- Cut and serve: Once set, cut into squares or rectangles. Serve immediately or store as directed below.
Pro tip: If the mixture starts to harden while stirring or pressing into the pan, warm your spatula slightly or work quickly to avoid cracking. The marshmallow mix cools fast!
Cooking Tips & Techniques
One key to perfect Rice Krispie treats is controlling the marshmallow melt. I’ve learned the hard way that too high heat scorches the marshmallows, leaving an unpleasant burnt taste. So, low and slow is the way to go.
When mixing, be gentle — folding rather than stirring vigorously keeps the cereal from breaking into crumbs, preserving that satisfying crunch. And about the M&Ms: add them at the end and fold carefully to keep their shape and color intact. Nobody wants a sad, melted mess of candies.
Timing matters, too. Marshmallow mixture cools quickly, so prepare your pan and ingredients first. When pressing the mixture into the pan, use a buttered spatula or wax paper to prevent sticking and avoid compacting too firmly — you want light, airy treats.
Lastly, don’t skip the vanilla. It’s a subtle step, but it brings a depth that makes these treats feel homemade and a little special.
Variations & Adaptations
- Peanut Butter Twist: Stir in ½ cup (120g) creamy peanut butter with the melted marshmallows for a nutty richness that pairs beautifully with the M&Ms.
- Gluten-Free Version: Use certified gluten-free crispy cereal instead of Rice Krispies to keep it safe for gluten-sensitive friends.
- Seasonal M&Ms: Swap regular M&Ms for holiday-themed colors — red and green for Christmas, pastels for Easter, or autumn hues for fall gatherings.
- Dairy-Free Option: Replace butter with coconut oil and use vegan marshmallows to make treats suitable for dairy-free diets.
- Mix-In Changes: Try swapping M&Ms for mini chocolate chips, dried cranberries, or chopped nuts for a different flavor and texture profile. I once made a batch with mini peanut butter cups — total game changer!
Serving & Storage Suggestions
These treats are best served at room temperature — that’s when the marshmallow is perfectly chewy and the M&Ms hold their crunch. They make a cheerful addition to any snack table, especially alongside a comforting cup of tea or coffee.
For a playful party spread, try pairing them with colorful finger foods like smoked salmon cucumber tea sandwiches — the savory and sweet contrast is delightful. Or bring them out with a light dessert like the airy passion fruit mousse cups for a layered dessert experience.
Store leftover treats in an airtight container at room temperature for up to 3 days. If it’s humid, pop them in the fridge to hold their shape longer. They also freeze well — just wrap tightly and thaw at room temperature before serving. Reheating isn’t necessary, but a few seconds in the microwave can soften them if they feel too firm.
Nutritional Information & Benefits
Each serving of these Easy No-Bake Rice Krispie Treats with M&Ms offers quick energy from the simple carbs and sugar, making them a fun occasional snack. The marshmallows and cereal provide light, airy texture with minimal fat, while the M&Ms add a bit of chocolate satisfaction. They’re not a health food, but they do bring joy and a welcome treat for busy days or celebrations.
For those watching allergens, note that traditional M&Ms contain milk and soy, and marshmallows usually contain gelatin. Gluten-free versions of the cereal and vegan marshmallows can be used to accommodate dietary restrictions.
Conclusion
These Easy No-Bake Rice Krispie Treats with M&Ms are a simple reminder that sometimes, the best snacks are the ones that bring back a little childhood magic. They’re quick, colorful, and comforting — perfect for when you want a fuss-free treat that feels like a celebration in every bite. I love how this recipe invites a little creativity, whether you stick to classic M&Ms or try your own twists.
Give it a try, make it your own, and share your favorite variations — there’s always room for a new favorite in the treat rotation. I’m already thinking of the next batch I’ll make for a casual gathering, right alongside a pot of tea and maybe a slice of Earl Grey tea cake to round out the spread. Sweet, simple, and satisfying — that’s what these treats are all about.
FAQs About Easy No-Bake Rice Krispie Treats with M&Ms
Can I use regular-sized marshmallows instead of mini?
Yes! Just use about 8 cups of regular marshmallows and melt a bit longer to get the same smooth consistency.
How do I keep the M&Ms from melting?
Add the M&Ms after removing the marshmallow mixture from heat and fold them in gently to avoid melting.
Can I make these treats ahead of time?
Absolutely. They store well in an airtight container for up to 3 days at room temperature or can be frozen for longer storage.
What’s the best way to cut them without sticking?
Use a sharp knife lightly greased with butter or sprayed with cooking spray. Cutting while the treats are slightly cooled but not completely set helps prevent crumbling.
Are there any good alternatives to Rice Krispies cereal?
Yes, you can use other crispy rice cereals, gluten-free crispy rice, or even puffed millet for a similar texture.
Pin This Recipe!
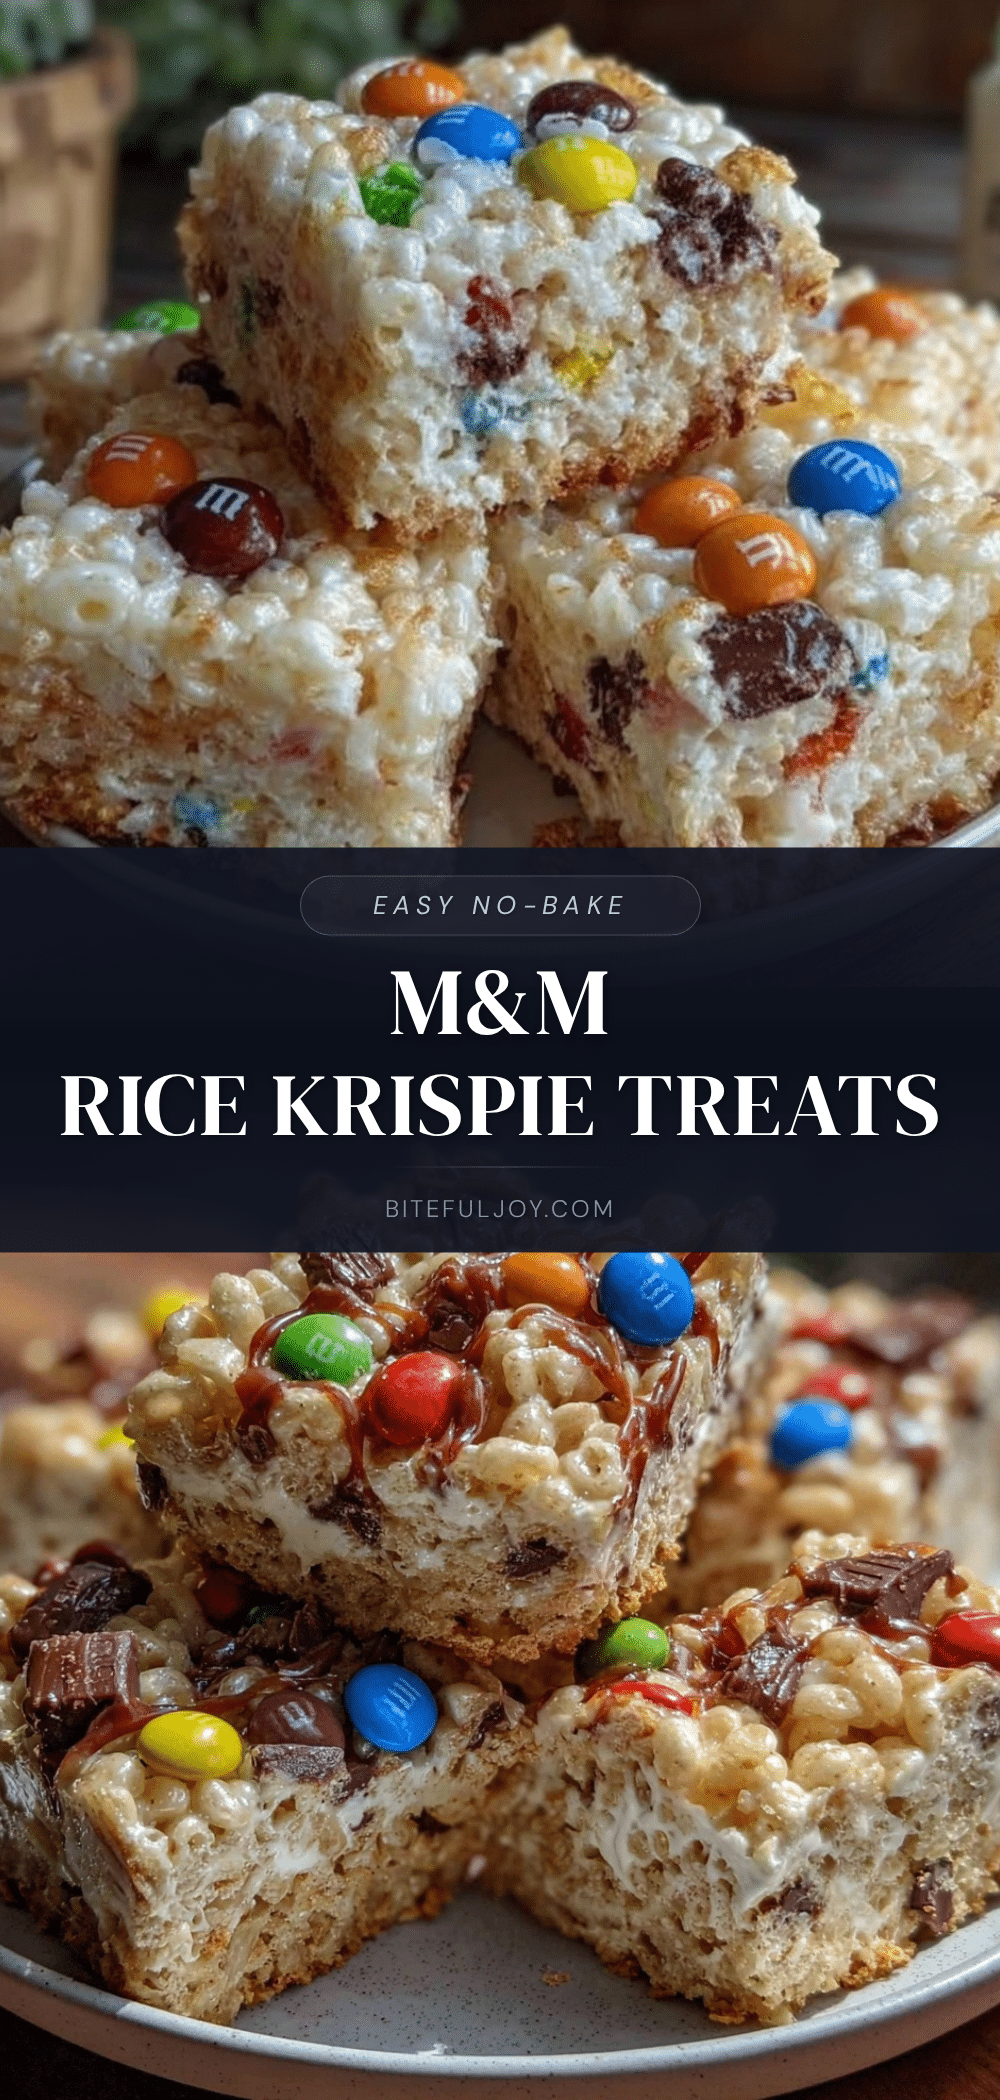
Easy No-Bake Rice Krispie Treats with M&Ms

A quick and easy no-bake snack combining crispy Rice Krispies cereal, gooey marshmallows, and colorful M&Ms for a nostalgic, chewy treat perfect for any occasion.
- Prep Time: 10 minutes
- Cook Time: 5 minutes
- Total Time: 35 minutes
- Yield: 12 servings 1x
- Category: Snack
- Cuisine: American
Ingredients
- 6 cups (about 150g) Rice Krispies cereal
- 4 cups (about 200g) mini marshmallows
- 3 tablespoons (about 42g) unsalted butter, softened
- 1 cup (about 150g) M&Ms
- 1 teaspoon vanilla extract
Instructions
- Lightly grease a 9×13-inch baking pan or line it with parchment paper and set aside.
- In a medium saucepan over low heat, melt 3 tablespoons (42g) of unsalted butter until just melted (about 2 minutes).
- Add 4 cups (200g) mini marshmallows and stir continuously until completely melted and smooth (around 4-5 minutes).
- Remove the saucepan from heat and stir in 1 teaspoon of vanilla extract.
- Immediately pour 6 cups (150g) of Rice Krispies cereal into the melted marshmallow mixture and fold gently but thoroughly to coat all cereal pieces.
- Add 1 cup (150g) of M&Ms and fold them in carefully to distribute evenly without crushing.
- Quickly pour the mixture into the prepared pan and press evenly using a buttered spatula or wax paper, being careful not to press too hard.
- Let the treats cool at room temperature for about 30 minutes until firm, or refrigerate for 15-20 minutes to speed up setting.
- Cut into squares or rectangles and serve immediately or store as directed.
Notes
Use low heat to melt marshmallows to avoid burning. Fold gently to keep cereal pieces intact and M&Ms from melting. Press mixture lightly into pan to keep treats light and crispy. Variations include adding peanut butter, using gluten-free cereal, or substituting dairy-free ingredients.
Nutrition
- Serving Size: 1 square (approx. 2x
- Calories: 180
- Sugar: 18
- Sodium: 90
- Fat: 6
- Saturated Fat: 3.5
- Carbohydrates: 30
- Fiber: 0.5
- Protein: 1
Keywords: Rice Krispie treats, no-bake snacks, M&Ms, easy dessert, quick treats, childhood snacks, marshmallow treats