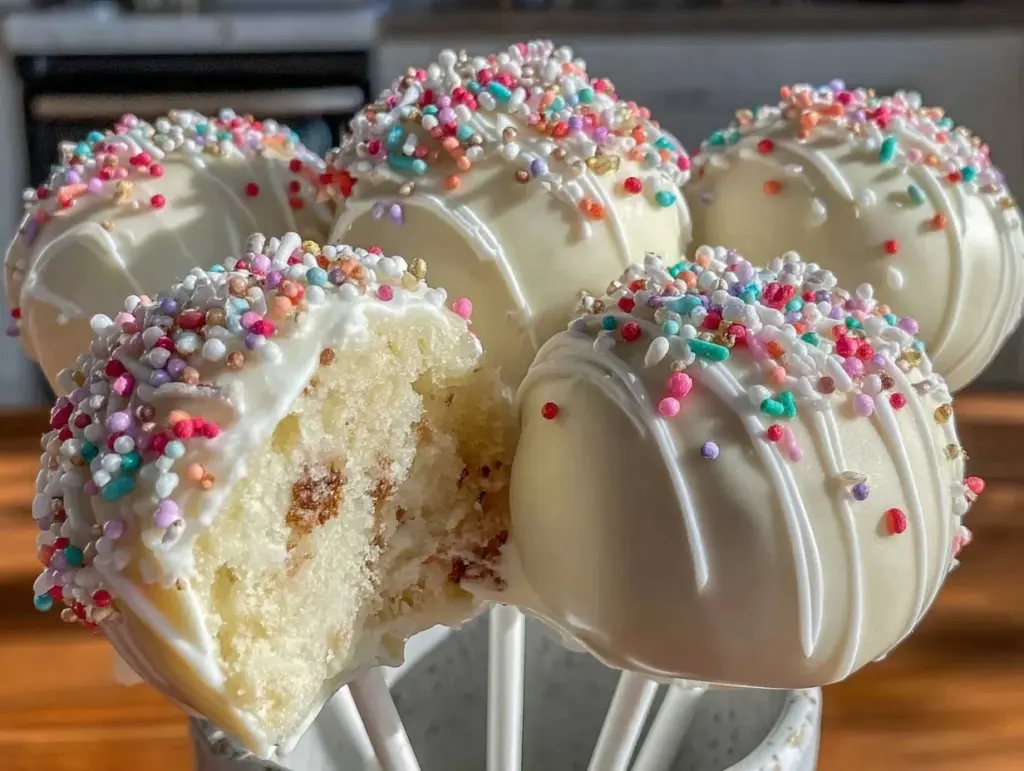
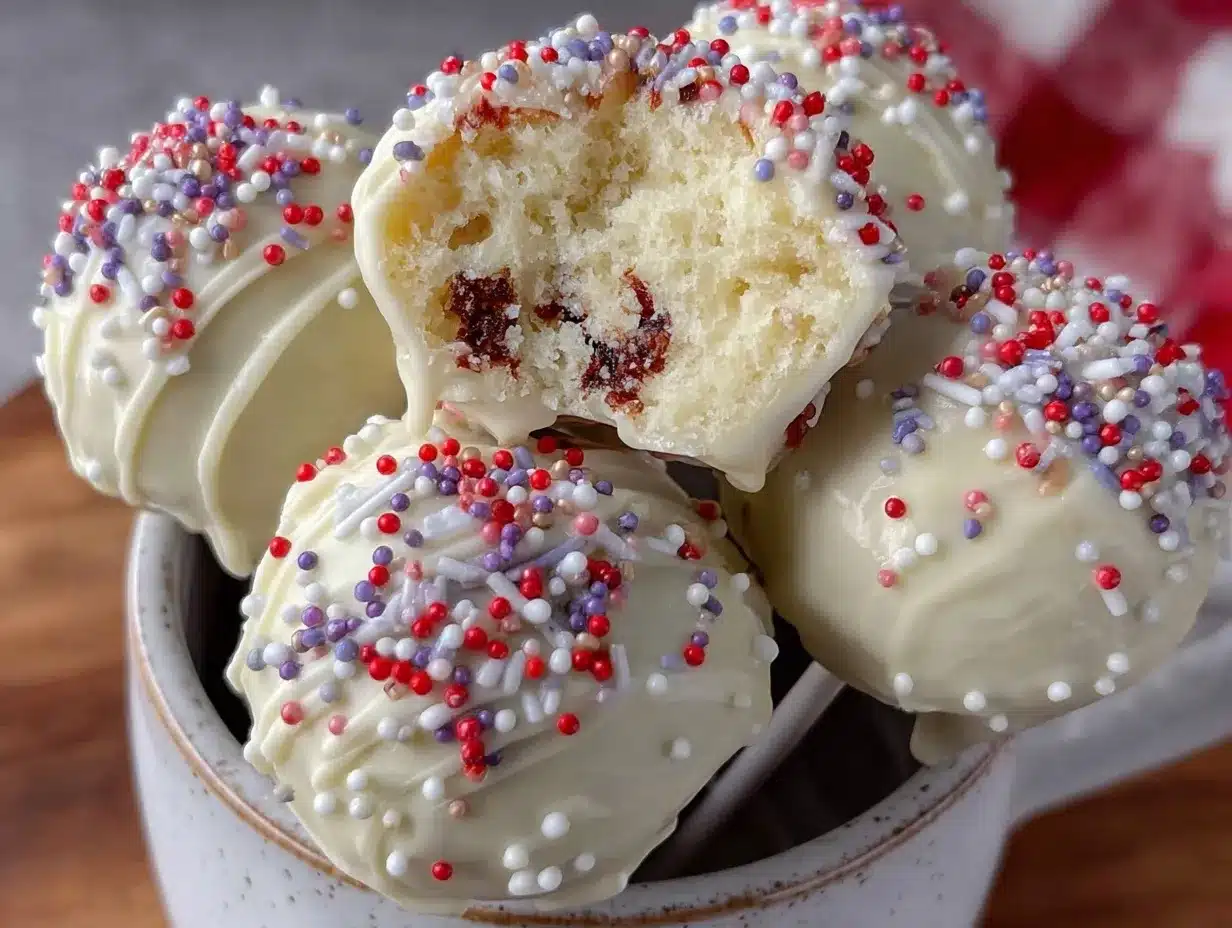
“Wait, you made those? From scratch?” That’s the look I got the first time I brought these Perfect Firework Cake Pops to a summer barbecue. Honestly, I wasn’t even sure they’d turn out. I’d grabbed a leftover box of white cake mix, a random tub of frosting from the fridge, and some white chocolate chips that were nearing their expiration date. It was one of those last-minute dessert ideas born from sheer laziness and curiosity. I figured, why not roll up the crumbled cake with frosting, dip them in melted white chocolate, and decorate with colorful sprinkles? What I didn’t expect was the way these little spheres of joy lit up the party — kids and adults alike hovered around the platter like it was magic. The texture was soft and moist, the coating perfectly smooth, and those tiny fireworks of sprinkles added just the right pop of festivity. It became my go-to when I needed a quick, fun dessert that feels homemade but looks like a showstopper. And let’s be honest, nothing beats the feeling of nailing a treat that looks so deliberate, yet was mostly a happy accident. These cake pops have quietly become my secret weapon for when I want to impress without the stress.
What stuck with me is how approachable this recipe is — no fancy tools, no complicated steps, just a bit of patience and love. Plus, the white chocolate coating isn’t just for looks; it adds a creamy sweetness that balances the cake’s crumb perfectly. If you’re anything like me, juggling a busy schedule with a sweet tooth, these firework cake pops will quickly become a favorite in your recipe box. They’re festive, fun, and honestly a little addictive once you get rolling. And hey, if you ever want to switch it up, pairing them with a cup of tea — maybe something like the earl grey tea cake — is a simple way to keep the celebration going.
Why You’ll Love This Recipe
This Perfect Firework Cake Pops recipe is one of those rare finds that checks all the boxes when it comes to ease, flavor, and presentation. After countless trials (and a few messy kitchen moments), I’ve nailed a version that anyone can make with confidence. Here’s what makes it stand out:
- Quick & Easy: The entire process, from baking to decorating, takes under two hours. That’s perfect for last-minute parties or a spontaneous sweet fix.
- Simple Ingredients: You likely have most of what you need in your pantry — basic cake mix, frosting, white chocolate, and sprinkles. No scavenger hunts required!
- Perfect for Celebrations: These cake pops scream party vibes — ideal for summer barbecues, Fourth of July festivities, or any occasion craving a bit of whimsy.
- Crowd-Pleaser: The balance of moist cake and creamy coating wins over kids and adults alike. Expect requests for seconds (and thirds!).
- Unbelievably Delicious: The white chocolate coating adds a subtle richness that complements the cake’s sweetness without overpowering.
What really sets this recipe apart is the texture contrast — the soft, tender cake inside with the firm, glossy white chocolate shell outside. Plus, the fun part is customizing your “fireworks” with colorful sprinkles or edible glitter to match any theme. I’ve even swapped in a few tweaks like using almond-flavored frosting or adding a dash of lemon zest for a fresh twist. It’s not just a cake pop; it’s a mini celebration on a stick that brings a smile every time.
If you love desserts that feel special without fuss, this recipe is for you. And for a richer dessert spread, pairing these pops alongside creamy white chocolate raspberry cheesecake bars creates a perfect sweet table.
What Ingredients You Will Need
This recipe uses simple, wholesome ingredients to deliver bold flavor and that satisfying texture you expect from cake pops without the fuss. Most are pantry staples, and if you want to switch things up, there are easy substitutions along the way.
- For the Cake:
- 1 box white cake mix (about 15.25 oz/432 g) – I recommend brands like Pillsbury or Duncan Hines for consistent texture
- Ingredients called for on the cake mix box (usually eggs, oil, water) – follow package instructions
- For the Cake Pop Mixture:
- 1 cup (240 g) vanilla frosting – store-bought or homemade; cream cheese frosting works too for a tangy note
- For the White Chocolate Coating:
- 12 oz (340 g) white chocolate chips or chopped white chocolate – Ghirardelli or Guittard are my go-to for meltability and flavor
- 1 tsp coconut oil or vegetable shortening (optional, for smooth melting)
- For Decoration:
- Colorful sprinkles, edible glitter, or nonpareils – choose a vibrant mix to mimic fireworks
- Optional: edible gold dust or shimmer spray for extra sparkle
- Extras:
- Cake pop sticks or sturdy lollipop sticks
- Styrofoam block or cake pop stand for drying
If you want a gluten-free option, using a gluten-free cake mix works well here. For dairy-free, swap the frosting and white chocolate for coconut-based alternatives. And if you find yourself without white chocolate, candy melts can be a decent fallback, though the flavor won’t be quite as rich.
Equipment Needed
- Mixing bowls: Medium and large size for cake batter and frosting mix
- Baking pan: 9×13 inch (23×33 cm) rectangular pan to bake the cake evenly
- Cooling rack: To cool the cake completely before crumbling
- Food processor or fork: For crumbling cake into fine crumbs
- Baking sheet: For chilling cake pops before dipping
- Parchment paper: To line baking sheets for easy cleanup
- Microwave-safe bowl or double boiler: For melting white chocolate
- Cake pop sticks: Essential for holding and dipping the pops
- Styrofoam block or cake pop stand: For drying the dipped cake pops upright
For those without a cake pop stand, a piece of floral foam or even a cardboard box with holes works fine. I’ve tried silicone molds to shape cake pops, but rolling by hand gives a better texture. When melting chocolate, a gentle double boiler prevents scorching, which I learned the hard way after a few burnt batches. If budget is tight, a microwave-safe bowl and short bursts of heat work just as well.
Preparation Method
- Bake the Cake: Prepare the white cake mix according to the box instructions, usually combining the mix with eggs, oil, and water. Pour into the greased 9×13 inch (23×33 cm) pan and bake at 350°F (175°C) for 30-35 minutes or until a toothpick inserted in the center comes out clean. Let the cake cool completely on a rack — this step is crucial so your cake pops don’t get soggy.
- Crumble the Cake: Once cooled, break the cake into chunks and place in a large mixing bowl. Use your hands or a fork to crumble the cake finely. The texture should be crumbly but not powdery — think soft sand.
- Mix with Frosting: Add 1 cup (240 g) of vanilla frosting to the cake crumbs. Gently fold and mix until the crumbs hold together when pressed. You want the mixture to be moist but not sticky. If it’s too dry, add a little more frosting; too wet, add more crumbs.
- Shape the Cake Pops: Roll the mixture into 1.5-inch (3.8 cm) balls, about the size of a golf ball. Place the balls on a parchment-lined baking sheet. Chill in the fridge for at least 1 hour or in the freezer for 20 minutes so they firm up for dipping.
- Melt the White Chocolate: In a microwave-safe bowl, gently melt the white chocolate chips with 1 tsp coconut oil in 30-second intervals, stirring between each until smooth. Alternatively, use a double boiler. Avoid overheating to prevent seizing.
- Assemble Cake Pops: Dip one end of a cake pop stick about 1 inch (2.5 cm) into the melted chocolate, then insert it halfway into a chilled cake ball. This acts as glue to hold the stick in place. Repeat for all cake balls.
- Coat the Cake Pops: Holding the stick, dip each cake pop into the melted white chocolate until fully coated. Gently tap off excess chocolate and immediately decorate with sprinkles or edible glitter before the coating sets.
- Dry and Set: Stick the pops upright into a Styrofoam block or cake pop stand to dry completely, about 30 minutes. If you need to speed up the process, place them briefly in the fridge.
If the coating thickens too much while you’re working, just reheat it gently to keep it fluid. And don’t worry if some sprinkles fall off after drying — just press a few more on for a fuller look. The goal is a smooth, even coating with playful bursts of color that look like fireworks. For added fun, try mixing different sprinkle shapes and sizes.
Cooking Tips & Techniques
Making cake pops might seem straightforward, but a few tricks can really make your results shine. First, chilling the cake balls is non-negotiable — it helps them keep their shape and stops the coating from cracking. I’ve learned the hard way that warm cake balls cause melty, messy dips.
When melting white chocolate, patience is key. Heat in short bursts, stirring often. Overheated white chocolate gets grainy and unusable. Adding a bit of coconut oil or shortening thins the coating, making it easier to dip and faster to set.
Use quality cake and frosting for the best flavor. I usually bake my own from scratch when I have time, but a good box mix paired with homemade frosting tastes just fine. For frosting, cream cheese or buttercream both work, but cream cheese adds a nice tang that cuts through the sweetness.
Don’t overload your cake pops with too many sprinkles. A light sprinkle mimics fireworks better than a heavy coating. And while you want the coating fully set before serving, if you’re short on time, chilling in the fridge helps speed things up without dulling the shine.
Lastly, if you want to multitask, bake your cake while prepping the frosting or melting the chocolate. Efficiency helps keep everything fresh and avoids overhandling the cake balls, which can make them fall apart. And if you’re looking for a brunch dessert to pair with these pops, the creamy passion fruit mousse cups make a delightful combo with their light, fruity contrast.
Variations & Adaptations
These firework cake pops are a blank canvas for your creativity. Here are some ideas I’ve tried or thought up that keep things interesting:
- Flavor Twists: Add a teaspoon of lemon zest or almond extract to your frosting for a fresh flavor pop. I once added a bit of cinnamon and nutmeg for a fall-inspired batch that was surprisingly cozy.
- Chocolate Shell Variations: Swap white chocolate for milk or dark chocolate coating if you prefer a richer taste. Just remember to add a bit of shortening for smooth melting.
- Dietary Adaptations: Use gluten-free cake mix and dairy-free frosting to accommodate allergies or preferences. There are great coconut-based white chocolate alternatives that melt well.
- Seasonal Decorations: Change sprinkles to match holidays — red and green for Christmas, pastels for Easter, or even edible gold stars for a New Year’s bash.
- Alternative Shapes: Instead of balls, form mini cones or stars using silicone molds for a more dramatic look. Though fair warning, the traditional round shape still wins for ease and texture.
Personally, I once made a batch with a splash of espresso powder in the frosting — it added a subtle mocha note that paired beautifully with the white chocolate. Also, if you ever want a lighter take, try using Greek yogurt frosting and dust with freeze-dried fruit powder instead of sprinkles. That gives a tangy brightness and less sweetness overall.
Serving & Storage Suggestions
These cake pops are best served at room temperature so the white chocolate coating stays creamy but firm. Arrange them upright on a decorative platter or in a Styrofoam block for a fun display. Pairing them with light drinks like iced tea or a sparkling lemonade works well to balance their sweetness.
For storage, keep the cake pops in an airtight container in the refrigerator for up to 5 days. Bring them to room temperature about 30 minutes before serving to soften the coating. If you want to keep them longer, freeze the pops in a single layer on a baking sheet, then transfer to a freezer-safe container for up to 2 months. Thaw overnight in the fridge and then bring to room temp.
One tip: flavors actually mellow and meld beautifully after a day or two in the fridge, so if you can wait, the cake pops taste even better the next day. This makes them perfect for prepping ahead of a party or picnic. And if you’d like to explore more fun, festive desserts for your next gathering, the stars and stripes sugar cookies are a colorful and tasty companion.
Nutritional Information & Benefits
Each firework cake pop contains roughly 150-180 calories depending on size and exact ingredients. The main sources are carbs from the cake and sugars from the frosting and coating. While this is definitely a treat, using quality ingredients like real white chocolate and homemade frosting reduces artificial additives.
The white cake base provides energy-boosting carbohydrates, and if you use cream cheese frosting, you get a bit of protein and calcium. For a slightly healthier twist, incorporating Greek yogurt frosting or reducing added sugar helps balance indulgence with nutrition.
These cake pops are naturally gluten-containing unless you use a gluten-free mix. They also contain dairy and eggs, so be mindful of allergies. Overall, they’re a fun, occasional dessert that brings joy and celebration without being complicated or overly processed.
Conclusion
There’s something quietly satisfying about making these Perfect Firework Cake Pops from scratch — no matter how many times I’ve made them, they never lose that “wow” factor on the first bite. They’re simple enough for a busy cook but special enough to brighten any occasion. I love how customizable they are, whether you keep them classic or add your own spin with flavors and decorations.
If you want a dessert that’s as fun to make as it is to eat, this recipe won’t disappoint. Give it a whirl and see which variation sparks your creativity. Don’t forget to share your version or questions below — I always enjoy hearing how others put their own twist on this festive treat. Happy popping!
FAQs
How long do cake pops last?
Stored in an airtight container in the fridge, cake pops last about 4-5 days. For longer storage, freeze them for up to 2 months.
Can I use homemade cake instead of box mix?
Absolutely! Homemade cake works great and can add extra flavor. Just make sure the cake is fully cooled before crumbling.
What if my white chocolate coating is too thick?
Try gently reheating it or adding a teaspoon of coconut oil or shortening to thin the chocolate for easier dipping.
Can I make cake pops without sticks?
You can serve them as cake balls on a platter, but sticks make them easier to dip and eat, plus they look more festive.
How do I prevent the cake pops from falling off the sticks?
Dip the stick tip in melted chocolate before inserting it into the cake ball, then chill to set. This “glue” helps secure the pops.
Pin This Recipe!
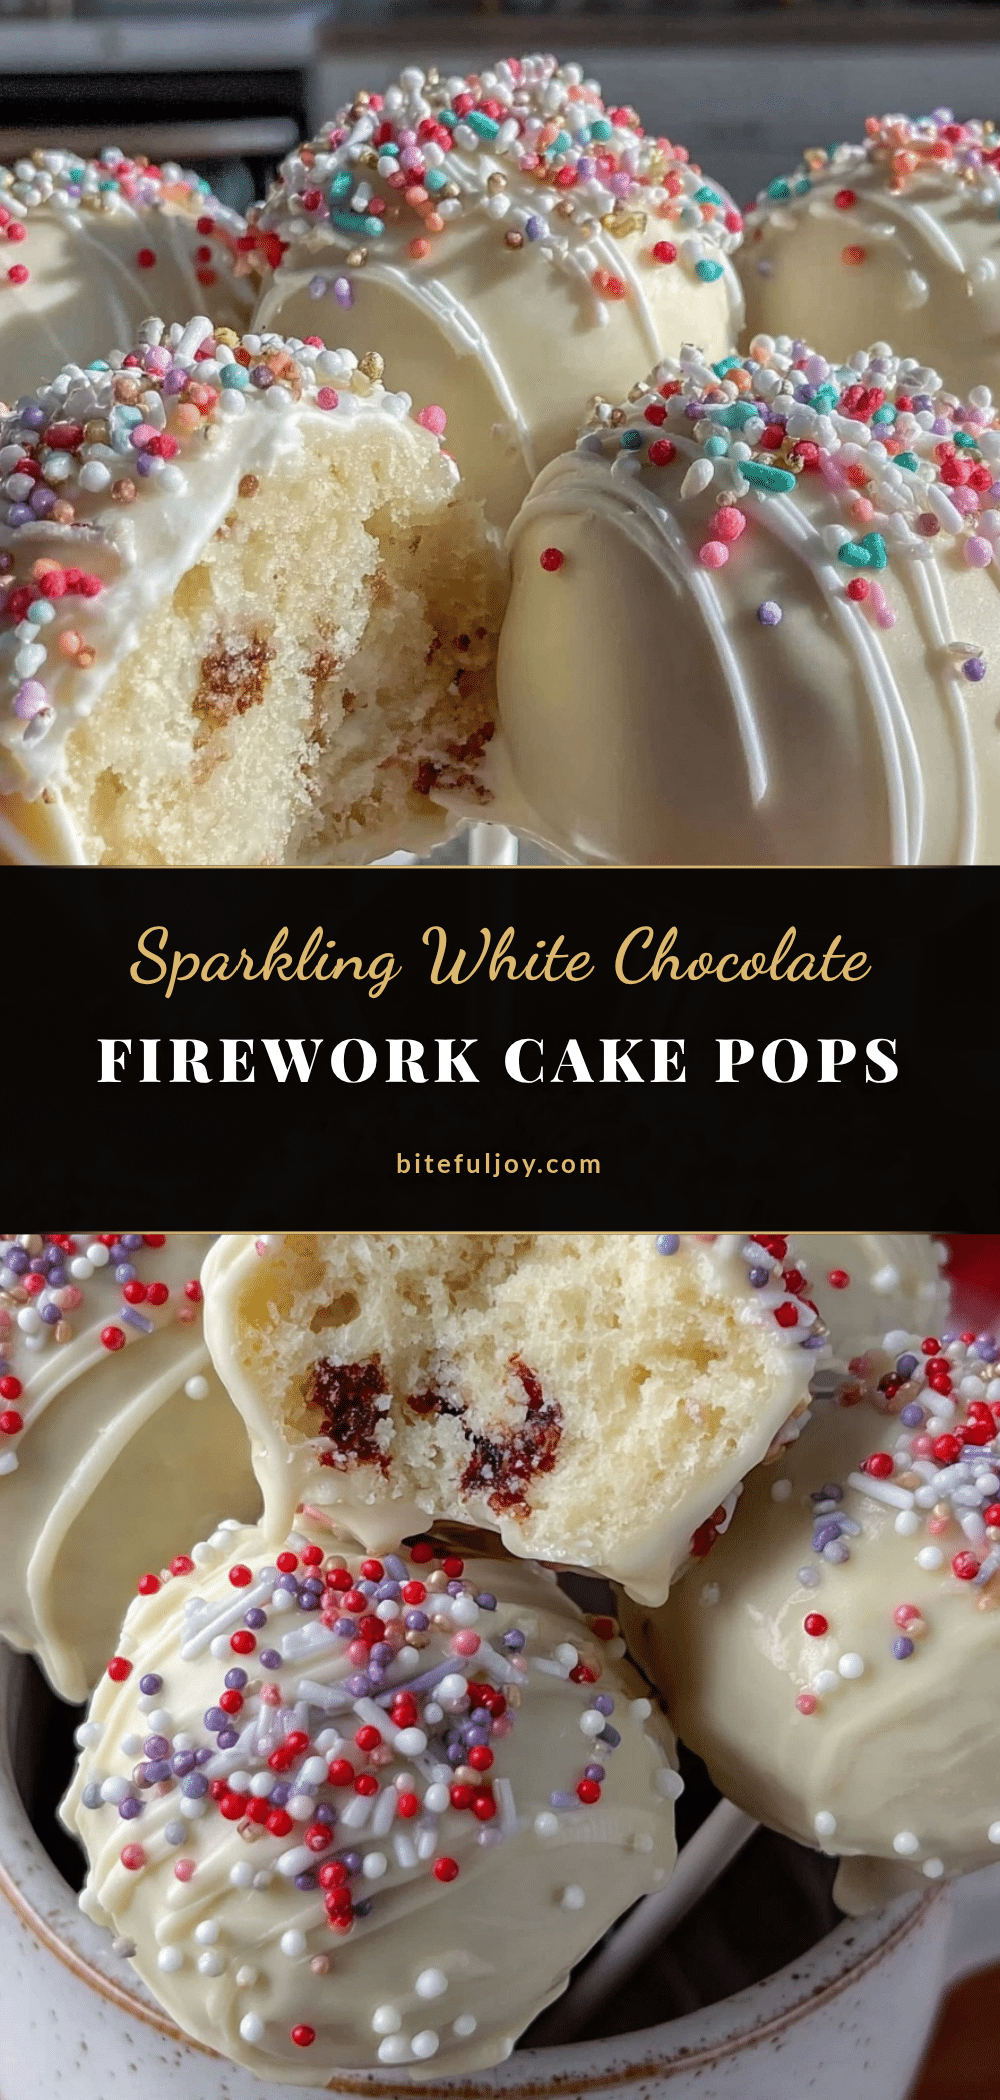
Perfect Firework Cake Pops
These festive and fun cake pops feature a moist white cake center coated in creamy white chocolate and decorated with colorful sprinkles, perfect for celebrations and easy to make from scratch or with a box mix.
- Prep Time: 20 minutes
- Cook Time: 35 minutes
- Total Time: 1 hour 45 minutes
- Yield: 24 cake pops 1x
- Category: Dessert
- Cuisine: American
Ingredients
- 1 box white cake mix (about 15.25 oz / 432 g)
- Ingredients called for on the cake mix box (usually eggs, oil, water)
- 1 cup (240 g) vanilla frosting (store-bought or homemade; cream cheese frosting works too)
- 12 oz (340 g) white chocolate chips or chopped white chocolate
- 1 tsp coconut oil or vegetable shortening (optional, for smooth melting)
- Colorful sprinkles, edible glitter, or nonpareils
- Optional: edible gold dust or shimmer spray
- Cake pop sticks or sturdy lollipop sticks
- Styrofoam block or cake pop stand for drying
Instructions
- Prepare the white cake mix according to the box instructions, usually combining the mix with eggs, oil, and water. Pour into a greased 9×13 inch (23×33 cm) pan and bake at 350°F (175°C) for 30-35 minutes or until a toothpick inserted in the center comes out clean. Let the cake cool completely on a rack.
- Once cooled, break the cake into chunks and place in a large mixing bowl. Crumble the cake finely using your hands or a fork until the texture is crumbly but not powdery.
- Add 1 cup (240 g) of vanilla frosting to the cake crumbs. Gently fold and mix until the crumbs hold together when pressed. Adjust frosting or crumbs if mixture is too dry or too wet.
- Roll the mixture into 1.5-inch (3.8 cm) balls, about the size of a golf ball. Place the balls on a parchment-lined baking sheet. Chill in the fridge for at least 1 hour or in the freezer for 20 minutes to firm up.
- In a microwave-safe bowl, gently melt the white chocolate chips with 1 tsp coconut oil in 30-second intervals, stirring between each until smooth. Alternatively, use a double boiler. Avoid overheating.
- Dip one end of a cake pop stick about 1 inch (2.5 cm) into the melted chocolate, then insert it halfway into a chilled cake ball to secure the stick. Repeat for all cake balls.
- Holding the stick, dip each cake pop into the melted white chocolate until fully coated. Gently tap off excess chocolate and immediately decorate with sprinkles or edible glitter before the coating sets.
- Stick the pops upright into a Styrofoam block or cake pop stand to dry completely, about 30 minutes. To speed up, place briefly in the fridge.
Notes
Chill cake balls before dipping to prevent cracking. Melt white chocolate gently in short bursts and stir often to avoid graininess. Use coconut oil or shortening to thin chocolate coating if needed. Press extra sprinkles on if some fall off after drying. Store cake pops in an airtight container in the fridge for up to 5 days or freeze for up to 2 months.
Nutrition
- Serving Size: 1 cake pop
- Calories: 165
- Sugar: 18
- Sodium: 110
- Fat: 8
- Saturated Fat: 5
- Carbohydrates: 22
- Fiber: 0.5
- Protein: 1.5
Keywords: cake pops, white chocolate, easy dessert, party treats, summer barbecue, festive dessert, homemade cake pops, sprinkles, quick dessert


