
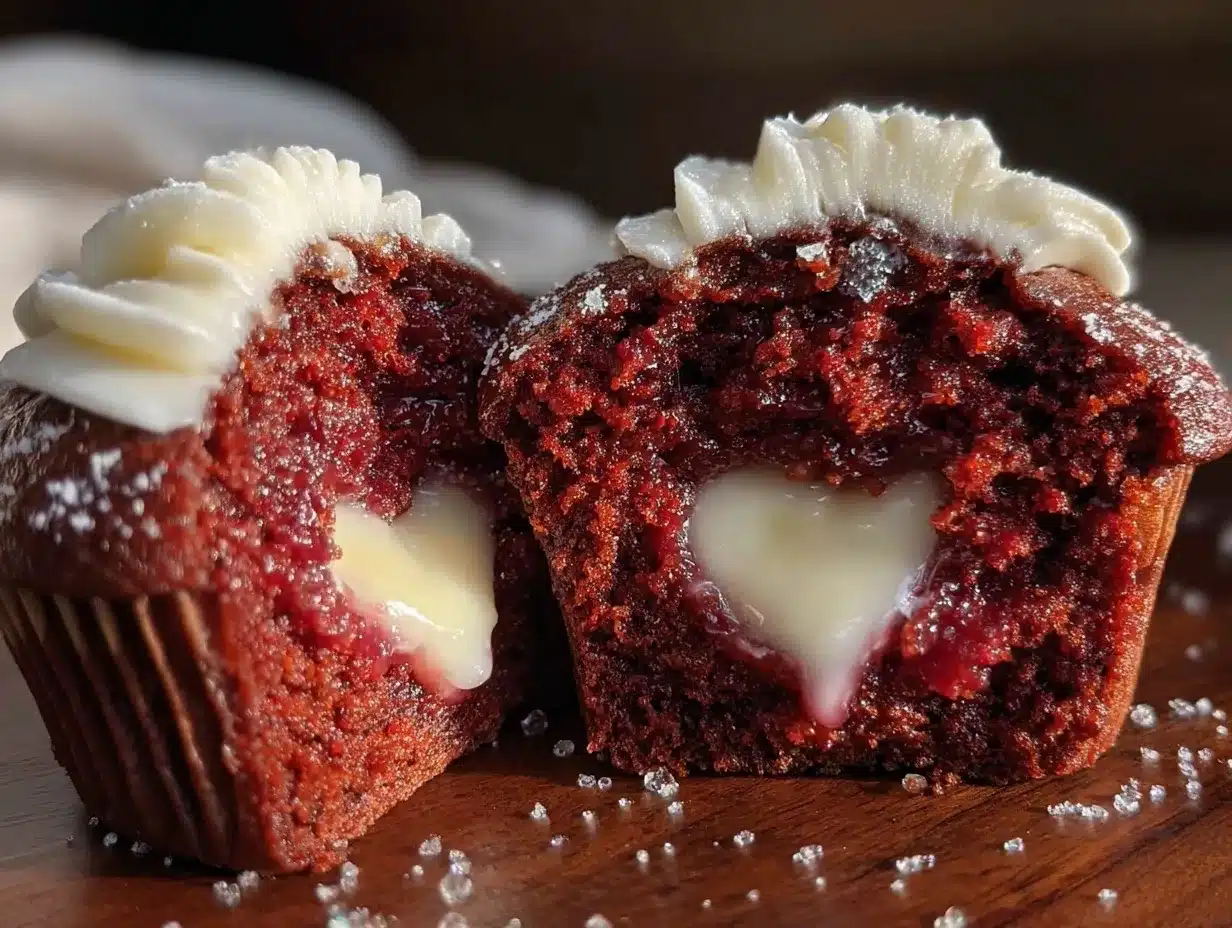
“You really have to see this,” my friend texted me one rainy afternoon, sending a blurry picture of cupcakes that looked like they were bleeding ruby-red hearts right from the center. Honestly, I was skeptical—red velvet cupcakes are everywhere, and the idea of a “bleeding heart” cupcake sounded a bit gimmicky. But curiosity got the better of me, and I decided to try making these irresistible bleeding heart red velvet cupcakes with cream filling myself. What started as a casual experiment on a gloomy day quickly became a bit of an obsession. The moment I bit into one, the surprise of the luscious cream filling spilling out felt like a little secret shared between me and the cupcake.
The texture was so tender and moist, with just the right hint of cocoa, and the cream filling? Oh, it was silky and smooth, a perfect balance to the subtle tang of the cake. I found myself baking these multiple times in a week, tweaking the filling and refining the recipe until it was just right. It’s funny how comfort food can sometimes come wrapped in a playful disguise—these cupcakes look dramatic but are genuinely simple to make.
They’ve now become my go-to treat for everything from cozy weekend afternoons to last-minute celebrations. There’s something quietly satisfying about surprising someone with a cupcake that’s not only beautiful but also bursts with flavor and texture. I think you’ll find the same kind of joy making and sharing them.
Why You’ll Love This Recipe
After countless batches and taste tests, I can say these cupcakes are a winner for so many reasons. Here’s why you’ll want to keep this recipe on speed dial:
- Quick & Easy: You can whip these up in under an hour, which is a lifesaver when you’re craving something sweet but short on time.
- Simple Ingredients: No need for fancy or hard-to-find items. Everything you need is probably already in your pantry or fridge.
- Perfect for Special Occasions: Whether it’s Valentine’s Day, a birthday, or just a treat to brighten up a rainy day, these cupcakes make a memorable centerpiece.
- Crowd-Pleaser: Kids, adults, your picky aunt—everyone loves the surprise cream filling and the moist red velvet crumb.
- Unbelievably Delicious: The combination of a tender crumb and a creamy, dreamy filling is just the kind of comfort food that makes you pause and savor each bite.
This isn’t just another red velvet cupcake recipe. The secret is in the cream filling — it’s lightly sweetened and silky smooth, giving you that “bleeding heart” effect when you cut or bite into the cupcakes. Plus, the red velvet batter itself is balanced perfectly: not too sweet, with a subtle cocoa note and just a touch of tang from the buttermilk. Honestly, it’s the kind of recipe I’m glad I stumbled upon, and I trust you’ll feel the same way.
It’s also a fun twist that adds a little drama to an otherwise classic dessert. If you love rich, creamy treats like the white chocolate raspberry cheesecake bars or the soft decadence of rose petal cupcakes, these red velvet cupcakes will fit right into your recipe rotation.
What Ingredients You Will Need
This recipe uses straightforward, trusty ingredients to create a bold flavor and moist texture without any fuss. Most are pantry staples, and a few tips on choosing the best versions make a big difference.
- All-purpose flour: The base that gives structure; I recommend sifting to avoid lumps.
- Cocoa powder, unsweetened: Use a good-quality Dutch-processed cocoa for a richer, deeper flavor.
- Baking soda: The leavening agent that helps the cupcakes rise and become fluffy.
- Salt: Just a pinch to balance the sweetness and bring out the cocoa notes.
- Granulated sugar: Regular white sugar works well, but you can swap half for brown sugar for a subtle molasses hint.
- Vegetable oil: Keeps the cupcakes moist; neutral oils like canola or sunflower are ideal.
- Buttermilk: Adds tang and tenderness; if unavailable, mix milk with a tablespoon of vinegar and let it sit for 5 minutes.
- Large eggs, room temperature: For richness and binding.
- Vanilla extract: Use pure vanilla for the best aroma.
- Red food coloring: Gel or liquid works; gel tends to give a more vibrant color without thinning the batter.
- White vinegar: Reacts with baking soda for lift and adds subtle tanginess.
- For the cream filling:
- Cream cheese, softened: Full-fat for the creamiest texture (I like Philadelphia brand).
- Unsalted butter, softened: Adds richness and smoothness.
- Powdered sugar: For sweetness without graininess.
- Vanilla extract: A little extra to deepen the flavor of the filling.
- Heavy cream: Whipped slightly to lighten the filling.
Feel free to swap the all-purpose flour for a gluten-free blend if necessary, and use dairy-free cream cheese and butter alternatives to make a vegan version. The cream filling is forgiving and can be customized to your taste, but sticking to these ingredients gives you that classic, dreamy texture.
Equipment Needed
To make these cupcakes just right, you’ll need some basic kitchen tools, most of which you probably already own. Here’s what I use:
- Muffin tin: A standard 12-cup tin works perfectly.
- Paper cupcake liners: Keeps the cupcakes from sticking and makes cleanup easier.
- Mixing bowls: One large for dry ingredients, one medium for wet.
- Hand mixer or stand mixer: For creaming the butter and sugar and whipping the filling. You can do it by hand, but it’s a workout!
- Measuring cups and spoons: Precision helps here, especially with the baking soda and vinegar.
- Sifter or fine mesh sieve: To aerate the flour and cocoa powder for a tender crumb.
- Spatula: For folding ingredients together gently.
- Pastry bag or plastic sandwich bag: To pipe the cream filling into the cupcakes after baking.
For those without a mixer, a sturdy whisk and some patience will do the trick. If you want to get fancy, a cupcake corer or small knife helps to neatly remove the centers for filling, but a spoon works just fine. I’ve had success with silicone liners too, which prevent tearing and keep the cupcakes moist.
Preparation Method
- Preheat your oven to 350°F (175°C) and line a 12-cup muffin tin with paper liners. This usually takes about 10 minutes, so getting started early helps.
- Mix dry ingredients: In a large bowl, sift together 2 ½ cups (310 g) all-purpose flour, 2 tablespoons (15 g) unsweetened cocoa powder, 1 teaspoon (5 g) baking soda, and ½ teaspoon (3 g) salt. Sifting helps keep the batter light and lump-free.
- Combine wet ingredients: In another bowl, whisk 1 ½ cups (300 g) granulated sugar, 1 cup (240 ml) vegetable oil, 1 cup (240 ml) buttermilk, 2 large eggs (room temperature), 2 teaspoons (10 ml) vanilla extract, 2 tablespoons (30 ml) red food coloring, and 1 teaspoon (5 ml) white vinegar. Make sure everything is well combined but don’t overmix to avoid tough cupcakes.
- Incorporate dry into wet: Gradually add the dry ingredients to the wet bowl, folding gently with a spatula until just combined. Don’t overmix — a few lumps are fine!
- Fill cupcake liners: Spoon the batter evenly into the liners, filling about two-thirds full (roughly ¼ cup or 60 ml batter each). This ensures a nice dome without overflow.
- Bake: Place the tin in the oven and bake for 18-22 minutes. Check at 18 minutes by inserting a toothpick in the center; it should come out with a few moist crumbs but no raw batter.
- Cool: Let cupcakes cool in the pan for 5 minutes, then transfer to a wire rack to cool completely before filling. This takes about 30-40 minutes, and patience here avoids melty filling.
- Prepare the cream filling: Beat 8 oz (225 g) softened cream cheese with ½ cup (115 g) softened unsalted butter until smooth. Gradually add 1 ½ cups (180 g) powdered sugar and 1 teaspoon (5 ml) vanilla extract. In a separate bowl, lightly whip ¼ cup (60 ml) heavy cream until just thickened and fold it into the cream cheese mixture for a lighter texture.
- Core the cupcakes: Using a cupcake corer or small knife, carefully remove a small cone from the center of each cupcake. Fill a pastry bag or plastic bag corner with the cream filling.
- Fill the cupcakes: Pipe the cream filling into the hollow center of each cupcake until it’s nicely filled but not overflowing.
- Serve or store: These cupcakes are best enjoyed the same day but can be refrigerated for up to 3 days. Let them come to room temperature before serving for the best flavor.
Pro tip: If you want a perfectly smooth top, give the cupcakes a quick trim with a serrated knife before coring. Also, make sure your cream cheese and butter are truly softened to avoid lumps in the filling.
Cooking Tips & Techniques
Getting the perfect moist crumb and that oozy cream filling requires a bit of know-how, but nothing too fancy. Here are some things I learned the hard way:
- Don’t skip sifting: Cocoa powder and flour can clump, and those lumps show up as dry pockets in your cupcakes.
- Room temperature ingredients: Eggs, buttermilk, cream cheese, and butter all mix better and produce a smoother batter and filling when not cold.
- Folding gently: Overmixing the batter develops gluten, making cupcakes dense. Fold just until no flour streaks remain.
- Measuring flour correctly: Spoon flour into your measuring cup and level it off rather than scooping directly, which compresses the flour and can dry out your cupcakes.
- Filling technique: If you don’t have a piping bag, a small spoon works, but piping gives more control and less mess.
- Timing the bake: Ovens vary, so start checking a few minutes before the minimum time. Overbaking is the fastest way to dry cupcakes out.
- Storage: Refrigerate if not eating right away, but bring cupcakes to room temp before serving so the cream filling tastes fresh and soft.
I once tried freezing these cupcakes with the filling already inside, and it made the cream a bit watery on thawing. So, fill them fresh or freeze the cupcakes alone and fill after thawing.
Variations & Adaptations
While these bleeding heart red velvet cupcakes are delightful as is, I’ve played around with a few tweaks that might spark your creativity:
- Chocolate Ganache Filling: Swap the cream filling for a rich dark chocolate ganache for a decadently intense surprise center.
- Berry Cream Cheese Filling: Add a tablespoon of pureed raspberries or strawberries to the cream filling for a fruity twist.
- Vegan Version: Use flax eggs, plant-based milk mixed with lemon juice for buttermilk, and dairy-free cream cheese and butter alternatives. The red color might be a little less vibrant, but the flavor shines through.
- Seasonal Twist: In fall, add a pinch of cinnamon and nutmeg to the batter for a cozy spice note.
- Mini Cupcakes: Bake these as bite-sized treats, reducing baking time to 12-15 minutes, perfect for parties or dessert tables.
Once, I tried piping a rose swirl buttercream on top for a Valentine’s Day party—talk about pretty! If you want a lighter frosting, the recipe for the rose petal cupcakes offers a great idea for delicate floral flavors that complement red velvet beautifully.
Serving & Storage Suggestions
These cupcakes are best served at room temperature, allowing the cream filling to be perfectly soft and luscious. They make a stunning dessert centerpiece—especially when arranged on a pretty platter that shows off the red hue and the “bleeding heart” surprise.
Pair them with a cup of Earl Grey tea or a creamy latte for an elegant afternoon treat. For a special brunch, they sit nicely alongside something savory like a spinach and feta croissant bake, balancing sweet and savory flavors effortlessly.
To store, place cupcakes in an airtight container and refrigerate for up to 3 days. If you want to freeze them, do so before filling. When ready to enjoy, thaw completely and fill with cream.
Reheat gently in a warm oven (around 300°F / 150°C for 5 minutes) if you prefer a slightly warm cupcake, but be careful not to melt the filling too much. Over time, the flavors meld beautifully, making leftovers even better the next day.
Nutritional Information & Benefits
Each cupcake provides roughly 320 calories, with 18 grams of fat, 38 grams of carbohydrates, and 4 grams of protein. The cream cheese filling adds a good dose of calcium and vitamin A.
Thanks to the buttermilk and vinegar, these cupcakes have a nice tang that helps balance sweetness and adds a gentle probiotic note from the cultured dairy. For those avoiding gluten, swapping to a gluten-free flour blend works well, making these cupcakes accessible to more diets.
While indulgent, the recipe uses vegetable oil instead of butter in the cake, which cuts saturated fat somewhat and keeps the crumb moist. Overall, it’s a delightful treat that hits the spot without going overboard.
Conclusion
These irresistible bleeding heart red velvet cupcakes with cream filling are a fun, delicious way to impress yourself and others with a recipe that looks impressive but is surprisingly straightforward. I love how they offer that little “wow” moment with every bite—a soft, tender cake with a creamy center that feels like a secret gift hidden inside.
Feel free to play with the filling or frosting to suit your taste, but don’t skip the core idea: a cupcake with personality and heart. They’ve become a staple in my kitchen, perfect for sharing or just indulging on a cozy afternoon.
If you enjoy baking, you might appreciate trying the Earl Grey tea cake with honey glaze for more subtle flavors or the creamy passion fruit mousse cups for a light, refreshing dessert option.
Give this recipe a go and share your versions—I’d love to hear how you make these cupcakes your own!
Frequently Asked Questions
- Can I make the cream filling ahead of time? Yes, you can prepare it a day ahead and keep it refrigerated. Just bring it back to room temperature and give it a quick whip before filling the cupcakes.
- What if I don’t have buttermilk? Mix 1 cup (240 ml) milk with 1 tablespoon (15 ml) white vinegar or lemon juice and let it sit for 5 minutes to create a buttermilk substitute.
- How do I prevent the cupcakes from drying out? Avoid overbaking and store them in an airtight container. Using oil instead of butter in the batter also helps maintain moisture.
- Can I freeze the filled cupcakes? It’s best to freeze cupcakes before filling. Freeze unfrosted cupcakes in an airtight container or freezer bag, then thaw and fill when ready to serve.
- Is there a way to make these cupcakes vegan? Yes! Use flax eggs (1 tablespoon ground flaxseed + 3 tablespoons water per egg), plant-based milk with lemon juice for buttermilk, and vegan cream cheese and butter alternatives for the filling.
Pin This Recipe!
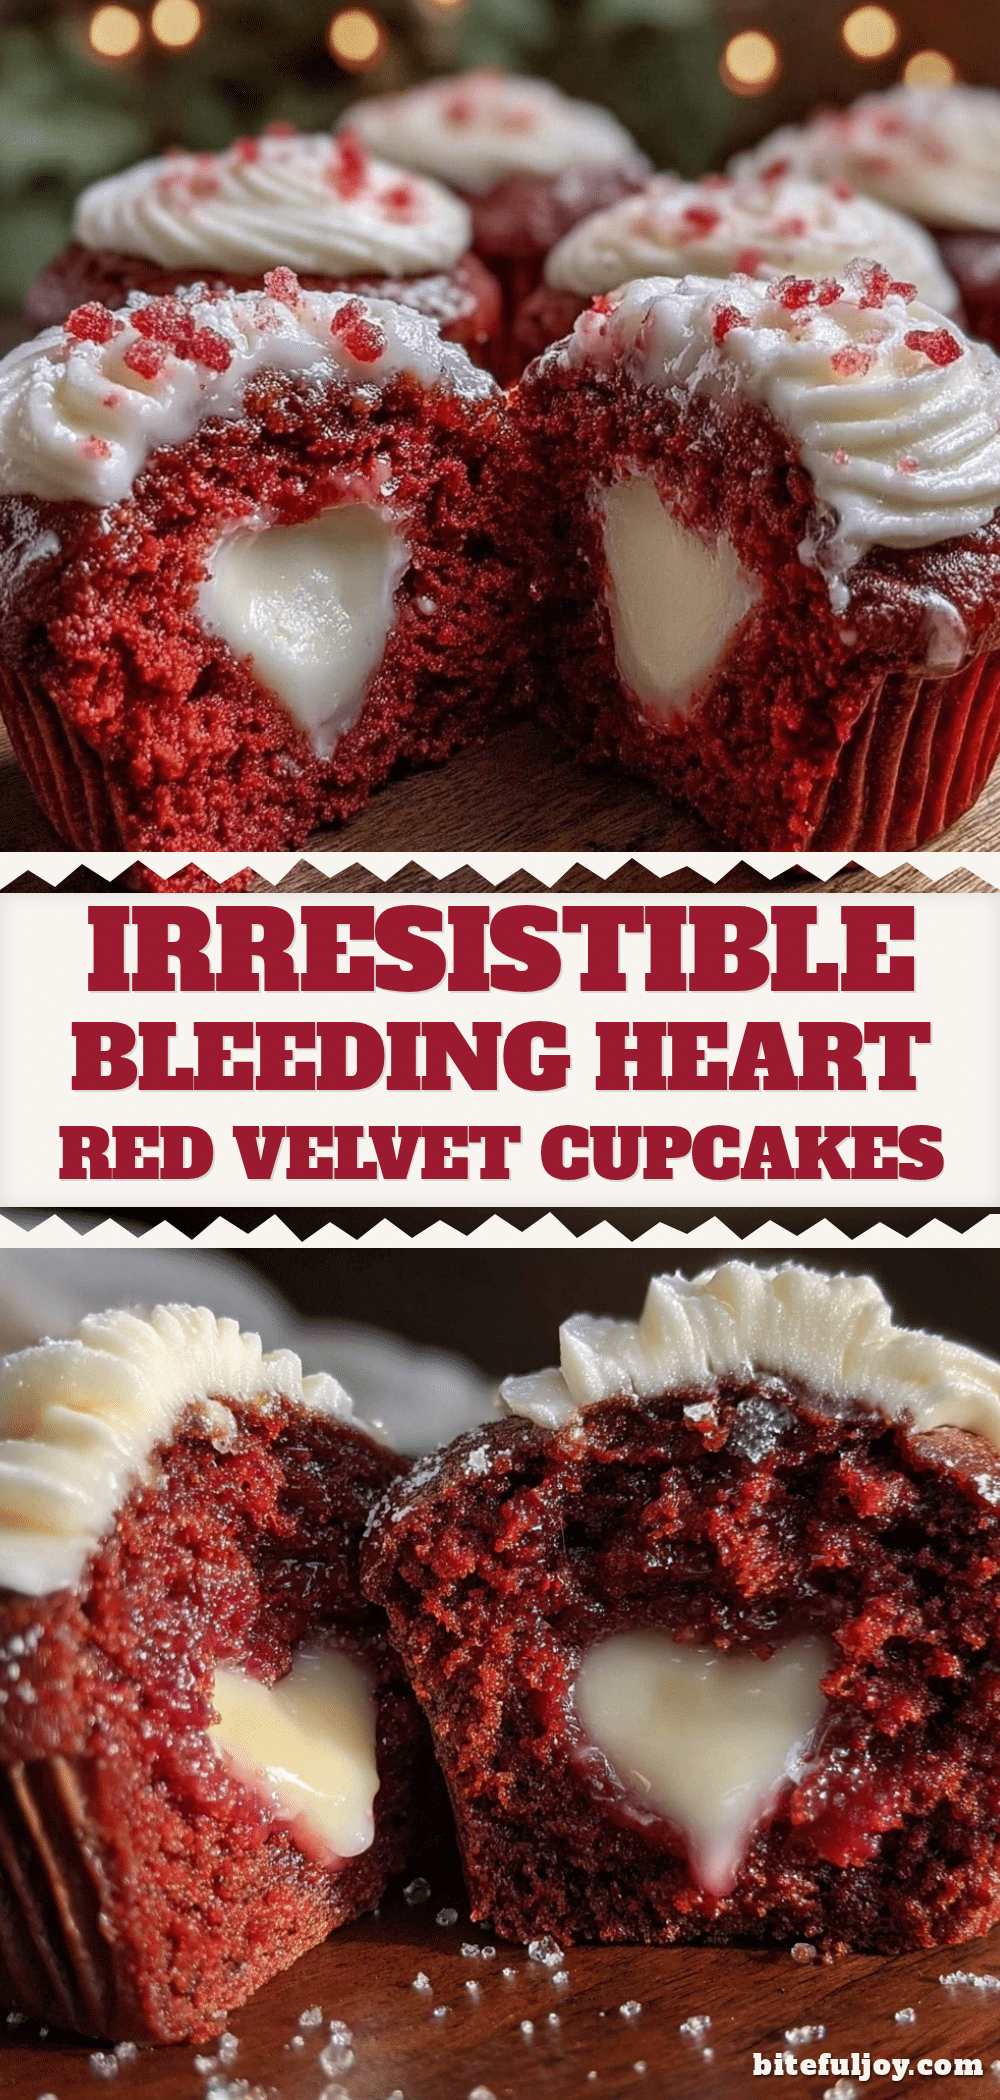
Bleeding Heart Red Velvet Cupcakes with Cream Filling

These bleeding heart red velvet cupcakes feature a tender, moist crumb with a luscious, silky cream cheese filling that surprises with every bite. Perfect for special occasions or cozy treats, they combine classic red velvet flavor with a playful twist.
- Prep Time: 15 minutes
- Cook Time: 22 minutes
- Total Time: 1 hour
- Yield: 12 servings 1x
- Category: Dessert
- Cuisine: American
Ingredients
- 2 ½ cups all-purpose flour (310 g)
- 2 tablespoons unsweetened Dutch-processed cocoa powder (15 g)
- 1 teaspoon baking soda (5 g)
- ½ teaspoon salt (3 g)
- 1 ½ cups granulated sugar (300 g)
- 1 cup vegetable oil (240 ml)
- 1 cup buttermilk (240 ml) or 1 cup milk + 1 tablespoon white vinegar (let sit 5 minutes)
- 2 large eggs, room temperature
- 2 teaspoons vanilla extract (10 ml)
- 2 tablespoons red food coloring (gel or liquid) (30 ml)
- 1 teaspoon white vinegar (5 ml)
- For the cream filling:
- 8 oz cream cheese, softened (225 g)
- ½ cup unsalted butter, softened (115 g)
- 1 ½ cups powdered sugar (180 g)
- 1 teaspoon vanilla extract (5 ml)
- ¼ cup heavy cream, lightly whipped (60 ml)
Instructions
- Preheat oven to 350°F (175°C) and line a 12-cup muffin tin with paper liners.
- Sift together flour, cocoa powder, baking soda, and salt in a large bowl.
- In another bowl, whisk sugar, vegetable oil, buttermilk, eggs, vanilla extract, red food coloring, and white vinegar until combined.
- Gradually fold dry ingredients into wet ingredients until just combined; do not overmix.
- Spoon batter evenly into liners, filling about two-thirds full (about ¼ cup or 60 ml each).
- Bake for 18-22 minutes, checking at 18 minutes with a toothpick; it should come out with moist crumbs but no raw batter.
- Cool cupcakes in the pan for 5 minutes, then transfer to a wire rack to cool completely (30-40 minutes).
- Prepare cream filling by beating cream cheese and butter until smooth. Gradually add powdered sugar and vanilla extract. Fold in lightly whipped heavy cream.
- Core each cupcake center using a cupcake corer or small knife.
- Fill a pastry bag or plastic bag corner with cream filling and pipe into the hollow centers of cupcakes.
- Serve immediately or refrigerate up to 3 days; bring to room temperature before serving.
Notes
Use room temperature ingredients for best results. Do not overmix batter to avoid dense cupcakes. Sift dry ingredients to prevent lumps. Fill cupcakes fresh for best cream filling texture; freezing filled cupcakes may cause watery filling. Refrigerate cupcakes if not eaten immediately and bring to room temperature before serving. For a vegan version, use flax eggs, plant-based milk with lemon juice, and dairy-free cream cheese and butter alternatives.
Nutrition
- Serving Size: 1 cupcake
- Calories: 320
- Fat: 18
- Carbohydrates: 38
- Protein: 4
Keywords: red velvet cupcakes, cream filling, bleeding heart cupcakes, easy cupcakes, moist cupcakes, dessert, Valentine's Day dessert


