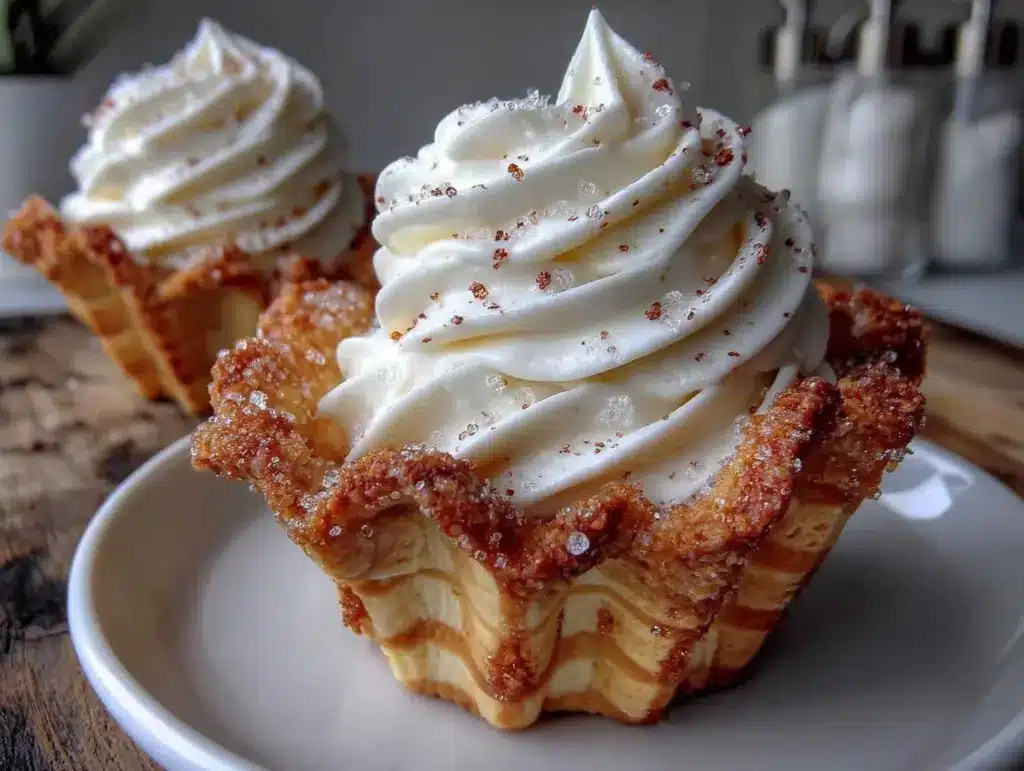
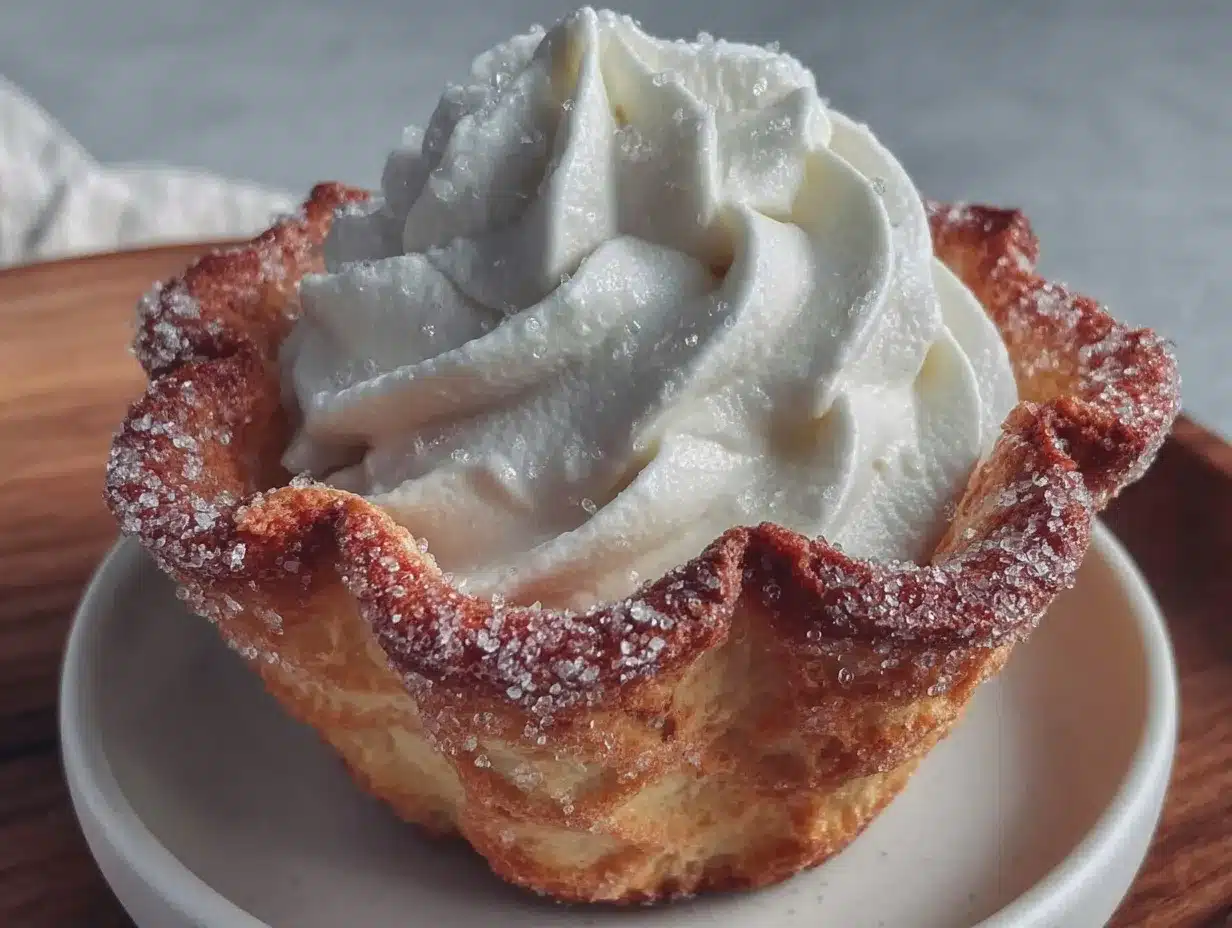
“You really don’t need a fancy ice cream maker for a summer treat,” my friend said over the phone, half-joking but mostly serious. That casual comment stuck with me through a particularly chaotic weekend when the freezer was packed, and the kids were begging for something cool and sweet. I rummaged through the pantry and found those plain ice cream cones lurking in the back, a forgotten pack from a party months ago. What if, I wondered, I baked cookie cups using those cones as molds? Crispy on the outside, soft and chewy on the inside, perfect for holding a swirl of homemade soft serve. Honestly, I was skeptical—cookie dough in a cone? Would it even hold up? But the result surprised me. The cookie cups baked up golden and crisp, with just the right crunch to contrast the creamy softness of the soft serve. It became a quick favorite, especially when I needed a simple but show-stopping dessert that didn’t demand a trip to the ice cream shop. These crispy ice cream cone cookie cups with soft serve became my go-to treat for last-minute celebrations or an easy weekend indulgence. There’s something quietly satisfying about biting into that crisp cookie shell, then digging into the smooth, cold soft serve inside. It’s a little nostalgic, a little playful, and totally easy to make.
Why You’ll Love This Recipe
After testing this recipe more times than I can count (yes, multiple batches in a week, no shame), here’s why these crispy ice cream cone cookie cups with soft serve are worth your time:
- Quick & Easy: From mixing the dough to serving, this dessert comes together in under 45 minutes, making it perfect for spontaneous cravings or casual get-togethers.
- Simple Ingredients: No need for specialty stores. You probably have all these pantry staples already – butter, sugar, flour, eggs, and those trusty ice cream cones.
- Perfect for Summer & Parties: Whether it’s a weekend family treat or a fun addition to a backyard BBQ, these cookie cups bring a festive vibe without fuss.
- Crowd-Pleaser: Kids and adults adore the combo of crisp cookie shell and creamy soft serve. Trust me, it’s a hit every time.
- Unbelievably Delicious: The cookie cups have a caramelized, buttery crunch that pairs magically with the smooth, cold swirl of soft serve, creating a texture party in every bite.
- A Unique Twist: Instead of the usual cones or bowls, baking cookie dough inside ice cream cones makes for a crisp, sturdy cup that holds soft serve beautifully without sogginess.
Honestly, this recipe isn’t just another dessert. It’s the kind of treat that makes you pause for a moment, savoring both texture and taste, with a little smile because it’s homemade and surprisingly simple. If you’ve enjoyed creative desserts like the creamy passion fruit mousse cups, you’ll appreciate how this recipe adds a fun crunch and cold creaminess all in one cute package.
What Ingredients You Will Need
This recipe uses straightforward, easy-to-source ingredients to deliver those perfect crispy cookie cups that cradle soft serve like a dream. Everything is pantry-friendly, with a few notes on substitutions if you want to tweak it.
- Ice Cream Cones: Plain wafer cones work best – sturdy and crisp without too much sweetness. I like the classic brands you find in most grocery stores.
- Unsalted Butter: ½ cup (113g), softened – the backbone of rich, tender cookie cups.
- Granulated Sugar: ⅓ cup (67g) – for sweetness and slight crispness.
- Brown Sugar: ⅓ cup (67g), packed – adds moisture and that subtle caramel note.
- Large Egg: 1, room temperature – binds the dough and contributes to softness inside.
- Vanilla Extract: 1 teaspoon – pure vanilla always makes a difference.
- All-Purpose Flour: 1 ½ cups (190g) – the cookie’s structure. For a gluten-free option, swap with almond flour, noting the texture will be a bit different.
- Baking Soda: ½ teaspoon – helps the cookies rise slightly for a soft interior.
- Salt: ¼ teaspoon – balances the sweetness.
- Soft Serve Ice Cream or Frozen Yogurt: About 2 cups – you can use your favorite store-bought soft serve or homemade if you like to experiment. Vanilla is classic, but feel free to try chocolate or strawberry.
Optional add-ins if you want to mix it up:
- Mini chocolate chips or chunks (about ½ cup) for extra indulgence.
- Chopped nuts for texture contrast.
When I made these for a casual brunch, I paired them with the crispy brioche French toast with caramelized bananas, and the combo was a hit — the cookie cups added a playful, crunchy contrast to the soft textures on the plate.
Equipment Needed
To make these delightful cookie cups, you don’t need anything fancy. Here’s what I use:
- Mixing Bowls: At least one medium bowl for the dough. Glass or stainless steel works fine.
- Hand Mixer or Stand Mixer: Helpful for creaming butter and sugars efficiently, but a sturdy whisk and elbow grease will do.
- Measuring Cups and Spoons: Precise measurements help keep the cookie texture consistent.
- Baking Sheet: A rimmed cookie sheet is best to catch any drips or spills.
- Parchment Paper or Silicone Baking Mat: Prevents sticking and makes cleanup easier.
- Cooling Rack: For letting the cookie cups cool properly—important to keep them crisp.
If you don’t have a hand mixer, mixing the butter and sugars by hand can work, just take your time until it’s fluffy. I’ve found that using parchment paper on the baking sheet helps avoid any melted dough sticking to the cones, which can be a bit tricky otherwise. No need for a specialized ice cream maker if you’re using store-bought soft serve, but if you want to try homemade soft serve, a simple frozen yogurt maker or even a blender can help whip up a creamy texture.
Preparation Method
- Preheat your oven to 350°F (175°C). Line a baking sheet with parchment paper or a silicone mat for easy cleanup.
- Prepare the cookie dough: In a medium bowl, cream together ½ cup (113g) softened unsalted butter, ⅓ cup (67g) granulated sugar, and ⅓ cup (67g) packed brown sugar until light and fluffy, about 3-4 minutes with a mixer. This step is key to getting a tender cookie cup.
- Add the egg and vanilla: Beat in 1 large room temperature egg and 1 teaspoon vanilla extract until fully incorporated.
- Combine dry ingredients: In a separate bowl, whisk together 1 ½ cups (190g) all-purpose flour, ½ teaspoon baking soda, and ¼ teaspoon salt.
- Mix dry into wet: Gradually add the dry ingredients to the wet mixture, stirring just until combined. Avoid overmixing to keep the cookie cups soft inside with a crisp edge.
- Optional add-ins: Fold in ½ cup mini chocolate chips or nuts if you’re using them.
- Fill the cones: Carefully spoon about 2 tablespoons of cookie dough into each ice cream cone, pressing lightly to fill the bottom and sides but leaving a small space at the top for soft serve later. This step can be a little sticky — a small spoon or your fingers work well here.
- Place cones upright: Arrange the filled cones standing upright on the prepared baking sheet. If they don’t stand well, nestle them closely together or use a small cup for extra support.
- Bake: Bake for 12-15 minutes until the cookie cups are golden brown and firm to the touch. Keep an eye on them starting at 12 minutes to avoid overbaking, which can make them too hard.
- Cool completely: Remove from the oven and let the cookie cups cool on the baking sheet for 5 minutes, then transfer to a cooling rack to cool fully. Cooling is crucial to let the cookie crisp up and hold the soft serve without sogginess.
- Serve: Once cool, fill each cookie cup with your favorite soft serve ice cream or frozen yogurt. Serve immediately for the best texture contrast.
Pro tip: If you want to prepare ahead, bake the cookie cups and store them in an airtight container at room temperature. Add the soft serve just before serving to keep the crispness intact.
Cooking Tips & Techniques
Getting these crispy ice cream cone cookie cups with soft serve just right is easier when you know a few tricks I picked up along the way:
- Don’t overfill the cones: Leaving a little room at the top prevents cookie dough from overflowing and keeps the shape intact during baking.
- Temperature matters: Using room temperature butter and egg helps the dough come together smoothly without overmixing.
- Watch your oven closely: Ovens vary, so start checking at 12 minutes. Overbaked cookie cups get too hard and lose that soft-chewy center that makes them so satisfying.
- Cooling is key: Let the cookie cups cool fully on a rack to firm up and stay crisp. Rushing this step often leads to soft or soggy edges.
- Soft serve timing: Add soft serve right before serving. If it melts too much, the cookie cups can get soggy.
- Mix-ins caution: Adding chocolate chips or nuts is delicious, but too many can weigh down the dough and cause the cookie cups to lose their shape.
- Multitasking tip: While the cookie cups are baking, you can whip up a quick homemade soft serve or prep toppings like sprinkles or fruit.
One time I left the cookie cups in the oven too long, and they turned into brittle shells. Not the worst thing, but I missed that soft center that contrasts so nicely with the ice cream. Since then, I set a timer and check early. It really makes a difference.
Variations & Adaptations
If you want to switch things up, here are some fun ways to adapt your crispy ice cream cone cookie cups with soft serve:
- Flavor variations: Add a tablespoon of cocoa powder to the dough for chocolate cookie cups, or mix in some lemon zest for a bright, citrusy twist.
- Dietary tweaks: Use almond flour or a gluten-free blend for gluten-free cookie cups. Swap butter for coconut oil or vegan butter for a dairy-free version.
- Soft serve swaps: Try frozen yogurt, gelato, or even a dairy-free soft serve alternative. Flavors like mango or salted caramel work beautifully.
- Seasonal toppings: Add fresh berries, chopped nuts, or a drizzle of chocolate or caramel sauce on top of the soft serve for extra flair.
- Baking method: If you don’t have cones, try shaping the dough into mini cups using a silicone muffin tin for a sturdier shell.
Personally, I once made a batch with browned butter in the dough for a nuttier, deeper flavor, and paired the cups with homemade honey lavender soft serve. It was a hit at a small garden party and felt fancy without the fuss.
Serving & Storage Suggestions
These cookie cups are best enjoyed fresh—warm, crisp, and filled with cold soft serve. Serve them immediately after filling to keep that delightful crunch. For presentation, arrange them on a platter with fresh fruit or a sprinkle of colorful sprinkles or chopped nuts.
If you need to store the cookie cups before serving, keep them in an airtight container at room temperature for up to 3 days. Avoid refrigerating as that can soften the crisp edges.
Soft serve should be scooped or piped in moments before serving. If you have leftovers, soft serve can be stored in the freezer but will lose some of its creamy texture after thawing.
When reheating cookie cups (if you want a warm base), gently warm them in a 300°F (150°C) oven for 3-4 minutes, but let them cool slightly before adding soft serve to avoid melting too fast.
Flavors tend to deepen when cookie cups rest overnight, but keep in mind the crispness is best fresh. For a fun twist, serve alongside a refreshing iced tea or a fruity lemonade for a complete summer spread.
Nutritional Information & Benefits
Each crispy ice cream cone cookie cup with soft serve offers a satisfying treat with roughly 200-250 calories per serving, depending on the soft serve choice and add-ins. The cookie provides a dose of energy from butter and sugars, while the soft serve adds protein and calcium if dairy-based.
Using quality ingredients like real butter and pure vanilla improves both flavor and nutritional value. For a lighter option, frozen yogurt-based soft serve cuts calories and adds probiotics, making the treat a bit friendlier to digestion.
Gluten-free adaptations using almond or oat flour can accommodate different dietary needs, though texture will vary slightly. The cones themselves are low in fat and can be a crunchy container replacing heavier bowls or cups.
Overall, this recipe balances indulgence with simplicity, perfect for a realistic home cook wanting a fun dessert without complicated prep or artificial ingredients.
Conclusion
These crispy ice cream cone cookie cups with soft serve are a simple, playful dessert that brings a little magic to everyday moments. I love how the crunchy cookie shell and smooth cold ice cream combine to deliver a satisfying mix of textures and flavors. Whether you’re craving a quick treat or need a fun dessert for friends, this recipe hits the spot without fuss. Feel free to tweak the flavors or add your favorite toppings—it’s a flexible recipe that welcomes your creativity.
I hope you enjoy making and sharing these as much as I do. If you try this recipe, I’d love to hear how you customize it or what soft serve flavors you pair it with. Happy baking and even happier eating!
FAQs
- Can I use sugar cones instead of plain wafer cones?
Sugar cones are thicker and sweeter, which might affect how the cookie cups bake and taste. Wafer cones are recommended for best crispness and texture. - How do I make homemade soft serve for this recipe?
You can whip frozen yogurt or ice cream in a blender until creamy, or use a simple frozen yogurt maker. Vanilla or fruit-flavored soft serve works great. - Can I prepare cookie cups ahead of time?
Yes, bake and cool the cookie cups, then store in an airtight container at room temperature up to 3 days. Add soft serve just before serving. - What if my cookie cups crack during baking?
Make sure not to overfill cones and avoid overbaking. Also, handle cones gently when filling and removing from the oven. - Are there vegan versions of this recipe?
Swap butter for vegan butter or coconut oil, use flax or chia eggs instead of real eggs, and choose dairy-free soft serve for a fully vegan treat.
Pin This Recipe!

Crispy Ice Cream Cone Cookie Cups Recipe Easy Homemade Soft Serve Treats

These crispy ice cream cone cookie cups are a quick and easy dessert that combines a crunchy cookie shell baked inside ice cream cones with creamy soft serve ice cream, perfect for summer treats and parties.
- Prep Time: 15 minutes
- Cook Time: 15 minutes
- Total Time: 30 minutes
- Yield: 8 servings 1x
- Category: Dessert
- Cuisine: American
Ingredients
- Ice Cream Cones (plain wafer cones)
- ½ cup (113g) unsalted butter, softened
- ⅓ cup (67g) granulated sugar
- ⅓ cup (67g) packed brown sugar
- 1 large egg, room temperature
- 1 teaspoon vanilla extract
- 1 ½ cups (190g) all-purpose flour
- ½ teaspoon baking soda
- ¼ teaspoon salt
- About 2 cups soft serve ice cream or frozen yogurt
- Optional: ½ cup mini chocolate chips or chunks
- Optional: chopped nuts
Instructions
- Preheat your oven to 350°F (175°C). Line a baking sheet with parchment paper or a silicone mat.
- In a medium bowl, cream together ½ cup softened unsalted butter, ⅓ cup granulated sugar, and ⅓ cup packed brown sugar until light and fluffy, about 3-4 minutes with a mixer.
- Beat in 1 large room temperature egg and 1 teaspoon vanilla extract until fully incorporated.
- In a separate bowl, whisk together 1 ½ cups all-purpose flour, ½ teaspoon baking soda, and ¼ teaspoon salt.
- Gradually add the dry ingredients to the wet mixture, stirring just until combined. Avoid overmixing.
- Fold in ½ cup mini chocolate chips or nuts if using.
- Carefully spoon about 2 tablespoons of cookie dough into each ice cream cone, pressing lightly to fill the bottom and sides but leaving a small space at the top.
- Arrange the filled cones standing upright on the prepared baking sheet. Use a small cup for support if needed.
- Bake for 12-15 minutes until golden brown and firm to the touch. Start checking at 12 minutes to avoid overbaking.
- Remove from oven and let cool on the baking sheet for 5 minutes, then transfer to a cooling rack to cool completely.
- Once cool, fill each cookie cup with your favorite soft serve ice cream or frozen yogurt. Serve immediately.
Notes
Do not overfill the cones to prevent dough overflow. Use room temperature butter and egg for smooth dough. Watch oven closely starting at 12 minutes to avoid overbaking. Cool cookie cups completely before filling to keep crispness. Add soft serve just before serving to prevent sogginess. Optional add-ins like chocolate chips or nuts can be added but avoid too many to maintain shape.
Nutrition
- Serving Size: 1 cookie cup with so
- Calories: 225
- Sugar: 18
- Sodium: 120
- Fat: 10
- Saturated Fat: 6
- Carbohydrates: 30
- Fiber: 1
- Protein: 3
Keywords: cookie cups, ice cream cone cookies, soft serve dessert, summer treats, easy dessert, homemade soft serve, crispy cookie cups


