“Are you sure this is dessert?” a friend asked me while staring at one of these dirt cup puddings, half-expecting to find actual soil beneath the chocolate crumbs. Honestly, I get that a lot. The first time I made this creative dirt cup pudding that looks like a real potted plant, I was just trying to come up with a fun, unexpected dessert for a casual backyard gathering. I grabbed some pudding, crushed cookies, and a few gummy worms, thinking it’d be a cute joke. But it surprised me how many people actually wanted the recipe—especially the kids who were convinced they were digging into something real.
It was one of those rare moments when a simple, almost silly idea turned into a recipe I kept making over and over. In fact, I ended up preparing it three times within a week! Each time, I tweaked the “soil” texture or swapped in different edible “plants” to keep it fresh. The look on people’s faces when they realize they’re about to eat something so whimsically disguised always makes me smile.
What stuck with me most is how this recipe manages to be both playful and impressively tasty. It’s not just a gimmick — the pudding is silky, the cookie crumbs add crunch, and the little candy “flowers” or herbs bring a surprising pop of fun. I can’t recommend it enough for anyone who wants to surprise guests or add a little magic to a kid’s party without fuss or mess.
So, if you’re curious how to make a dessert that fools the eye and delights the taste buds, you’re in the right place. This creative dirt cup pudding recipe is way easier than it looks, and it’s become one of those treats I trust to impress without stress. Here’s why it might just become your new favorite too.
Why You’ll Love This Recipe
Having tested countless pudding desserts and playful treats, this dirt cup pudding recipe stands out because it balances fun and flavor effortlessly. It’s one thing to make a dessert look cool, but quite another to make it actually delicious. Here’s what makes this recipe a winner in my kitchen and beyond:
- Quick & Easy: The entire recipe comes together in about 15 minutes—perfect for last-minute dessert emergencies or spontaneous get-togethers.
- Simple Ingredients: You don’t need a specialty store run; most ingredients are pantry staples like chocolate pudding mix and Oreo crumbs.
- Perfect for Parties: Whether it’s a birthday, picnic, or casual brunch, these edible potted plants catch eyes and spark conversations.
- Crowd-Pleaser: Kids love them for the novelty; adults appreciate the nostalgic chocolatey flavors with a twist.
- Unbelievably Delicious: The creamy pudding paired with crumbly “dirt” and sweet gummy accents hits all the right texture notes.
This isn’t just another dirt cup pudding recipe. What sets it apart is the creative presentation and the little touches—like layering pudding with crushed cookies for that authentic soil look, or sculpting mini edible “plants” with candies and fresh mint leaves. Plus, the recipe’s flexible enough for you to make variations, so it never gets boring.
Honestly, it’s the kind of dessert that makes you pause mid-bite, smile, and think, “Yep, this is pure fun with a side of chocolate.” And that’s why I keep coming back to it when I want a little culinary whimsy without the fuss.
What Ingredients You Will Need
This creative dirt cup pudding recipe relies on simple, everyday ingredients that come together to create a dessert that looks impressive but tastes even better. Most are pantry staples, and if you don’t have something, there’s usually a handy substitute to keep things easy.
- Chocolate pudding mix: Instant mix or homemade pudding both work well. I usually go with a trusted brand like Jell-O for that classic silky texture.
- Milk: Whole milk gives the pudding richness, but 2% or even almond milk can substitute if you prefer.
- Oreo cookies or chocolate sandwich cookies: Crushed into fine crumbs, these create your “dirt” layer. You can buy pre-crumbled cookies or blitz them in a food processor.
- Gummy worms or candy flowers: These little edible accents bring the “garden” vibe to life. Feel free to swap with other candies like sour belts or jelly beans.
- Fresh mint leaves or small edible flowers: For a realistic plant touch, fresh herbs are perfect. If you don’t have fresh, skip it or use candy flowers.
- Whipped cream (optional): Adds a creamy top layer for contrast and extra indulgence. You can use store-bought or homemade.
For a twist, you might try adding a layer of crushed graham crackers mixed with cinnamon for a different “soil” flavor. Or swap Oreo crumbs with gluten-free chocolate cookies to accommodate dietary needs.
Also, a quick tip: When picking your cookies, smaller crumbs give a more believable dirt texture, while chunkier bits add crunch. I usually pulse the cookies in short bursts in my food processor to get the perfect mix.
Equipment Needed
- Mixing bowls: At least two—one for pudding, one for crushing cookies.
- Whisk or electric mixer: To prepare pudding smoothly without lumps.
- Food processor or plastic bag and rolling pin: For crushing cookies. If you don’t have a food processor, a sturdy zip-top bag and rolling pin work just fine.
- Measuring cups and spoons: For accurate ingredient amounts (especially pudding mix and milk).
- Clear plastic cups or small glass jars: To build your dirt cups and show off the layers. I like mason jars or even little terracotta-look cups for the full garden effect.
- Spoons and small tongs: For layering and placing gummy worms or edible plants neatly.
Personally, I like using mason jars because they’re reusable and great for serving individual portions, but if you’re making a bunch, inexpensive clear plastic cups save you on cleanup. If you plan on making this dessert regularly, investing in a good-quality food processor (even a compact one) is worth it for easy cookie crushing and other kitchen tasks.
Preparation Method
- Prepare the pudding: In a large mixing bowl, whisk together 1 package (3.9 oz / 110 g) of chocolate pudding mix with 2 cups (480 ml) of cold milk. Whisk vigorously for about 2 minutes until thickened. For smoother pudding, use an electric mixer on medium speed for 1-2 minutes. Set aside.
- Crush the cookies: Place about 20 Oreo cookies in a food processor and pulse until fine crumbs form. If you don’t have a food processor, put the cookies in a zip-top bag and crush them with a rolling pin until you get a mix of fine crumbs and a few larger pieces for texture.
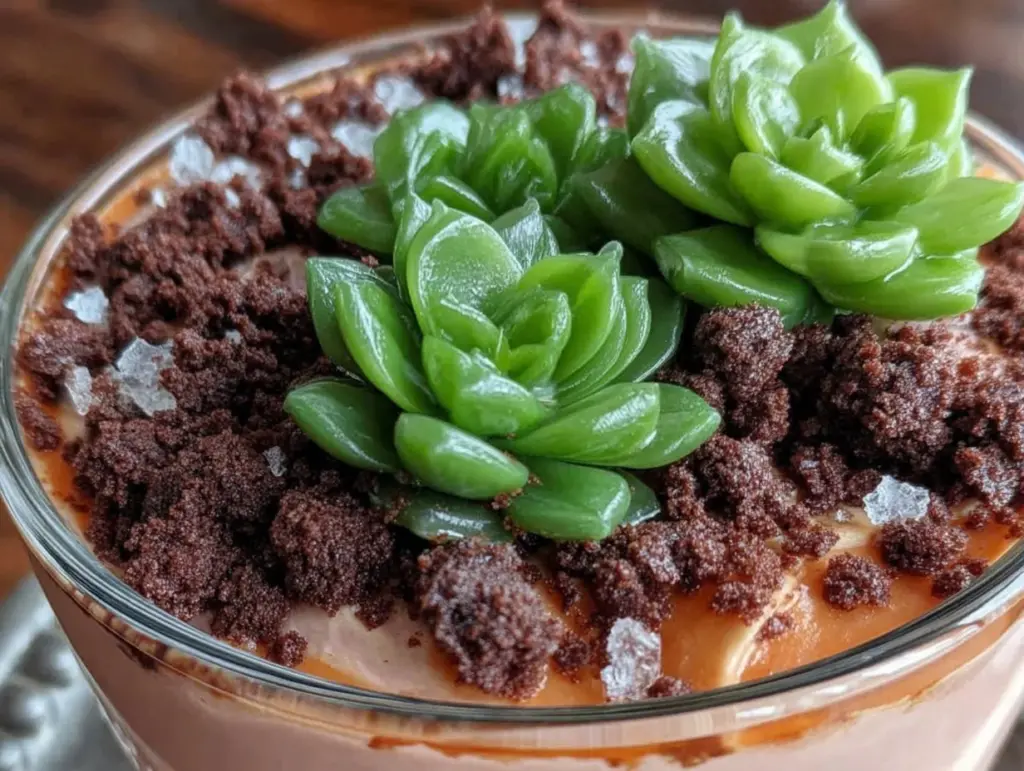
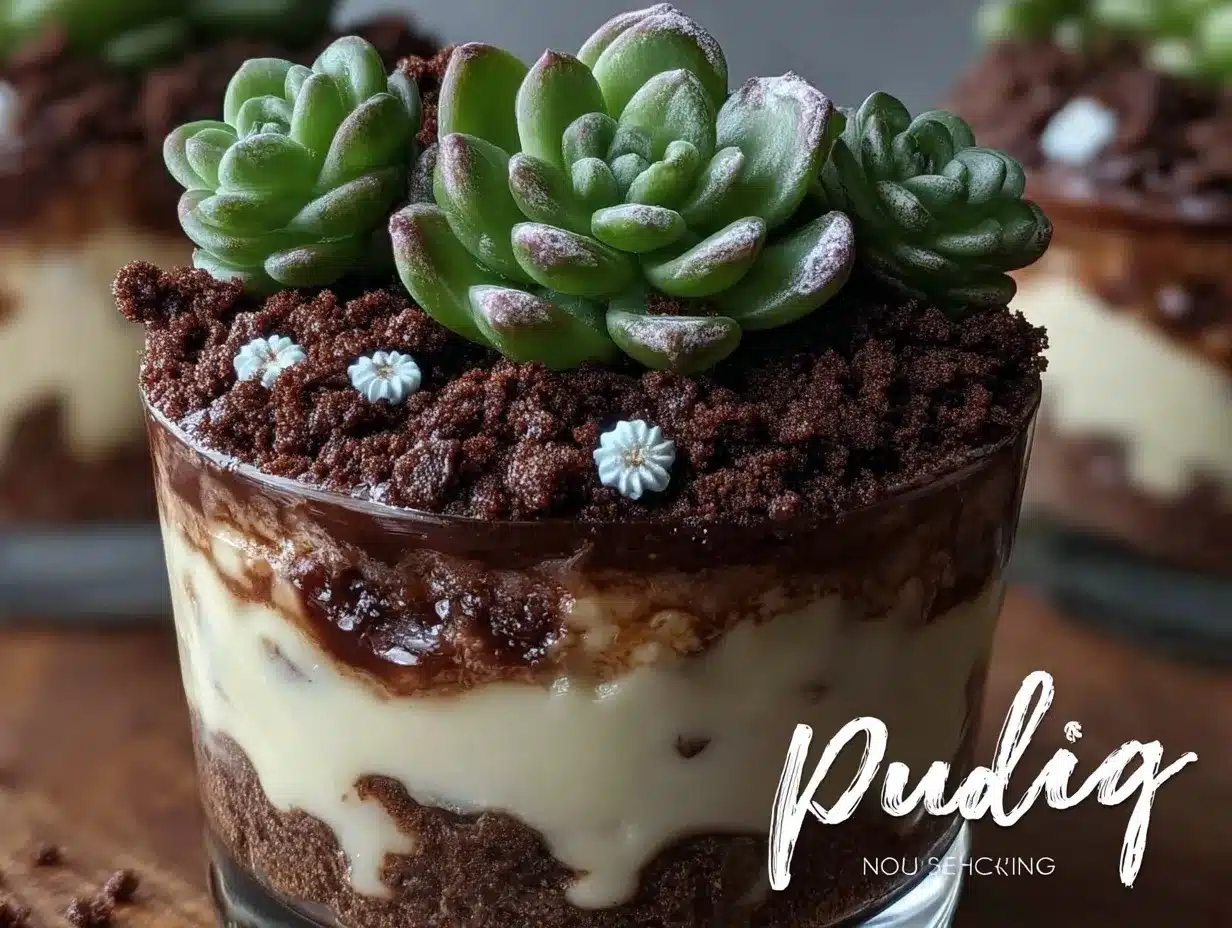
- Layer the pudding and “dirt”: Fill each clear cup about halfway with chocolate pudding (roughly 4 oz / 120 ml). Then add a generous 1/4 cup (30 g) of cookie crumbs on top to mimic soil. Repeat layers if your cups are taller, ending with a cookie crumb layer on top.
- Add “plants”: Gently nestle gummy worms, candy flowers, or fresh mint leaves into the “soil.” You can get creative here—try small clusters of mint for tiny bushes or flower-shaped candies for a pop of color.
- Optional whipped cream topping: Add a dollop of whipped cream on top for extra creaminess and a contrasting layer. Sprinkle a few cookie crumbs over the whipped cream to keep the “dirt” look going.
Timing tip: Make the pudding and cookie crumbs ahead of time and assemble just before serving to keep the cookie crumbs crunchy. If you want to prepare fully in advance, store assembled cups covered in the fridge for up to 24 hours—the crumbs soften a bit but still taste great.
Texture cue: The contrast between creamy pudding and slightly crunchy cookie crumbs is what sells this dessert. If the crumbs get soggy, try serving cups sooner next time or adding crumbs last minute.
Cooking Tips & Techniques
Making this dirt cup pudding look like a real potted plant takes a few tricks I’ve picked up after some trial and error.
- Crushing cookies: I learned the hard way that pulverizing cookies too much results in dust that looks less like soil and more like flour. Aim for a mix of fine crumbs and small chunks for a realistic texture.
- Layering: Pat down the pudding gently after pouring each layer to avoid air pockets and get a solid “soil” base. You want those layers to hold together so it doesn’t look like a messy pile.
- Choosing “plants”: Fresh mint leaves add a lovely herbal note and look surprisingly like real foliage. But gummy worms and candy flowers bring the whimsy, especially for kids. Mixing fresh and candy elements can make the cups visually interesting.
- Multitasking tip: While pudding sets, prep your cookie crumbs and candy decorations so you’re ready to assemble quickly. This keeps the cookies crunchy and pudding fresh.
- Presentation: Using clear cups or glass containers is key to showing off the layered “soil” and pudding. Avoid opaque containers.
One personal blunder was forgetting to chill the pudding first, which made it runny and hard to layer neatly. Lesson learned: patience pays off here, so let the pudding fully set in the fridge for at least 5 minutes before building your cups.
Variations & Adaptations
This recipe is a great base for creativity, and I’ve tried a few fun twists over time.
- Dietary swaps: Use dairy-free pudding mix and coconut milk to make vegan-friendly dirt cups. Gluten-free chocolate cookies work well to keep it allergy-friendly.
- Seasonal plants: Swap mint leaves for small sprigs of rosemary or thyme for a more sophisticated adult version. Edible flowers like violets or pansies add a delicate touch.
- Flavor variations: Try vanilla or butterscotch pudding instead of chocolate for a different flavor profile. Use crushed gingersnaps or cinnamon graham crackers for “dirt” with a spicy twist.
- Cooking method alternative: For a no-pudding-mix option, make chocolate mousse from scratch and layer with cookie crumbs for an extra luscious texture.
- Personal favorite: I once added a layer of caramel sauce beneath the pudding and topped with sea salt before adding cookie crumbs. It was an unexpected crowd-pleaser.
Serving & Storage Suggestions
Serve your dirt cup pudding chilled, straight from the fridge. The contrast of cold pudding with the crumbly “soil” and chewy candy is delightful. I like to arrange them on a rustic wooden tray or even plant trays for a fun garden-party vibe.
They pair surprisingly well with light, refreshing beverages like iced tea or a sparkling lemonade. For a brunch twist, consider serving alongside delicate finger sandwiches, maybe like the smoked salmon cucumber tea sandwiches that balance savory with sweet.
Store leftovers covered in the refrigerator for up to 24 hours. Note that cookie crumbs soften over time but don’t lose flavor. To refresh texture, sprinkle a few extra cookie crumbs just before serving again. Reheat is not recommended, but if you want the pudding softer, let it sit at room temperature for 10 minutes before serving.
Flavors actually deepen a bit overnight, making the dessert taste more harmonious, though the “dirt” texture is best fresh.
Nutritional Information & Benefits
Each serving of this dirt cup pudding (about 6 oz / 170 g) roughly contains:
- Calories: 250-300 kcal
- Fat: 10-15 g (depending on milk and whipped cream used)
- Carbohydrates: 35-40 g
- Protein: 3-5 g
Chocolate pudding provides some calcium and iron, while mint leaves add a touch of antioxidants and vitamins. Using fresh ingredients and controlling added sugars can keep this treat balanced.
This recipe can be adapted easily for gluten-free, dairy-free, or vegan diets, making it a friendly option for many gatherings. As a dessert, it offers a satisfying sweet finish without being overly heavy or complicated.
Conclusion
This creative dirt cup pudding recipe has become one of my go-to desserts when I want to surprise guests with something playful yet delicious. It’s simple to make, uses everyday ingredients, and brings smiles every time. Whether you’re serving it at a kids’ party, a casual brunch, or just treating yourself, it’s a fun way to mix up your dessert game.
Don’t be afraid to adjust the “plants” or try different pudding flavors to make it truly your own. I love this recipe because it’s proof that a little imagination in the kitchen can turn ordinary ingredients into something memorable.
If you give it a try, I’d love to hear how you customize your edible potted plants — feel free to leave a comment or share your photos. Happy gardening, dessert-style!
FAQs
Can I make these dirt cup puddings ahead of time?
Yes, you can assemble them up to 24 hours in advance and store covered in the fridge. Just know the cookie crumbs soften a bit over time, so add extra crumbs just before serving to keep the “dirt” texture fresh.
What if I don’t like gummy worms?
No problem! You can use candy flowers, fresh mint leaves, edible flowers, or even small chocolate chips to decorate your dirt cups.
Can I use homemade pudding instead of instant mix?
Absolutely! Homemade pudding or chocolate mousse works well and can make the dessert richer. Just make sure it sets enough to layer nicely.
Are there gluten-free options for this recipe?
Yes, simply swap the Oreo cookies for gluten-free chocolate cookies or crushed gluten-free chocolate graham crackers.
What’s the best way to crush cookies if I don’t have a food processor?
Place cookies in a zip-top plastic bag and crush them with a rolling pin or heavy pan. Aim for a mix of fine crumbs and small chunks for the best texture.
For more creative dessert ideas with simple ingredients, you might enjoy my creamy passion fruit mousse cups or the white chocolate raspberry cheesecake bars. Both bring unique flavors to the table with straightforward prep.
Pin This Recipe!
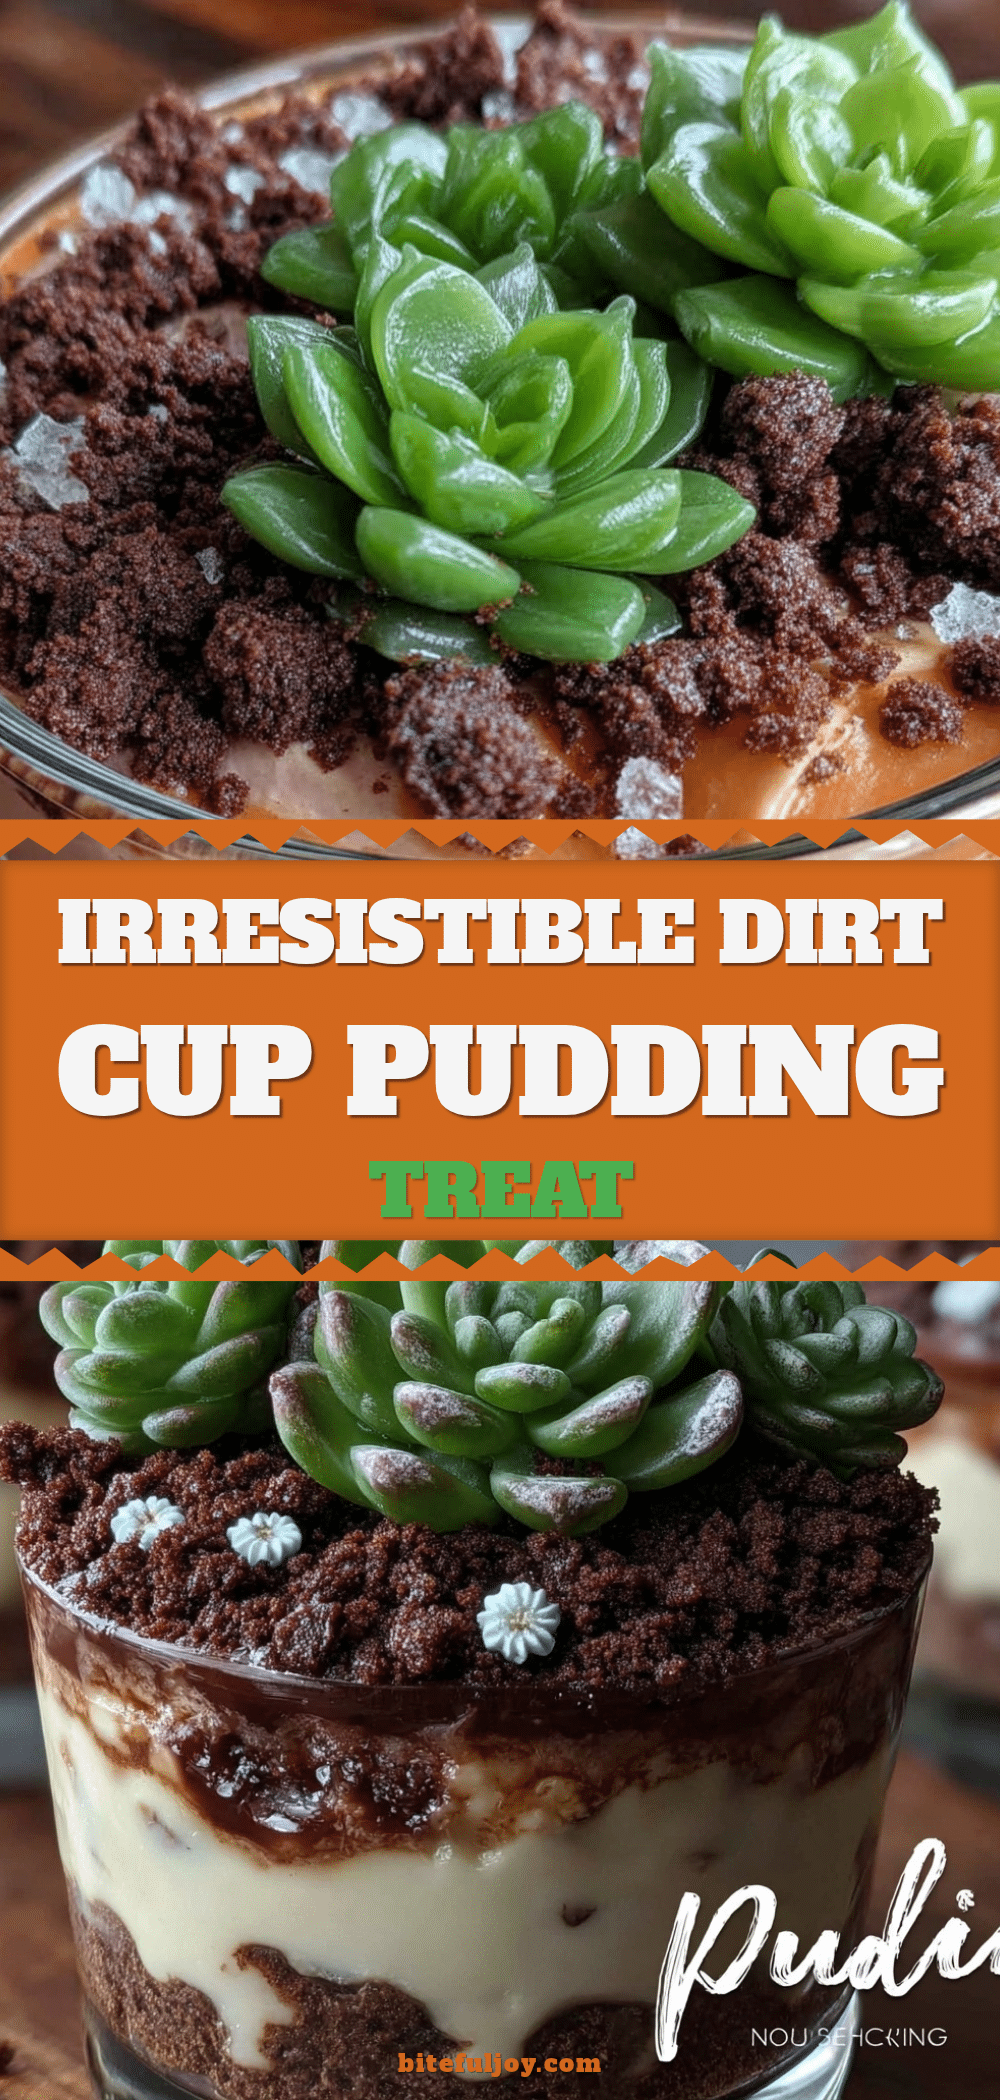
Creative Dirt Cup Pudding Recipe

A playful and delicious dessert that looks like edible potted plants, combining silky chocolate pudding, crunchy cookie crumbs, and whimsical candy or fresh mint decorations.
- Prep Time: 10 minutes
- Cook Time: 5 minutes
- Total Time: 15 minutes
- Yield: 6 servings 1x
- Category: Dessert
- Cuisine: American
Ingredients
- 1 package (3.9 oz / 110 g) chocolate pudding mix (instant or homemade)
- 2 cups (16 fl oz / 480 ml) cold milk (whole, 2%, or almond milk)
- About 20 Oreo cookies or chocolate sandwich cookies, crushed into fine crumbs
- Gummy worms or candy flowers (or other candies like sour belts or jelly beans)
- Fresh mint leaves or small edible flowers (optional)
- Whipped cream (optional, store-bought or homemade)
- Optional twist: crushed graham crackers mixed with cinnamon for soil flavor
- Optional: gluten-free chocolate cookies for dietary needs
Instructions
- Prepare the pudding: In a large mixing bowl, whisk together the chocolate pudding mix with cold milk. Whisk vigorously for about 2 minutes until thickened or use an electric mixer on medium speed for 1-2 minutes for smoother pudding. Set aside.
- Crush the cookies: Place about 20 Oreo cookies in a food processor and pulse until fine crumbs form. If no food processor, put cookies in a zip-top bag and crush with a rolling pin until a mix of fine crumbs and small chunks is achieved.
- Layer the pudding and dirt: Fill each clear cup about halfway with chocolate pudding (roughly 4 oz / 120 ml). Add a generous 1/4 cup (30 g) of cookie crumbs on top to mimic soil. Repeat layers if cups are taller, ending with cookie crumbs on top.
- Add plants: Gently nestle gummy worms, candy flowers, or fresh mint leaves into the soil layer. Get creative with clusters or flower-shaped candies.
- Optional whipped cream topping: Add a dollop of whipped cream on top for extra creaminess and contrast. Sprinkle a few cookie crumbs over the whipped cream to maintain the dirt look.
Notes
Make pudding and cookie crumbs ahead and assemble just before serving to keep crumbs crunchy. Store assembled cups covered in fridge up to 24 hours; crumbs soften but remain tasty. For best texture, add extra crumbs before serving if stored. Use smaller cookie crumbs for realistic soil texture. Let pudding set in fridge at least 5 minutes before layering. Can substitute pudding flavors and cookie types for variety.
Nutrition
- Serving Size: About 6 oz (170 g) p
- Calories: 275
- Sugar: 25
- Sodium: 150
- Fat: 12
- Saturated Fat: 5
- Carbohydrates: 38
- Fiber: 2
- Protein: 4
Keywords: dirt cup pudding, edible potted plants, chocolate pudding dessert, kids party dessert, creative desserts, easy pudding recipe


