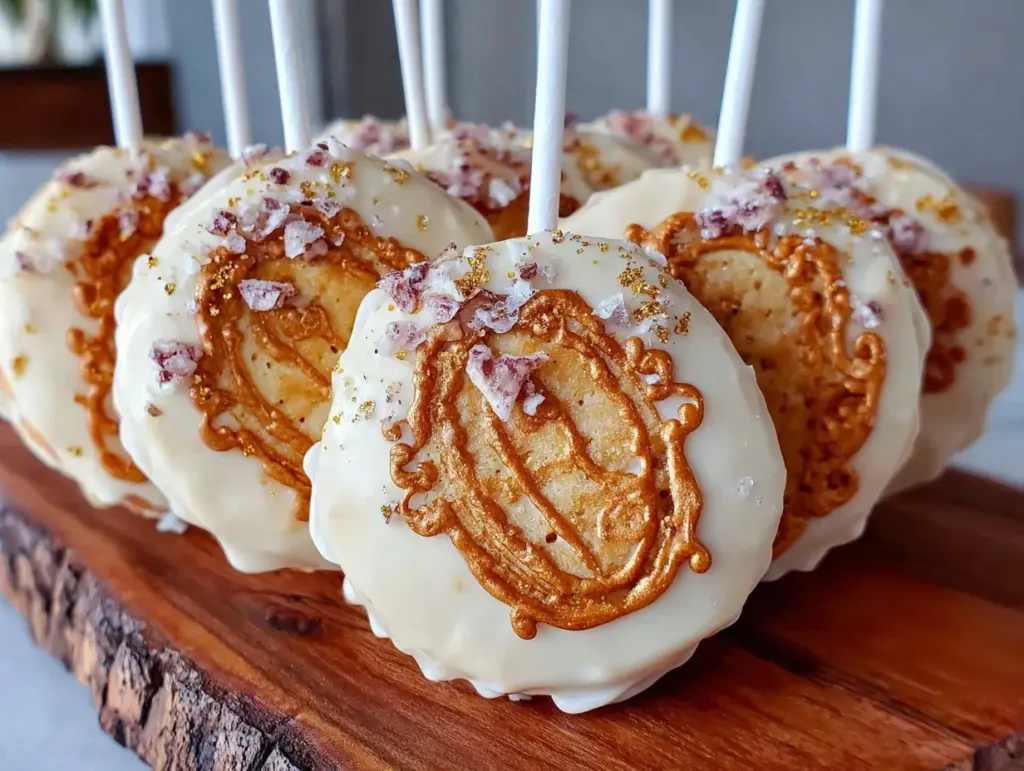
“You won’t believe how these perfect mini Capstone diploma cookie pops came to be,” my neighbor chuckled as she handed me a sparkling gold-dusted treat. It was a lazy Saturday afternoon when I first encountered these little wonders, tucked inside a quaint café’s display case, shimmering under delicate lighting. Honestly, I wasn’t expecting much—cookie pops, right? But as I bit into that crisp, buttery cookie, adorned with a glossy white chocolate cap and a subtle dusting of gold, it was like a small celebration in my mouth.
That day, I scribbled some notes on a napkin (classic, I know) while balancing my coffee and these treats. I had to recreate them—because you know that feeling when you stumble onto something so simple yet so elegant, it sticks with you? Well, these mini Capstone diploma cookie pops have become my go-to for parties, gifts, and, yes, random Tuesdays when life needs a little sparkle.
There was a bit of a mess along the way—a cracked piping bag here, a misfired gold dust application there—but it all added to the charm. And maybe you’ll enjoy making a few messes of your own because, honestly, that’s half the fun. So, if you’ve ever wanted to craft a sweet, charming treat that looks like it belongs on a graduation table (or just your kitchen counter), this recipe is the one to try.
Why You’ll Love This Recipe
After multiple test runs and a few late-night dusting sessions, I can tell you this recipe hits all the right notes. It’s not just a cookie pop; it’s a mini celebration on a stick that’s surprisingly easy to pull off.
- Quick & Easy: Comes together in under 45 minutes, perfect if you’re tackling last-minute party prep or just craving something fun.
- Simple Ingredients: No need for fancy shopping trips; most items are pantry staples or easy to find in your local store.
- Perfect for Celebrations: Whether it’s graduation, a capstone project party, or just a sweet treat to mark a milestone, these pops shine.
- Crowd-Pleaser: Kids love the fun shape and gold sparkle, while adults appreciate the subtle vanilla and buttery flavors.
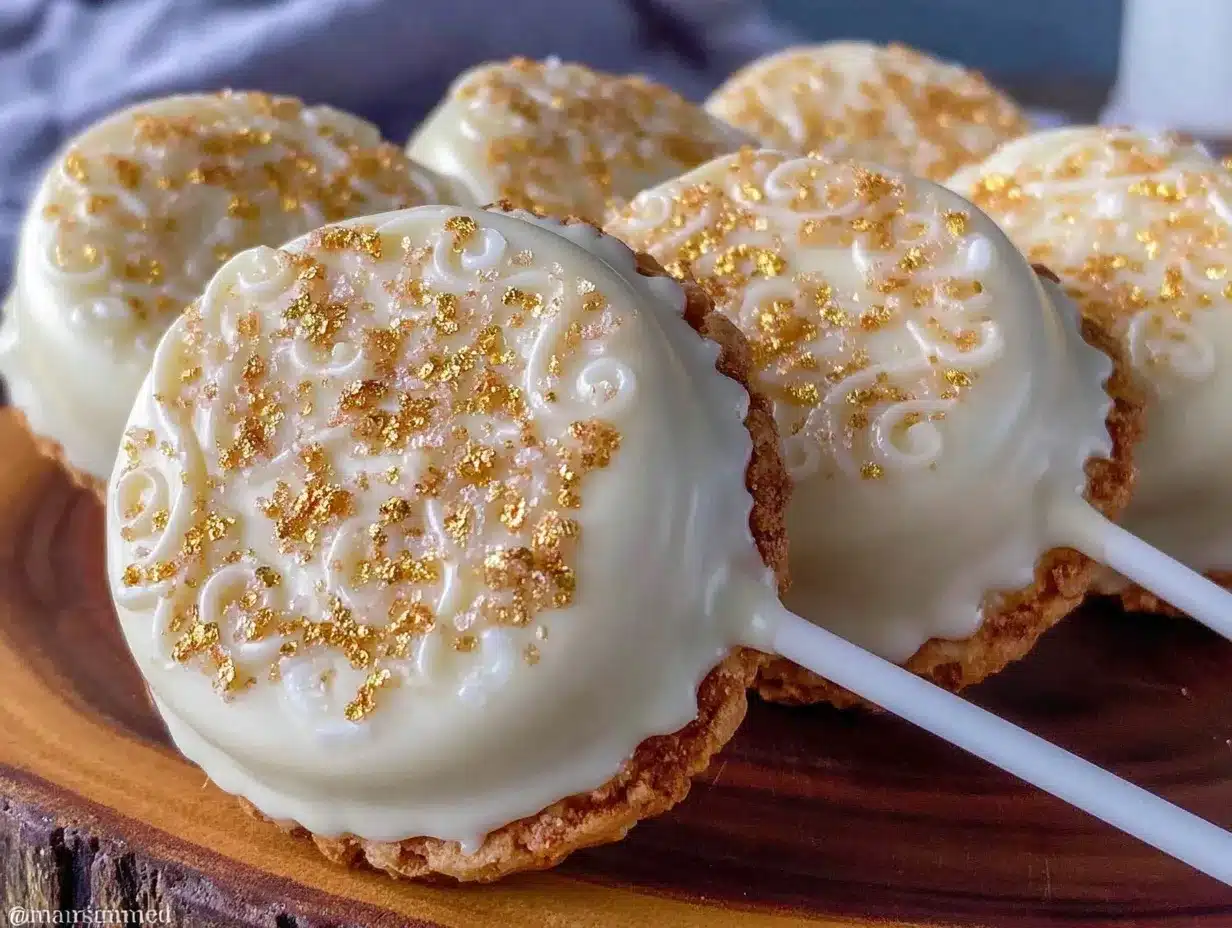
- Unbelievably Delicious: The crisp cookie base paired with smooth white chocolate and a touch of gold dust makes this more than just a cookie pop—it’s an experience.
What sets this recipe apart? The gold dusting technique is straightforward but adds that wow factor without needing special tools or skills. Plus, the cookie dough is perfectly balanced—neither too sweet nor too crumbly—so it holds up beautifully on the stick. Trust me, once you make these, you’ll find yourself inventing reasons to dust off the gold more often.
What Ingredients You Will Need
This recipe uses simple, wholesome ingredients to deliver bold flavor and satisfying texture without the fuss. Most are pantry staples, and you can switch a few out to fit your preferences or dietary needs.
- For the Cookie Dough:
- All-purpose flour – 2 ½ cups (310 g), sifted for a smooth dough
- Unsalted butter – 1 cup (227 g), softened (I prefer Plugrá for its creamy texture)
- Granulated sugar – ¾ cup (150 g)
- Large egg – 1, room temperature
- Pure vanilla extract – 1 teaspoon
- Baking powder – 1 teaspoon
- Salt – ¼ teaspoon
- For Decoration:
- White chocolate chips or melting wafers – 1 cup (180 g), for coating
- Edible gold dust – 1 teaspoon (available at specialty baking stores; a little goes a long way)
- Food-grade brush – for applying the gold dust
- Wooden lollipop sticks – 12 to 15 pieces
Ingredient tips: If you want a gluten-free version, swap the all-purpose flour with a 1:1 gluten-free baking flour blend. For dairy-free, try vegan butter and coconut-based white chocolate melts. In warmer months, I sometimes add a touch of lemon zest to the dough for a fresh twist.
Equipment Needed
- Mixing bowls – for combining dough and melting chocolate
- Electric hand mixer or stand mixer – makes creaming butter and sugar much easier
- Baking sheet lined with parchment paper or silicone mat – to prevent sticking
- Rolling pin – to roll out dough evenly (a textured rolling pin adds a charming pattern)
- Capstone diploma-shaped cookie cutter (approx. 3 inches) – if you don’t have one, a rectangle with a slight taper works fine
- Cooling rack – to let cookies cool before dipping
- Small saucepan or microwave-safe bowl – for melting chocolate
- Food-grade paintbrush – for the gold dust application
- Lollipop sticks – wooden, sturdy but not too thick
Don’t worry if you don’t own a cookie cutter in the exact shape—I’ve used a butter knife to freehand a diploma shape and it worked just fine! For melting chocolate, a double boiler is ideal, but a microwave with short bursts works too (just don’t walk away, or it burns!). If you’re on a budget, parchment paper and a basic hand mixer will cover most of your needs.
Preparation Method
- Prep the Dough: In a large bowl, cream together 1 cup (227 g) softened unsalted butter and ¾ cup (150 g) granulated sugar using a mixer on medium speed until light and fluffy, about 3-4 minutes. This step is key for a tender cookie base.
- Add Egg and Vanilla: Beat in 1 large room-temperature egg and 1 teaspoon pure vanilla extract until fully combined, scraping down the sides of the bowl as needed.
- Mix Dry Ingredients: In a separate bowl, whisk together 2 ½ cups (310 g) sifted all-purpose flour, 1 teaspoon baking powder, and ¼ teaspoon salt.
- Combine Wet and Dry: Gradually add the dry ingredients to the wet mixture on low speed. Mix until just combined—don’t overwork the dough or it may toughen.
- Chill the Dough: Wrap the dough in plastic wrap and refrigerate for at least 1 hour. This firms it up, making rolling and cutting easier (plus, it helps maintain shape during baking).
- Roll and Cut: Preheat your oven to 350°F (175°C). On a lightly floured surface, roll dough to about ¼-inch (6 mm) thickness. Use your diploma-shaped cookie cutter to cut out shapes, placing each onto a parchment-lined baking sheet. If the dough softens while working, pop it back in the fridge for 10 minutes.
- Insert Sticks: Gently press a lollipop stick into the base of each cutout, about halfway in. Be careful not to push through the top. This step can be tricky—if sticks feel loose, try chilling the dough a bit more.
- Bake: Bake cookies for 10-12 minutes, until edges just start to turn golden. Keep an eye—overbaking dries them out.
- Cool Completely: Transfer to a cooling rack and let cool fully before decorating; warm cookies will melt your chocolate coating.
- Melt White Chocolate: Melt 1 cup (180 g) white chocolate chips in a microwave-safe bowl in 20-second intervals, stirring each time until smooth. Alternatively, use a double boiler for gentler heat.
- Dip Cookie Pops: Holding the stick, dip each cookie halfway into the melted white chocolate, allowing excess to drip off. Set back on parchment paper to dry. This white chocolate layer adds a lovely smooth finish.
- Apply Gold Dust: Using a dry, food-grade brush, gently tap edible gold dust over the white chocolate area. A light hand works best; you can always add more sparkle later.
- Dry and Serve: Let the chocolate set completely at room temperature or in the fridge for 10-15 minutes. Then, enjoy or package for gifting!
Pro tip: If your kitchen is humid, setting the dipped cookies in the fridge helps solidify the coating faster. Also, keep your brush dry when applying gold dust to avoid clumping.
Cooking Tips & Techniques
One thing I’ve learned from making these cookie pops over and over is patience really pays off. Chilling the dough isn’t optional—without it, your cookies spread and lose that crisp diploma shape.
When melting white chocolate, go slow. I once overheated a batch, and it seized into a grainy mess. Stirring frequently and using short microwave bursts prevent this. If it does seize, adding a teaspoon of vegetable oil can help smooth it out.
Inserting the sticks can be fiddly. If your dough is too soft, the sticks won’t stay put during baking. A quick chill after inserting sticks can firm things up. Also, don’t push sticks all the way through the cookie or they’ll poke out the other side—trust me, I learned that the hard way!
For the gold dust, less is more. You want a subtle, elegant shimmer, not a blinding gold plate. Use a light tapping motion with a dry brush. If you accidentally get too much, a gentle blow or light brush can tone it down.
Multitasking tip: While the dough chills, prep your baking sheets and melt the white chocolate. This way, you’re ready to dip as soon as cookies cool. It keeps the momentum going and makes the process feel smoother.
Variations & Adaptations
- Chocolate Cookie Base: Swap ¼ cup (30 g) of flour with unsweetened cocoa powder for a rich chocolate twist. Pair with dark chocolate coating instead of white.
- Nutty Upgrade: Add ½ cup (50 g) finely chopped toasted almonds or pecans to the dough for crunch and flavor depth. Just mix in after combining wet and dry ingredients.
- Vegan Friendly: Use dairy-free butter and coconut-based white chocolate melts. Replace the egg with a flax egg (1 tablespoon ground flaxseed + 3 tablespoons water, let sit 5 minutes).
For an alternative decorating technique, try drizzling colored candy melts over the white chocolate before applying gold dust. It adds a playful pop of color without much extra effort. Personally, I once made these with a mint chocolate drizzle for a holiday party, and they were a hit!
Serving & Storage Suggestions
These mini Capstone diploma cookie pops look fantastic served at room temperature, arranged upright in a decorative jar or floral foam block. The gold dust catches the light beautifully, making them a showstopper on any dessert table.
Pair them with a fresh fruit platter or a light sparkling beverage for a balanced celebration spread. They also make charming party favors—wrap individually in clear cellophane tied with a ribbon.
Store leftover cookie pops in an airtight container at room temperature for up to 4 days. For longer storage, place them in the fridge for up to a week, but bring back to room temperature before serving to revive the crispness.
If you need to freeze them, layer with parchment paper and freeze for up to 3 months. Thaw overnight in the fridge, then let sit at room temp before serving. The gold dust may dull slightly in the freezer, so consider reapplying a light dusting after thawing.
Nutritional Information & Benefits
Each mini Capstone diploma cookie pop roughly contains 150-180 calories, depending on size and coating. They offer a modest amount of protein from the egg and butter and provide energy from carbohydrates and fats.
The use of real butter and quality vanilla extract enhances flavor without unnecessary additives. White chocolate adds sweetness and creaminess but can be swapped for a lower-sugar alternative if desired.
Gluten-free substitutions make this treat accessible to those with sensitivities. Just be mindful of cross-contamination with gold dust and chocolate products.
From my wellness perspective, enjoying these cookie pops in moderation is a delightful way to celebrate milestones without guilt—sometimes, the joy of baking and sharing is just as nourishing as the ingredients themselves.
Conclusion
If you’re looking for a fun, festive, and surprisingly simple dessert to mark a special moment, these perfect mini Capstone diploma cookie pops with gold dusting are hard to beat. They bring a touch of elegance to any gathering without the fuss of complicated decorating.
Feel free to tweak the shapes, colors, or flavors to match your style. I love how these cookie pops let me get creative while still delivering that classic comfort cookie taste.
Give this recipe a try, and don’t hesitate to share your own twists or questions below—I’m always excited to hear how you make these your own. Happy baking, and here’s to sweet celebrations that sparkle!
FAQs
Can I make the cookie dough ahead of time?
Yes! You can prepare the dough and refrigerate it for up to 3 days before rolling and cutting. Just keep it well wrapped to prevent drying out.
What if I don’t have a diploma-shaped cookie cutter?
No worries! A small rectangle or a simple rounded rectangle shape works well. You can also freehand with a knife for a rustic look.
Is the edible gold dust safe to eat?
Absolutely. Make sure you buy food-grade gold dust from a reputable supplier. It’s non-toxic and specifically made for decorating desserts.
How do I store these cookie pops without the chocolate melting?
Store them in a cool, dry place away from direct sunlight. If your kitchen is warm, refrigeration is best, but bring them back to room temperature before serving.
Can I use dark chocolate instead of white chocolate?
Yes! Dark chocolate pairs nicely with the buttery cookie and looks stunning with gold dust. Just melt it carefully to avoid burning.
Pin This Recipe!
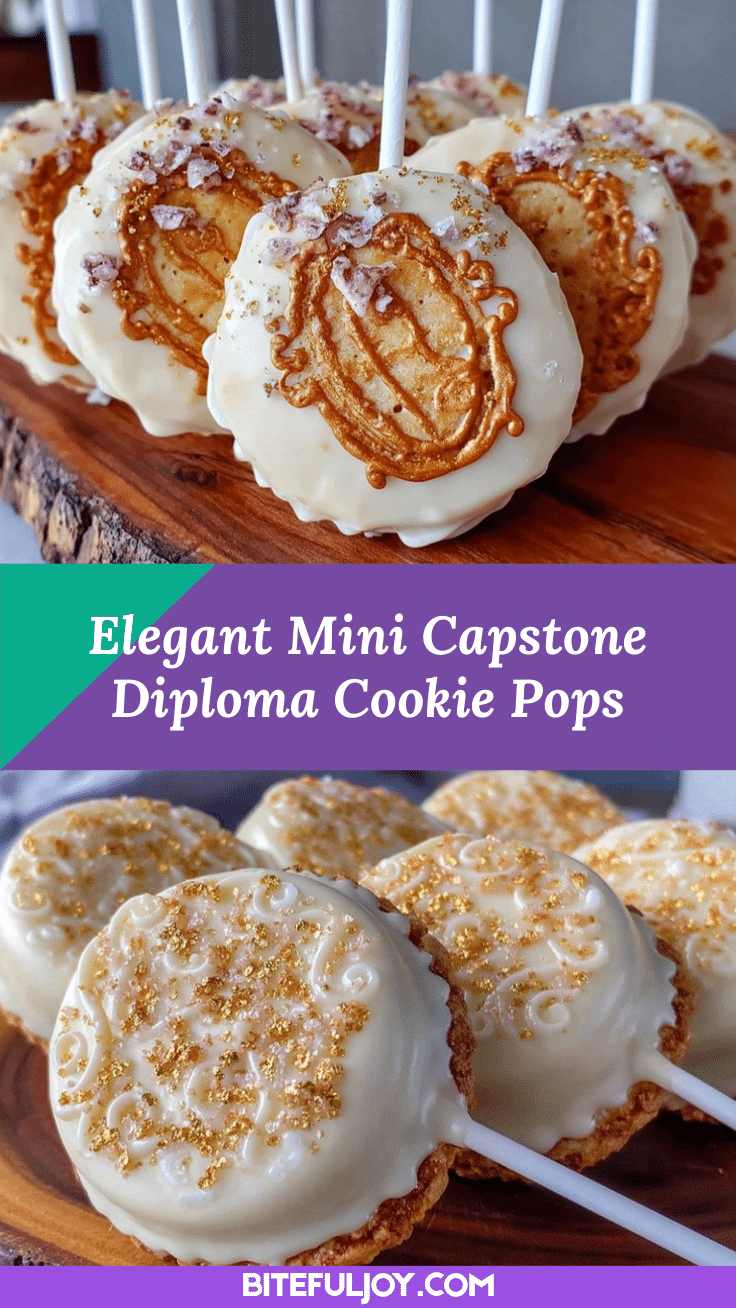
Perfect Mini Capstone Diploma Cookie Pops Easy Gold Dusting Tutorial
These mini Capstone diploma cookie pops are crisp, buttery cookies coated with smooth white chocolate and adorned with edible gold dust, perfect for celebrations and gifting.
- Prep Time: 15 minutes
- Cook Time: 12 minutes
- Total Time: 1 hour 27 minutes
- Yield: 12 to 15 cookie pops 1x
- Category: Dessert
- Cuisine: American
Ingredients
- 2 ½ cups (310 g) all-purpose flour, sifted
- 1 cup (227 g) unsalted butter, softened
- ¾ cup (150 g) granulated sugar
- 1 large egg, room temperature
- 1 teaspoon pure vanilla extract
- 1 teaspoon baking powder
- ¼ teaspoon salt
- 1 cup (180 g) white chocolate chips or melting wafers
- 1 teaspoon edible gold dust
- Wooden lollipop sticks (12 to 15 pieces)
- Food-grade brush for applying gold dust
Instructions
- In a large bowl, cream together 1 cup (227 g) softened unsalted butter and ¾ cup (150 g) granulated sugar using a mixer on medium speed until light and fluffy, about 3-4 minutes.
- Beat in 1 large room-temperature egg and 1 teaspoon pure vanilla extract until fully combined, scraping down the sides of the bowl as needed.
- In a separate bowl, whisk together 2 ½ cups (310 g) sifted all-purpose flour, 1 teaspoon baking powder, and ¼ teaspoon salt.
- Gradually add the dry ingredients to the wet mixture on low speed. Mix until just combined—do not overwork the dough.
- Wrap the dough in plastic wrap and refrigerate for at least 1 hour.
- Preheat oven to 350°F (175°C). On a lightly floured surface, roll dough to about ¼-inch (6 mm) thickness.
- Use a diploma-shaped cookie cutter (approx. 3 inches) or a rectangle with a slight taper to cut out shapes. Place each onto a parchment-lined baking sheet.
- Gently press a wooden lollipop stick into the base of each cutout, about halfway in, being careful not to push through the top.
- Bake cookies for 10-12 minutes, until edges just start to turn golden.
- Transfer to a cooling rack and let cool completely before decorating.
- Melt 1 cup (180 g) white chocolate chips in a microwave-safe bowl in 20-second intervals, stirring each time until smooth.
- Holding the stick, dip each cookie halfway into the melted white chocolate, allowing excess to drip off. Set back on parchment paper to dry.
- Using a dry, food-grade brush, gently tap edible gold dust over the white chocolate area.
- Let the chocolate set completely at room temperature or in the fridge for 10-15 minutes before serving or packaging.
Notes
Chill dough for at least 1 hour to maintain shape. Use short microwave bursts when melting chocolate to avoid seizing. Insert sticks carefully and chill dough if sticks feel loose. Use a dry brush for gold dust to prevent clumping. Store in airtight container at room temperature up to 4 days or refrigerate up to 1 week. Freeze with parchment paper layers up to 3 months.
Nutrition
- Serving Size: 1 cookie pop
- Calories: 165
- Sugar: 12
- Sodium: 80
- Fat: 9
- Saturated Fat: 5
- Carbohydrates: 20
- Fiber: 0.5
- Protein: 2
Keywords: cookie pops, diploma cookie, graduation treats, gold dust cookies, white chocolate cookies, party desserts, easy cookie recipe


