The first time I whipped up a batch of homemade sweet and sour sauce, the kitchen filled with a tangy, mouthwatering aroma that had everyone peeking in to see what was bubbling on the stove. Honestly, there’s just something magical about watching a few pantry staples transform into that glossy, vibrant sauce you find at your favorite Chinese place. If you’ve ever wondered how to make an easy sweet and sour sauce recipe that’s both zesty and well-balanced, you’re in for a treat!
I stumbled into making this zesty sweet and sour sauce recipe years ago when I wanted to recreate a classic Chinese takeout experience at home—without all the mystery ingredients. After a little experimenting (and a couple of messy kitchen fails), this version quickly became my go-to for dipping, drizzling, and stirring into quick weeknight stir-fries. What I love most? It’s ridiculously easy, uses simple ingredients, and is bold enough to stand on its own—even my picky eaters will eat veggies if they’re dunked in this stuff!
This sweet and sour sauce recipe is perfect for busy families, beginner cooks, or honestly, anyone craving that nostalgic sweet-tangy punch. I’ve tested it more times than I can count, tweaking the balance of sugar, vinegar, and that classic ketchup note until I landed on a homemade version that’s better than any store-bought bottle. You’ll love how versatile it is—think classic chicken, crispy tofu, or even as a glaze for grilled veggies. If you’re looking for an easy homemade Chinese essential, this sweet and sour sauce recipe is the one you’ll keep coming back to.
Why You’ll Love This Zesty Sweet and Sour Sauce Recipe
- Quick & Easy: Ready in under 10 minutes, so you can whip it up with zero stress—even on the busiest weeknight or when last-minute guests show up.
- Simple Ingredients: No fancy shopping trips needed. Everything is probably hanging out in your fridge or pantry already.
- Perfect for Any Occasion: Whether it’s a cozy night in, a family gathering, or a game-day snack spread, this sweet and sour sauce recipe fits right in.
- Crowd-Pleaser: Kids and adults go wild for the bold, balanced flavor. I’ve served this at potlucks, and the bowl is always scraped clean!
- Unbelievably Delicious: The tangy zip and subtle sweetness are just right—not too sugary, never too sharp. It’s the kind of sauce that makes you go back for seconds (and thirds).
What really sets this sweet and sour sauce recipe apart is the balance. A lot of homemade versions end up too sweet or mouth-puckeringly tart. Through plenty of trial and error (and more than a few taste tests), I nailed the ratio of vinegar to sugar. The secret? A touch of pineapple juice for natural sweetness and a little cornstarch for that perfect, glossy finish. I always blend the sauce before simmering, which keeps it silky-smooth and better than any takeout joint’s version.
This isn’t just a dip—it’s a kitchen essential. Imagine drizzling it over crispy chicken, stirring it into fried rice, or tossing steamed veggies until they glisten. It’s comfort food made easy, and the best part is you’re in total control of the ingredients. No food coloring, no weird preservatives, just real, honest flavor. If you’re looking for an easy homemade Chinese essential that’ll wow your family and friends, you truly can’t go wrong with this sweet and sour sauce recipe.
What Ingredients You Will Need
This zesty sweet and sour sauce recipe is all about classic, fuss-free ingredients coming together for big flavor. You’ll find everything you need right in your pantry or fridge—no specialty store trips required. Here’s what you’ll need for the perfect balance of sweet, tangy, and just a hint of savory:
- Ketchup (1/2 cup / 120 ml) – Brings that classic color and a sweet tomato base. I like Heinz, but any good-quality ketchup works.
- Pineapple juice (1/3 cup / 80 ml) – Adds natural sweetness and a subtle tropical note. Canned or fresh—just make sure it’s unsweetened.
- Rice vinegar (1/4 cup / 60 ml) – Gives the sauce its signature tang. Apple cider vinegar is a decent backup if you’re in a pinch.
- Soy sauce (2 tablespoons / 30 ml) – Adds a savory, umami undertone. For gluten-free, go with tamari or coconut aminos.
- Brown sugar (1/4 cup, packed / 50 g) – Deepens the sweetness and gives a hint of caramel flavor. White sugar works, but brown sugar is my secret weapon for depth.
- Cornstarch (1 1/2 tablespoons / 12 g) – Thickens the sauce to that perfect, glossy texture. Arrowroot also does the trick if that’s what you have.
- Water (1/4 cup / 60 ml) – Helps everything blend smoothly and keeps the sauce from getting too sticky.
- Garlic powder (1/2 teaspoon / 2 g) – A gentle hint of savory flavor. Fresh minced garlic is lovely if you want a little extra zing.
- Ginger powder (1/4 teaspoon / 1 g) – Adds warmth and subtle spice. Fresh grated ginger is even better, but the powder is perfect for no-fuss prep.
- Optional: Red chili flakes (a pinch) – If you like a bit of heat, throw these in. My kids prefer it mild, but adults at the table always want a little spice.
Ingredient notes:
- If you’re out of pineapple juice, orange juice makes a fun, citrusy stand-in. The sauce will be a tad brighter and less tropical, but still totally delicious.
- For a vegan version, double-check your ketchup and sugar are plant-based (some sugars are processed with bone char).
- If you want a thicker sauce for dipping, use a little extra cornstarch. For drizzling or stir-fries, stick to the measurements above for a pourable consistency.
- Don’t sweat it if you’re missing one ingredient—this recipe is super forgiving. Once, I swapped in lemon juice for some of the vinegar, and everyone raved about the extra freshness!
Honestly, these are the kind of ingredients you almost always have around, making this sweet and sour sauce recipe an easy homemade essential you can whip up any time.
Equipment Needed
One of my favorite things about this sweet and sour sauce recipe is how little equipment you need—no fancy gadgets or tools, just basic kitchen staples. Here’s what you’ll want to have ready:
- Small saucepan – For simmering the sauce. If you have a nonstick one, cleanup is a breeze.
- Whisk – Essential for blending the cornstarch and making sure you have a silky, lump-free sauce.
- Measuring cups and spoons – For accuracy. Trust me, getting the sugar and vinegar balance right makes all the difference.
- Heatproof spatula or wooden spoon – For stirring as the sauce thickens (I use my trusty silicone spatula, which never lets me down).
- Small bowl – For mixing the cornstarch slurry before adding it to the saucepan—this avoids clumps.
- Storage jar or airtight container – If you want to make the sauce ahead or save leftovers. A mason jar is perfect.
If you don’t have a whisk, a fork will work in a pinch, but you’ll need to stir a bit more vigorously. I’ve even used a chopstick to break up lumps before—no shame in kitchen improvisation! For easy cleaning, soak your saucepan and whisk in warm, soapy water right after using, especially if the sauce has thickened and stuck to the sides. And if you’re just starting out or on a budget, honestly, any basic saucepan and spoon will get the job done.
Preparation Method
-
Mix the Cornstarch Slurry:
- In a small bowl, whisk together 1/4 cup (60 ml) water and 1 1/2 tablespoons (12 g) cornstarch until completely smooth. Set aside.
- Tip: This step prevents lumps—don’t skip it! If you notice any stubborn clumps, press them out with the back of a spoon.
-
Combine Main Ingredients:
- In a small saucepan off the heat, add 1/2 cup (120 ml) ketchup, 1/3 cup (80 ml) pineapple juice, 1/4 cup (60 ml) rice vinegar, 2 tablespoons (30 ml) soy sauce, and 1/4 cup (50 g) packed brown sugar.
- Whisk in 1/2 teaspoon (2 g) garlic powder and 1/4 teaspoon (1 g) ginger powder. If using, add a pinch of red chili flakes.
- Mix well until everything is combined.
- Note: At this stage, the mixture will look thin and a bit runny. That’s normal!
-
Simmer the Sauce:
- Place the saucepan over medium heat.
- Bring the mixture to a gentle simmer, stirring frequently (about 2-3 minutes).
- Once you see small bubbles around the edge, reduce the heat to low.
- Sensory cue: The sauce should begin to smell tangy and sweet—if it smells too vinegary, don’t worry, it mellows out as it cooks.
-
Add the Cornstarch Slurry:
- Stir the cornstarch slurry again (it settles quickly) and pour it slowly into the simmering sauce, whisking constantly.
- Continue to cook, stirring, for 2-4 minutes until the sauce thickens and turns glossy.
- Warning: Don’t walk away—the sauce thickens fast and can scorch on the bottom if left unattended.
-
Taste and Adjust:
- Remove from heat and taste. If you like it tangier, add a splash more vinegar. For more sweetness, stir in a teaspoon of sugar.
- If it’s too thick, whisk in a tablespoon (15 ml) of water at a time until you hit your preferred consistency.
-
Cool and Store:
- Let the sauce cool for a few minutes before pouring into a jar or serving bowl.
- The sauce will thicken a bit more as it cools—don’t panic if it looks a touch runny at first!
- Store cooled sauce in an airtight container in the fridge for up to 1 week.
Personal tips: I always give the sauce a quick blend with my immersion blender if I want it extra-smooth, especially for dipping. If you ever end up with lumps, just strain it through a fine mesh sieve—problem solved! And remember, the color is supposed to be bold and a little orange-red. That’s the sign of a classic sweet and sour sauce recipe done right.
Cooking Tips & Techniques
Over the years, I’ve discovered a few tricks that take this sweet and sour sauce recipe from good to restaurant-worthy. Here’s what I’ve learned from trial (and a little error):
- Stir Constantly: Cornstarch loves to settle at the bottom and can scorch quickly. Keep your whisk or spatula moving, especially after adding the slurry.
- Don’t Overcook: As soon as the sauce is glossy and coats the back of a spoon, pull it off the heat. Overcooking can dull the flavor and make it gummy.
- Adjust Consistency on the Fly: If your sauce comes out too thick, just whisk in a bit more water. Too thin? Simmer for another minute or whisk in an extra teaspoon of cornstarch dissolved in water.
- Balance the Flavors: Taste at the end and tweak to your liking. A splash more vinegar brightens things up, while a sprinkle of sugar calms too much tang.
- Make It Silky-Smooth: For dipping sauces, I sometimes run the finished sauce through a blender or sieve. It makes a difference for presentation—especially if you’re sharing on Pinterest or serving guests!
- Flavor Boost: Try adding a tiny bit of sesame oil at the very end for a nutty background note. Not traditional, but so good.
I’ve definitely scorched a batch or two by walking away for “just a second” (lesson learned: don’t multitask at this stage). If you get lumps, don’t sweat it—just strain them out or blend. And if you want to save time, prep your cornstarch slurry and measure everything before you start, so you’re not scrambling at the stove. For consistent results, always use level measurements and the same brand of ketchup—it really does affect the flavor! This sweet and sour sauce recipe is forgiving, but a little attention to detail makes it shine every time.
Variations & Adaptations
One of the best things about this sweet and sour sauce recipe is how easy it is to tweak for different tastes, diets, or what you have on hand. Here are some of my favorite ways to switch it up:
- Gluten-Free: Swap the soy sauce for tamari or coconut aminos to keep the sauce completely gluten-free. Double-check your ketchup too.
- Spicy Kick: Add more red chili flakes or a squirt of sriracha for a bold, spicy version. Sometimes I even toss in a little grated fresh ginger for extra heat.
- Low-Sugar or Keto-Friendly: Use a sugar substitute like monk fruit sweetener or erythritol in place of brown sugar. The sauce will be a bit lighter in color and flavor, but still zesty.
- Fruit Variations: Use orange juice instead of pineapple for a citrusy twist, or stir in crushed pineapple for a chunkier, tropical vibe (great on grilled chicken!)
- Allergen-Friendly: For soy allergies, coconut aminos are a lifesaver. For corn allergies, arrowroot powder thickens the sauce just as well as cornstarch.
- Cooking Method Variations: If you’re grilling, brush the sauce onto skewers or meat during the last 2 minutes of cooking for a sticky glaze. For stir-fries, thin it with an extra splash of water before tossing with your main ingredients.
My personal favorite? Swapping half the pineapple juice for mango juice in the summer—it makes the sauce a little sweeter and is incredible with shrimp or crispy tofu. Don’t be afraid to experiment. This sweet and sour sauce recipe is your easy homemade Chinese essential, but it’s also a blank canvas for your own flavor adventure!
Serving & Storage Suggestions
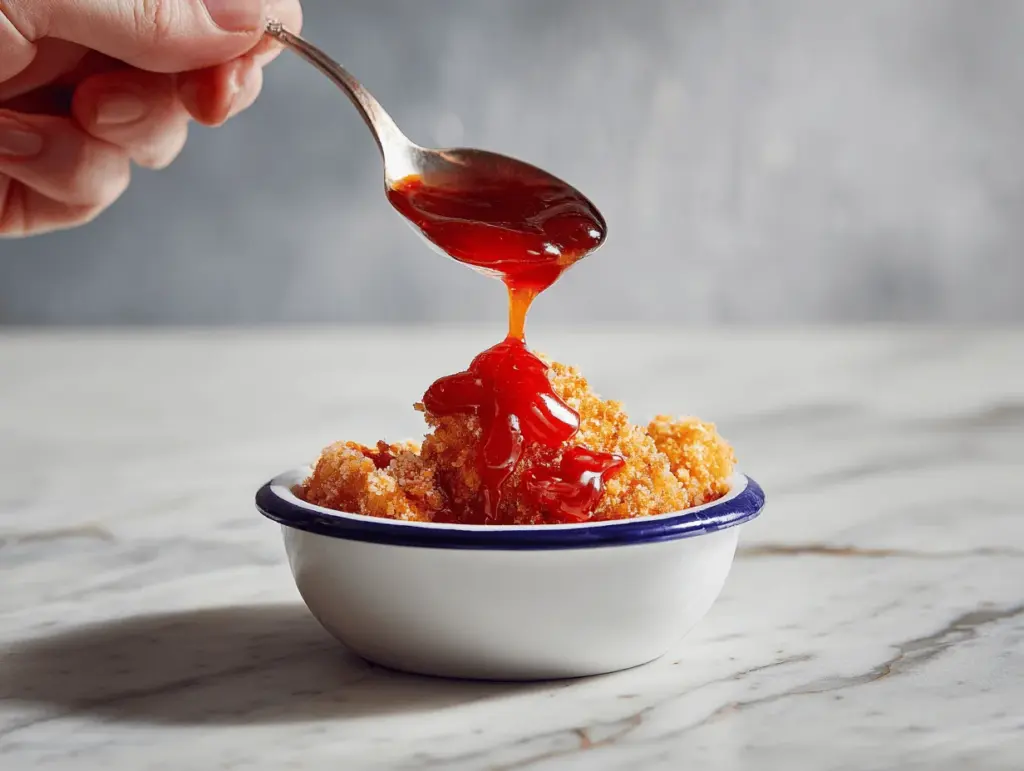
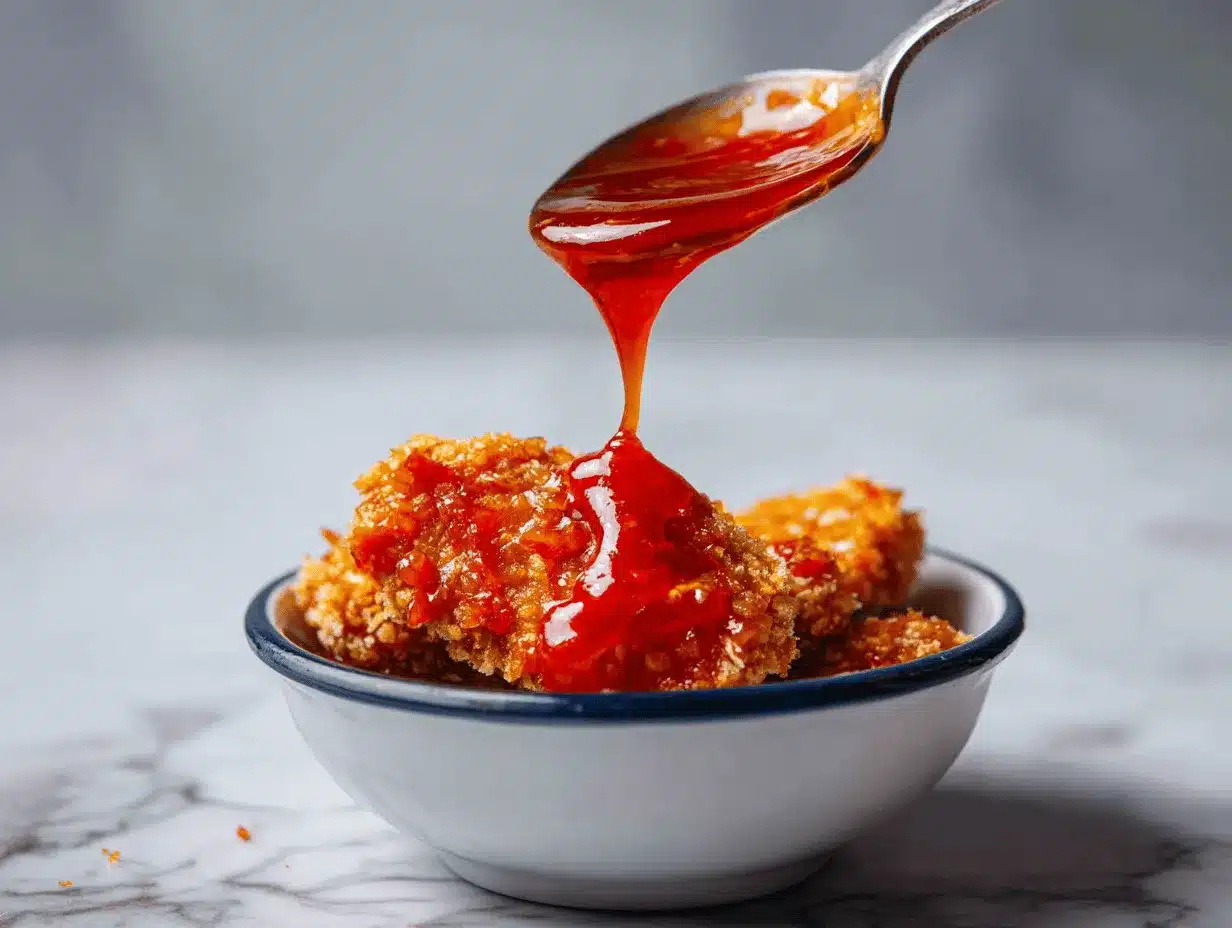
For the best experience, serve your sweet and sour sauce warm or at room temperature. It’s perfect drizzled over crispy chicken, tossed with battered tofu, or as a dipping sauce for spring rolls, wontons, or even simple roasted veggies. For an effortless appetizer, I love pouring it into a small bowl and surrounding it with chopped bell peppers and pineapple chunks—so pretty and so tasty!
Pair it with classic Chinese dishes like fried rice, egg rolls, or homemade chicken nuggets. For drinks, a crisp iced tea or light sparkling water complements the sauce’s tang beautifully.
To store, cool the sauce completely and transfer it to an airtight jar or container. It’ll keep in the refrigerator for up to one week. For longer storage, freeze in small, airtight containers for up to 2 months—just thaw in the fridge overnight before using. To reheat, warm gently in a saucepan over low heat, stirring often. If it thickens too much after chilling, whisk in a splash of water until it’s just right.
The flavors get even better after a day or two, so don’t be shy about making it ahead. I’ve found it tastes bolder and more rounded after sitting overnight, making it the perfect make-ahead party sauce!
Nutritional Information & Benefits
Each two-tablespoon (30 ml) serving of this sweet and sour sauce recipe has roughly:
- Calories: 50
- Fat: 0g
- Carbohydrates: 12g (mostly natural sugars)
- Protein: 0g
- Sodium: 270mg (can be lowered with reduced-sodium soy sauce)
The sauce is naturally vegan and can be gluten-free with ingredient swaps. It’s free of dairy, eggs, and nuts, making it a safe option for most allergies (just watch the soy). The real benefit is knowing exactly what’s in your sauce—no artificial colors or preservatives, just real, whole ingredients. As someone who’s always striving for balance, I love using this sweet and sour sauce recipe to add flavor to veggie dishes and lean proteins, making healthy eating way less boring!
Conclusion
There’s a reason this easy sweet and sour sauce recipe has become a staple in my kitchen—it’s fast, foolproof, and brings a zesty punch to everything from crispy chicken to simple veggies. With just a handful of familiar ingredients, you can create a homemade Chinese essential that tastes better and fresher than anything from a jar. I genuinely love how this recipe invites creativity—switch up the juice, add some spice, or make it extra thick or thin depending on your mood and meal.
If you’re craving that classic sweet-and-tangy flavor at home, give this recipe a go. It’s flexible, family-friendly, and guaranteed to impress (even if you’re just impressing yourself on a Tuesday night). I’d love to hear how you customize yours—leave a comment below with your favorite twist or tag me on Pinterest with your creations! Happy saucing, friends—here’s to homemade comfort that’s always just a whisk away.
Frequently Asked Questions
How long does homemade sweet and sour sauce last in the fridge?
This sauce keeps well for up to 1 week when stored in an airtight container in the refrigerator. The flavors even improve with a day or two of rest!
Can I freeze sweet and sour sauce?
Absolutely! Pour cooled sauce into freezer-safe containers and freeze for up to 2 months. Thaw overnight in the fridge and whisk before reheating.
Is this sweet and sour sauce recipe gluten-free?
Yes, if you use gluten-free soy sauce (like tamari) and double-check your ketchup. It’s an easy swap for anyone avoiding gluten.
Can I make this sauce without pineapple juice?
Yes! Substitute with orange juice for a brighter, citrusy flavor, or use extra water and a teaspoon of honey for sweetness. The sauce will still be delicious.
What can I serve with sweet and sour sauce?
This sauce is perfect for dipping chicken, tofu, egg rolls, spring rolls, or drizzling over stir-fried veggies and rice. It’s super versatile—use it anywhere you want a tangy, sweet punch!
Pin This Recipe!

Sweet and Sour Sauce Recipe Easy Homemade Chinese Essential

This easy homemade sweet and sour sauce is a classic Chinese essential, made with simple pantry ingredients for a zesty, tangy, and perfectly balanced flavor. It’s quick to prepare and perfect for dipping, drizzling, or stirring into your favorite dishes.
- Prep Time: 5 minutes
- Cook Time: 5 minutes
- Total Time: 10 minutes
- Yield: About 1 cup (8 servings) 1x
- Category: Sauce
- Cuisine: Chinese
Ingredients
- 1/2 cup ketchup
- 1/3 cup pineapple juice (unsweetened, canned or fresh)
- 1/4 cup rice vinegar (or apple cider vinegar as substitute)
- 2 tablespoons soy sauce (use tamari or coconut aminos for gluten-free)
- 1/4 cup packed brown sugar
- 1 1/2 tablespoons cornstarch (or arrowroot powder)
- 1/4 cup water
- 1/2 teaspoon garlic powder (or fresh minced garlic)
- 1/4 teaspoon ginger powder (or fresh grated ginger)
- Pinch red chili flakes (optional, for heat)
Instructions
- In a small bowl, whisk together 1/4 cup water and 1 1/2 tablespoons cornstarch until completely smooth. Set aside.
- In a small saucepan off the heat, combine ketchup, pineapple juice, rice vinegar, soy sauce, and brown sugar.
- Whisk in garlic powder, ginger powder, and red chili flakes if using. Mix well until combined.
- Place the saucepan over medium heat and bring the mixture to a gentle simmer, stirring frequently for about 2-3 minutes.
- Once small bubbles appear, reduce heat to low.
- Stir the cornstarch slurry again and slowly pour it into the simmering sauce, whisking constantly.
- Continue to cook, stirring, for 2-4 minutes until the sauce thickens and turns glossy.
- Remove from heat and taste. Adjust with more vinegar or sugar if desired. If too thick, whisk in a tablespoon of water at a time.
- Let the sauce cool for a few minutes before pouring into a jar or serving bowl. The sauce will thicken more as it cools.
- Store cooled sauce in an airtight container in the fridge for up to 1 week.
Notes
For a gluten-free version, use tamari or coconut aminos and check your ketchup. Adjust sweetness or tanginess to taste. For a thicker sauce, add more cornstarch; for a thinner sauce, add water. Sauce can be blended for extra smoothness or strained if lumpy. Store in the fridge for up to 1 week or freeze for up to 2 months.
Nutrition
- Serving Size: 2 tablespoons (30 ml)
- Calories: 50
- Sugar: 10
- Sodium: 270
- Carbohydrates: 12
Keywords: sweet and sour sauce, homemade Chinese sauce, dipping sauce, easy sweet and sour, vegan sauce, gluten-free option, stir fry sauce, takeout sauce, pineapple sauce, Asian sauce