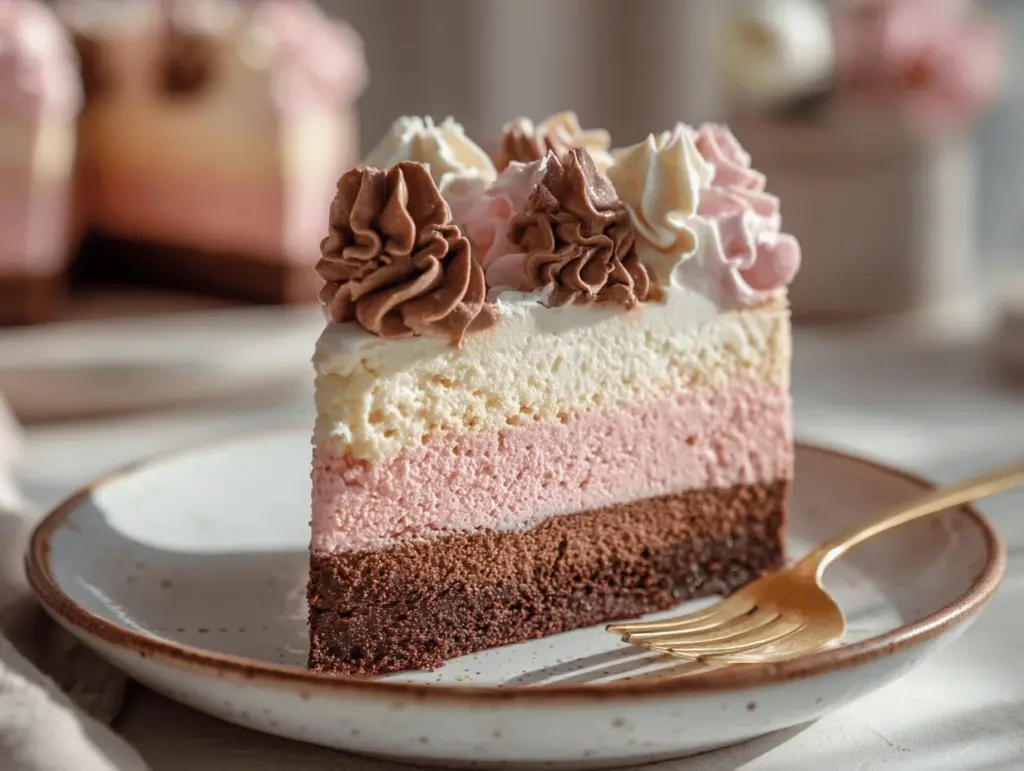
The first time I sliced into this Neapolitan Layer Cheesecake, I was hit with a wave of nostalgia—honestly, it was like childhood birthdays and fancy dessert shops all rolled into one. Picture this: three gorgeous layers, each boasting its own flavor—classic vanilla, rich chocolate, and soft strawberry—topped with a cloud of strawberry buttercream. The colors alone are enough to make you smile, but it’s that first bite, with creamy cheesecake melting into buttery crumbs, that’ll have you hooked.
I stumbled upon the idea for this Neapolitan Layer Cheesecake with Strawberry Buttercream after a friend dared me to combine her two favorite sweets: cheesecake and Neapolitan ice cream. Challenge accepted! After a few trial runs (and a couple of delicious “mistakes”), I landed on a recipe that’s now a family favorite. It’s festive, impressive, and surprisingly easy enough for a weekend project, even if you’re not a seasoned baker.
This dessert isn’t just about looks. It hits all the right notes—velvety texture, balanced sweetness, and that nostalgic trio of flavors. Whether you’re baking for a birthday, a holiday, or just because you need a little pick-me-up, this Neapolitan Layer Cheesecake is a guaranteed winner. As someone who’s baked more cheesecakes than I care to count, I can promise: this one’s worth every minute.
Why You’ll Love This Neapolitan Layer Cheesecake
- Showstopper Looks: Those pastel layers and fluffy strawberry buttercream make this cheesecake a total centerpiece. It’s the dessert that gets all the “oohs” and “ahhs.”
- Flavor Variety: Every bite is a little different—one forkful you get creamy vanilla, the next rich chocolate, and then a hint of real strawberry. No picking favorites here!
- Perfect for Any Occasion: Birthdays, showers, anniversaries, or whenever you want to treat yourself. This Neapolitan Layer Cheesecake fits in everywhere.
- Kid-Friendly & Adult-Approved: My nieces and nephews go wild for these layers, but grown-ups always sneak in for seconds too.
- Straightforward Steps: Don’t be intimidated by the layers—if you can measure and mix, you can make this. I’ve simplified the instructions so you won’t be left scratching your head.
- Real Strawberry Buttercream: This isn’t just pink frosting—there’s real strawberry in there for a flavor that’s bright and fresh, not just sweet.
- Customizable: Want to go gluten-free, swap out flavors, or add your own twist? This recipe’s flexible. I’ve included my favorite adaptations below.
What sets my Neapolitan Layer Cheesecake apart is how the layers seamlessly blend together—not just in looks, but in taste. The secret is in the careful balance of flavors and the creamy, not-too-dense texture. I use a water bath (don’t worry, I’ll guide you through) for that classic, crack-free top. And honestly, after testing different strawberry buttercreams, I found that using freeze-dried strawberries gives the best punch without watering down the frosting. This is the kind of dessert that has people texting you for the recipe the next day.
What Ingredients You Will Need
This Neapolitan Layer Cheesecake recipe uses easy-to-find ingredients, but each one plays a starring role in achieving those vibrant layers and dreamy textures. Let’s break it down so you know exactly what to grab at the store (or hopefully, what’s already in your pantry!).
- For the Crust:
- Graham cracker crumbs (200g or about 2 cups)—Classic, buttery base. I usually go with Honey Maid, but any brand works.
- Granulated sugar (2 tbsp/25g)—A little sweetness.
- Unsalted butter, melted (6 tbsp/85g)—Holds it all together and adds richness.
- Pinch of salt—Brings out the flavors.
- For the Cheesecake Layers:
- Cream cheese, full-fat, softened (24 oz/680g)—Don’t skimp here! Philadelphia is my go-to for the creamiest texture.
- Granulated sugar (1 cup/200g)—Sweetens but lets the flavors shine.
- Large eggs (3)—Room temperature blends in best.
- Sour cream (1 cup/240g)—Adds tang and keeps things creamy.
- Vanilla extract (2 tsp)—For depth and warmth.
- All-purpose flour (2 tbsp/16g)—Just a touch to prevent cracks.
- For the Chocolate Layer:
- Semi-sweet chocolate, melted and cooled (3 oz/85g)—Ghirardelli gives a deep flavor, but use your favorite.
- Cocoa powder (1 tbsp/8g)—Dutch-process for a richer color, but any unsweetened works.
- For the Strawberry Layer:
- Freeze-dried strawberries, finely ground (1/2 cup/10g)—These pack so much flavor without watering down the batter.
- Pink food coloring (optional)—Makes the color pop, but not required.
- For the Strawberry Buttercream:
- Unsalted butter, softened (1 cup/225g)—Don’t use margarine, trust me.
- Powdered sugar (3 cups/375g)—For a smooth, fluffy finish.
- Freeze-dried strawberries, finely ground (1/3 cup/7g)—They give real flavor and a gorgeous color.
- Heavy cream (2-3 tbsp/30-45ml)—Adjust for your desired consistency.
- Vanilla extract (1 tsp)
- Pinch of salt
Ingredient Tips: For the freeze-dried strawberries, you’ll find them in most grocery stores near the dried fruit, or you can order online. If you’re avoiding gluten, swap in gluten-free graham crackers. If strawberries aren’t your thing, swap in raspberries or even blueberries for a fun twist. And if you’re dairy-free, use your favorite plant-based cream cheese and butter substitutes—though texture may change a little.
Equipment Needed
- 9-inch (23cm) Springform Pan: This is key for easy release and those neat layers. If you don’t have one, a deep cake pan with a removable bottom will do, but be extra careful when unmolding.
- Mixing Bowls: At least three—one for each layer. Glass or metal bowls work great and are easy to clean.
- Electric Hand Mixer or Stand Mixer: Cream cheese can be stubborn, so a good mixer saves your arm. If you’re using a stand mixer, use the paddle attachment.
- Measuring Cups and Spoons: Precision matters for cheesecake, so don’t eyeball it.
- Rubber Spatula: For scraping down the sides and smoothing layers.
- Food Processor or Blender: To grind the graham crackers and freeze-dried strawberries. If you don’t have one, a rolling pin and zip-top bag work for the crackers, and a mortar and pestle for the strawberries.
- Oven-safe Roasting Pan: For the water bath. I once used a deep casserole dish when my roasting pan was missing—worked just fine!
- Aluminum Foil: To wrap the springform pan and keep water out.
- Wire Cooling Rack: For even cooling.
- Piping Bag (optional): For fancy buttercream swirls, but a zip-top bag with the corner snipped off works too.
Tip: If you’re tight on tools, don’t stress. I’ve made this cheesecake with just a hand whisk and some elbow grease—it takes longer, but still works! Just make sure your cream cheese is truly softened to avoid lumps. And always check that your springform pan’s latch is tight—mine leaked once, and I lost half the crust. Lesson learned.
Preparation Method

- Prep the Pan and Oven (10 minutes): Preheat your oven to 325°F (163°C). Line the bottom of your 9-inch springform pan with parchment paper. Wrap the outside with two layers of heavy-duty foil, making sure it’s snug to prevent water from sneaking in during the water bath.
- Make the Graham Cracker Crust (10 minutes): In a medium bowl, combine 2 cups (200g) graham cracker crumbs, 2 tablespoons (25g) sugar, a pinch of salt, and 6 tablespoons (85g) melted butter. Stir until the mixture looks like wet sand. Press evenly into the bottom of your prepared pan, using the bottom of a glass to pack it firmly. Bake for 10 minutes, then cool while you make the filling.
- Prepare the Cheesecake Batter (15 minutes): In a large mixing bowl, beat 24 ounces (680g) softened cream cheese until smooth—about 3-5 minutes on medium speed. Scrape down the sides often to avoid lumps. Add 1 cup (200g) granulated sugar and beat until combined. Add 3 large eggs, one at a time, mixing on low and scraping after each addition. Mix in 1 cup (240g) sour cream, 2 teaspoons vanilla extract, and 2 tablespoons (16g) flour until just combined—don’t overmix!
- Divide and Flavor the Batter (5 minutes): Split the batter evenly into three bowls (about 2 cups/420g per bowl).
- Make the Chocolate Layer: Stir 3 ounces (85g) melted, cooled chocolate and 1 tablespoon (8g) cocoa powder into one bowl. Mix until smooth.
- Make the Strawberry Layer: Stir 1/2 cup (10g) finely ground freeze-dried strawberries into the second bowl. Add a drop or two of pink food coloring if you want a brighter look.
- Leave the Vanilla Layer Plain: The third bowl stays as is for that classic creamy vanilla flavor.
- Layer the Cheesecake (5 minutes): Pour the chocolate batter into the crust and smooth it evenly. Carefully spoon the vanilla batter over the chocolate, spreading gently to the edges. Repeat with the strawberry batter. If you’re worried about mixing the layers, chill the pan for 10 minutes between each addition.
- Bake in a Water Bath (60-70 minutes): Place the foil-wrapped pan in a large roasting pan. Pour hot water into the roasting pan until it reaches halfway up the sides of the springform. Bake for 60-70 minutes, or until the edges are set and the center jiggles slightly when shaken. If you notice browning, tent loosely with foil.
- Cool Gradually (3 hours + overnight): Turn off the oven, crack the door, and let the cheesecake cool inside for 1 hour—this helps prevent cracks. Remove from the water bath, unwrap the foil, and cool on a rack for another hour. Chill in the fridge at least 6 hours or overnight. Don’t rush this step—the flavors develop and the texture sets perfectly.
- Make the Strawberry Buttercream (10 minutes): Beat 1 cup (225g) softened butter until fluffy. Add 3 cups (375g) powdered sugar, 1/3 cup (7g) ground freeze-dried strawberries, 1 teaspoon vanilla, and a pinch of salt. Beat on low until combined, then increase speed and whip until light, adding 2-3 tablespoons (30-45ml) heavy cream until spreadable.
- Decorate and Serve: Unlatch the springform and remove the cheesecake (run a thin knife around the edge first). Frost with strawberry buttercream—spread a thick layer on top, and pipe swirls if you’re feeling fancy. Slice with a hot, clean knife for the neatest layers. Enjoy!
Notes: If you see cracks, don’t panic—the buttercream will cover them. If the center looks runny after chilling, it probably needed a bit more bake time, but it’ll still taste amazing. Always use a water bath for the creamiest, most even bake. Trust me, I once skipped it and ended up with cheesecake that looked more like a crater than a cake!
Cooking Tips & Techniques
- Room Temperature Ingredients: Make sure your cream cheese, eggs, and sour cream are at room temp. Cold ingredients lead to lumps—been there, done that. If you’re in a hurry, microwaving cream cheese in 10-second bursts helps.
- Avoid Overmixing: Once everything is incorporated, stop. Overbeating adds air, which can cause cracks and a weird texture. I learned this the hard way after my first cheesecake came out spongy instead of creamy.
- Water Bath Wisdom: Wrap your pan tightly in foil to keep water out. I like to use two layers—if even a drop sneaks in, the crust gets soggy. Place the roasting pan in the oven first, then pour in the water for fewer spills.
- Layering Without Mixing: Use a spoon to gently dollop each layer and smooth carefully. Chilling between layers helps them stay crisp and defined. If you go too fast, colors may swirl (which is pretty, but not the classic Neapolitan look).
- Checking for Doneness: The edges should look set, but the center should wobble slightly. Don’t wait for it to be fully firm or you’ll end up with dry cheesecake.
- Cooling is Key: Letting cheesecake cool slowly in the oven, then at room temp, and finally in the fridge prevents cracks. I used to rush this step—never again!
- Buttercream Texture: If your buttercream is too stiff, add a splash more cream. Too runny? Extra powdered sugar. And sift those freeze-dried strawberries for a smooth finish.
- Cleaning for Perfect Slices: Dip your knife in hot water and wipe clean between cuts. It’s a tiny detail, but wow, those layers just pop!
Cheesecake can feel intimidating, but trust me, the little details make all the difference. I’ve had my share of cracked tops and messy layers, but with a few tweaks (and some patience), you’ll nail it every time. And hey, even the “ugly” ones taste incredible!
Variations & Adaptations
- Gluten-Free Neapolitan Cheesecake: Swap regular graham crackers for gluten-free ones in the crust. The rest of the recipe stays the same—no one will know the difference!
- Dairy-Free Version: Use dairy-free cream cheese (like Kite Hill or Tofutti), coconut-based sour cream, and vegan butter. The texture is a little lighter, but the flavors shine through just as well.
- Berry Swap: Not a strawberry fan? Try freeze-dried raspberries or blueberries for a new twist on the pink layer and buttercream. Raspberry buttercream is my personal favorite variation—just tart enough to balance the sweetness.
- Chocolate Lovers’ Dream: Double the chocolate layer by swapping the vanilla layer for extra chocolate batter. I’ve done this for my nephew’s birthday, and there wasn’t a crumb left!
- Mini Cheesecakes: Bake in muffin tins with cupcake liners for single-serve treats. Reduce baking time to about 22-25 minutes, or until centers are set but still jiggle.
- Nut-Free Option: The recipe is naturally nut-free, but always check your ingredients for cross-contamination if allergies are a concern.
- No Oven? Try a no-bake version by substituting the cheesecake layers with whipped cream cheese and gelatin-based mixes. It’s not quite the same, but it’s great for hot days or when the oven’s busy.
The beauty of this Neapolitan Layer Cheesecake is how easy it is to make it your own. My family loves to experiment—sometimes we add a hint of lemon zest to the strawberry layer, or use chocolate cookie crumbs instead of graham crackers for extra decadence. Don’t be afraid to get creative!
Serving & Storage Suggestions
This cheesecake is at its best served slightly chilled. Let it sit at room temperature for about 15 minutes before slicing, so the layers soften just enough for that perfect creamy bite. I love to top each slice with a swirl of strawberry buttercream and a sprinkle of extra freeze-dried berries—it looks pretty and adds a little tang.
Pair your Neapolitan Layer Cheesecake with fresh berries, a drizzle of chocolate sauce, or even a scoop of vanilla ice cream for a dessert that’s over-the-top. For drinks, coffee or a light sparkling wine are my go-tos—you really can’t go wrong.
To store, cover the cheesecake tightly and refrigerate for up to 5 days. The flavors actually deepen and meld together over time, so leftovers are a treat. For longer storage, wrap slices individually and freeze for up to 2 months. Thaw overnight in the fridge, then let sit at room temp before enjoying. Refrain from microwaving to prevent the buttercream from melting.
Nutritional Information & Benefits
One generous slice (about 1/12th of the cake) has an estimated 410 calories, 28g fat, 36g carbs, and 6g protein. The real star here is the combination of calcium from the cream cheese and antioxidants from the freeze-dried strawberries. Thanks to the real fruit, you get a little vitamin C in every bite—plus, it’s naturally gluten-free if you use the right crust.
If you’re watching your sugar or fat intake, try using a lighter cream cheese and cut back a bit on the buttercream. Always check for allergens, especially dairy and gluten if you use a traditional crust. Personally, I love how this cheesecake satisfies my sweet tooth while still delivering some protein and a burst of berry flavor from the real fruit. Balance, right?
Conclusion
There’s just something magical about slicing into a Neapolitan Layer Cheesecake and seeing those colors stacked up, ready to impress. It’s a dessert that’s playful, nostalgic, and just plain delicious—and honestly, it’s easier to pull together than you might think. Whether you stick to the classic flavors or try one of the fun variations, you’ll end up with a cheesecake that’s as fun to make as it is to eat.
I love this recipe because it makes any occasion feel special, and it always gets rave reviews. Don’t be afraid to add your own twist—swap out berries, make it gluten-free, or go mini for parties. If you try it, let me know how it turns out! Leave a comment, share a photo, or tell me your favorite flavor combo. Happy baking, and remember: the best desserts are the ones you get to share.
Frequently Asked Questions
Can I make Neapolitan Layer Cheesecake ahead of time?
Absolutely! In fact, it tastes even better after chilling overnight. You can make it up to 2 days in advance and keep it refrigerated until you’re ready to serve.
What if I don’t have freeze-dried strawberries?
No problem. You can use finely chopped fresh strawberries, but the color and flavor won’t be as intense. Just blot them well to remove extra moisture, or try freeze-dried raspberries as a substitute.
How do I keep my cheesecake from cracking?
Use a water bath, don’t overmix the batter, and let the cheesecake cool slowly. Even if a crack appears, the buttercream will cover it right up—no stress!
Can I freeze leftover cheesecake?
Yes! Slice and wrap each piece in plastic, then freeze for up to 2 months. Thaw overnight in the fridge for best texture. I always keep a slice or two hidden in the back of my freezer for emergencies.
What’s the best way to get clean layers when slicing?
Use a sharp knife dipped in hot water and wiped dry between cuts. It sounds fussy, but it keeps those layers looking picture-perfect every time.
Pin This Recipe!
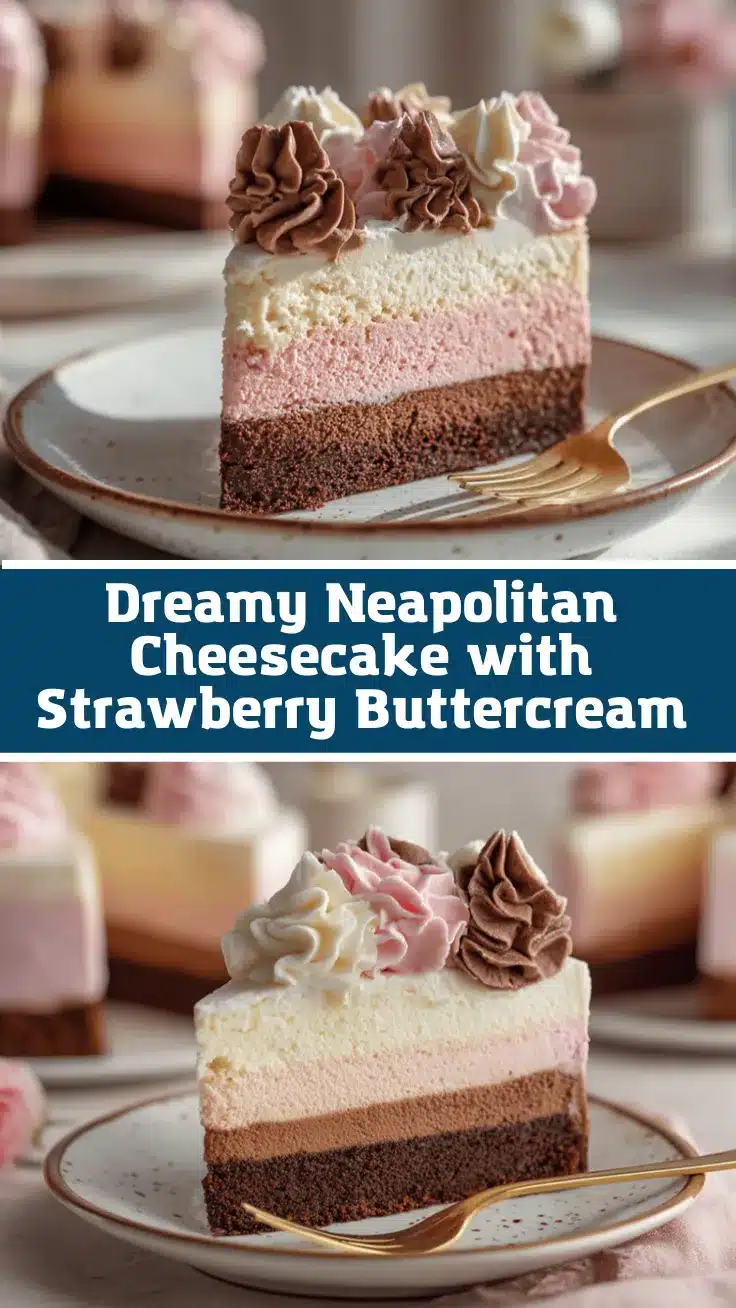
Neapolitan Layer Cheesecake with Strawberry Buttercream
This showstopping Neapolitan Layer Cheesecake features creamy vanilla, rich chocolate, and vibrant strawberry layers, all topped with a fluffy real-strawberry buttercream. It’s a nostalgic, festive dessert that’s surprisingly easy to make and perfect for any celebration.
- Prep Time: 40 minutes
- Cook Time: 70 minutes
- Total Time: 8 hours (including chilling)
- Yield: 12 servings 1x
- Category: Dessert
- Cuisine: American
Ingredients
- 2 cups graham cracker crumbs (about 200g)
- 2 tablespoons granulated sugar (25g)
- 6 tablespoons unsalted butter, melted (85g)
- Pinch of salt
- 24 ounces full-fat cream cheese, softened (680g)
- 1 cup granulated sugar (200g)
- 3 large eggs, room temperature
- 1 cup sour cream (240g)
- 2 teaspoons vanilla extract
- 2 tablespoons all-purpose flour (16g)
- 3 ounces semi-sweet chocolate, melted and cooled (85g)
- 1 tablespoon cocoa powder (8g)
- 1/2 cup freeze-dried strawberries, finely ground (10g)
- Pink food coloring (optional)
- 1 cup unsalted butter, softened (225g)
- 3 cups powdered sugar (375g)
- 1/3 cup freeze-dried strawberries, finely ground (7g)
- 2–3 tablespoons heavy cream (30-45ml)
- 1 teaspoon vanilla extract
- Pinch of salt
Instructions
- Preheat oven to 325°F (163°C). Line the bottom of a 9-inch springform pan with parchment paper and wrap the outside with two layers of heavy-duty foil.
- In a medium bowl, combine graham cracker crumbs, sugar, salt, and melted butter. Mix until it resembles wet sand. Press evenly into the bottom of the prepared pan. Bake for 10 minutes, then cool.
- In a large mixing bowl, beat softened cream cheese until smooth (3-5 minutes). Scrape down the sides often.
- Add granulated sugar and beat until combined. Add eggs one at a time, mixing on low and scraping after each addition.
- Mix in sour cream, vanilla extract, and flour until just combined. Do not overmix.
- Divide the batter evenly into three bowls.
- For the chocolate layer: Stir melted, cooled chocolate and cocoa powder into one bowl until smooth.
- For the strawberry layer: Stir finely ground freeze-dried strawberries into the second bowl. Add pink food coloring if desired.
- Leave the third bowl plain for the vanilla layer.
- Pour the chocolate batter into the crust and smooth. Carefully spoon the vanilla batter over the chocolate, spreading gently. Repeat with the strawberry batter. Chill the pan for 10 minutes between layers if desired.
- Place the foil-wrapped pan in a large roasting pan. Pour hot water into the roasting pan until it reaches halfway up the sides of the springform.
- Bake for 60-70 minutes, or until edges are set and the center jiggles slightly. Tent loosely with foil if browning.
- Turn off the oven, crack the door, and let the cheesecake cool inside for 1 hour. Remove from the water bath, unwrap foil, and cool on a rack for another hour. Chill in the fridge at least 6 hours or overnight.
- For the strawberry buttercream: Beat softened butter until fluffy. Add powdered sugar, ground freeze-dried strawberries, vanilla, and salt. Beat on low until combined, then whip until light, adding heavy cream until spreadable.
- Unlatch the springform and remove the cheesecake. Frost with strawberry buttercream and pipe swirls if desired. Slice with a hot, clean knife for neat layers. Serve and enjoy!
Notes
For best results, use room temperature ingredients and avoid overmixing the batter. Always use a water bath for a creamy, crack-free cheesecake. If you see cracks, the buttercream will cover them. Chill thoroughly for clean layers. For gluten-free, use gluten-free graham crackers. You can swap freeze-dried raspberries or blueberries for the strawberry layer and buttercream.
Nutrition
- Serving Size: 1 slice (1/12th of cake)
- Calories: 410
- Sugar: 28
- Sodium: 260
- Fat: 28
- Saturated Fat: 17
- Carbohydrates: 36
- Fiber: 1
- Protein: 6
Keywords: Neapolitan cheesecake, strawberry buttercream, layered cheesecake, chocolate vanilla strawberry dessert, birthday cheesecake, easy cheesecake recipe