The first time I pulled a tray of honey walnut cream cheese baked pears out of my oven, the kitchen smelled like autumn at a fancy bakery. Sweet pears bubbling, golden honey dripping, and a hint of toasted walnut—honestly, it was hard to wait for them to cool down. I love how this recipe instantly makes any evening feel special, even if you’re just wearing fuzzy socks and binge-watching your favorite show.
I started making honey walnut cream cheese baked pears when I wanted an elegant dessert but didn’t want to fuss over pastry dough or fancy cake layers. It’s so simple: ripe pears, a creamy filling, a crunchy topping, and a drizzle of honey. Believe it or not, it’s the kind of dessert that looks restaurant-worthy but is secretly the easiest thing ever. I’ve made these for holiday dinners, cozy date nights, and even for my picky niece who usually turns her nose up at anything “grown-up” (she ate two!).
This recipe is a blend of old-world comfort and modern convenience—classic flavors with a twist. The cream cheese filling is smooth and tangy, walnuts add crunch, and honey brings everything together. If you love desserts that are both healthy-ish and indulgent, honey walnut cream cheese baked pears will hit the spot. They’re perfect for anyone who loves fruit-forward treats, needs a gluten-free option, or just wants something quick but impressive. I’ve tested this recipe with different pear varieties and tweaked the filling until it was just right: not too sweet, not too heavy. Trust me, after baking these more times than I can count, I’m convinced they’re the ultimate easy elegant dessert.
Why You’ll Love This Recipe
- Quick & Easy: Ready in less than 40 minutes, so you can whip them up even on busy weeknights or when surprise guests show up.
- Simple Ingredients: No need to hunt down fancy stuff—pears, cream cheese, walnuts, honey, and a few pantry staples.
- Perfect for Any Occasion: These baked pears look beautiful for dinner parties, holiday brunch, or just when you want a treat after a long day.
- Crowd-Pleaser: Kids love the sweet, soft pears and adults adore the sophisticated flavors. It’s rare I have leftovers!
- Deceptively Delicious: The combo of creamy, tangy filling and crunchy walnuts inside tender baked pears is pure comfort.
This isn’t just another fruit dessert—it’s a showstopper. What sets honey walnut cream cheese baked pears apart is the clever filling: blending cream cheese until ultra-smooth, folding in finely chopped walnuts, and finishing with a touch of honey for balance. You can’t help but feel a little fancy serving these, even if you’re just sharing them with your family.
Honestly, it’s the kind of recipe that makes you close your eyes after the first bite. Warm pears, creamy filling, and that sticky honey—yum! Plus, it’s gluten-free, customizable, and doesn’t require intensive baking skills. If you want a dessert that feels special but comes together in a flash, this is the one. It’s comfort food disguised as something elegant and refined. I’ve made these for birthdays, book clubs, and even just random Tuesdays—they never disappoint. The best part? You get all the satisfaction of a homemade treat without the stress or mess.
What Ingredients You Will Need
This recipe uses simple, wholesome ingredients to deliver bold flavor and satisfying texture without the fuss. Most of these are probably already in your kitchen, and if not, they’re easy to substitute or pick up at the store. Here’s what you’ll need for honey walnut cream cheese baked pears:
- Pears (4 large, ripe but firm—Bosc or Anjou work best for baking)
- Cream Cheese (120g/4 oz, softened—full-fat for the richest filling, but you can use light or dairy-free)
- Walnuts (60g/2 oz, finely chopped—adds crunch and flavor; pecans are an easy swap if you prefer)
- Honey (3 tbsp/45ml—local or raw honey gives the best aroma)
- Brown Sugar (2 tbsp/25g—gives the filling a caramel note; coconut sugar works too)
- Ground Cinnamon (1/2 tsp—warms up the flavor and makes your kitchen smell amazing)
- Vanilla Extract (1/2 tsp—optional, but adds a lovely depth)
- Pinch of Salt (balances sweetness)
- Lemon Juice (1 tbsp/15ml—keeps pears from browning and lifts the flavor)
- Butter (1 tbsp/15g, melted—for brushing the pears, helps them caramelize)
Ingredient Notes & Substitutions:
- Pears: If you’re making this in summer, swap in peaches or nectarines (so good!). Slightly underripe pears hold their shape best.
- Cream Cheese: Dairy-free versions work well if you have allergies. I like Philadelphia for texture, but store brands are fine.
- Walnuts: Toast them for extra flavor. Allergic? Substitute sunflower seeds or skip for a nut-free option.
- Honey: Maple syrup works if you’re out of honey or want a vegan swap.
- Brown Sugar: For a lower-sugar version, halve the amount or use coconut sugar.
- Cinnamon & Vanilla: Play with the spices—cardamom or ginger can be fun if you want a twist.
These ingredients come together quickly, and you can tweak them based on your pantry or dietary needs. Don’t stress if you’re missing something—there’s plenty of room to adapt!
Equipment Needed
- Baking Dish: A medium-sized ceramic or glass dish (about 9×13-inch/23x33cm fits 4 pears snugly). If you’re short on space, use a rimmed sheet pan lined with parchment.
- Small Mixing Bowl: For blending the cream cheese filling. You can use a stand mixer, but a sturdy spoon works just fine.
- Spoon or Melon Baller: For scooping out the pear cores. If you don’t have a melon baller, a teaspoon does the trick—just go slow so you don’t break the pears.
- Sharp Knife: Essential for halving and prepping the pears.
- Measuring Cups & Spoons: To get those ratios right, especially with the filling.
- Pastry Brush: For brushing butter on the pears. If you don’t have one, use the back of a spoon.
I’ve used everything from fancy ceramic dishes to battered old pans—honestly, these baked pears don’t care. Just make sure the dish fits the pears snugly so they don’t tip over while baking. Wash and dry your equipment before starting; sticky honey and cream cheese can be hard to clean once baked on. If you’re on a budget, dollar-store utensils work perfectly—I’ve done it!
Preparation Method
-
Preheat your oven: Set to 350°F (180°C). While it heats up, gather all your ingredients and equipment so everything’s within reach.
-
Prepare the pears: Wash and dry 4 large pears. Slice each one in half lengthwise. Using a melon baller or teaspoon, gently scoop out the cores and seeds to create a well for the filling. Try not to break the pear halves—if you do, don’t panic, just tuck the broken pieces together in the dish.
-
Brush with lemon juice: Drizzle 1 tbsp (15ml) lemon juice over the cut sides to prevent browning and add a little tang.
-
Make the filling: In a small mixing bowl, blend 120g (4 oz) cream cheese until smooth. Add 2 tbsp (25g) brown sugar, 1/2 tsp ground cinnamon, 1/2 tsp vanilla extract, and a pinch of salt. Mix until creamy. Fold in 60g (2 oz) finely chopped walnuts (reserve a little for topping if you like).
-
Fill the pears: Spoon about 1 generous tablespoon of cream cheese mixture into the well of each pear half. It’s okay if it overflows a bit—the filling will puff up slightly as it bakes.
-
Arrange in baking dish: Nestle the filled pear halves in your baking dish, cut side up. If they wobble, use crumpled foil to steady them.
-
Brush with butter: Melt 1 tbsp (15g) butter and brush it lightly over the exposed pear flesh and around the edges. This helps them caramelize and keeps the fruit moist.
-
Drizzle with honey: Spoon about 2 tbsp (30ml) honey over the filled pears. Reserve the rest for serving.
-
Bake: Place the dish in the middle rack of your oven. Bake for 25–30 minutes, until the pears are fork-tender and the filling is lightly golden. If your pears are very ripe, check after 20 minutes. The aroma will be irresistible!
-
Finish & serve: Remove pears from oven. Let them cool for 5 minutes—this helps the filling set. Drizzle with remaining honey and sprinkle reserved walnuts on top.
Troubleshooting: If filling spills out, it’s okay—just scoop it back onto the pears before serving. If pears aren’t soft, cover with foil and bake an extra 5 minutes. Pears should be tender but not mushy, and the tops golden brown.
Personal tip: I prep the pears earlier in the day, cover, and refrigerate until it’s dessert time. That way, all you have to do is pop them in the oven!
Cooking Tips & Techniques
Here’s where all my kitchen trial-and-error comes in handy. For truly irresistible honey walnut cream cheese baked pears, a few tricks make all the difference.
- Choose the right pears: Bosc and Anjou pears hold their shape best. Super ripe pears get mushy—firm is your friend here.
- Don’t rush the filling: Blend the cream cheese until it’s fluffy. If it’s too cold, it’ll be lumpy; let it come to room temp for smooth results.
- Roast the nuts: Toast walnuts for 5 minutes in a dry skillet before chopping. Makes the flavor pop and keeps them crunchy.
- Keep pears steady: Use a snug dish or crumple foil to keep pears upright. If they tip, filling runs out and you’re left with a gooey mess (been there, done that).
- Multi-task like a pro: While pears bake, clean up your prep area or whip cream for serving. The aroma will let you know when to check the oven.
- Timing is key: Don’t overbake. Pears should be tender but not collapsing. If you poke them with a fork and they offer a little resistance, they’re perfect.
- Let them cool slightly: Hot pears will make the filling runny. Five minutes is just enough to set without losing that warm comfort factor.
- Lesson learned: Once I tried packing in too much filling—looked amazing, but half of it melted out. Moderation is your friend here.
Consistency comes from choosing similar-sized pears and measuring filling evenly. And if you mess up, just scoop the filling back on top. Don’t stress—these pears are forgiving!
Variations & Adaptations
The best part about honey walnut cream cheese baked pears is how easy it is to tweak them for any diet or craving. Here are some fun ways to make them your own:
- Gluten-Free & Dairy-Free: Use dairy-free cream cheese and swap walnuts for toasted seeds if you’re allergic. Maple syrup works instead of honey for a vegan touch.
- Seasonal Fruit Switch: Try peaches or nectarines in summer. Apples work too (slice thicker to avoid over-softening).
- Flavor Twists: Add a pinch of cardamom, ginger, or nutmeg to the filling for a different spice profile. Mix in dried cranberries or chopped dates for extra texture.
- Different Cooking Methods: Grill the pears outdoors for a smoky flavor, or air fry for extra caramelization (just reduce baking time).
- Nut-Free Version: Skip the walnuts and sprinkle with sunflower seeds or pumpkin seeds for crunch.
I once made these with whipped goat cheese instead of cream cheese—so tangy and delicious! You can also use ricotta for a lighter texture. If you like things extra sweet, swirl a little caramel sauce over the top before serving. There’s no wrong way to enjoy these pears, and you’ll find your favorite twist with a little experimenting.
Serving & Storage Suggestions
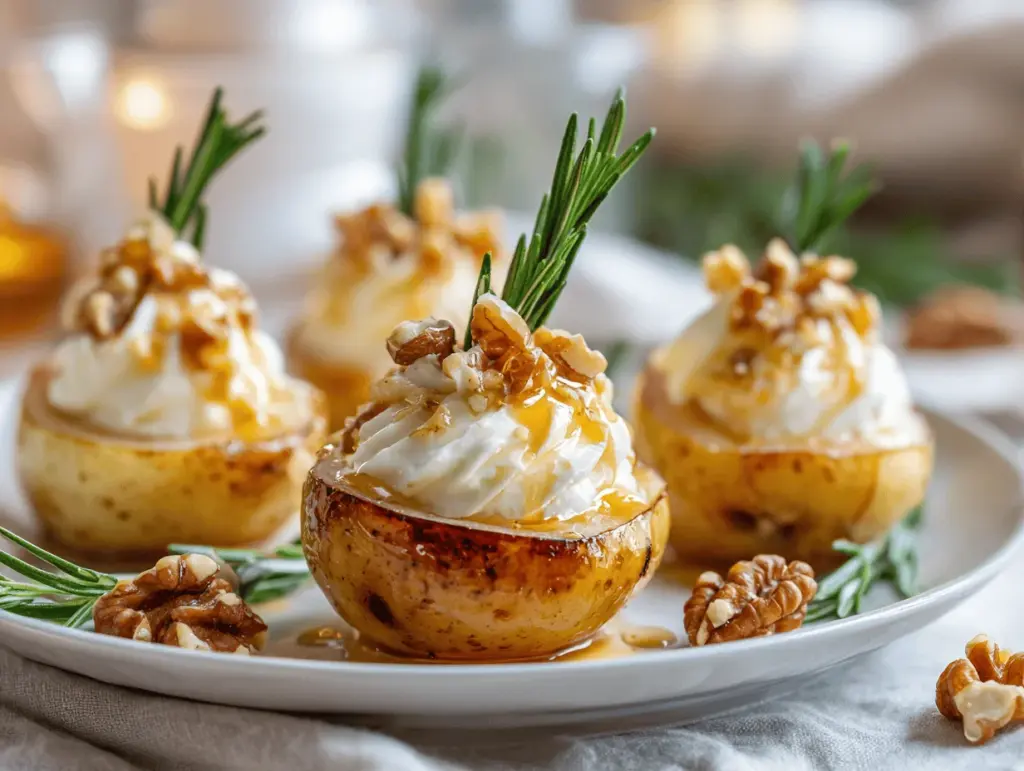
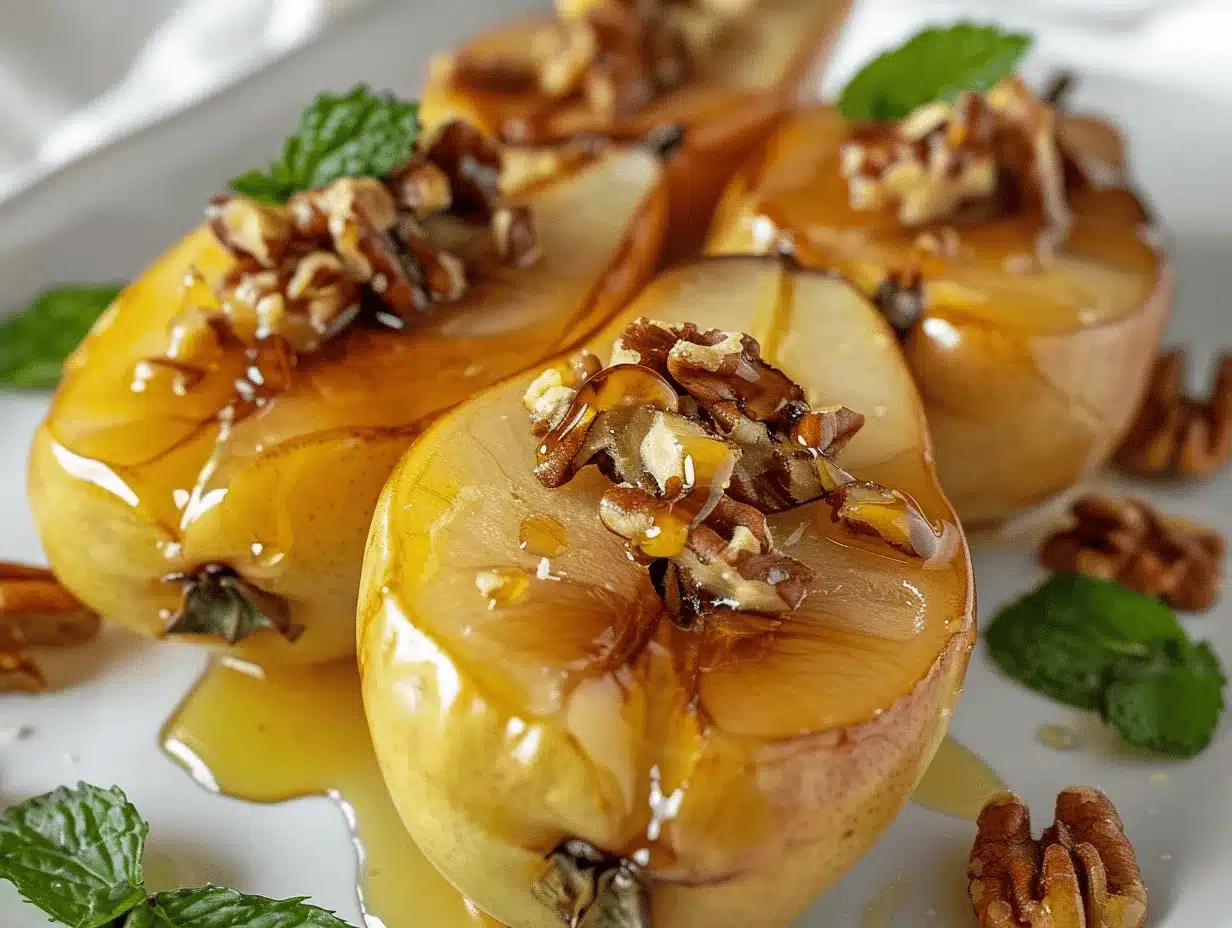
Honey walnut cream cheese baked pears are best served warm, straight from the oven. The filling is creamy, the pears are tender, and the honey is glossy—so irresistible! For a pretty presentation, place each pear half on a small plate and drizzle with extra honey. I like to sprinkle a few whole toasted walnuts for drama.
Pair with softly whipped cream, vanilla ice cream, or a dollop of Greek yogurt if you want a lighter finish. These pears go beautifully with a cup of black tea, dessert wine, or even coffee. For a brunch spread, serve alongside a cheese board or fresh berries.
Storage: If you have leftovers (rare, but it happens!), cover and refrigerate for up to 2 days. The flavors deepen as they sit, and reheating is easy: warm in a 300°F (150°C) oven for 10 minutes or microwave in short bursts until just warm. Don’t overheat or the filling gets runny. You can also freeze baked pears for up to a month—just wrap tightly and thaw overnight in the fridge before reheating.
Pro tip: The pears soak up more honey as they sit, so they’re even more flavorful the next day. Honestly, I love sneaking one for breakfast!
Nutritional Information & Benefits
Each serving of honey walnut cream cheese baked pears (1 pear half) provides roughly:
- Calories: 180
- Protein: 3g
- Fat: 10g (mostly healthy fats from walnuts)
- Carbs: 22g
- Fiber: 3g
Pears are a great source of vitamin C and fiber, supporting digestion and immune health. Walnuts add omega-3 fats and protein, while honey gives natural antioxidants. The dessert is naturally gluten-free and can be made nut-free or dairy-free if needed. Just watch out for nut and dairy allergens depending on your swaps.
Personally, I love that this dessert feels indulgent but isn’t heavy. It’s sweet enough to satisfy without leaving you sluggish—perfect for a mindful treat!
Conclusion
If you’re looking for a dessert that’s easy, elegant, and downright delicious, honey walnut cream cheese baked pears are it. They’re simple enough for a weeknight but beautiful enough for a celebration. The warm fruit, creamy filling, and drizzle of honey—seriously, it’s magic in every bite.
Feel free to make this recipe your own. Tweak the filling, swap the nuts, or add your favorite spices. I love making these because they always feel a little special, no matter the occasion. And every time I serve them, someone asks for the recipe. That’s a win in my book!
Give this recipe a try, share your twist, and let me know how it turned out! Drop your comments below, pin this for later, and tag me if you post your baked pears on social media. Happy baking and enjoy every sweet, creamy bite!
FAQs
Can I make honey walnut cream cheese baked pears ahead of time?
Yes! You can prep the pears and filling, assemble them in your baking dish, and refrigerate until ready to bake. Just add a few extra minutes to the baking time if they’re chilled.
What type of pear is best for baking?
Bosc and Anjou pears are ideal because they hold their shape well and don’t get mushy. Bartletts work too, just pick firmer ones.
Can I use another sweetener instead of honey?
Absolutely. Maple syrup or agave are delicious substitutes and work well for vegan adaptations.
What if I don’t eat nuts?
No worries! Skip the walnuts or use toasted pumpkin or sunflower seeds for crunch. You can also leave them out entirely.
How do I know when the pears are done baking?
The pears should be fork-tender but not falling apart. The filling will be lightly golden on top, and the aroma will be sweet and inviting.
Pin This Recipe!
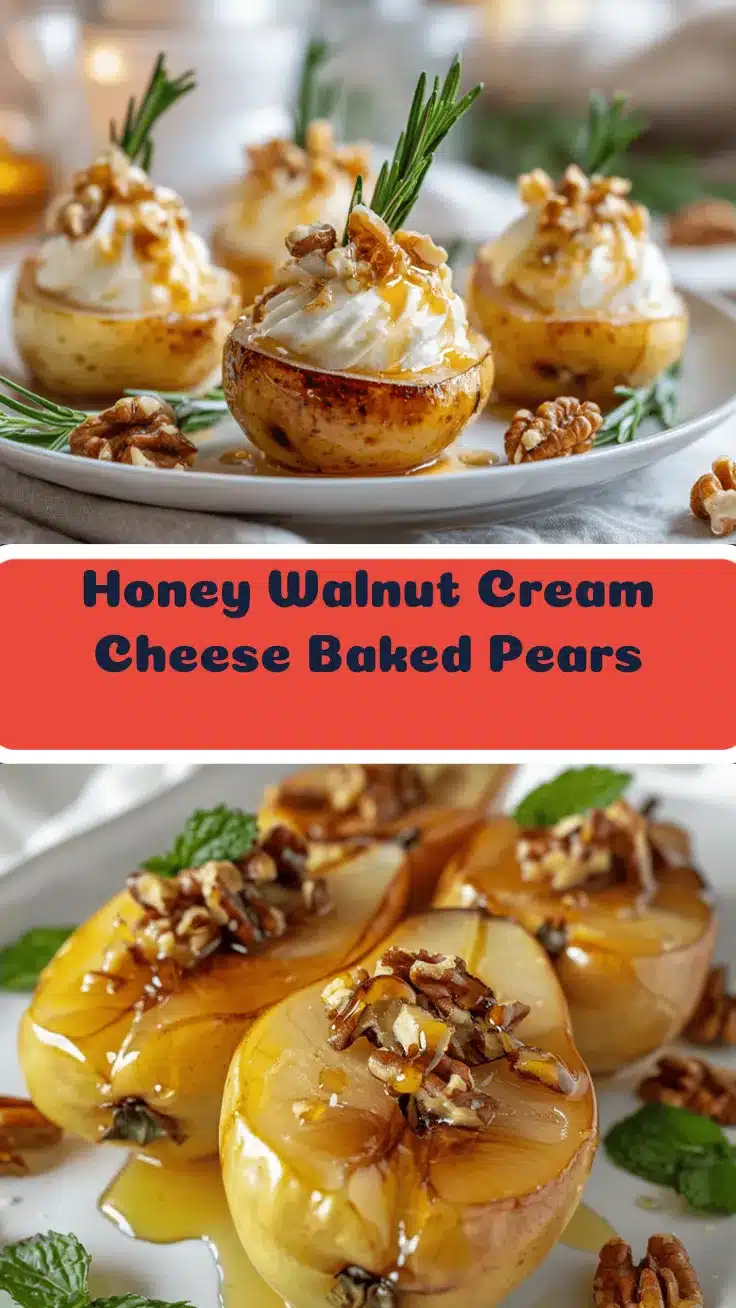
Honey Walnut Cream Cheese Baked Pears

These honey walnut cream cheese baked pears are an easy yet elegant dessert featuring ripe pears filled with a creamy, nutty filling and finished with a drizzle of honey. Perfect for special occasions or a cozy night in, this gluten-free treat is both indulgent and wholesome.
- Prep Time: 10 minutes
- Cook Time: 25-30 minutes
- Total Time: 35-40 minutes
- Yield: 8 servings 1x
- Category: Dessert
- Cuisine: American
Ingredients
- 4 large ripe but firm pears (Bosc or Anjou recommended)
- 4 oz (120g) cream cheese, softened
- 2 oz (60g) walnuts, finely chopped (plus extra for topping, optional)
- 3 tbsp (45ml) honey, divided
- 2 tbsp (25g) brown sugar
- 1/2 tsp ground cinnamon
- 1/2 tsp vanilla extract (optional)
- Pinch of salt
- 1 tbsp (15ml) lemon juice
- 1 tbsp (15g) butter, melted
Instructions
- Preheat oven to 350°F (180°C). Gather all ingredients and equipment.
- Wash and dry pears. Slice each in half lengthwise. Using a melon baller or teaspoon, gently scoop out the cores and seeds to create a well for the filling.
- Drizzle lemon juice over the cut sides of the pears to prevent browning.
- In a small mixing bowl, blend cream cheese until smooth. Add brown sugar, cinnamon, vanilla extract (if using), and a pinch of salt. Mix until creamy. Fold in chopped walnuts, reserving some for topping if desired.
- Spoon about 1 generous tablespoon of the cream cheese mixture into each pear half.
- Arrange filled pear halves in a snug baking dish, cut side up. Use crumpled foil to steady them if needed.
- Brush melted butter over the exposed pear flesh and edges.
- Drizzle about 2 tablespoons of honey over the filled pears, reserving the rest for serving.
- Bake for 25–30 minutes, until pears are fork-tender and filling is lightly golden. Check after 20 minutes if pears are very ripe.
- Remove from oven and let cool for 5 minutes. Drizzle with remaining honey and sprinkle reserved walnuts on top before serving.
Notes
Use firm pears like Bosc or Anjou for best results. Toast walnuts before chopping for extra flavor. For dairy-free, use dairy-free cream cheese and swap honey for maple syrup. Filling can be made ahead and pears assembled in advance. Let pears cool slightly before serving for best texture.
Nutrition
- Serving Size: 1 pear half
- Calories: 180
- Sugar: 16
- Sodium: 60
- Fat: 10
- Saturated Fat: 3
- Carbohydrates: 22
- Fiber: 3
- Protein: 3
Keywords: baked pears, honey walnut cream cheese, gluten-free dessert, easy elegant dessert, fall dessert, fruit dessert, holiday dessert