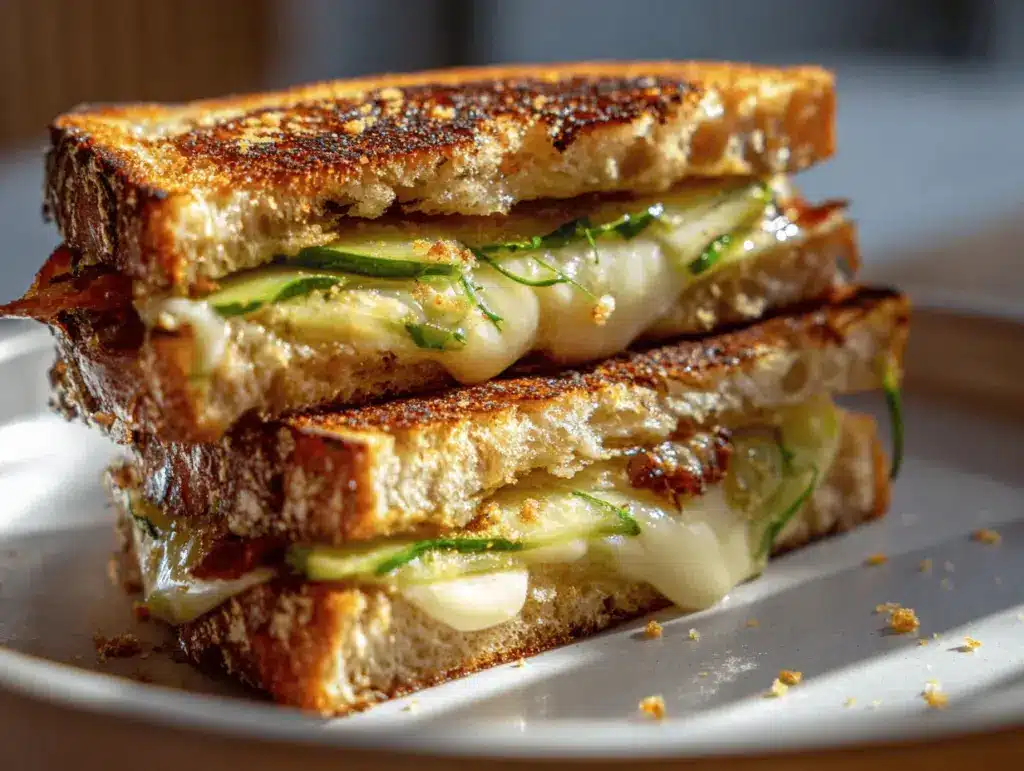
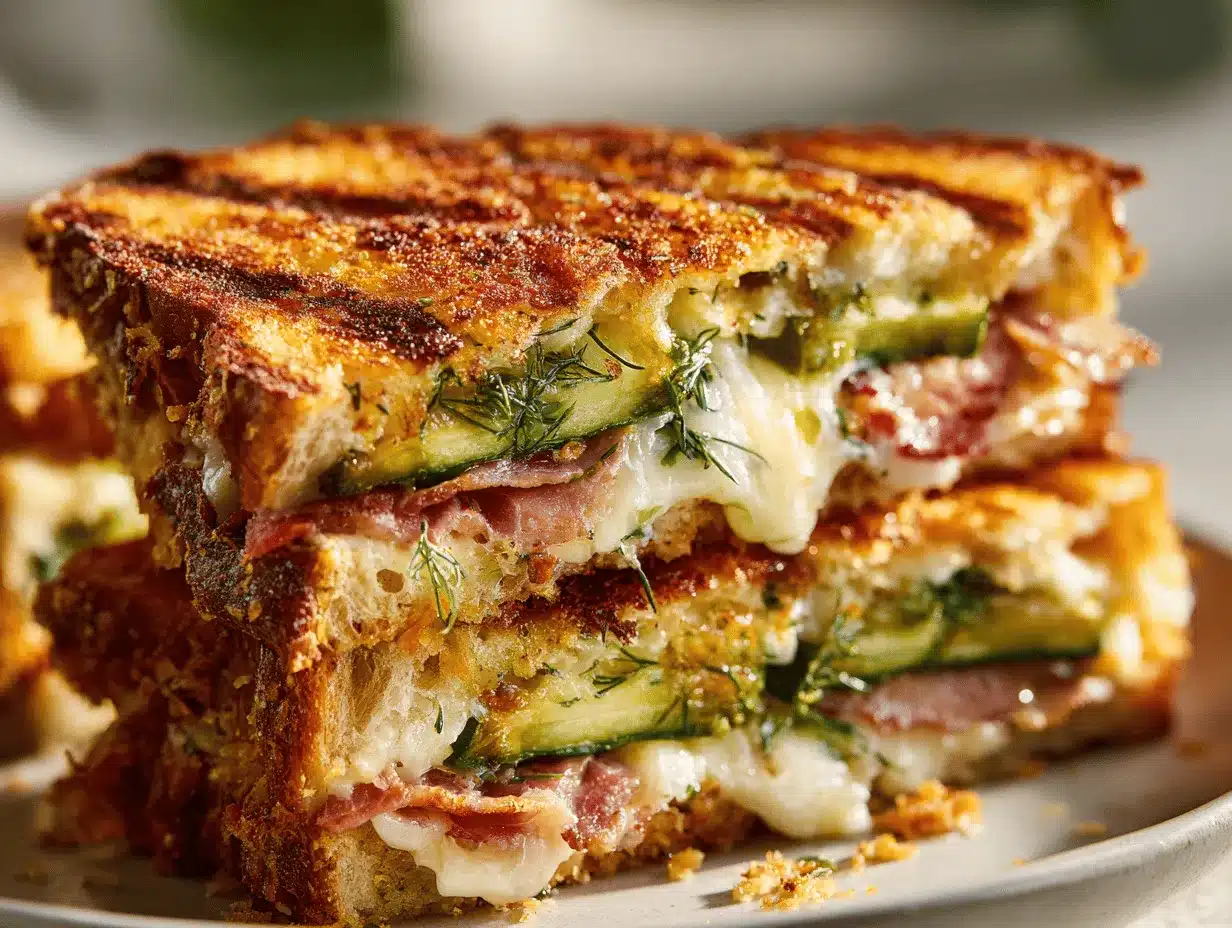
The sizzle of bacon, the tang of dill pickles, and the oozy, golden cheese—yeah, this sandwich is pure magic. No exaggeration, the first time I bit into this crispy dill pickle bacon grilled cheese, I had to close my eyes and just savor it. The crunch, the salt, the melty cheese—it’s like your favorite diner grilled cheese took a trip through a deli and came out better than ever. If you’re craving something a little extra (you know, something that’ll make your taste buds do a happy dance), this is the recipe for you.
I first stumbled onto this combo during a midnight fridge raid. There was leftover bacon, a jar of dill pickles, and some cheddar begging to be used. I threw them together in a pan, and—no joke—it was love at first bite. Since then, I’ve made this crispy dill pickle bacon grilled cheese at least a dozen times, tweaking the cheese blend and even testing out different pickles. Trust me, it’s a hit every single time I serve it (my family now requests it for game nights and lazy Sunday lunches).
Not only does this sandwich pack a punch of flavor, but it’s also so easy to whip up. You don’t need any fancy ingredients or gadgets—just a skillet and a craving for something delicious. That savory, tangy, slightly smoky combination is perfect for busy families, picky eaters, or anyone who loves a twist on a classic. The best part? It’s ready in less than 20 minutes, so you can satisfy your grilled cheese dreams whenever the mood strikes. If you love grilled cheese and have a soft spot for crunchy, salty pickles and crispy bacon, this one’s going to become your new obsession.
Why You’ll Love This Crispy Dill Pickle Bacon Grilled Cheese Sandwich
- Quick & Easy: Ready in under 20 minutes—perfect for those “what’s-for-lunch?” moments or a cozy dinner when you just want comfort food fast.
- Simple Ingredients: You probably have everything you need already—bread, cheese, bacon, pickles, and butter. No hunting for hard-to-find stuff.
- Perfect for Any Occasion: This grilled cheese is a winner for lunch, dinner, or even as a hearty snack. Great for picnics, movie nights, or when friends drop by unexpectedly.
- Crowd-Pleaser: Kids love the gooey cheese, adults go wild for the bacon and tangy pickles. I’ve served this to picky eaters and foodies alike—they all rave about it!
- Unbelievably Delicious: The flavor and texture combo is just next-level. Crispy bread, melty cheese, smoky bacon, and that tart pickle bite—it’s a sandwich you’ll crave again and again.
Let’s face it, there are plenty of grilled cheese recipes out there, but this crispy dill pickle bacon grilled cheese is in a league of its own. The secret? Blending sharp cheddar and mozzarella for the perfect melt, crisping the bacon just right, and layering in sliced dill pickles for a tangy punch. I even press the sandwich with a spatula for that diner-style crispness—these little tricks make all the difference.
This isn’t just another grilled cheese—it’s the one that makes you pause and go, “Wow.” It’s comfort food, but with bold flavors and fun textures that keep you coming back for more. Whether you’re looking to impress guests (with zero stress) or just need something special to brighten your day, this sandwich delivers every single time. After dozens of test runs (and plenty of taste-tests), I can honestly say: you won’t find a better combo of crispy, cheesy, tangy, and savory in one bite.
What Ingredients You Will Need
This crispy dill pickle bacon grilled cheese recipe keeps things simple but packs a ton of flavor. Here’s everything you’ll need to make it happen (and a few pro tips I’ve learned along the way):
- Bread: Thick-cut sourdough is my go-to for extra crunch and structure, but you can use white, whole wheat, or even rye. (Day-old bread works great for crispier results!)
- Cheese:
- Sharp Cheddar, shredded (about 1/2 cup or 60g per sandwich): Brings bold flavor and great melt.
- Mozzarella, shredded (about 1/4 cup or 30g per sandwich): For that perfect stretchy, gooey factor. (You can swap in Monterey Jack or Swiss if you want!)
- Bacon (2 slices per sandwich): Cooked until crispy. I like to use thick-cut, but regular works too. Turkey bacon is a good alternative if you want something lighter.
- Dill Pickles (about 4-5 slices per sandwich): I recommend classic deli-style or sandwich stackers. Try to pat them dry with a paper towel so your sandwich doesn’t get soggy. (I’ve experimented with spicy pickles for a little kick—so good!)
- Butter (about 1 tbsp or 14g per sandwich): For spreading on the outside of the bread. Unsalted is best so you can control the saltiness, but salted butter works if that’s what you have.
- Optional Add-Ins:
- Garlic powder or a pinch of smoked paprika sprinkled inside for extra flavor.
- Fresh dill or chives for a herby twist.
- Hot sauce for a fiery edge—my husband swears by this!
If you’re missing something, don’t stress. I’ve made this with everything from gluten-free bread to vegan cheese and it still turns out tasty. For a gluten-free version, just swap in your favorite GF bread. Need it vegetarian? Ditch the bacon, add some roasted red peppers or extra pickles, and you’re set. And if you’re feeling adventurous, try different types of pickles (like bread-and-butter or spicy chips) for a new twist. I’ve even thrown in leftover ham once—no regrets.
Equipment Needed
- Nonstick Skillet or Cast-Iron Pan: My cast-iron gives the best crust, but nonstick is easier for cleanup. If you only have a regular frying pan, that works fine too!
- Spatula: For flipping and pressing the sandwich. A fish spatula is my favorite for easy maneuvering, but any sturdy one will do.
- Bacon Press or Small Pot (optional): If you want extra-crispy bread, you can use a bacon press or even a heavy mug to gently press the sandwich as it cooks.
- Cheese Grater: Freshly shredded cheese melts so much better than the pre-shredded stuff (less weird powdery texture, too!).
- Paper Towels: For blotting bacon and pickles to prevent a soggy sandwich.
- Knife and Cutting Board: For slicing bread, cheese, and pickles.
Honestly, you don’t need anything fancy here. I’ve even made these on an electric griddle at a friend’s house—worked like a charm. Just be sure to keep your pan well-oiled and don’t crank the heat too high or the bread will burn before the cheese melts. Pro tip: keep your skillet clean between batches for the crispiest results (those leftover cheese bits can burn fast!). A $15 skillet from my college days still gets the job done, so don’t stress about top-of-the-line gear.
How to Make Crispy Dill Pickle Bacon Grilled Cheese
- Cook the Bacon:
- In a large skillet over medium heat, cook 2 slices of bacon per sandwich until crispy (about 5-7 minutes), flipping halfway. Transfer to a paper towel-lined plate to drain. Pat off excess grease for extra crunch.
- Prep the Ingredients:
- Shred 1/2 cup (60g) sharp cheddar and 1/4 cup (30g) mozzarella per sandwich. Slice 4-5 pickle rounds per sandwich, then blot pickles dry with paper towels so your bread doesn’t get soggy.
- Butter one side of each bread slice (about 1/2 tbsp or 7g per slice). Make sure to get all the way to the edges for even toasting.
- Assemble the Sandwich:
- Place a slice of bread, buttered side down, on a cutting board. Layer with half the cheese, followed by cooked bacon strips, pickle slices, and then the remaining cheese. Top with the second slice of bread, buttered side up.
- If you want to sprinkle in garlic powder or a pinch of smoked paprika, now’s your moment.
- Grill the Sandwich:
- Heat your skillet over medium-low heat. When it’s hot (test by flicking a drop of water—should sizzle), carefully place the sandwich in the pan.
- Cook for about 3-4 minutes per side, pressing down gently with a spatula or bacon press. The bread should be golden and crispy, and the cheese perfectly melty. If the bread is browning too fast, lower the heat so the cheese has time to melt.
- If you’re making more than one at a time, wipe out the pan between batches for best results.
- Finish and Serve:
- Remove from pan and let rest for one minute—this helps the cheese set slightly, so it doesn’t all ooze out when you cut it.
- Slice in half (diagonally, if you want classic grilled cheese vibes) and enjoy hot!
Prep Notes: If your cheese isn’t melting, cover the pan loosely with a lid for the last minute. Too much pickle juice can make your sandwich soggy, so always blot those pickles. Don’t overload on fillings—too much can make the sandwich fall apart (I learned that the messy way!). And trust your nose—the sandwich should smell toasty and buttery, not burnt.
Cooking Tips & Techniques for the Perfect Grilled Cheese
- Low and Slow: Medium-low heat is your best friend. Cranking up the stove leads to burnt bread with unmelted cheese—trust me, I’ve done it (more than once!).
- Press for Crispiness: Gently pressing the sandwich with your spatula creates that epic diner-style crust. If you have a bacon press or a small pot, you can use it to really get that golden crunch.
- Freshly Grated Cheese: Skip the bagged stuff if you can. Freshly grated cheese melts smoother and gives you that perfect stretch. Pre-shredded cheese has anti-caking agents that can mess with the melt.
- Blot Your Fillings: Extra moisture is the enemy of a crispy grilled cheese. Always blot your bacon and pickles with a paper towel before assembling.
- Don’t Overstuff: I used to pile on way too much cheese and bacon (because, you know, more is more?), but it just made for a leaky, hard-to-eat mess. Layer thoughtfully for the best balance.
- Clean the Pan Between Batches: Burnt cheese bits from the first sandwich will stick and mess up the next one—just give the skillet a quick wipe.
My biggest lesson? Patience pays off. Let the cheese melt slowly, and don’t be tempted to rush. If you want to multitask, cook the bacon ahead of time and store it in the fridge—then it’s ready to go for sandwich assembly. And if you’re making a batch for a crowd, keep finished sandwiches warm on a baking sheet in a 200°F (95°C) oven until serving. That keeps them crispy without drying them out.
Variations & Adaptations
- Vegetarian Version: Skip the bacon and add roasted red peppers or caramelized onions for a sweet, smoky twist. I’ve even tried it with sliced mushrooms—so hearty and satisfying!
- Spicy Kick: Use spicy dill pickles or add a thin layer of jalapeños inside. A drizzle of hot sauce (like Frank’s or Sriracha) between the cheese layers takes it up a notch. My best friend loves hers with pepper jack cheese for even more heat.
- Gluten-Free Option: Substitute your favorite gluten-free bread and double-check your pickles and bacon for hidden gluten. Many brands are safe, but always check the label.
- Lighter Version: Use turkey bacon and swap the butter for olive oil spread or ghee. Light mozzarella works too, though the melt isn’t quite as dreamy.
- Dairy-Free: Plant-based butter and vegan cheese shreds make this sandwich totally dairy-free. Just be sure to pick a melty vegan cheese—I like Violife or Chao.
One of my favorite personal twists? Swapping in bread-and-butter pickles and adding a sprinkle of fresh dill—gives the sandwich a sweeter, herby flavor that’s super fun. I also love making this on rye bread for a deli-inspired vibe. Don’t be afraid to get creative—this recipe is a blank canvas for all your grilled cheese dreams!
Serving & Storage Suggestions
You’ll want to serve your crispy dill pickle bacon grilled cheese hot and fresh from the skillet—there’s just nothing like that gooey cheese pull and crunchy bread. For a classic diner presentation, cut diagonally and plate with a handful of kettle chips or a bowl of tomato soup (honestly, it’s the ultimate combo).
If you’re feeling extra, add a side of coleslaw, a few extra pickle spears, or even a quick salad. For drinks, an ice-cold soda or a tangy lemonade pairs perfectly; grown-ups might want a crisp lager or a light white wine.
Leftovers? You can refrigerate the sandwich, wrapped tightly in foil, for up to 2 days. Reheat in a nonstick pan over medium heat (no microwave, please—soggy city!). For a crowd, keep sandwiches warm in a 200°F (95°C) oven on a rack so the underside stays crispy. If you want to freeze, assemble (but don’t cook) the sandwiches, wrap them well, and freeze. Bake straight from frozen at 375°F (190°C) for about 20 minutes, flipping once.
Bonus tip: Flavors develop even more after a day in the fridge—leftover halves heated up in the pan are somehow even better!
Nutritional Information & Benefits
Each crispy dill pickle bacon grilled cheese sandwich comes in at roughly 480-550 calories, depending on bread and cheese choices. You’ll get about 22g protein, 28g fat, and 38g carbs per serving. Bacon adds a little extra salt, but you can use turkey bacon for a lighter touch. The dill pickles bring probiotics (yay, gut health!) and a punch of vitamin K.
This recipe can be adapted for gluten-free, low-carb, or dairy-free diets, as needed. For lower sodium, opt for low-sodium bacon and pickles. Allergens to watch for: dairy, gluten, and pork. As someone who tries to balance comfort food with nutrition, I love that you can sneak in extra veggies (think spinach or tomatoes) for added benefits without losing that classic grilled cheese feel.
Conclusion
If you’re ready to shake up your grilled cheese routine, this crispy dill pickle bacon grilled cheese is the answer. It’s the kind of sandwich that makes regular lunches feel special, turns rainy days into mini celebrations, and always leaves people asking for seconds. The flavor combo is unforgettable, and you can easily make it your own with fun twists and swaps.
I love this recipe for its simplicity and bold flavors—it’s become a staple in my house for good reason. Give it a try, make it your own, and don’t forget to share your version in the comments! Did you go spicy? Add extra cheese? I want to hear about all your grilled cheese adventures.
Now go grab your skillet and treat yourself—you absolutely deserve it!
Frequently Asked Questions
Can I make this crispy dill pickle bacon grilled cheese ahead of time?
Yes! Assemble the sandwiches and keep them in the fridge, then cook when ready. For best results, cook fresh, but you can reheat leftovers in a skillet to restore crispiness.
What kind of pickles work best for this recipe?
Deli-style dill pickles or sandwich stackers are ideal. Avoid sweet pickles unless you want a different flavor profile. Pat them dry for the crispiest sandwich.
Can I use a different cheese?
Absolutely! Cheddar and mozzarella are classic, but Swiss, Monterey Jack, or pepper jack work great too. Mix and match to suit your taste.
Is there a vegetarian version of this sandwich?
Yes, just skip the bacon! Add roasted veggies, caramelized onions, or even plant-based bacon for a meatless twist.
How do I keep the bread from burning before the cheese melts?
Cook on medium-low heat and cover the pan loosely if needed. Press gently with a spatula to help the cheese melt without rushing the process. Patience is key!
PrintCrispy Dill Pickle Bacon Grilled Cheese
This crispy dill pickle bacon grilled cheese sandwich combines smoky bacon, tangy dill pickles, and a blend of melty cheddar and mozzarella for a next-level twist on the classic grilled cheese. Ready in under 20 minutes, it’s the ultimate comfort food for lunch, dinner, or a hearty snack.
- Prep Time: 7 minutes
- Cook Time: 10 minutes
- Total Time: 17 minutes
- Yield: 1 sandwich 1x
- Category: Main Course
- Cuisine: American
Ingredients
- 2 slices thick-cut sourdough bread (or white, whole wheat, or rye)
- 1/2 cup (2 oz) sharp cheddar cheese, shredded
- 1/4 cup (1 oz) mozzarella cheese, shredded
- 2 slices bacon, cooked until crispy
- 4–5 slices dill pickles, patted dry
- 1 tablespoon unsalted butter, softened
- Optional: pinch garlic powder or smoked paprika
- Optional: fresh dill or chives
- Optional: hot sauce
Instructions
- In a large skillet over medium heat, cook bacon until crispy (about 5-7 minutes), flipping halfway. Transfer to a paper towel-lined plate and blot excess grease.
- Shred cheddar and mozzarella cheese. Slice pickles and blot dry with paper towels.
- Butter one side of each bread slice, spreading evenly to the edges.
- Place one slice of bread, buttered side down, on a cutting board. Layer with half the cheese, bacon, pickles, and remaining cheese. Top with the second slice of bread, buttered side up. Sprinkle with garlic powder or smoked paprika if desired.
- Heat skillet over medium-low heat. When hot, add the sandwich. Cook for 3-4 minutes per side, pressing gently with a spatula or bacon press, until bread is golden and cheese is melted. Lower heat if bread browns too quickly.
- Remove from pan and let rest for 1 minute. Slice in half and serve hot.
Notes
For best results, use freshly shredded cheese and blot pickles and bacon to prevent sogginess. Cook on medium-low heat for even melting and crispiness. For a vegetarian version, omit bacon and add roasted veggies. Gluten-free bread and vegan cheese can be substituted as needed. Wipe out the pan between batches to avoid burnt cheese bits.
Nutrition
- Serving Size: 1 sandwich
- Calories: 500
- Sugar: 4
- Sodium: 1100
- Fat: 28
- Saturated Fat: 13
- Carbohydrates: 38
- Fiber: 2
- Protein: 22
Keywords: grilled cheese, bacon, dill pickle, sandwich, comfort food, easy lunch, skillet, cheddar, mozzarella, crispy, diner-style