The first time I bit into one of these chocolate peanut butter Rice Krispie cups, I swear it was like a little fireworks show in my mouth—crunchy, creamy, and chocolatey all at once. You know that feeling when you need a sweet treat but you can’t be bothered to turn on the oven? That’s exactly why I keep coming back to this recipe. These no bake cups have rescued me more times than I can count, whether it’s for a last-minute potluck, a late-night craving, or just something fun to make with the kids on a rainy afternoon.
I stumbled upon the idea for chocolate peanut butter Rice Krispie cups back when I was hunting for something simple, but not boring. I remember being in my kitchen, staring at a box of Rice Krispies, a jar of peanut butter, and some chocolate chips, thinking, “Why not?” That’s how my favorite easy candy treat was born! Over time, I’ve tweaked and tested, aiming for that perfect bite—just the right amount of crunch, the creamy peanut butter layer, topped with a smooth, glossy chocolate shell. If you love classic flavor combos, this one’s a total win.
Let’s be real: Anything with peanut butter and chocolate is already off to a good start, but when you add in the crispiness of Rice Krispies, it’s next-level snack territory. These chocolate peanut butter Rice Krispie cups are a hit with everyone—kids, adults, picky eaters, you name it. Plus, they’re gluten-free (just check your cereal!), require zero baking, and use ingredients you probably already have stashed away. I’ve made this recipe at least a dozen times, and it never fails to impress or disappear in record time. Whether you’re a busy parent, a college student, or anyone in between, you’ll love how easy, quick, and downright delicious these cups are.
Why You’ll Love This Recipe
- Quick & Easy: No baking, no fancy gadgets, and you’ll have a batch ready in under 30 minutes (plus a little chill time—if you can wait that long!).
- Simple Ingredients: All you need is some cereal, peanut butter, chocolate chips, and a touch of sweetness. Honestly, you probably already have everything in your pantry.
- Perfect for Any Occasion: These chocolate peanut butter Rice Krispie cups are my go-to for birthdays, holiday parties, or just because. They pack up great for lunchboxes and road trips, too.
- Crowd-Pleaser: I’ve brought these to countless gatherings and never had leftovers. Kids and adults both love them—trust me, they vanish fast!
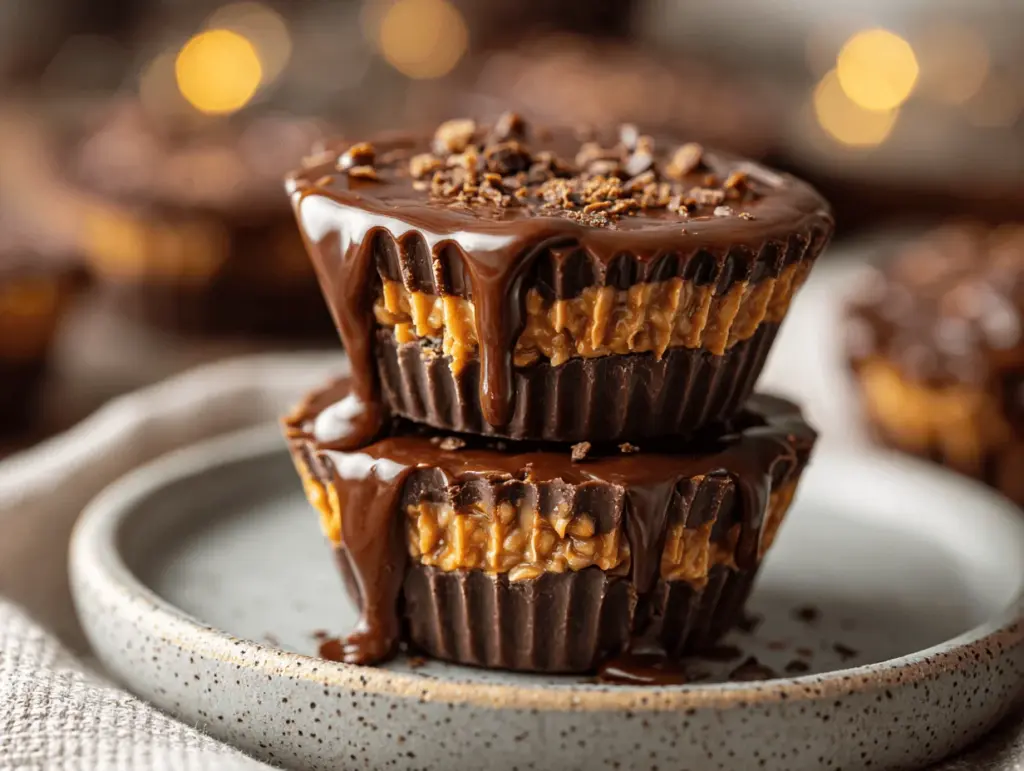
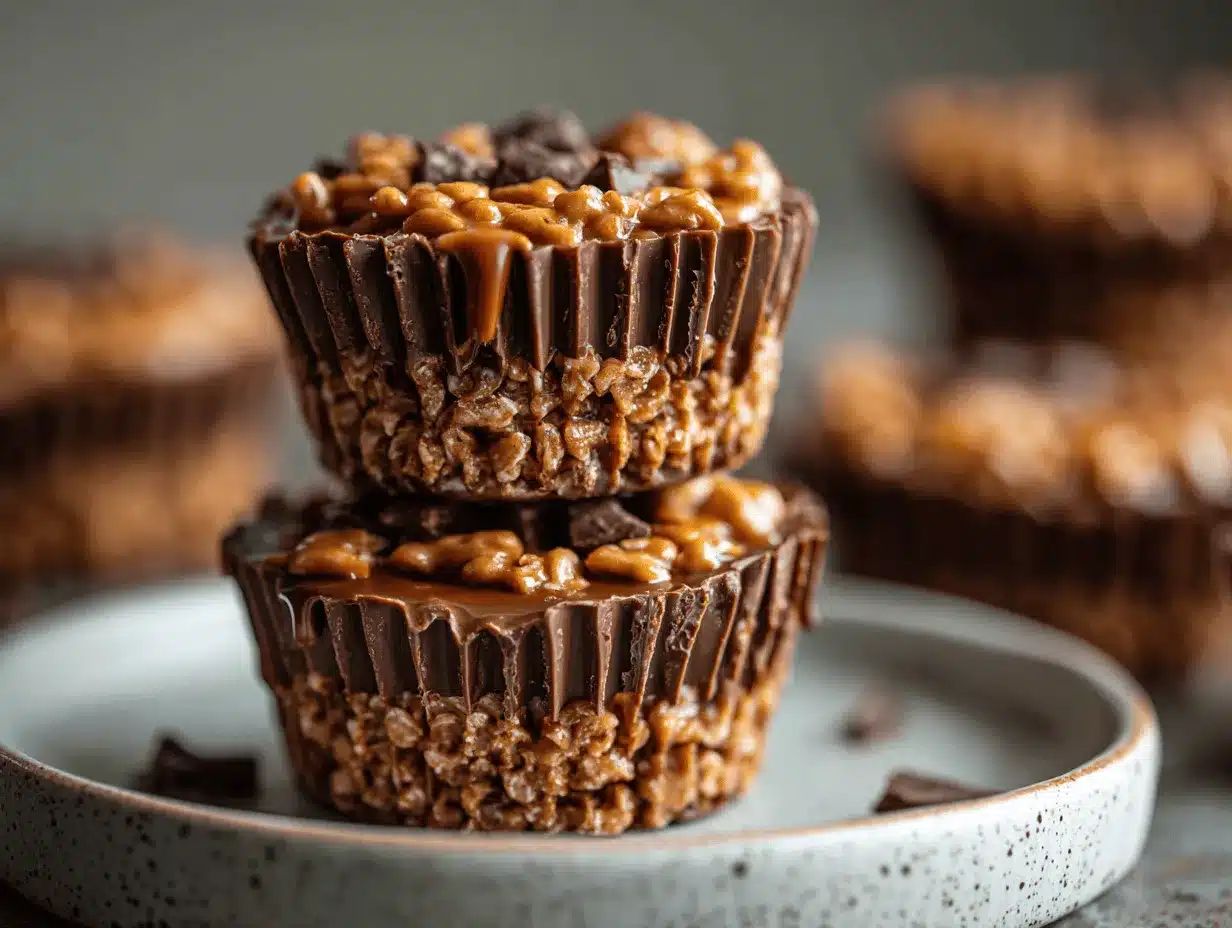
- Unbelievably Delicious: Imagine biting through a rich chocolate layer, into creamy peanut butter, and then a crispy, chewy base. It’s sweet, salty, and crunchy all at once.
What makes these chocolate peanut butter Rice Krispie cups stand out from the rest? It’s all in the method. Instead of just mixing everything together, I like to layer the peanut butter between the cereal base and the chocolate topping. This gives you those defined, bakery-style layers and a perfect bite every time. I also blend the peanut butter with a little coconut oil for extra creaminess and easy spreading. Trust me, this step makes a big difference!
This recipe is more than just a treat—it’s a memory-maker. There’s something so nostalgic and comforting about the combo of peanut butter, chocolate, and crispy cereal. It’s the kind of snack that makes you pause after that first bite and just smile to yourself. Whether you’re impressing guests or just treating yourself, these cups turn any moment into a special occasion. And the best part? You don’t have to fuss over a hot oven or fancy decorating. Simple, satisfying, and oh-so-irresistible.
What Ingredients You Will Need
This recipe uses simple, wholesome ingredients to create a treat that’s both satisfying and fun to make. Most are pantry staples, and you can swap in alternatives to fit dietary needs or flavor cravings. Here’s what you’ll need for these delicious chocolate peanut butter Rice Krispie cups:
- Rice Krispies cereal (about 3 cups / 75g) – This is your crispy, crunchy base. You can use any crispy rice cereal, but I stick with the classic for that nostalgic flavor. For a gluten-free version, just double-check your cereal label.
- Creamy peanut butter (3/4 cup / 180g) – I always go for smooth, natural peanut butter. It blends easier and gives you that ultra-creamy middle layer. If you prefer crunchy, go for it! Almond or sunflower seed butter also work.
- Honey or maple syrup (1/3 cup / 80ml) – This helps sweeten and bind the base together. I usually use honey for its rich flavor, but maple syrup is a great vegan swap.
- Coconut oil (2 tablespoons / 28g) – Adding a little coconut oil to both the peanut butter and chocolate layers gives you that glossy finish and helps everything set up perfectly in the fridge. Butter works too, but I love the slight coconut hint.
- Semi-sweet chocolate chips (1 cup / 175g) – For that luscious chocolate topping. Dark chocolate works if you like a richer, less sweet cup. Milk chocolate is fun for a sweeter treat.
- Fine sea salt (a pinch) – Just a tiny sprinkle brings out all the flavors and makes everything pop. Don’t skip it!
- Optional: Vanilla extract (1/2 teaspoon / 2.5ml) – I sometimes stir a little into the base for extra warmth and depth.
Ingredient tips and swaps:
- If you want a gluten-free treat, make sure your cereal is certified gluten-free.
- Swap peanut butter for almond butter or sunflower seed butter if you need a nut-free option.
- If you’re vegan, use maple syrup instead of honey and choose dairy-free chocolate chips.
- For a lower-sugar version, try using a sugar-free syrup and dark chocolate.
- I’ve found that generic brand cereals can get soggier faster, so stick with name brands if you want that perfect crunch.
Honestly, the best part about these chocolate peanut butter Rice Krispie cups is how easy it is to mix and match. Grab what you have, and let’s get started!
Equipment Needed
- 12-cup muffin tin – Standard size works best. If you have a silicone muffin pan, it’ll make popping out your cups a breeze (no sticking!).
- Paper or silicone muffin liners – These keep cleanup easy and help the cups hold their shape. I love the reusable silicone ones for less waste.
- Heatproof mixing bowl – You’ll need this for melting chocolate and peanut butter. Glass or metal both work well.
- Microwave or stovetop – For melting. If you don’t have a microwave, a double boiler over low heat does the trick.
- Spatula or wooden spoon – For mixing everything together. I use a silicone spatula so nothing sticks.
- Tablespoon or small cookie scoop – Helps portion out the layers evenly in the muffin tin. Not essential, but it keeps things tidy.
- Refrigerator or freezer – To set the cups quickly. If your kitchen is warm, the freezer is your friend!
If you don’t have muffin liners, you can lightly grease each muffin cup with a little coconut oil or butter. I’ve done this in a pinch—just let the cups set fully before popping them out with a butter knife. For melting chocolate, I used to use a makeshift double boiler with a glass bowl over a pot of simmering water. Just remember to stir often and keep an eye out for any water getting into the chocolate (it’ll seize up fast!). Budget tip: Dollar store muffin tins and spatulas work just fine for this recipe, so no need to splurge.
How to Make Chocolate Peanut Butter Rice Krispie Cups
-
Prep your muffin tin:
Line a standard 12-cup muffin tin with paper or silicone liners. This keeps the cups from sticking and makes for easy cleanup. (If you’re out of liners, just grease each cup lightly with coconut oil or butter.) -
Make the crispy base:
In a large mixing bowl, add 3 cups (75g) Rice Krispies. In a separate microwave-safe bowl, combine 1/3 cup (80ml) honey or maple syrup and 1 tablespoon (14g) coconut oil. Microwave in 20-second bursts, stirring between each, until melted and smooth. (You can also do this on the stovetop over low heat.) Stir in 1/2 cup (120g) creamy peanut butter and 1/2 teaspoon (2.5ml) vanilla extract if using. Mix until fully combined and glossy. -
Combine and press:
Pour the peanut butter mixture over the Rice Krispies. Stir gently but thoroughly until every piece is coated. Spoon the mixture evenly into the 12 muffin cups (about 2 heaping tablespoons each). Press down firmly with the back of a spoon to create an even, compact base. The tighter you pack it, the better the cups hold together! If it sticks, lightly oil your spoon. -
Make the peanut butter layer:
In a small bowl, melt 1/4 cup (60g) creamy peanut butter with 1/2 tablespoon (7g) coconut oil—about 20-30 seconds in the microwave. Stir until smooth. Spoon about 1 teaspoon of this mixture onto each Rice Krispie base and spread gently. This gives you that creamy middle layer everyone loves. -
Melt the chocolate topping:
In a separate heatproof bowl, combine 1 cup (175g) semi-sweet chocolate chips and 1/2 tablespoon (7g) coconut oil. Microwave in 30-second bursts, stirring between each, until melted and silky. (Or use a double boiler.) If the chocolate seizes or looks grainy, add a splash more coconut oil and stir well. -
Assemble and finish:
Spoon about 1 tablespoon of the melted chocolate over each cup, swirling gently with the back of a spoon to cover the peanut butter layer completely. Tap the muffin tin on the counter to smooth out the tops. Sprinkle each cup with a pinch of fine sea salt—this step is game-changing! -
Chill to set:
Place the muffin tin in the refrigerator for at least 1 hour (or 20-30 minutes in the freezer if you’re impatient, like me). The cups are ready when the chocolate is firm to the touch. -
Remove and enjoy:
Once set, pop each cup out of the tin and peel off the liner. Store in an airtight container in the fridge for up to a week or freeze for up to 2 months. (Honestly, they rarely last that long in my house!)
Troubleshooting: If your cups crumble when removing, try packing the base tighter next time. If the chocolate topping cracks, let the cups sit at room temp for 5 minutes before eating. The peanut butter layer might seem soft at first, but it firms up in the fridge. For extra neat layers, chill each layer for 5-10 minutes before adding the next one.
Sensory cues: The base should feel firm and slightly sticky, the peanut butter creamy but not runny, and the chocolate silky and glossy. You’ll smell that nutty, chocolatey aroma as you assemble—a good sign you’re doing it right! My personal tip: Make a double batch. Trust me, these disappear so quickly.
Cooking Tips & Techniques
- Use room-temperature peanut butter for easy mixing and smooth layers. Cold, stiff peanut butter can make the base crumbly.
- Pack the base firmly into the muffin cups. I’ve had a few cups fall apart when I didn’t press hard enough—don’t be shy with the spoon!
- Melt chocolate and peanut butter gently. If you overheat them, the mixture can seize or become grainy. Short bursts in the microwave and lots of stirring are your friends.
- Chill between layers for extra-neat lines. If you’re making these for a party or for photos, pop the tin in the freezer between steps for five minutes. The layers won’t blend together.
- Don’t skip the salt! That little sprinkle on top really makes the chocolate and peanut butter flavors pop. I learned that one the hard way—my early batches tasted a little flat without it.
- Use a silicone spatula to scrape every last bit of peanut butter and chocolate out of the bowls. Less mess and more goodness in each cup.
- Work quickly in a warm kitchen. If it’s hot, your chocolate might stay soft longer. Chill the muffin tin between steps for best results.
I’ve definitely made my share of mistakes—once, I used a super-cheap chocolate chip brand and the topping never set (lesson: stick with quality chocolate for a glossy finish). Another time, I forgot to press the base and the cups just fell apart. Now, I always take my time on the base and use a sturdy spoon. If you’re making a big batch, enlist a friend or a kiddo to help with layering—it goes much faster and is way more fun.
Multitasking tip: While each layer chills, you can wash your bowls or prep a second batch. I like to set up a little assembly line if I’m doubling the recipe for a party. If you want perfect, bakery-worthy cups, patience is your best friend—don’t rush the chilling time. But honestly, even if your layers aren’t perfect, they’ll still taste amazing!
Variations & Adaptations
- Vegan version: Use maple syrup instead of honey, and choose dairy-free chocolate chips. Swap in plant-based butter or coconut oil for a 100% vegan treat.
- Nut-free option: Use sunflower seed butter or soy nut butter in place of peanut butter. Always double-check your cereal and chocolate for potential allergens if you’re making these for someone with allergies.
- Flavor twists: Stir a little cinnamon or espresso powder into the base for a grown-up spin. Or, add a few mini marshmallows for a s’mores vibe. During the holidays, a dash of peppermint extract in the chocolate layer is so festive!
- Extra crunch: Add 1/4 cup (30g) of chopped peanuts, pretzel bits, or toasted coconut to the cereal base for more texture.
- No muffin tin? Press the mixture into an 8×8-inch (20x20cm) pan lined with parchment, layer as usual, then slice into squares once set.
I’ve personally made a version with almond butter and dark chocolate—total game changer for grown-up palates. Sometimes I’ll swirl a bit of raspberry jam into the peanut butter layer for a PB&J flavor. Get creative! These chocolate peanut butter Rice Krispie cups are endlessly customizable, so play around with your favorites and make them your own.
Serving & Storage Suggestions
Serve these chocolate peanut butter Rice Krispie cups chilled, straight from the fridge for the best bite and snap. They look adorable stacked on a cake stand or arranged in a pretty box for gifting—think teacher treats, party favors, or holiday cookie swaps. Pair with a glass of cold milk, hot coffee, or even a scoop of vanilla ice cream for the ultimate dessert.
For storage, keep the cups in an airtight container in the refrigerator for up to 7 days. If you want to stash some for later (or hide them from snack-happy kids!), freeze them in a single layer, then transfer to a zip-top bag. They’ll keep for up to 2 months. To serve from frozen, let them sit at room temp for 10-15 minutes so the chocolate softens just enough. The flavors actually deepen after a day or two in the fridge, so don’t be afraid to make them ahead of time!
If you’re packing these for lunches or picnics, wrap each cup in parchment or wax paper to prevent sticking. For parties, I sometimes drizzle a little extra melted chocolate on top just before serving—it’s a fun, fancy touch with zero extra effort.
Nutritional Information & Benefits
Each chocolate peanut butter Rice Krispie cup (based on 12 servings) has about 180-200 calories, 9g fat, 24g carbs, and 3g protein. Not bad for a decadent-tasting treat! The peanut butter adds some heart-healthy fats and protein, while the cereal base keeps things light and crispy. If you use dark chocolate, you’ll get a boost of antioxidants, too.
This recipe is naturally gluten-free (just check your cereal and chocolate labels), and with the right swaps, can be made vegan or nut-free. The main allergens here are peanuts and chocolate—always double-check if making for anyone with dietary restrictions. I love that you can tweak the sweetness and chocolate intensity based on your needs, making this a feel-good treat you can actually enjoy more often. For me, these little cups are the perfect portion-controlled sweet fix!
Conclusion
So there you have it—my tried-and-true chocolate peanut butter Rice Krispie cups recipe. Whether you’re a seasoned baker, a college student with just a microwave, or a parent looking for a fun kitchen project with the kids, these no-bake treats never disappoint. They’re fast, easy, and packed with those classic flavors everyone loves.
Don’t be afraid to put your own spin on them—swap in your favorite nut butter, throw in some mix-ins, or try fun toppings. I love how these little cups bring smiles to everyone’s faces (and honestly, I always sneak a couple for myself before the rest disappear!).
If you try this recipe, let me know in the comments how it turned out or what twists you added. Share with your friends, pin for later, or tag me if you post your creation—seeing your versions makes my day. Happy snacking, and remember: life’s too short to skip dessert!
FAQs
How long do chocolate peanut butter Rice Krispie cups last?
They’ll stay fresh in the fridge for about a week, or you can freeze them for up to 2 months. Just let frozen cups thaw for about 10-15 minutes before enjoying.
Can I make these vegan or dairy-free?
Absolutely! Use maple syrup instead of honey and choose dairy-free chocolate chips. Coconut oil works great as a plant-based fat.
Do I have to use peanut butter?
Nope! Almond butter, cashew butter, or sunflower seed butter all work well. Just keep in mind that the flavor will change slightly depending on your swap.
What if I don’t have a muffin tin?
You can press the mixture into a parchment-lined 8×8-inch pan, layer as usual, and cut into squares once set. Easy and just as tasty!
Why did my chocolate topping crack?
This usually happens if the chocolate is too cold or the cups are removed straight from the freezer. Let them sit at room temperature for 5 minutes before eating to avoid cracking.
PrintChocolate Peanut Butter Rice Krispie Cups

These easy, no-bake chocolate peanut butter Rice Krispie cups are the ultimate sweet treat—crunchy, creamy, and chocolatey with defined layers. Perfect for parties, lunchboxes, or a quick dessert fix, they come together in under 30 minutes and are naturally gluten-free.
- Prep Time: 15 minutes
- Cook Time: 5 minutes
- Total Time: 1 hour 20 minutes
- Yield: 12 cups 1x
- Category: Dessert
- Cuisine: American
Ingredients
- 3 cups Rice Krispies cereal (75g)
- 3/4 cup creamy peanut butter (180g), divided
- 1/3 cup honey or maple syrup (80ml)
- 2 tablespoons coconut oil (28g), divided
- 1 cup semi-sweet chocolate chips (175g)
- Fine sea salt, a pinch
- 1/2 teaspoon vanilla extract (optional, 2.5ml)
Instructions
- Line a standard 12-cup muffin tin with paper or silicone liners. If you don’t have liners, lightly grease each cup with coconut oil or butter.
- In a large mixing bowl, add 3 cups Rice Krispies cereal.
- In a separate microwave-safe bowl, combine 1/3 cup honey or maple syrup and 1 tablespoon coconut oil. Microwave in 20-second bursts, stirring between each, until melted and smooth. (Alternatively, melt on the stovetop over low heat.)
- Stir in 1/2 cup creamy peanut butter and 1/2 teaspoon vanilla extract (if using) until fully combined and glossy.
- Pour the peanut butter mixture over the Rice Krispies. Stir gently until every piece is coated.
- Spoon the mixture evenly into the 12 muffin cups (about 2 heaping tablespoons each). Press down firmly with the back of a spoon to create a compact base.
- In a small bowl, melt 1/4 cup creamy peanut butter with 1/2 tablespoon coconut oil (about 20-30 seconds in the microwave). Stir until smooth.
- Spoon about 1 teaspoon of the peanut butter mixture onto each Rice Krispie base and spread gently.
- In a separate heatproof bowl, combine 1 cup semi-sweet chocolate chips and 1/2 tablespoon coconut oil. Microwave in 30-second bursts, stirring between each, until melted and silky. (Or use a double boiler.)
- Spoon about 1 tablespoon of the melted chocolate over each cup, swirling gently to cover the peanut butter layer. Tap the muffin tin on the counter to smooth out the tops.
- Sprinkle each cup with a pinch of fine sea salt.
- Chill the muffin tin in the refrigerator for at least 1 hour (or 20-30 minutes in the freezer) until the chocolate is firm.
- Once set, remove each cup from the tin and peel off the liner. Store in an airtight container in the fridge for up to a week or freeze for up to 2 months.
Notes
For vegan cups, use maple syrup and dairy-free chocolate chips. For nut-free, use sunflower seed butter. Pack the base firmly for best results. Chill between layers for neat lines. Store chilled for best texture. If chocolate cracks, let cups sit at room temp for 5 minutes before eating.
Nutrition
- Serving Size: 1 cup
- Calories: 190
- Sugar: 13
- Sodium: 70
- Fat: 9
- Saturated Fat: 4
- Carbohydrates: 24
- Fiber: 1
- Protein: 3
Keywords: chocolate peanut butter rice krispie cups, no bake dessert, gluten free treat, easy candy, peanut butter chocolate, rice krispie treats, party snack, kid friendly, lunchbox treat, homemade candy