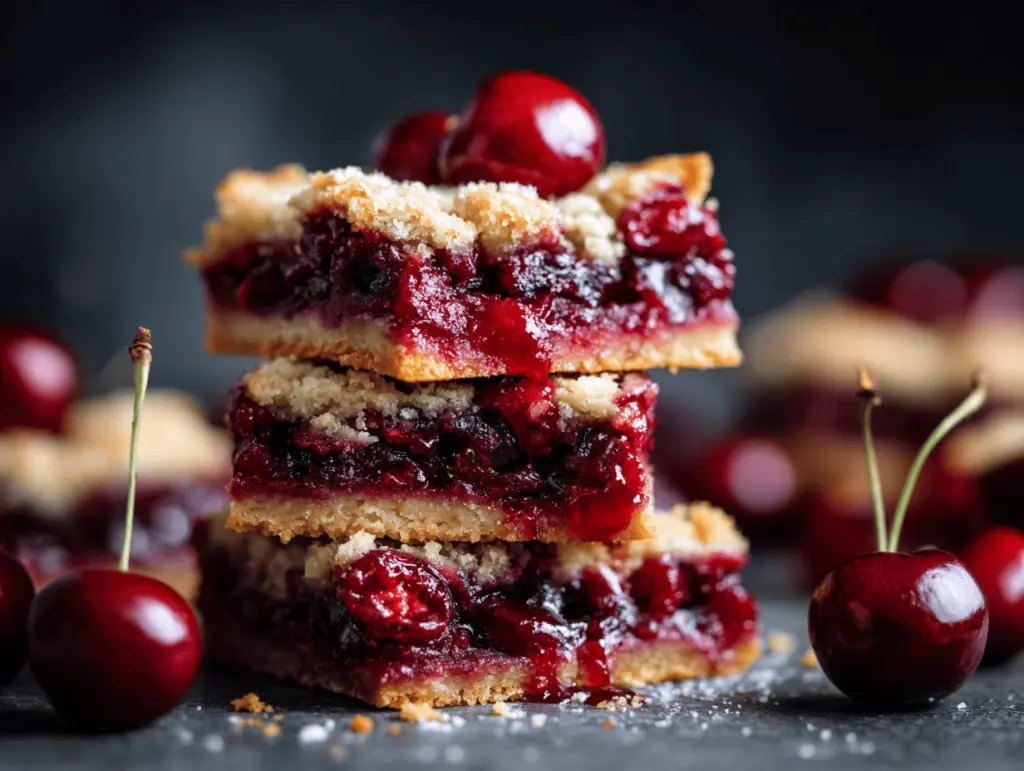
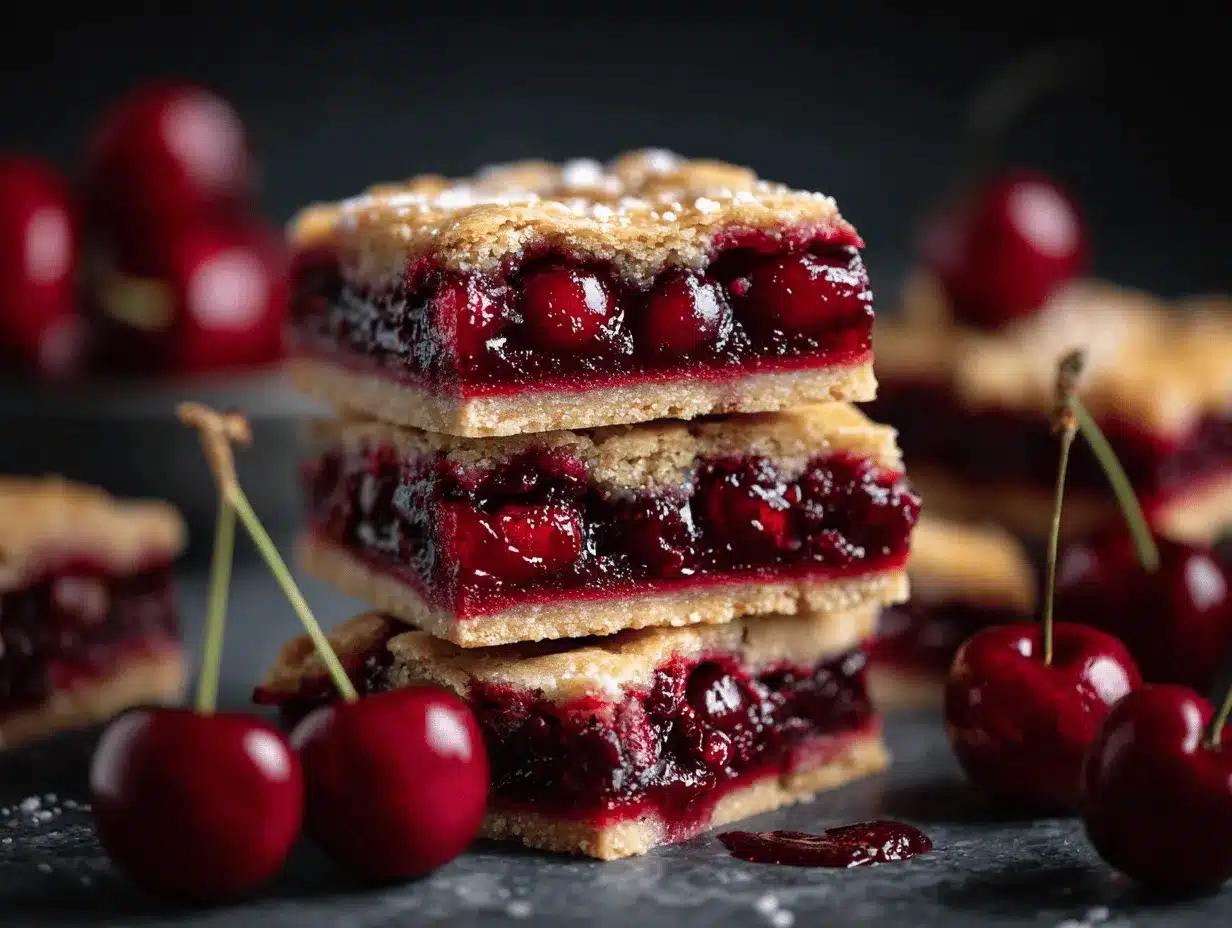
The scent of bubbling cherries and buttery crust wafting from the oven? Yeah, that’s the smell of summer at my place. The first bite of these cherry pie bars—tart, jammy cherries with a sweet, golden crumble—always transports me to backyard picnics and family reunions where the dessert table was the main attraction. I’ll be honest, I first threw together this cherry pie bars recipe when my pie crust skills were failing me (rolling dough is not my favorite thing, you know?), but I still wanted that classic cherry pie flavor in a way anyone could manage. Spoiler alert: it totally worked. These easy homemade summer dessert bars are now on repeat all season long, and I bet they’ll become a staple in your kitchen too.
What I love most about this cherry pie bars recipe is its honest simplicity. No fussy crust, just a quick mix, spread, and bake situation. It’s like the best of pie and a cookie bar had a baby—crispy edges, gooey cherry center, and a crumble topping that’s just buttery enough to make you swoon. Over the years, I’ve tested all sorts of tweaks (extra almond extract, a handful of oats in the topping, even swapping in different fruits), but cherries are the star here. If you’re a fan of classic fruit desserts that come together quickly and always impress, you’re in for a treat. Plus, these bars slice up perfectly for summer potlucks, picnics, or just sneaking from the fridge at midnight.
After making this recipe a dozen times (and sharing with friends who always ask for seconds), I can promise: these cherry pie bars deliver that old-fashioned cherry pie vibe with way less effort—and a whole lot more fun. Whether you’ve got a can of cherry pie filling in the pantry, a pile of fresh cherries from the farmers market, or just a craving for something sweet and shareable, you’re going to love these bars. Let’s get baking!
Why You’ll Love This Cherry Pie Bars Recipe
- Quick & Easy: These cherry pie bars come together in about 15 minutes of prep—no need to chill dough or fuss with lattice tops. Perfect for busy summer days or when you want dessert, like, now.
- Simple Ingredients: Everything you need is probably already in your kitchen: flour, butter, sugar, eggs, and a can (or jar) of cherry pie filling. No specialty shopping required.
- Perfect for Summer Gatherings: I make these for picnics, BBQs, and family reunions. They’re sturdy enough to pack and slice up without a mess, but still have that wow-factor.
- Crowd-Pleaser: These bars are a universal favorite, even among folks who claim they “don’t like pie.” Kids and grown-ups both go back for seconds—trust me, I’ve witnessed it!
- Unbelievably Delicious: Think golden, buttery crust, a juicy cherry layer that’s just tart enough, and a crumble topping that’ll have you licking your fingers. It’s comfort food meets summer fruit in the best way.
The real magic in this cherry pie bars recipe is the balance. The crust doubles as the topping, which means less work and more flavor. There’s a little almond extract in the dough that makes everything taste like a bakery treat. Honestly, these bars are the kind of dessert that makes you pause after the first bite, eyes closed, thinking, “Yup, this is what I was craving.”
I’ve made a lot of fruit bars in my time, but what sets these apart is the texture—soft, chewy, with a bit of crispy edge. No dry, cakey bars here! And since you can swap in different fillings or add nuts, it’s endlessly adaptable. Whether you’re a baking newbie or a pie pro, these cherry pie bars are a total win for summer—and every season, really.
What Ingredients You Will Need
This recipe uses simple, wholesome ingredients to deliver bold cherry pie flavor without the hassle. Most of these are pantry staples, but I’ve included a few tips and swaps based on all my cherry pie bar adventures.
-
For the Dough (Crust & Topping):
- All-purpose flour (2 1/2 cups / 315g) – The base for both crust and crumble.
- Granulated sugar (1 cup / 200g) – Sweetens but doesn’t overpower the cherries.
- Unsalted butter (1 cup / 226g, softened) – Go for real butter if you can, it gives the best flavor and texture.
- Large eggs (2, room temperature) – Binds everything together; let them sit out for about 30 minutes for better blending.
- Vanilla extract (1 1/2 teaspoons) – Classic flavor boost.
- Almond extract (1/2 teaspoon, optional) – This is my secret weapon! Adds that “bakery” taste, but you can skip if allergic.
- Salt (1/2 teaspoon) – Balances the sweetness.
- Baking powder (1 teaspoon) – Gives a little lift to the dough.
-
For the Cherry Filling:
- Cherry pie filling (1 can, 21 oz / 595g) – I like Lucky Leaf or Comstock brand for best consistency. If you’re using homemade or fresh cherries, see the variations below.
- Fresh lemon zest (from 1 lemon, optional) – Brightens up the cherry flavor. Highly recommend, especially if using canned filling.
-
For the Optional Glaze:
- Powdered sugar (1/2 cup / 60g)
- Milk or cream (1-2 tablespoons) – Add just enough for a thick drizzle.
- Vanilla extract (1/4 teaspoon)
Ingredient Tips & Swaps:
- Use gluten-free all-purpose flour if you need a gluten-free version—Bob’s Red Mill 1:1 is my go-to.
- If you want less sugar, reduce it by 1/4 cup; the bars still turn out great—trust me, I’ve tried!
- For a dairy-free option, use vegan butter (like Earth Balance) in place of regular butter.
- No cherry pie filling? Use about 2 cups (300g) pitted, chopped fresh or frozen cherries tossed with 1/3 cup (65g) sugar and 1 tablespoon (8g) cornstarch.
- Not a cherry fan? Substitute blueberry, raspberry, or apple pie filling—equally delicious!
Equipment Needed
- 9×13-inch baking pan – Metal or glass both work. I prefer metal for crispier edges.
- Mixing bowls – At least two: one for dough, one for the filling if making your own.
- Hand mixer or stand mixer – Makes creaming butter and sugar a breeze, but you can use a sturdy whisk and some elbow grease if needed.
- Measuring cups and spoons – For accuracy (baking is science, after all!).
- Rubber spatula or wooden spoon – For folding and spreading the dough and filling.
- Microplane or fine grater – If you’re using fresh lemon zest for extra zing.
- Wire rack – For cooling bars evenly.
- Parchment paper – This helps lift the bars out easily for perfect slices. If you’re out, just grease the pan well.
I’ve baked these cherry pie bars in both glass and metal pans. Metal gives a slightly crisper bottom, but glass works perfectly if that’s what you have. If you don’t have a hand mixer, a sturdy fork gets the job done—just takes a little more muscle. And for easy cleanup, I always line my pan with parchment (I buy the big rolls at Costco—saves money and hassle!).
How to Make Cherry Pie Bars – Step by Step
- Preheat & Prep: Heat your oven to 350°F (175°C). Line a 9×13-inch (23×33 cm) baking pan with parchment paper, leaving a bit of overhang on the sides for easy lifting later. Lightly grease the paper.
- Cream Butter & Sugar: In a large bowl, beat 1 cup (226g) softened unsalted butter with 1 cup (200g) granulated sugar using a hand mixer or stand mixer on medium speed until light and fluffy—about 2-3 minutes. If you’re mixing by hand, just be patient until the mixture looks pale and creamy.
- Add Eggs & Flavorings: Add 2 large eggs, one at a time, mixing well after each addition. Add 1 1/2 teaspoons vanilla extract and 1/2 teaspoon almond extract (if using). Beat until smooth. If the mixture looks a little curdled, don’t panic—it’ll come together once you add the dry ingredients.
- Combine Dry Ingredients: In a separate bowl, whisk together 2 1/2 cups (315g) all-purpose flour, 1 teaspoon baking powder, and 1/2 teaspoon salt. Gradually add the dry ingredients to the wet, mixing until just combined. The dough will be thick—almost like sugar cookie dough.
- Press Dough into Pan: Scoop about 2/3 of the dough into your prepared pan. Using a spatula or your fingers (the fun part!), press it into an even layer covering the bottom. It doesn’t have to be perfect—just do your best.
- Add Cherry Filling: Spread 1 can (21 oz / 595g) cherry pie filling evenly over the dough. If you’re using lemon zest, sprinkle it over the cherries now. Try to get an even layer so every bite gets some cherry!
- Crumble Topping: Use your fingers to pinch off pieces of the remaining dough and scatter them over the cherry layer. It won’t cover the whole top, and that’s what you want—those little cherry “windows” look so pretty after baking.
- Bake: Bake in the preheated oven for 35-40 minutes, or until the top is lightly golden and the cherry filling is bubbling around the edges. Rotate the pan halfway through for even baking. If your oven runs hot, start checking at 33 minutes.
- Cool: Let the bars cool in the pan for at least 30 minutes, then lift out using the parchment overhang and cool completely on a wire rack. If you try to slice them hot, they’ll be messy—patience pays off here.
- Optional Glaze: Stir together 1/2 cup (60g) powdered sugar, 1-2 tablespoons milk or cream, and 1/4 teaspoon vanilla extract until smooth. Drizzle over cooled bars for extra sweetness and that bakery look.
- Slice & Serve: Cut into 18-24 bars (depending on how big you like them). Enjoy at room temp or slightly chilled.
Troubleshooting: If your dough feels too sticky, chill it for 10 minutes. If it’s too dry, add a splash of milk. Bars look too brown? Tent loosely with foil for the last 5 minutes. If the filling bubbles over, just trim the edges—a little mess means they’re homemade!
Personal tip: For neater slices, refrigerate the bars for 1 hour before cutting. Use a sharp knife and wipe it clean between cuts for perfect Pinterest-worthy squares!
Cooking Tips & Techniques
- Don’t Overmix the Dough: Once you add the flour, mix just until combined. Overmixing can make the bars tough instead of tender. Learned that one the hard way after my first batch turned out a bit chewy.
- Room Temperature Ingredients Matter: Let your butter and eggs warm up before starting—this helps everything blend smoothly. Cold butter will leave you with uneven dough and pockets of flour.
- Spread the Cherry Filling Evenly: Use the back of a spoon to gently nudge the filling into all the corners. If you pile it all in the center, you’ll end up with soggy middle bars (been there, fixed that!).
- Watch for Doneness: Every oven is a little different. When the edges are golden and the filling bubbles, you’re good to go. If you’re unsure, insert a toothpick into the crust; it should come out clean.
- Cool Before Slicing: These bars set up as they cool. Cutting too soon means a gooey mess—unless that’s what you’re after, in which case, grab a fork!
- For Extra Crispy Edges: Use a metal pan and bake towards the lower end of your oven. If you love soft, cakey bars, glass pans work too.
I’ve definitely rushed the cooling step out of impatience (who hasn’t?), but trust me—waiting gives you cleaner slices and lets the flavors mingle. And if you’re baking for a crowd, doubling the recipe and using a rimmed half-sheet pan works great—just add 8-10 minutes to the baking time.
Variations & Adaptations
- Fresh Cherry Bars: Use 2 cups (300g) pitted, chopped fresh cherries tossed with 1/3 cup (65g) sugar and 1 tablespoon (8g) cornstarch. The bars will be a bit more tart and “jammy”—super summery!
- Gluten-Free Cherry Pie Bars: Swap the all-purpose flour for a 1:1 gluten-free baking blend. I’ve tried Bob’s Red Mill and King Arthur Flour versions—both work well, just expect a slightly crumblier texture.
- Mixed Berry Bars: Use any combo of berry pie filling (blueberry, raspberry, blackberry, or a mix). You can even do half cherry, half blueberry for a red-and-blue Fourth of July vibe.
- Dairy-Free Version: Use vegan butter and plant-based milk for the glaze. I’ve made this for friends with allergies, and nobody even noticed!
- Nutty Crunch: Sprinkle 1/2 cup (60g) sliced almonds or chopped pecans over the top before baking for a little crunch. Pairs beautifully with the almond extract in the dough.
- Lemon-Lovers: Add 2 teaspoons lemon zest to the dough and a squeeze of lemon juice to the glaze. Bright, tangy, and perfect for summer.
One of my favorite tweaks was mixing in 1/4 cup (20g) quick oats to the topping for a heartier, almost streusel-like effect. Don’t be afraid to experiment—these bars are super forgiving and love a personal twist.
Serving & Storage Suggestions
These cherry pie bars are best served at room temperature, where the filling is gooey and the crust is tender but stable. If you’re feeling fancy, dust with a little powdered sugar or drizzle with glaze just before serving for that bakery finish.
- Serving Ideas: Top with a scoop of vanilla ice cream or a dollop of whipped cream for dessert. For brunch, serve alongside fresh fruit and coffee (they pair so well with cold brew or iced tea!).
- Storage: Store leftover bars in an airtight container at room temperature for up to 2 days, or in the refrigerator for up to 5 days. The flavors deepen as they sit—so honestly, the bars taste even better on day two.
- Freezing: Cherry pie bars freeze like a dream. Place cooled, cut bars in a single layer in a freezer bag or airtight container. Freeze for up to 2 months. Thaw overnight in the fridge and bring to room temp before serving.
- Reheating: For that fresh-baked taste, warm individual bars in the microwave for 10-15 seconds, or pop a pan in a 300°F (150°C) oven for 5-8 minutes.
I swear, sneaking a cold bar straight from the fridge might be my favorite “midnight snack” move. If you’re prepping for a party, you can bake these a day ahead—just hold off on the glaze until just before serving for the prettiest presentation.
Nutritional Information & Benefits
One cherry pie bar (based on 24 bars per batch, without glaze) contains approximately:
- Calories: 180
- Carbohydrates: 27g
- Protein: 2g
- Fat: 8g
- Sugar: 15g
Cherries are loaded with antioxidants and vitamin C, so you’re getting a little boost with each bite. Using whole fruit or homemade filling can cut down on added sugar and bump up the fiber. The bars are naturally nut-free (without toppings), and you can make them gluten-free or dairy-free with a few easy swaps. Just a heads up for allergens: eggs, wheat, and dairy are in the base recipe. As someone who tries to sneak in more fruit for my family, these bars are a win-win—treats that taste good and feel a bit better for you than most bakery desserts!
Conclusion
There’s just something about cherry pie bars that feels like summer in every bite—bright, sweet, a touch tart, and so easy anyone can make them. Whether you’re baking for a crowd or just want something special for your family, this cherry pie bars recipe is a guaranteed hit. I love how customizable it is, and honestly, it’s my go-to when I need an easy homemade summer dessert bar that never fails to impress.
If you’re craving that nostalgic cherry pie flavor but don’t want to fuss with rolling dough or fancy techniques, give this recipe a shot. And don’t be afraid to play with the flavors—make it your own! I’d love to hear how your batch turns out, so leave a comment, share a photo, or let me know your favorite twist on these bars. Happy baking, and here’s to sweet summer treats all season long!
Frequently Asked Questions About Cherry Pie Bars
Can I use fresh or frozen cherries instead of canned cherry pie filling?
Absolutely! Mix 2 cups (300g) pitted, chopped cherries with 1/3 cup (65g) sugar and 1 tablespoon (8g) cornstarch for a homemade filling. It adds a more tart, “jammy” flavor. If using frozen, thaw and drain excess juice first.
What’s the best way to keep cherry pie bars from getting soggy?
Spread the cherry filling evenly and don’t overload the center. Bake until the edges are golden and the filling bubbles. Cooling the bars before slicing also helps them firm up for clean cuts.
Can I make these cherry pie bars gluten-free?
Yes, just swap the all-purpose flour for a 1:1 gluten-free baking blend. I’ve tried this with Bob’s Red Mill and King Arthur Flour and both worked well—just expect a slightly different texture.
How do I store cherry pie bars, and can they be frozen?
Store bars in an airtight container at room temp for 2 days or in the fridge for up to 5 days. Freeze cooled bars in a single layer; thaw overnight in the fridge and bring to room temp before serving.
Can I add other fruit or nuts to this recipe?
Definitely! Try blueberry, apple, or mixed berry filling, or sprinkle sliced almonds or chopped pecans on top before baking. It’s fun to experiment—just keep the total fruit amount to about 2 cups for best results.
Pin This Recipe!
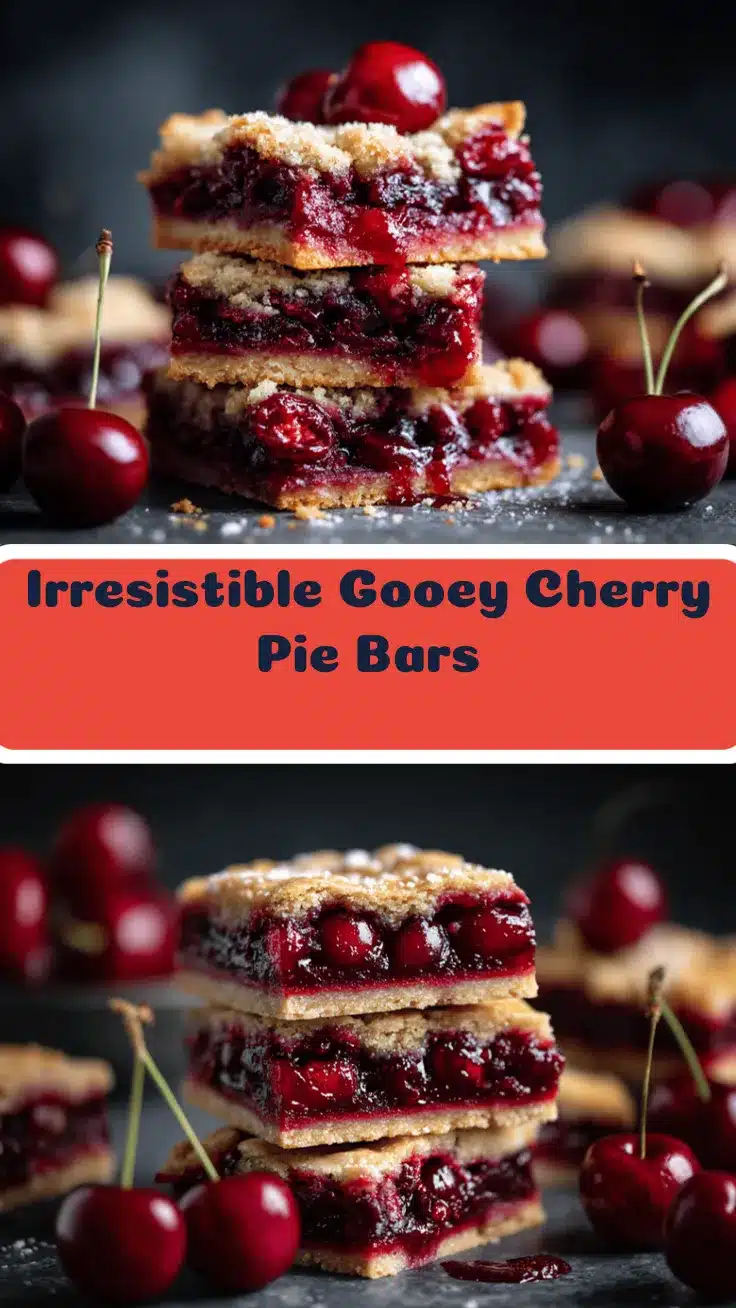
Cherry Pie Bars
These easy homemade cherry pie bars combine a buttery crust, tart cherry filling, and a sweet crumble topping for a nostalgic summer dessert that’s perfect for gatherings or a simple treat at home. No fussy pie crust required—just mix, layer, and bake for a crowd-pleasing bar that tastes just like cherry pie.
- Prep Time: 15 minutes
- Cook Time: 35-40 minutes
- Total Time: 50-55 minutes
- Yield: 18-24 bars 1x
- Category: Dessert
- Cuisine: American
Ingredients
- 2 1/2 cups all-purpose flour (315g)
- 1 cup granulated sugar (200g)
- 1 cup unsalted butter, softened (226g)
- 2 large eggs, room temperature
- 1 1/2 teaspoons vanilla extract
- 1/2 teaspoon almond extract (optional)
- 1/2 teaspoon salt
- 1 teaspoon baking powder
- 1 can (21 oz) cherry pie filling (595g)
- Zest of 1 lemon (optional)
- For the glaze (optional):
- 1/2 cup powdered sugar (60g)
- 1–2 tablespoons milk or cream
- 1/4 teaspoon vanilla extract
Instructions
- Preheat oven to 350°F (175°C). Line a 9×13-inch baking pan with parchment paper, leaving overhang for easy lifting. Lightly grease the paper.
- In a large bowl, beat softened butter and granulated sugar with a hand or stand mixer on medium speed until light and fluffy, about 2-3 minutes.
- Add eggs one at a time, mixing well after each. Add vanilla and almond extract (if using); beat until smooth.
- In a separate bowl, whisk together flour, baking powder, and salt. Gradually add dry ingredients to wet, mixing until just combined. Dough will be thick.
- Press about 2/3 of the dough evenly into the prepared pan.
- Spread cherry pie filling evenly over the dough. Sprinkle lemon zest over the cherries if using.
- Pinch off pieces of the remaining dough and scatter over the cherry layer, leaving some cherry exposed.
- Bake for 35-40 minutes, or until the top is lightly golden and the filling is bubbling at the edges. Rotate pan halfway through baking.
- Cool in the pan for at least 30 minutes, then lift out using parchment and cool completely on a wire rack.
- For the optional glaze: Stir together powdered sugar, milk or cream, and vanilla extract until smooth. Drizzle over cooled bars.
- Slice into 18-24 bars and serve at room temperature or slightly chilled.
Notes
For gluten-free bars, use a 1:1 gluten-free flour blend. For dairy-free, substitute vegan butter and plant-based milk in the glaze. Bars slice best when fully cooled or chilled. Add sliced almonds or oats to the topping for extra texture. Store in an airtight container at room temp for 2 days or refrigerate up to 5 days. Bars freeze well for up to 2 months.
Nutrition
- Serving Size: 1 bar (based on 24 bars per batch)
- Calories: 180
- Sugar: 15
- Fat: 8
- Carbohydrates: 27
- Protein: 2
Keywords: cherry pie bars, summer dessert, easy cherry bars, fruit bars, picnic dessert, potluck dessert, cherry dessert, homemade bars, cherry recipes