The very first time I pulled a golden pan of cherry cheesecake bars out of my oven, the scent alone practically had my neighbors knocking. There’s something magical about the way buttery crust, creamy cheesecake, and juicy cherry topping come together—like a dessert symphony you can’t stop humming. These cherry cheesecake bars are the kind you make once for a party and end up scribbling the recipe down for five friends before the night’s over. They’re perfectly sweet, a little tangy, and honestly, dangerously easy to slice and share (or not share—I won’t judge!).
My love affair with cheesecake started early, but bars like these? Total game changer. I first whipped up a batch on a whim for a summer potluck, desperate for a fruit dessert that wasn’t just another pie. Turns out, cherry cheesecake bars are a little nostalgic—reminding me of family holidays and bake sales—yet they feel fresh and modern too. I’ve tested this recipe so many times, tweaking the crust, the cheesecake layer, even the swirl pattern, to get it just right. The results? Every bite is rich, creamy, and studded with that gorgeous cherry flavor that practically screams “celebration.”
If you’re craving a crowd-pleaser that’s as stunning on a dessert table as it is simple to make, these cherry cheesecake bars check every box. They’re perfect for busy bakers, sweet tooths, and anyone who loves a seriously good baked fruit dessert. And hey—if you end up sneaking a second (or third) bar straight from the fridge, you’re in good company. Let’s get into why these bars are about to become your new favorite treat!
Why You’ll Love This Cherry Cheesecake Bars Recipe
- Quick & Easy: You can have these cherry cheesecake bars in the oven in under 20 minutes—no fussy water bath or springform pan required. Perfect for last-minute get-togethers or when the sweet craving hits hard.
- Simple Ingredients: No wild goose chase for specialty items—everything’s probably already in your kitchen, from the graham crackers to the cream cheese.
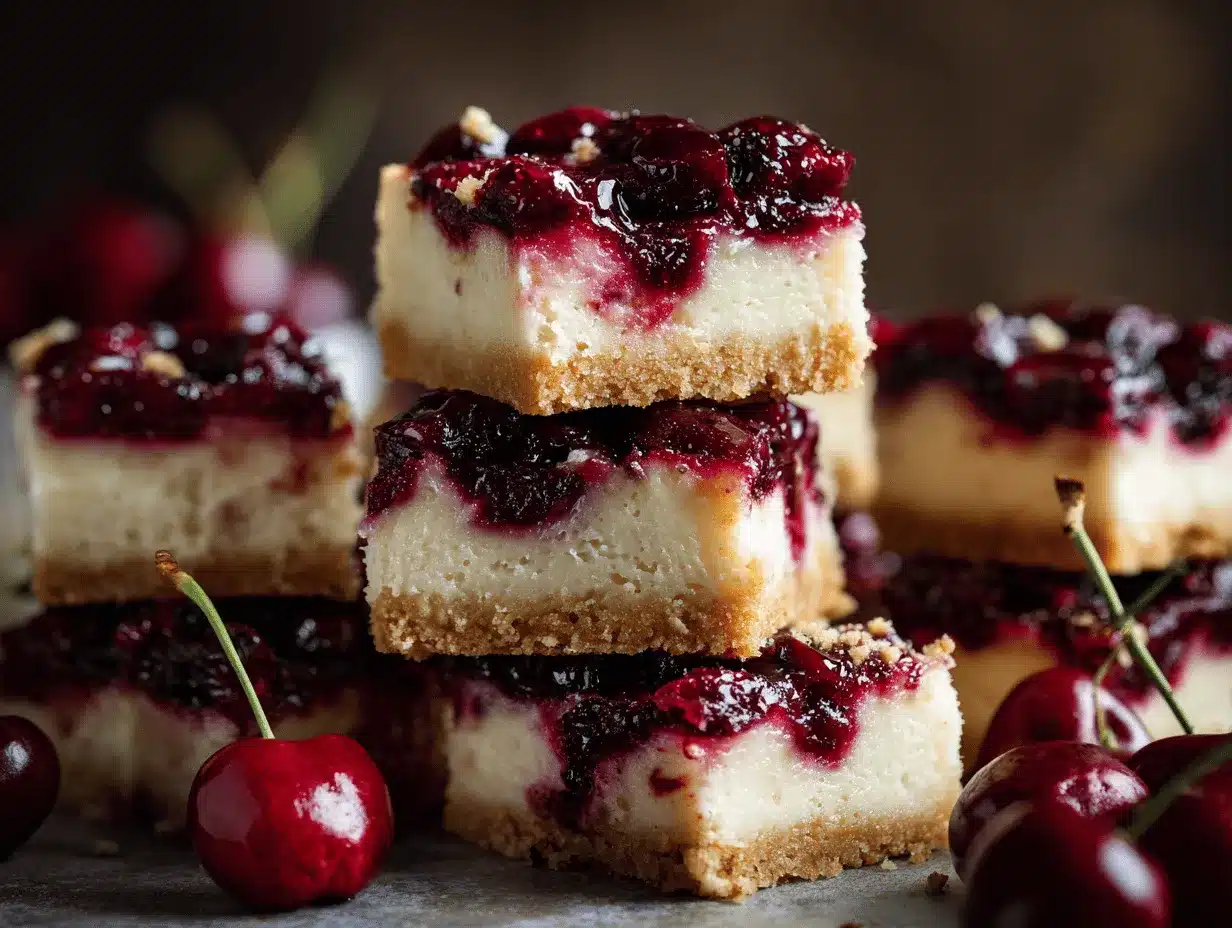
- Perfect for Parties: These bars cut cleanly, stack beautifully, and travel well, making them a go-to for potlucks, birthdays, or holiday brunches.
- Crowd-Pleaser: I’ve never had leftovers. Kids, teens, and adults all rave—especially those who secretly love classic desserts with a twist.
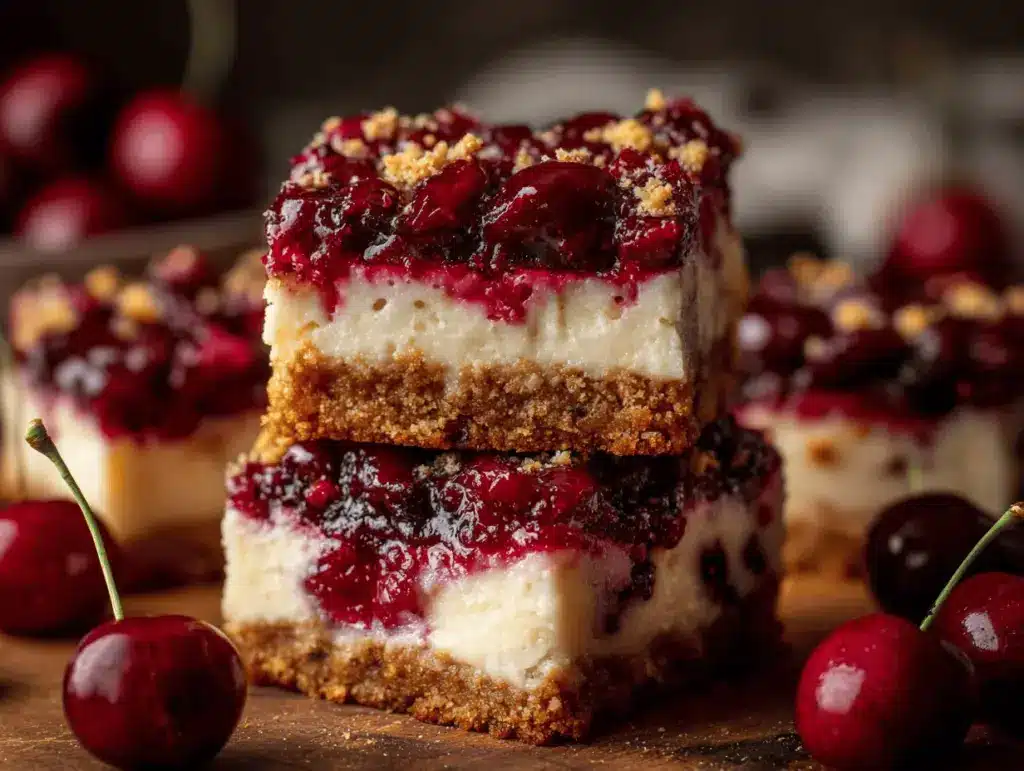
- Unbelievably Delicious: The buttery crust, rich cheesecake layer, and tangy-sweet cherry topping hit every flavor and texture note. You get that classic cheesecake satisfaction, but in a portable, snackable bar.
What sets these cherry cheesecake bars apart is a couple of things I’ve learned after a dozen test runs. First, blending the cheesecake layer until it’s super smooth (no lumps, please!) gives you that bakery-quality silkiness. Second, using a touch of lemon in the filling balances the sweetness and lets the cherry flavor really sing. And let’s not forget—these bars are so much easier to make than a traditional cheesecake, but you don’t lose any of that wow factor.
Honestly, this recipe is the best kind of comfort food. It’s nostalgic, but it feels a little special, too. It’s the sort of treat that makes people ask, “Wait, you made these yourself?”—and isn’t that just the best feeling?
What Ingredients You Will Need
This cherry cheesecake bars recipe is all about using simple, reliable ingredients that deliver big on flavor and texture. The best part? Nothing fancy, nothing tricky—just straightforward baking with a sweet payoff.
- For the Crust:
- Graham cracker crumbs (2 cups / 200g) – Classic choice for that signature cheesecake crunch. I prefer Honey Maid for the best flavor, but any brand works fine.
- Granulated sugar (1/4 cup / 50g) – Just enough to sweeten up the base.
- Unsalted butter, melted (1/2 cup / 115g) – Gives richness and helps everything stick together. Salted butter works in a pinch, but I’d skip adding extra salt if you do.
- Pinch of salt – Optional, but a little helps balance the sweetness.
- For the Cheesecake Layer:
- Cream cheese, room temperature (16 oz / 450g) – Full-fat is best for a creamy texture. I use Philadelphia for consistency, but store brands are okay if you’re in a pinch.
- Granulated sugar (3/4 cup / 150g) – To sweeten the filling without making it cloying.
- Large eggs (2, room temperature) – They help set the cheesecake and provide a little lift.
- Sour cream (1/2 cup / 120g) – Adds tang and makes the filling extra smooth.
- Vanilla extract (2 teaspoons) – For warmth and depth. Pure vanilla is worth it here!
- Lemon zest (from 1 medium lemon) – Don’t skip this. It brightens up the whole bar.
- Lemon juice (2 teaspoons) – Balances the richness of the cream cheese.
- For the Cherry Topping:
- Cherry pie filling (1 can, 21 oz / 595g) – The quickest route to glossy, ruby-red cherry goodness. If you like, you can use homemade cherry compote, but honestly, the canned stuff keeps things easy and tasty.
- Optional: Fresh cherries, pitted and halved (for extra flair on top, especially during cherry season!)
Substitution tips: Use gluten-free graham crackers for a gluten-free base. Swap sour cream for Greek yogurt if that’s what’s in your fridge (I’ve tried both—works great!). If you’re feeling adventurous, try blueberry or mixed berry pie filling instead of cherry.
Equipment Needed
You don’t need a professional kitchen to make these cherry cheesecake bars, just some basic gear—and a little baking spirit.
- 9×13-inch (23x33cm) baking pan: Standard size for bars. If you only have an 8×8-inch, halve the recipe or expect thicker bars (and a slightly longer bake time).
- Mixing bowls (at least 2): One for the crust, one for the filling. I use glass bowls so I can check for lumps.
- Electric hand mixer or stand mixer: Makes whipping the cheesecake layer a breeze. A sturdy whisk can work, but your arm might get tired!
- Measuring cups and spoons: Precision means perfect bars every time.
- Rubber spatula: For scraping down bowls and smoothing the cheesecake layer.
- Parchment paper: Lining the pan means bars lift out cleanly (and less scrubbing after).
- Knife or offset spatula: For cutting the bars neatly—run under hot water for extra clean slices.
If your mixer is on the fritz, I’ve made this with just a whisk and some elbow grease. It’s doable! And for budget-friendly tools, a glass casserole dish works just as well as a pricier “cheesecake” pan. Just don’t forget to line it, or you’ll be prying out bars with a fork (been there, not fun).
How to Make Cherry Cheesecake Bars – Step by Step
- Prep the Pan and Preheat: Line a 9×13-inch (23x33cm) baking pan with parchment paper, letting the paper hang over the edges for easy lifting. Preheat your oven to 350°F (175°C). This saves you from sticking disasters later!
- Make the Crust (5 minutes): In a mixing bowl, stir together 2 cups (200g) graham cracker crumbs, 1/4 cup (50g) granulated sugar, and a pinch of salt. Pour in 1/2 cup (115g) melted unsalted butter and mix until the crumbs are evenly moistened and look like wet sand. Press firmly and evenly into the bottom of your prepared pan. Use the flat bottom of a glass for the smoothest finish. Bake for 10 minutes, then let cool while you make the filling.
- Prepare the Cheesecake Layer (10 minutes): In a large bowl, beat 16 oz (450g) room temperature cream cheese until smooth—no lumps! Add 3/4 cup (150g) granulated sugar and beat again until creamy. Scrape down the sides. Add 2 eggs, one at a time, beating just until blended. Stir in 1/2 cup (120g) sour cream, 2 teaspoons vanilla extract, zest from 1 lemon, and 2 teaspoons lemon juice. Mix until smooth and silky, but don’t overbeat or you’ll introduce too much air (which can cause cracks).
- Assemble (3 minutes): Pour the cheesecake filling over the cooled crust and spread evenly with a rubber spatula. Spoon dollops of cherry pie filling (from a 21 oz / 595g can) over the top. Gently swirl with a knife for a marbled look, or just spread evenly if you prefer more defined layers. If using, nestle a few fresh cherry halves on top for extra color and texture.
- Bake (30-35 minutes): Bake in the center of the oven for 30-35 minutes, or until the edges are set but the center still jiggles slightly when shaken. Don’t overbake—the bars will firm up as they cool. If you notice browning on the edges but the center is still loose, tent lightly with foil for the last 5 minutes.
- Cool and Chill (2 hours minimum): Remove from the oven and cool completely on a wire rack. Then refrigerate for at least 2 hours (or overnight for best results). Chilling helps the bars slice cleanly and brings out all the flavors.
- Slice and Serve: Lift the bars out by the parchment paper. Cut into 16-24 squares, rinsing your knife in hot water between slices for tidy edges. Serve cool or at room temperature for the best texture.
Troubleshooting notes: If your crust seems crumbly, press it down a little more firmly. Lumpy cheesecake? Make sure your cream cheese and eggs are truly at room temp. If your bars crack a bit, don’t sweat it—the cherry topping covers all!
Expert Tips & Cheesecake Bar Success Secrets
- Room Temperature Ingredients: Don’t rush the process—cold cream cheese will clump, and nobody wants pockets of unmixed cheese in their bars. Set everything out at least 30 minutes ahead.
- Use Parchment Paper: You know those times you try to pry brownies out of a pan and they stick? Parchment is your friend here. It makes for easy lifting and super clean slices.
- Don’t Overmix: It’s tempting to keep beating, but too much air means cracks or a souffle-like texture. Just mix until smooth and combined.
- Watch the Bake Time: Every oven is quirky. Start checking at 28 minutes—edges should look set, but the center can have a slight wobble. Overbaked bars go rubbery, and nobody wants that.
- Let It Chill Fully: Trust me, it’s worth the wait. Warm bars will fall apart, but chilled bars slice beautifully and taste even better.
- Clean Slices: Run your knife under hot water and wipe between cuts for bakery-worthy presentation. This trick works wonders!
I’ve had my share of missteps—like forgetting the parchment and ending up with cheesecake “chunks” instead of bars. Or overbaking because I thought the center looked too soft (spoiler: it sets up as it cools). Take these tips to heart, and you’re on your way to cheesecake bar glory.
Fun Variations & Adaptations
- Gluten-Free: Swap in gluten-free graham crackers for the crust. The rest of the recipe stays the same!
- Dairy-Free: Use dairy-free cream cheese and sour cream (like Kite Hill or Tofutti brands), and plant-based butter for the crust. I’ve made these for lactose-intolerant friends, and they come out just as creamy.
- Flavor Twists: Try blueberry or raspberry pie filling instead of cherry. Or add a sprinkle of mini chocolate chips to the crust before baking—chocolate + cherry = pure bliss.
- Lemon Lovers: Add an extra teaspoon of lemon zest to the cheesecake layer and use lemon pie filling on top for a bright, tangy twist.
- Fresh Fruit: In summer, layer on fresh berries or sliced peaches over the cheesecake before baking, then finish with a homemade berry glaze.
Personally, I love swirling in a little almond extract with the vanilla for an extra cozy flavor (almond and cherry are a match made in dessert heaven). Feel free to get creative—this recipe is super forgiving and happy to play along with your favorite flavors!
Serving & Storage Suggestions
These cherry cheesecake bars are best served chilled, straight from the fridge for that perfect creamy bite. Arrange them on a pretty platter and garnish with a few fresh mint sprigs or extra cherries for party vibes—they look gorgeous, especially for Pinterest-worthy presentations.
Pair your bars with coffee, tea, or a crisp glass of rosé for a brunch or dessert spread that feels fancy with almost zero fuss. They’re right at home next to lemon bars, brownies, or a simple fruit salad.
For storage, keep bars covered in the refrigerator for up to 5 days. If you want to make them ahead, freeze individual bars wrapped tightly in plastic wrap and foil for up to 2 months. Thaw overnight in the fridge before serving. To refresh cold bars, let them sit at room temp for 10 minutes so the crust softens just a touch. Flavors deepen as they sit, so they’re even better on day two!
Nutritional Information & Benefits
Each cherry cheesecake bar (1 of 16) is roughly 250 calories, with 15g fat, 25g carbs, and 4g protein. Using low-fat cream cheese or lighter sour cream can drop the calorie count a bit, but for the creamiest texture, I go full-fat.
Cherries bring antioxidants and vitamin C, while the cream cheese layer offers satisfying richness and a bit of protein. If you opt for a gluten-free or dairy-free version, you can still enjoy these bars without missing out on flavor.
Allergens: Contains dairy, eggs, and wheat (unless using gluten-free subs). As someone who tries to balance treats with wholesome ingredients, I like that these bars deliver on taste without being over-the-top on sugar or heaviness—just a perfect “sometimes” indulgence.
Conclusion
Cherry cheesecake bars really are the best of both worlds—classic comfort and easy, breezy baking all rolled into one. They’re my secret weapon for parties, picnics, and those days when only a fruity, creamy dessert will do.
Don’t be afraid to put your own spin on them—try a new fruit, add a sprinkle of toasted nuts, or make them gluten-free for your crew. That’s the beauty of these bars—they’re endlessly adaptable and always a hit.
I love these cherry cheesecake bars because they’re the kind of dessert that brings people together, starts conversations, and (let’s be real) disappears fast. If you give them a try, let me know how they turned out in the comments, or share your creative twists! Happy baking, friends—here’s to many sweet, cherry-topped moments!
Frequently Asked Questions About Cherry Cheesecake Bars
Can I use fresh cherries instead of cherry pie filling?
Yes! Just cook 2 cups of pitted, chopped fresh cherries with 1/4 cup sugar and 1 tablespoon lemon juice until thickened, then cool before swirling onto the cheesecake layer.
How do I keep my cheesecake bars from cracking?
Don’t overmix the filling, bake just until set, and let the bars cool slowly. Even if you see small cracks, the cherry topping covers them beautifully.
Can I make these cherry cheesecake bars ahead of time?
Absolutely. They’re actually better after chilling overnight, so feel free to prep a day in advance.
What’s the best way to cut cheesecake bars cleanly?
Chill the bars completely, then use a sharp knife dipped in hot water and wiped dry between slices for neat, bakery-style squares.
Can I freeze cherry cheesecake bars?
You bet! Wrap individual bars tightly and freeze for up to 2 months. Thaw in the fridge overnight for best texture and flavor.
PrintCherry Cheesecake Bars
These cherry cheesecake bars feature a buttery graham cracker crust, a creamy cheesecake layer, and a tangy-sweet cherry topping. They’re easy to make, perfect for parties, and always a crowd-pleaser.
- Prep Time: 20 minutes
- Cook Time: 35 minutes
- Total Time: 2 hours 55 minutes
- Yield: 16-24 bars 1x
- Category: Dessert
- Cuisine: American
Ingredients
- 2 cups graham cracker crumbs
- 1/4 cup granulated sugar
- 1/2 cup unsalted butter, melted
- Pinch of salt (optional)
- 16 oz cream cheese, room temperature
- 3/4 cup granulated sugar
- 2 large eggs, room temperature
- 1/2 cup sour cream
- 2 teaspoons vanilla extract
- Zest from 1 medium lemon
- 2 teaspoons lemon juice
- 1 can (21 oz) cherry pie filling
- Optional: Fresh cherries, pitted and halved (for garnish)
Instructions
- Line a 9×13-inch baking pan with parchment paper, letting the paper hang over the edges for easy lifting. Preheat oven to 350°F (175°C).
- In a mixing bowl, stir together graham cracker crumbs, 1/4 cup sugar, and a pinch of salt. Pour in melted butter and mix until evenly moistened. Press firmly and evenly into the bottom of the prepared pan. Bake for 10 minutes, then let cool.
- In a large bowl, beat cream cheese until smooth. Add 3/4 cup sugar and beat until creamy. Scrape down the sides. Add eggs, one at a time, beating just until blended. Stir in sour cream, vanilla extract, lemon zest, and lemon juice. Mix until smooth and silky, but do not overbeat.
- Pour the cheesecake filling over the cooled crust and spread evenly. Spoon dollops of cherry pie filling over the top. Gently swirl with a knife for a marbled look, or spread evenly. If desired, add fresh cherry halves on top.
- Bake for 30-35 minutes, or until the edges are set but the center still jiggles slightly. If edges brown too quickly, tent lightly with foil for the last 5 minutes.
- Remove from oven and cool completely on a wire rack. Refrigerate for at least 2 hours (or overnight) before slicing.
- Lift the bars out by the parchment paper. Cut into 16-24 squares, rinsing your knife in hot water between slices for clean edges. Serve chilled or at room temperature.
Notes
For best results, use room temperature cream cheese and eggs. Don’t overmix the cheesecake layer to avoid cracks. Chill bars fully before slicing for clean edges. Swap in gluten-free graham crackers for a gluten-free version, or use dairy-free substitutes for a dairy-free option. Bars can be made ahead and freeze well for up to 2 months.
Nutrition
- Serving Size: 1 bar (1/16 of recipe)
- Calories: 250
- Sugar: 16
- Sodium: 180
- Fat: 15
- Saturated Fat: 8
- Carbohydrates: 25
- Fiber: 1
- Protein: 4
Keywords: cherry cheesecake bars, cheesecake bars, easy dessert, party dessert, baked cheesecake, cherry dessert, potluck, summer dessert, creamy cheesecake, fruit bars