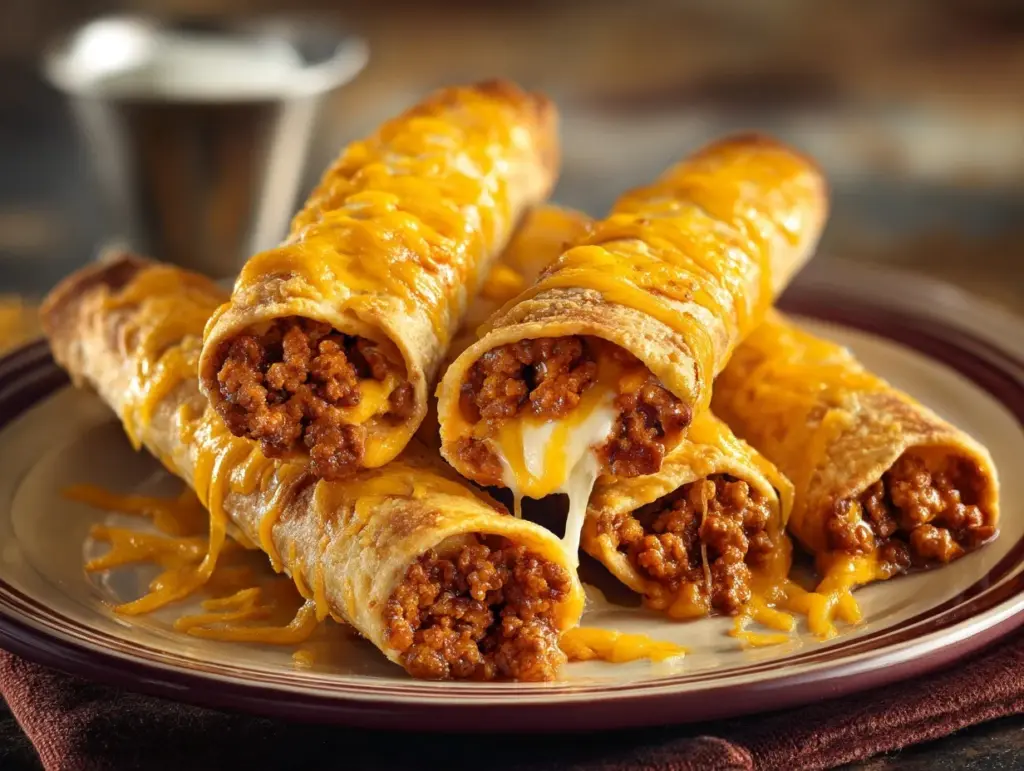
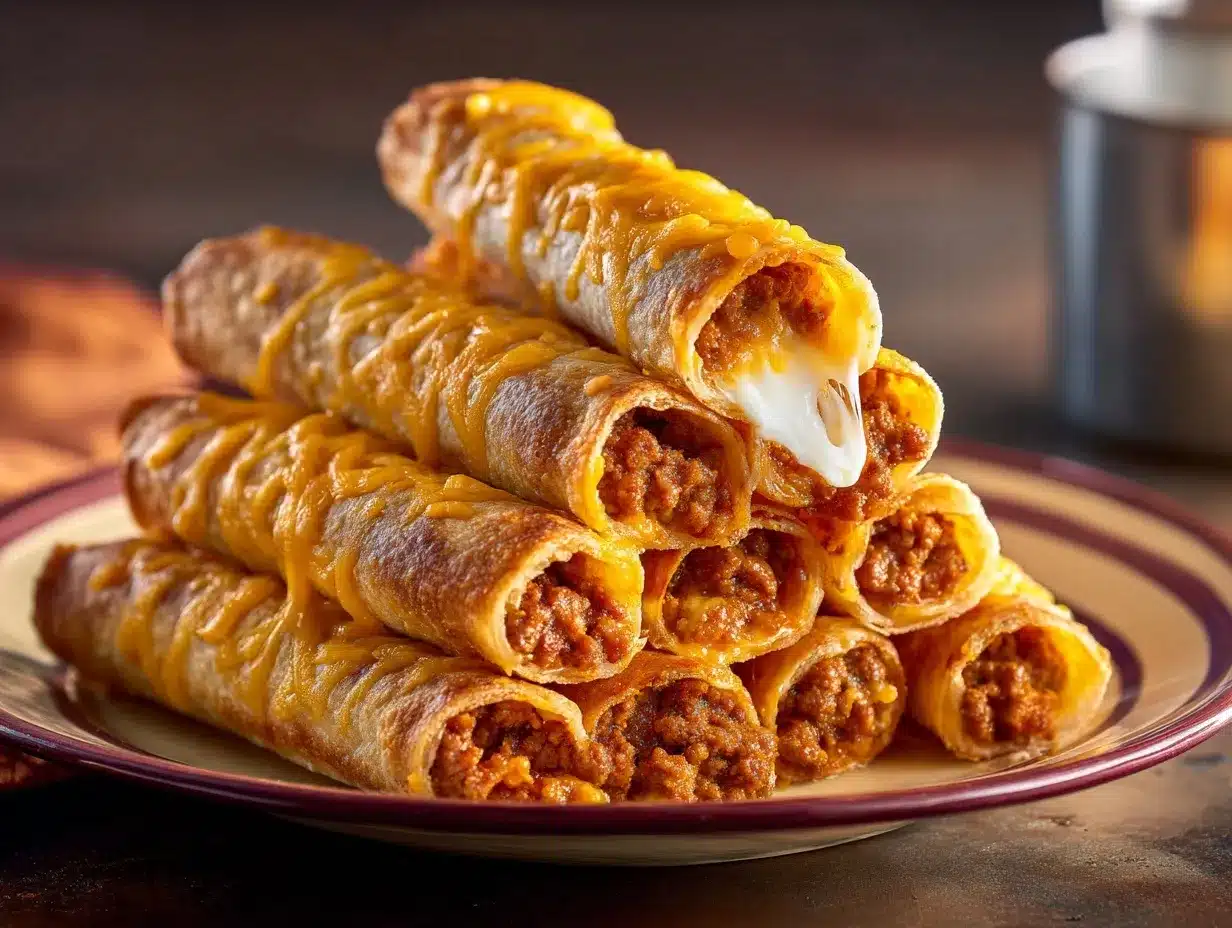
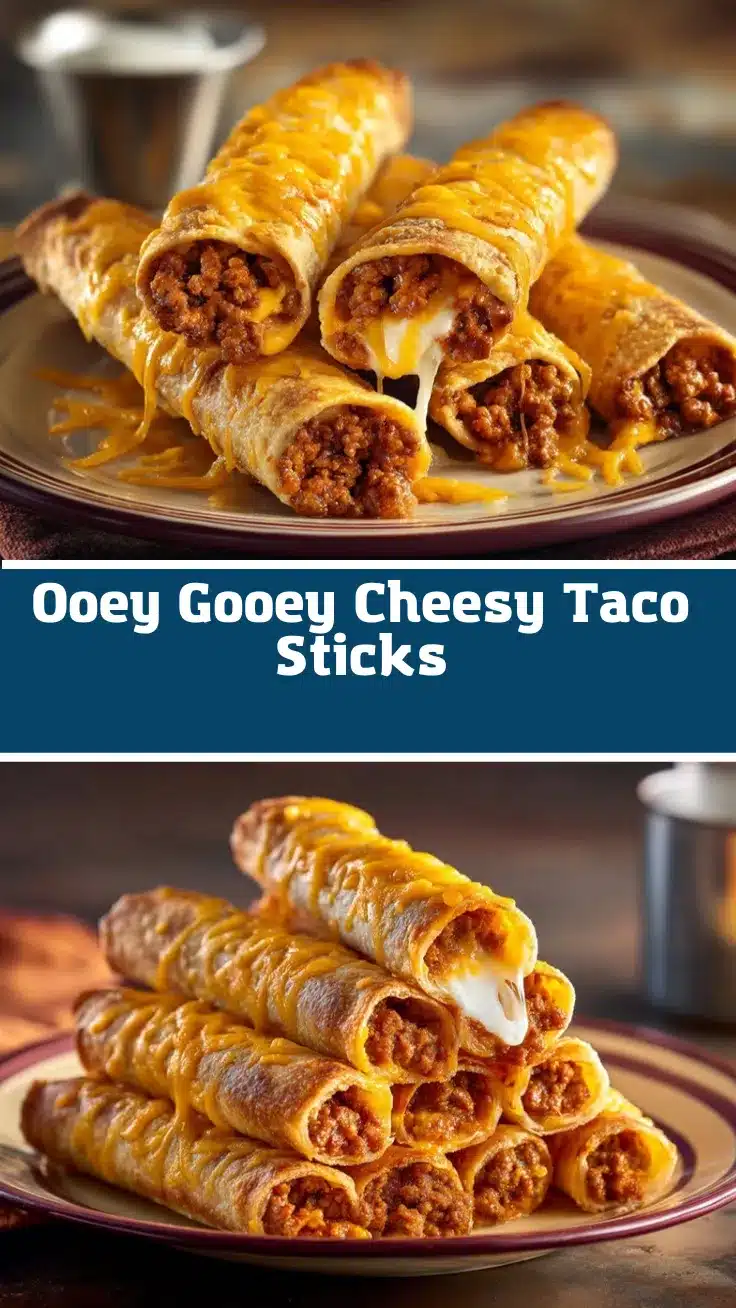
The sizzle of melted cheese, the aroma of seasoned taco meat, and the golden, pillowy bread—these are the things that make my kitchen the heart of every party! I still remember the first time I whipped up these Cheesy Taco Sticks: it was game night, and I needed something quick, handheld, and, honestly, totally irresistible. Let’s face it—no one wants to fuss with forks and plates when they’re in the middle of a heated board game or cheering on their favorite team. That’s where my Cheesy Taco Sticks recipe swoops in to save the night.
These easy appetizer taco sticks are a family favorite, and I’m not kidding when I say they disappear faster than you can say “second helping.” Whether you’re feeding a crowd of hungry kids or looking for a fun new finger food for your next party, this recipe checks all the boxes: cheesy, savory, perfectly dippable, and stress-free. I’ve tested and tweaked this recipe countless times, adjusting seasonings and cheese ratios until I found the magic combo. It’s now a staple at our house—birthdays, movie nights, you name it.
What I love most about these cheesy taco sticks? They’re so simple to make, but the payoff is huge. Gooey cheese stretches with every bite, tucked into soft bread and paired with seasoned beef. Even my pickiest eaters come running for seconds. Plus, you can prep these ahead of time and bake them when the crowd arrives. If you’re like me and crave that winning blend of comfort food and convenience, you’re going to want to bookmark this Cheesy Taco Sticks recipe. Trust me, you’ll be making them on repeat!
Why You’ll Love This Cheesy Taco Sticks Recipe
After making these taco sticks more times than I can count (my family begs for them at least twice a month!), I can promise you there’s a lot to adore. Here’s why these cheesy taco sticks are a standout:
- Quick & Easy: Ready in under 30 minutes, these taco sticks are a lifesaver for last-minute gatherings, weeknight snacks, or surprise guests.
- Simple Ingredients: No complicated shopping trips here. With just a few basic staples—think ground beef, shredded cheese, and refrigerated pizza dough—you’re set!
- Perfect for Any Occasion: These are a hit at birthday parties, potlucks, game nights, or even as a fun dinner for the family.
- Crowd-Pleaser: Kids, teens, and adults all rave about the gooey cheese and savory taco flavor. They’re totally dippable too (hello, salsa and sour cream!).
- Unbelievably Delicious: The combination of soft bread, juicy taco meat, and melty cheese is just pure comfort food magic.
But here’s what really sets my Cheesy Taco Sticks apart—I’ve learned that blending a mix of cheddar and mozzarella gives you both that classic taco flavor and the ultimate cheese pull. Plus, I use a bit of taco seasoning directly in the meat, not just on top, for a flavor that’s big and bold in every bite. I even tried stuffing in a couple of jalapeño slices for a little kick, and wow, did that take things up a notch (in a good way!).
This recipe is my go-to for making memories around the table. It’s the kind of snack that brings people together—no fancy presentation, just real, honest-to-goodness fun food. Whether you’re looking to impress your guests or simply make a Tuesday night extra special, you’ll love how easy and satisfying these taco sticks are. Honestly, once you try them, you might find yourself inventing reasons to invite friends over just so you can serve them again!
What Ingredients You Will Need for Cheesy Taco Sticks
This recipe uses familiar ingredients that you probably already have on hand. Here’s what you’ll need to whip up a batch of these crowd-pleasing Cheesy Taco Sticks:
- For the Taco Filling:
- 1 pound (450g) ground beef (I prefer 80/20 for flavor, but turkey works too!)
- 2 tablespoons taco seasoning (store-bought or homemade—go for your favorite blend!)
- 1/3 cup (80ml) water (to help the seasoning blend in and keep the beef juicy)
- 1/3 cup (50g) finely diced onion (optional, but adds a subtle sweetness)
- For the Sticks:
- 1 can (13.8 oz/390g) refrigerated pizza dough (Pillsbury or store brand both work well)
- 1 to 1 1/2 cups (115-170g) shredded cheddar cheese (sharp for extra punch—Colby Jack is another good option!)
- 1 cup (90g) shredded mozzarella cheese (for that gooey, stretchy melt)
- 1-2 tablespoons pickled jalapeño slices, chopped (optional for heat; kids tend to prefer them without)
- For Assembly & Topping:
- 2 tablespoons unsalted butter, melted (for brushing on top)
- 1/2 teaspoon garlic powder (sprinkle for savory aroma)
- 1/2 teaspoon dried parsley or cilantro (for a pop of color and flavor)
- For Dipping (Optional but highly recommended):
- Salsa or pico de gallo
- Sour cream or Greek yogurt
- Guacamole
Ingredient Tips: If you want to make these gluten-free, use a gluten-free pizza dough (I’ve had good luck with King Arthur’s mix). For a lighter version, swap ground beef for ground turkey or even black beans. And if you’re on a dairy-free kick, vegan cheese shreds hold up surprisingly well—just skip the butter brush or use olive oil instead.
For the cheese, I find that freshly shredded always melts better than pre-shredded, but honestly, use what you have on hand. The filling is forgiving, and you can sneak in diced bell peppers or corn if you want to add some veggies without the kids noticing!
Equipment Needed for Cheesy Taco Sticks
- Baking sheet (lined with parchment for easy cleanup—trust me, cheese gets messy!)
- Large skillet (for browning the beef—nonstick works, but cast iron gives a great sear)
- Mixing spoon or spatula (for breaking up the meat)
- Sharp knife or pizza cutter (for slicing the dough into rectangles)
- Small bowl and brush (for melting and brushing the butter topping)
- Measuring cups and spoons
- Parchment paper or silicone baking mat (optional, but makes cleanup breeze)
If you don’t have a rolling pin, just use a clean glass bottle to flatten the dough—I’ve done this more than once, and it works in a pinch! If you don’t own a pastry brush, use the back of a spoon to spread the butter. I always recommend rinsing your skillet with hot water right after browning the beef to make cleaning easier (and save yourself some elbow grease later!).
Budget tip: You don’t need fancy equipment. I’ve made these taco sticks in a toaster oven on a smaller tray for quick snacks, and they turn out great. Just keep an eye on baking time since smaller ovens run hot.
How to Make Cheesy Taco Sticks – Step-by-Step Preparation Method
- Preheat & Prep: Preheat your oven to 400°F (200°C). Line a baking sheet with parchment paper or a silicone baking mat.
- Cook the Taco Filling: Heat a large skillet over medium heat. Add 1 pound (450g) ground beef and cook for 4-5 minutes, breaking it up with a spoon, until browned and no longer pink. Drain off extra fat if needed. Stir in 2 tablespoons taco seasoning, 1/3 cup (80ml) water, and, if using, 1/3 cup (50g) diced onion. Cook for another 2-3 minutes until mixture thickens and onions are soft. Remove from heat and let cool for a few minutes (warm filling is easier to handle than piping hot!).
- Prepare the Dough: Unroll the refrigerated pizza dough onto a lightly floured surface. Gently stretch or roll it into a rectangle about 9×13 inches (23x33cm). Use a sharp knife or pizza cutter to cut the dough into 8 rectangles (for bigger sticks) or 10-12 rectangles (for party-size sticks).
- Fill & Roll: Place a heaping tablespoon of taco meat onto one side of each rectangle. Sprinkle generously with shredded cheddar and mozzarella. If you like, add a bit of chopped jalapeño. Fold the dough over the filling and pinch the edges to seal tightly (if you don’t, some cheese might escape, but that’s part of the charm!). Gently roll each stick to smooth out the seams and place seam-side down on the prepared baking sheet.
- Brush & Top: In a small bowl, melt 2 tablespoons butter. Stir in 1/2 teaspoon garlic powder and 1/2 teaspoon dried parsley or cilantro. Brush the tops of each taco stick generously with the butter mixture.
- Bake: Bake for 12-15 minutes, or until the bread is golden brown and the cheese is bubbly. (Peek underneath—if they’re pale, bake 2 minutes longer).
- Cool & Serve: Let the cheesy taco sticks rest for 3-5 minutes on the pan. This helps the cheese set a bit and prevents burning your fingers (learned that one the hard way). Serve warm with salsa, sour cream, and guacamole for dipping.
Troubleshooting tips: If your dough tears while rolling, pinch it back together or patch with a small piece of extra dough. If the cheese leaks out a bit, don’t panic—it gets crispy and delicious on the pan. I sometimes sprinkle any cheese that falls out right back on top before baking for extra flavor.
Efficiency tip: Prep the filling a day ahead and refrigerate. You can even assemble the sticks, cover, and chill until ready to bake. Just add 2-3 extra minutes to the baking time if baking straight from the fridge.
Cooking Tips & Techniques for Perfect Cheesy Taco Sticks
- Don’t Overfill: It’s tempting to load up each stick, but too much filling makes them hard to seal and can cause leaks. Use about 1 heaping tablespoon of meat per stick for best results.
- Seal Well: Pinch the dough edges tightly and roll the stick seam-side down. This helps keep the cheese from escaping (although a little ooze is totally normal—honestly, it’s kind of the best part!).
- Use Freshly Shredded Cheese: Pre-shredded cheese has coating that can prevent melting. If you have the time, shredding your own makes the cheese melt creamier and stretchier.
- Space them Out: Give each taco stick a little room on the baking sheet so they bake evenly and get golden all around. Crowding leads to steamed, pale bottoms.
- Butter Brushing is Key: Don’t skip the butter! Brushing the tops adds flavor and helps the sticks brown beautifully. You can even sprinkle a little extra cheddar or Parmesan on top before baking for a cheesy crust.
When I first made these, I rushed and didn’t seal the edges well enough—hello, cheese lava! Now, I take an extra moment to really pinch those seams, and the payoff is so worth it. If you want to work ahead, you can prep the filling and even pre-shred your cheese the day before. While the sticks bake, I whip up a quick salsa or set out dips, so everything’s ready at once. Multitasking at its best!
And don’t worry if a few sticks split or some cheese sneaks out onto the pan. That crispy, caramelized cheese is basically a bonus snack. With a little practice, you’ll be churning out cheesy taco sticks like a pro.
Variations & Adaptations for Cheesy Taco Sticks
- Vegetarian Taco Sticks: Swap the ground beef for a black bean and corn mixture, or use plant-based ground “meat.” Add some sautéed peppers and onions for extra flavor.
- Spicy Kick: Mix in diced jalapeños, hot sauce, or a pinch of cayenne pepper to the meat filling for a bolder, spicier taco stick. Pepper Jack cheese is another great way to turn up the heat.
- Breakfast-Style: Replace the taco filling with scrambled eggs, cooked breakfast sausage, and cheddar cheese for a morning twist. These are amazing with a side of salsa or hot sauce!
- Gluten-Free Option: Use gluten-free pizza dough; check for cross-contamination if you’re baking for someone with celiac.
- Cheese Lovers’ Version: Double up on the cheese, or try adding a layer of cream cheese for extra creaminess.
One of my favorite twists? I once made a batch using leftover pulled chicken, tossed with taco seasoning, and they were just as tasty. You can get creative with the fillings—think rotisserie chicken, turkey, or even crumbled tofu for a plant-based option. If you’re serving picky eaters, let everyone customize their own stick with a mix of cheeses or mild vs. spicy filling. It’s a great way to get kids involved in the kitchen, too!
Serving & Storage Suggestions for Cheesy Taco Sticks
Serving: These cheesy taco sticks are best served hot and fresh from the oven. The cheese is gooey, the bread is crisp, and the aroma is simply irresistible. Pile them high on a platter, sprinkle with extra cilantro or green onions, and set out a rainbow of dips—salsa, guacamole, and sour cream are always crowd favorites. For parties, I like to stick toothpicks in each one so guests can grab and go.
If you’re serving as a meal, pair with a crisp green salad or a side of Mexican rice. These also make a fabulous addition to a game day spread alongside nachos, quesadillas, or even a big pot of chili.
Storage: Leftovers (if you have any!) keep well in the fridge for up to 3 days in an airtight container. To reheat, pop them in a 350°F (175°C) oven for 7-8 minutes, or until warmed through and the cheese gets melty again. The microwave works in a pinch, but the bread will be softer and less crisp.
Freezing: You can freeze unbaked assembled taco sticks on a baking sheet, then transfer to a freezer bag. Bake from frozen, adding 4-5 extra minutes to the baking time. They’re an awesome make-ahead snack for busy weeks!
As they sit, the flavors meld and the bread soaks up a bit more of the taco goodness—so don’t be surprised if you love them even more the next day.
Nutritional Information & Benefits
Each cheesy taco stick (based on a batch of 10) is approximately:
- Calories: 210
- Protein: 10g
- Carbohydrates: 18g
- Fat: 11g
- Fiber: 1g
- Sugar: 2g
Health Benefits: These taco sticks pack protein from the beef and cheese, and you can boost fiber by adding beans or veggies to the filling. Using lean meat and whole wheat dough can make them even lighter. They’re naturally nut-free, and you can make them gluten-free or dairy-free with a few easy swaps.
As someone who likes to sneak in extra nutrition, I sometimes fold in chopped spinach or bell peppers. It’s a fun, satisfying snack or meal that fits into a balanced approach to eating—and, hey, if it gets the kids excited about dinner, that’s a win in my book.
Conclusion – Why You Need Cheesy Taco Sticks in Your Life
So, why should you make these Cheesy Taco Sticks? Because they bring big flavor, big fun, and big smiles, every single time. They’re simple, customizable, and perfect for sharing—whether you’re hosting a party or just want to add some excitement to a regular Tuesday night.
I love this recipe for its flexibility (and the way it makes my kitchen smell like a Tex-Mex dream). There’s nothing quite like seeing friends and family devour these sticks, one cheesy, savory bite at a time. Don’t be surprised if they become your signature appetizer—mine certainly have!
Give these a try, share your own twists, or tag me with your results. Let’s keep the cheesy taco stick love going! If you have questions or your own fun adaptation, drop a comment below—I’d love to hear how you make these your own. Happy snacking, friends!
FAQs About Cheesy Taco Sticks
Can I make cheesy taco sticks ahead of time?
Absolutely! Assemble the sticks, cover, and refrigerate for up to 24 hours before baking. Add 2-3 minutes to the bake time if cold from the fridge.
Can I use a different type of dough?
Yes, crescent roll dough or homemade pizza dough both work great. Even biscuit dough can be used for a fluffier version.
What’s the best way to reheat leftovers?
For best results, reheat in the oven at 350°F (175°C) for 7-8 minutes. This keeps the bread crisp and the cheese melty.
Are these taco sticks freezer-friendly?
They sure are! Freeze unbaked sticks on a tray, then transfer to a freezer bag. Bake from frozen, adding 4-5 minutes to the baking time.
How do I make these vegetarian or gluten-free?
Use a black bean and corn filling or plant-based “meat” for vegetarian. For gluten-free, use a certified gluten-free pizza dough. Both versions are delicious!
Pin This Recipe!
Cheesy Taco Sticks

Cheesy Taco Sticks are a quick, crowd-pleasing appetizer featuring seasoned taco meat and gooey cheese wrapped in golden pizza dough. Perfect for parties, game nights, or family snacks, these handheld treats are easy to make and totally irresistible.
- Prep Time: 15 minutes
- Cook Time: 15 minutes
- Total Time: 30 minutes
- Yield: 10 taco sticks 1x
- Category: Appetizer
- Cuisine: Tex-Mex
Ingredients
- 1 pound ground beef (80/20 preferred, or ground turkey)
- 2 tablespoons taco seasoning
- 1/3 cup water
- 1/3 cup finely diced onion (optional)
- 1 can (13.8 oz) refrigerated pizza dough
- 1 to 1 1/2 cups shredded cheddar cheese
- 1 cup shredded mozzarella cheese
- 1–2 tablespoons pickled jalapeño slices, chopped (optional)
- 2 tablespoons unsalted butter, melted
- 1/2 teaspoon garlic powder
- 1/2 teaspoon dried parsley or cilantro
- Salsa or pico de gallo (for dipping, optional)
- Sour cream or Greek yogurt (for dipping, optional)
- Guacamole (for dipping, optional)
Instructions
- Preheat your oven to 400°F (200°C). Line a baking sheet with parchment paper or a silicone baking mat.
- Heat a large skillet over medium heat. Add ground beef and cook for 4-5 minutes, breaking it up with a spoon, until browned and no longer pink. Drain excess fat if needed.
- Stir in taco seasoning, water, and diced onion (if using). Cook for another 2-3 minutes until mixture thickens and onions are soft. Remove from heat and let cool for a few minutes.
- Unroll the refrigerated pizza dough onto a lightly floured surface. Gently stretch or roll it into a rectangle about 9×13 inches. Cut the dough into 8-12 rectangles, depending on desired stick size.
- Place a heaping tablespoon of taco meat onto one side of each rectangle. Sprinkle with cheddar and mozzarella cheese. Add chopped jalapeño if desired.
- Fold the dough over the filling and pinch the edges to seal tightly. Gently roll each stick to smooth out the seams and place seam-side down on the prepared baking sheet.
- In a small bowl, melt butter and stir in garlic powder and dried parsley or cilantro. Brush the tops of each taco stick with the butter mixture.
- Bake for 12-15 minutes, or until the bread is golden brown and the cheese is bubbly.
- Let the taco sticks rest for 3-5 minutes before serving. Serve warm with salsa, sour cream, and guacamole for dipping.
Notes
Don’t overfill the sticks to prevent leaks. Seal the edges well and place seam-side down for best results. Freshly shredded cheese melts better than pre-shredded. You can prep the filling or assemble the sticks ahead of time and bake when ready. For a vegetarian version, use black beans and corn or plant-based meat. Gluten-free pizza dough can be substituted.
Nutrition
- Serving Size: 1 taco stick
- Calories: 210
- Sugar: 2
- Fat: 11
- Saturated Fat: 5
- Carbohydrates: 18
- Fiber: 1
- Protein: 10
Keywords: cheesy taco sticks, taco appetizer, party food, kid friendly, easy appetizer, finger food, game day snack, Tex-Mex, pizza dough, ground beef, cheese sticks