
Let me tell you, the scent of buttery cookies baking in the oven, mingled with the sweet promise of creamy filling, is enough to make anyone’s mouth water instantly. The first time I baked these creamy ultimate sandwich cookies, I was honestly hooked—the kind of moment where you pause, take a deep breath, and just smile because you know you’re onto something truly special. It was a rainy weekend, and I was trying to recreate a nostalgic treat from my childhood, the one grandma used to make when I was knee-high to a grasshopper. Those cookies, with their perfectly crisp edges and luscious creamy center, felt like a warm hug on a chilly day.
Years ago, I stumbled upon this recipe while rummaging through an old family cookbook, and I wish I had discovered it sooner. My family couldn’t stop sneaking them off the cooling rack (and I can’t really blame them). Honestly, these sandwich cookies are dangerously easy to make, yet they offer pure, nostalgic comfort with every bite. Whether you’re brightening up your Pinterest cookie board, looking for a sweet treat for your kids, or needing a perfect potluck dessert, these creamy ultimate sandwich cookies fit the bill like a glove. I’ve tested this recipe multiple times—in the name of research, of course—and it’s now a staple for family gatherings and gifting.
Why You’ll Love This Recipe
Let’s face it, not all sandwich cookies are created equal. These creamy ultimate sandwich cookies hit that sweet spot between buttery crispness and rich creaminess, making them stand out from the crowd. Here’s why you’re going to want to bookmark this recipe:
- Quick & Easy: Comes together in under 45 minutes, perfect for those last-minute cookie cravings or spontaneous get-togethers.
- Simple Ingredients: No fancy grocery trips—most of these ingredients are pantry staples you probably already have on hand.
- Perfect for Any Occasion: Whether it’s a cozy afternoon tea, a holiday dessert tray, or a casual weekend treat, these cookies fit right in.
- Crowd-Pleaser: Always gets rave reviews from the pickiest kids to discerning adults.
- Unbelievably Delicious: The crisp buttery cookie pairs flawlessly with a luxuriously creamy filling that melts in your mouth.
What really sets this recipe apart? It’s the technique—like chilling the dough just right to get that ideal crispness without being hard, and whipping the filling until it’s ultra-smooth and just sweet enough. It’s not just another sandwich cookie recipe; it’s my best version, crafted with care and a few secret tweaks. This recipe isn’t just good—it’s the kind that makes you close your eyes after the first bite and savor every crumb. You’re about to create a classic comfort treat that’s both timeless and effortlessly impressive.
What Ingredients You Will Need
This recipe uses simple, wholesome ingredients to deliver bold flavor and satisfying texture without the fuss. Most of these are pantry staples, but feel free to swap or tweak based on what you have.
- For the Cookies:
- 1 cup (226g) unsalted butter, softened (adds rich buttery flavor)
- 3/4 cup (150g) granulated sugar
- 1 large egg, room temperature (helps bind the dough)
- 1 teaspoon pure vanilla extract
- 2 cups (250g) all-purpose flour (I prefer King Arthur for consistent texture)
- 1/4 teaspoon baking powder (for a light crispness)
- 1/4 teaspoon salt
- For the Creamy Filling:
- 1/2 cup (113g) unsalted butter, softened
- 1 1/2 cups (180g) powdered sugar, sifted (for smooth sweetness)
- 1 teaspoon vanilla extract
- 2 tablespoons heavy cream or whole milk (use dairy-free milk if needed)
- Pinch of salt (balances sweetness)
Substitution tips: Use almond flour for a gluten-free option, but keep in mind the texture will be slightly different. You can swap heavy cream with coconut cream for a dairy-free version of the filling. Also, for a fun flavor twist, try adding a tablespoon of cocoa powder to the cookie dough or a hint of lemon zest.
Equipment Needed
- Stand mixer or hand mixer – for creaming butter and whipping the filling; I’ve found a stand mixer makes this less of a workout, but hand mixers work just fine.
- Mixing bowls – a couple of medium sizes for dough and filling.
- Baking sheets – preferably rimmed to avoid any cookie escapes.
- Parchment paper or silicone baking mats – helps cookies bake evenly and prevents sticking.
- Cooling rack – essential for letting cookies cool completely before sandwiching.
- Measuring cups and spoons – precise measurements make a big difference here.
- Spatula and whisk – for mixing and folding.
If you don’t have a stand mixer, no worries! A sturdy hand mixer or even a wooden spoon can do the job, just expect a little more arm work. For budget-friendly baking, parchment paper is a must-have over silicone mats, and you can reuse it multiple times if you’re careful.
Preparation Method
- Preheat your oven to 350°F (175°C). Line two baking sheets with parchment paper or silicone mats. This ensures your cookies bake evenly and don’t stick.
- Cream the butter and sugar. In a large bowl, use a stand or hand mixer to beat 1 cup softened butter and 3/4 cup granulated sugar until light and fluffy—about 3-4 minutes. You’ll notice the mixture turn pale and smooth, which is exactly what you want.
- Add egg and vanilla. Beat in 1 large room temperature egg and 1 teaspoon vanilla extract until combined. The batter will look silky and a bit glossy.
- Mix dry ingredients. In a separate bowl, whisk together 2 cups all-purpose flour, 1/4 teaspoon baking powder, and 1/4 teaspoon salt.
- Combine wet and dry. Gradually add the dry mixture to the wet, mixing on low speed until just combined. Don’t overmix here—you want the dough tender, not tough.
- Chill the dough. Cover the dough with plastic wrap and chill for at least 30 minutes. This step is key for buttery crisp texture and easier rolling.
- Roll and cut cookies. Lightly flour your work surface and roll the dough to about 1/4 inch (6mm) thickness. Use a round cookie cutter (about 2 inches / 5cm diameter) to cut out cookies and place them on the prepared baking sheets, spaced about 1 inch (2.5cm) apart.
- Bake the cookies. Bake for 10-12 minutes or until the edges just start to turn golden. Keep an eye on them—overbaking will make them too hard.
- Cool completely. Transfer cookies to a cooling rack and let them cool fully before filling. This prevents your creamy filling from melting into a mess.
- Prepare the filling. Beat 1/2 cup softened butter until creamy. Gradually add 1 1/2 cups powdered sugar, beating well after each addition. Add 1 teaspoon vanilla, 2 tablespoons heavy cream, and a pinch of salt. Beat until the filling is smooth, fluffy, and spreadable.
- Assemble the sandwich cookies. Pair cookies of similar size. Spread or pipe about a tablespoon of filling onto the flat side of one cookie, then gently press the matching cookie on top.
- Chill before serving. For best results, chill the assembled cookies for 15-20 minutes to let the filling firm up a bit. This helps avoid oozy filling and makes them easier to handle.
Pro tip: If your dough feels too sticky to roll, pop it back in the fridge for 10-15 minutes. Also, don’t skip the chilling step for the dough and assembled cookies—it really makes a difference in texture and ease of handling.
Cooking Tips & Techniques
Getting that perfect buttery crisp texture on these sandwich cookies is all about patience and technique. Here are some nuggets I learned the hard way:
- Don’t skip chilling: Chilling the dough prevents spreading, which keeps the cookies nice and crisp rather than thin and fragile.
- Use room temperature butter: Soft but not melted butter creamed with sugar aerates the dough, making cookies tender yet crisp.
- Handle dough gently: Overmixing flour develops gluten, which can toughen cookies. Mix until just combined.
- Watch the oven closely: Baking time can vary based on oven calibration. Cookies are done when edges turn lightly golden, not brown.
- Pipe the filling for neatness: Using a piping bag or zip-top bag with a corner snipped helps you get even, tidy dollops of filling.
- Multitask wisely: While cookies bake, whip up the filling so you’re ready to assemble as soon as cookies cool.
Honestly, the first few times I made these, I rushed through chilling and ended up with flat, soggy cookies. Once I slowed down and followed these tips, the results were night and day.
Variations & Adaptations
This recipe is super flexible and welcomes your own spin. Here are some variations I’ve tried or recommend:
- Chocolate Sandwich Cookies: Add 2 tablespoons unsweetened cocoa powder to the dry ingredients. Use a chocolate ganache or cream cheese filling for a chocolate lover’s dream.
- Gluten-Free Option: Swap all-purpose flour with a 1:1 gluten-free baking blend. I’ve had success with Bob’s Red Mill brand for similar texture.
- Seasonal Twist: Mix in 1 teaspoon lemon or orange zest into the dough for a bright citrus note. Alternatively, swirl in a bit of pumpkin spice during fall.
- Dairy-Free Filling: Replace butter with dairy-free margarine and use coconut cream instead of heavy cream. The texture stays creamy and delicious.
- Nutty Crunch: Add finely chopped toasted pecans or almonds to the cookie dough for an extra layer of flavor and crunch.
Personally, I love the chocolate version around holidays—it’s a crowd favorite and feels a bit decadent without extra effort. Feel free to customize the filling too, swapping vanilla for almond or adding a pinch of cinnamon for warmth.
Serving & Storage Suggestions
These creamy ultimate sandwich cookies are best served at room temperature, letting that luscious filling shine through. Arrange them on a pretty platter for afternoon tea, or pack them up in a decorative tin for gifting—they always disappear quickly!
For storage, keep the cookies in an airtight container at room temperature for up to 3 days. If your kitchen is warm, refrigerate them to maintain their shape and texture, but bring them back to room temp before serving for the best flavor.
You can freeze the assembled cookies for up to 1 month by wrapping them individually in plastic wrap and placing them in a freezer-safe bag. Thaw in the refrigerator overnight, then bring to room temperature before serving.
Reheating isn’t really needed here, but if you want to refresh the crispness of the cookies, pop them in a 300°F (150°C) oven for 3-4 minutes (without the filling) before assembling.
Fun fact: letting the cookies sit for a day after assembling actually mellows the flavors and softens the edges slightly, making them even more addictive in my experience.
Nutritional Information & Benefits
Each sandwich cookie (makes about 24) roughly contains:
| Calories | Fat | Carbohydrates | Protein | Sugar |
|---|---|---|---|---|
| 150 kcal | 9 g | 18 g | 1.5 g | 10 g |
Key ingredients like butter provide a source of healthy fats, contributing to satiety and flavor. Using real vanilla extract adds natural depth without artificial additives. This recipe is naturally gluten-containing, but it’s easy to adapt for gluten-free diets by swapping flour blends.
While these sandwich cookies are a treat, their homemade nature means you control the quality and freshness of ingredients—always a win in my book when compared to store-bought alternatives loaded with preservatives.
Conclusion
To wrap it up, these creamy ultimate sandwich cookies are a must-try for anyone craving that perfect combo of buttery crispness and luscious creamy filling. They’re simple, satisfying, and insanely delicious—the kind of recipe you’ll want to make again and again. Customize them to your taste, whether it’s adding a citrus twist, going chocolate, or adapting for special diets.
I love this recipe because it brings back cozy memories while still feeling fresh and easy to make. Plus, they’re a guaranteed hit with family and friends—trust me on that. If you give this recipe a go, please share your thoughts or any tweaks you tried in the comments. Let’s keep the cookie love going!
Happy baking and cookie sharing!
FAQs
Can I make the cookie dough ahead of time?
Absolutely! You can prepare the dough and refrigerate it for up to 48 hours before rolling and baking. This actually improves the texture.
What if my cookies spread too much during baking?
Make sure your butter is softened, not melted, and chill the dough well before rolling. Also, avoid over-mixing the dough.
How do I store these sandwich cookies to keep them fresh?
Store in an airtight container at room temperature for up to 3 days or refrigerate if your kitchen is warm. They also freeze well.
Can I use a different filling instead of the buttercream?
Yes! Cream cheese frosting, chocolate ganache, or even fruit jams make delicious alternatives.
Are these cookies suitable for gluten-free diets?
With a gluten-free flour substitute, yes. Just note the texture may be slightly different but still delicious.
Pin This Recipe!

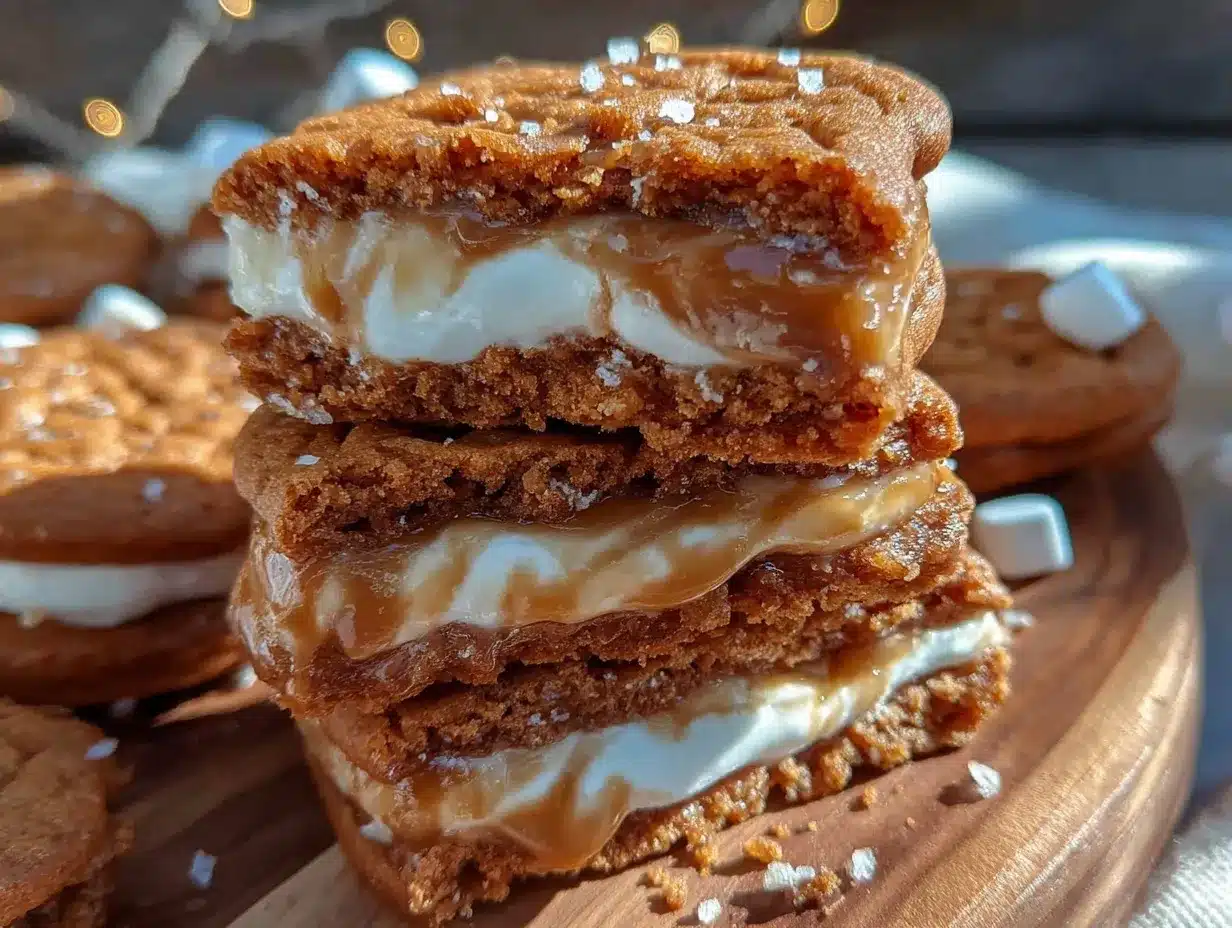
Creamy Ultimate Sandwich Cookies Recipe Easy Homemade Crispy Delight

These creamy ultimate sandwich cookies combine buttery crispness with a rich, luscious creamy filling, perfect for any occasion and easy to make with simple pantry ingredients.
- Prep Time: 15 minutes
- Cook Time: 12 minutes
- Total Time: 45 minutes
- Yield: 24 sandwich cookies 1x
- Category: Dessert
- Cuisine: American
Ingredients
- 1 cup (226g) unsalted butter, softened
- 3/4 cup (150g) granulated sugar
- 1 large egg, room temperature
- 1 teaspoon pure vanilla extract
- 2 cups (250g) all-purpose flour
- 1/4 teaspoon baking powder
- 1/4 teaspoon salt
- 1/2 cup (113g) unsalted butter, softened (for filling)
- 1 1/2 cups (180g) powdered sugar, sifted
- 1 teaspoon vanilla extract (for filling)
- 2 tablespoons heavy cream or whole milk
- Pinch of salt (for filling)
Instructions
- Preheat your oven to 350°F (175°C). Line two baking sheets with parchment paper or silicone mats.
- Cream the butter and sugar: In a large bowl, beat 1 cup softened butter and 3/4 cup granulated sugar until light and fluffy, about 3-4 minutes.
- Add egg and vanilla: Beat in 1 large room temperature egg and 1 teaspoon vanilla extract until combined.
- Mix dry ingredients: In a separate bowl, whisk together 2 cups all-purpose flour, 1/4 teaspoon baking powder, and 1/4 teaspoon salt.
- Combine wet and dry: Gradually add the dry mixture to the wet, mixing on low speed until just combined. Do not overmix.
- Chill the dough: Cover the dough with plastic wrap and chill for at least 30 minutes.
- Roll and cut cookies: Lightly flour your work surface and roll the dough to about 1/4 inch thickness. Use a 2-inch round cookie cutter to cut out cookies and place them on prepared baking sheets about 1 inch apart.
- Bake the cookies: Bake for 10-12 minutes or until edges just start to turn golden. Avoid overbaking.
- Cool completely: Transfer cookies to a cooling rack and let cool fully before filling.
- Prepare the filling: Beat 1/2 cup softened butter until creamy. Gradually add 1 1/2 cups powdered sugar, beating well after each addition. Add 1 teaspoon vanilla, 2 tablespoons heavy cream, and a pinch of salt. Beat until smooth, fluffy, and spreadable.
- Assemble the sandwich cookies: Pair cookies of similar size. Spread or pipe about a tablespoon of filling onto the flat side of one cookie, then gently press the matching cookie on top.
- Chill before serving: Chill assembled cookies for 15-20 minutes to let the filling firm up.
Notes
Chilling the dough and assembled cookies is key for perfect texture and ease of handling. Use room temperature butter for best creaming results. If dough is sticky, chill longer before rolling. Use a piping bag for neat filling application. Dough can be refrigerated up to 48 hours before baking. Cookies store well at room temperature for 3 days or can be frozen for up to 1 month.
Nutrition
- Serving Size: 1 sandwich cookie
- Calories: 150
- Sugar: 10
- Fat: 9
- Carbohydrates: 18
- Protein: 1.5
Keywords: sandwich cookies, creamy filling, homemade cookies, buttery cookies, easy cookie recipe, dessert, baking


