
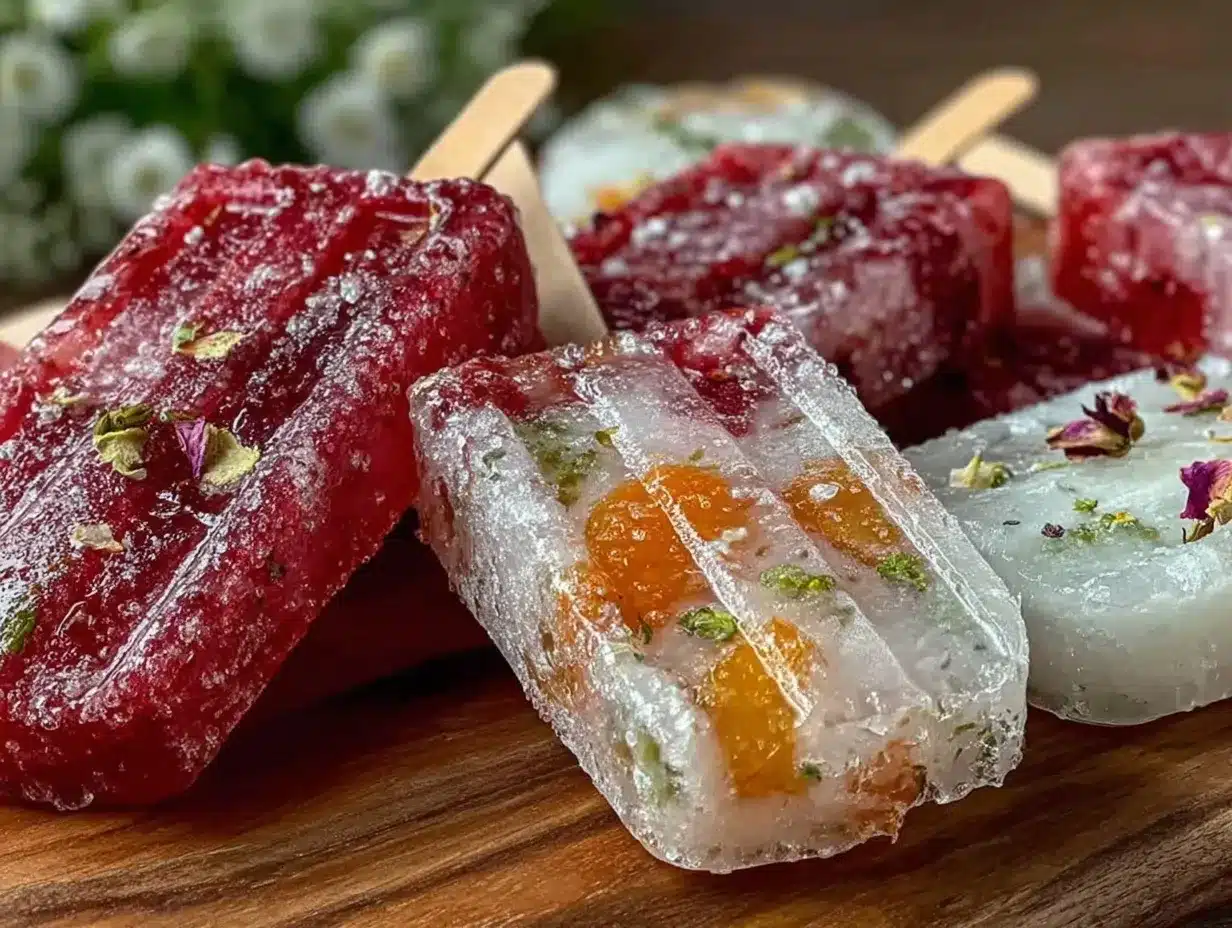
Let me tell you, the cool, sweet scent of ripe strawberries mingling with the delicate aroma of edible flowers fresh from the garden is enough to make anyone’s mouth water. The first time I made these fresh spring popsicles with real fruit and edible flowers, I was instantly hooked—the kind of moment where you pause, take a deep breath, and just smile because you know you’re onto something truly special. It was a sunny afternoon, the kind where the breeze carries hints of blooming jasmine, and I wanted something light, vibrant, and just a little bit magical.
When I was knee-high to a grasshopper, summer meant sticky, overly sweet treats that left you craving water. But years ago, I stumbled upon this fresh spring popsicles recipe while trying to recreate a simple, refreshing dessert for a family picnic. My grandma used to grow pansies and violets in her garden, and the idea of adding those colorful blossoms into popsicles felt like a nod to those childhood summers. Honestly, I wish I’d discovered this recipe years ago—it’s dangerously easy and delivers pure, nostalgic comfort in every bite.
My family couldn’t stop sneaking them off the cooling rack (and I can’t really blame them). Friends at potlucks ask for the recipe, and these popsicles have become a staple for warm-weather gatherings, birthday parties, and even as a sweet, healthy treat for the kids after school. You know what? They’re perfect for brightening up your Pinterest cookie board or just cooling down on a sunny afternoon. In the name of research, of course, I’ve tested this recipe multiple times—and it never fails to bring smiles and that little spark of springtime joy you didn’t know you needed.
Why You’ll Love This Recipe
Honestly, these fresh spring popsicles with real fruit and edible flowers aren’t just pretty—they’re packed with flavor and simplicity that anyone can pull off. As someone who’s spent countless summers experimenting with frozen treats, I can tell you these popsicles hit all the right notes.
- Quick & Easy: Comes together in under 15 minutes, perfect for last-minute cravings or a refreshing weekend project.
- Simple Ingredients: No fancy grocery runs needed; you probably have most of these ingredients in your kitchen or local market.
- Perfect for Spring & Summer: Great for garden parties, brunches, or a healthy snack on a warm day.
- Crowd-Pleaser: Kids and adults alike rave about the fresh fruit bursts and the charming edible flowers.
- Unbelievably Delicious: The natural sweetness of the fruit paired with the subtle floral notes makes each bite a celebration of fresh flavors.
What makes this recipe different? The real fruit pieces create a fresh texture that feels homemade, and the edible flowers add a whimsical touch that’s rarely seen in everyday popsicles. Plus, I blend just enough fruit juice to get that perfect balance of flavor without overpowering the natural fruit chunks. It’s not just another popsicle recipe—it’s your best fresh spring popsicles recipe, hands down.
These popsicles aren’t just good—they’re the kind of treat that makes you pause, close your eyes after the first bite, and feel a little spring sunshine in your soul. Whether you’re impressing guests without stress or just treating yourself to a light, refreshing snack, you’ll want to keep this recipe bookmarked for every warm day.
What Ingredients You Will Need
This fresh spring popsicles recipe uses simple, wholesome ingredients to deliver bold flavor and satisfying texture without any fuss. Most are pantry staples or easy to find at your local farmers market, and the edible flowers add that special touch of spring magic.
- Fresh Strawberries, hulled and sliced (adds natural sweetness and vibrant color)
- Fresh Kiwi, peeled and sliced (offers a tangy, juicy contrast)
- Fresh Blueberries (bursting little gems of flavor)
- Fresh Orange Juice, about 1 cup (240 ml) (for a bright, citrusy base; I recommend freshly squeezed for best flavor)
- Honey or Maple Syrup, 2 tablespoons (30 ml) (optional, for a touch of natural sweetness)
- Edible Flowers – pansies, violets, or nasturtiums (make sure they’re pesticide-free and safe for eating)
- Filtered Water, 1 cup (240 ml) (to lighten the juice, adjust based on sweetness preference)
- Fresh Lemon Juice, 1 tablespoon (15 ml) (balances the sweetness with a hint of tartness)
Ingredient Tips: For a dairy-free twist, you can swap out water for coconut water, adding subtle tropical notes. In summer, feel free to swap in fresh raspberries or blackberries instead of blueberries. If you want a sugar-free version, simply omit the honey or maple syrup—ripe fruit usually provides plenty of natural sweetness.
Equipment Needed
- Popsicle Molds: Essential for shaping your popsicles. I prefer silicone molds for easy removal, but plastic molds work just fine.
- Blender or Food Processor: To mix the juice base smoothly—though you can skip this if you prefer chunkier texture.
- Knife and Cutting Board: For slicing fruit into bite-sized pieces.
- Measuring Cups and Spoons: To keep the balance of flavors just right.
- Mixing Bowl: To combine juice, water, and sweetener efficiently.
If you don’t have popsicle molds, small paper cups with wooden sticks work well as a budget-friendly alternative. Just be sure to freeze them upright and check for firmness before serving. Silicone molds require occasional washing with warm soapy water and drying thoroughly to keep them flexible and odor-free.
Preparation Method
- Prepare the Fruit: Wash all fruit thoroughly. Hull and slice the strawberries, peel and slice the kiwi, and rinse the blueberries. Set aside about 1/3 cup (50 g) of each fruit to place inside the popsicle molds later. (Time estimate: 10 minutes)
- Mix the Juice Base: In a mixing bowl, combine 1 cup (240 ml) fresh orange juice, 1 cup (240 ml) filtered water, 1 tablespoon (15 ml) fresh lemon juice, and 2 tablespoons (30 ml) honey or maple syrup if using. Stir until the sweetener dissolves completely. (Time estimate: 5 minutes)
- Assemble the Popsicles: Place a few pieces of each fruit into each popsicle mold, distributing them evenly. Gently press edible flowers into the sides of the molds for maximum visibility and charm. Then, carefully pour the juice mixture over the fruit and flowers, filling each mold almost to the top, leaving a little space for expansion. (Tip: Avoid overcrowding to prevent sticking.) (Time estimate: 10 minutes)
- Insert Sticks and Freeze: Insert the popsicle sticks into each mold. If your mold doesn’t have a built-in stick holder, cover the molds with foil and poke the sticks through. Place the molds in the freezer and let them freeze solid for at least 4-6 hours, ideally overnight. (Time estimate: 4-6 hours or overnight)
- Remove and Serve: To unmold, run warm water briefly over the outside of the molds to loosen the popsicles. Gently pull on the sticks and enjoy your fresh spring popsicles with real fruit and edible flowers! (Time estimate: 2 minutes)
Pro tip: If the juice tastes too tart or sweet, adjust the balance next time by adding more water or sweetener. Also, make sure fruit pieces aren’t too big or they might get stuck in the molds or cause uneven freezing.
Cooking Tips & Techniques
Let’s face it—making popsicles sounds simple, but a few tricks make all the difference between a dreamy treat and a frozen flop. Here’s what I’ve learned (sometimes the hard way):
- Choose ripe, flavorful fruit. The natural sweetness of your fruit sets the tone. Avoid underripe or overly soft pieces; firm but ripe fruits freeze better and hold shape.
- Don’t overcrowd the molds. Give each fruit piece space. Otherwise, your popsicles might freeze unevenly or be difficult to unmold.
- Balance the liquid base. Too watery, and your popsicles might be icy; too sweet or thick, and they won’t freeze well. I find a 1:1 ratio of juice to water works best.
- Edible flowers need gentle handling. Place flowers flat against the mold walls using a skewer or chopstick before pouring in the liquid to keep them visible and pretty.
- Patience is key. Let your popsicles freeze fully for the best texture—no half-frozen pops here!
One time, I tried to speed things up by freezing them for just two hours, and it ended with a sticky mess. Lesson learned: give those popsicles the time they need. Also, multitask by prepping fruit while the juice base mixes—that smooths out the process and keeps you from rushing.
Variations & Adaptations
Want to mix things up? Here are some fun ways to customize this fresh spring popsicles recipe:
- Dairy-Free Creamy Version: Swap the water and juice for coconut milk and a splash of lime juice. It’s rich, tropical, and still light.
- Herbal Twist: Add fresh mint leaves or basil to the juice base for an herbal freshness that pairs beautifully with the fruit.
- Low-Sugar Option: Use unsweetened fruit juice and omit honey or syrup. Rely on the natural sweetness of the fruit. You can even add a splash of stevia or monk fruit if you want a hint of sweetness without sugar.
- Frozen Yogurt Popsicles: Blend Greek yogurt with the fruit and a touch of honey, then freeze with edible flowers. It’s tangy, creamy, and a little more filling.
I once added a handful of fresh lavender flowers to the juice base for a subtle floral note—my guests thought it was something out of a fancy boutique! Don’t be shy about experimenting with seasonal fruits or flowers; the recipe truly shines with fresh, local ingredients.
Serving & Storage Suggestions
These fresh spring popsicles are best served straight from the freezer on a warm day. Let them sit at room temperature for a minute or two before biting in, so they soften slightly for perfect texture. Present them in pretty glass dishes or wrapped in parchment paper tied with twine for a charming, rustic look.
Pair your popsicles with a light sparkling water flavored with lemon or cucumber for a refreshing combo. They also make a lovely palate cleanser between courses at spring brunches or garden parties.
To store, keep the popsicles in their molds or transfer to an airtight container lined with parchment paper to prevent sticking. Store in the freezer for up to 2 weeks for best flavor and texture. When reheating (if you can call it that!), just let them thaw a bit at room temperature before enjoying.
Fun fact: the floral flavors deepen slightly if you let the popsicles rest in the freezer a day or two longer, making them even more intriguing to the palate.
Nutritional Information & Benefits
Each fresh spring popsicle contains roughly 60-80 calories per serving, depending on the fruit and sweetener amounts. They’re naturally low in fat and a good source of vitamin C, vitamin K (from edible flowers), and antioxidants thanks to the fresh fruit.
This recipe is naturally gluten-free, dairy-free (unless you opt for yogurt variations), and can be made vegan by choosing maple syrup over honey. The edible flowers add a unique nutritional touch, often rich in vitamins and antioxidants, plus they’re a feast for the eyes.
From a wellness perspective, these popsicles provide hydration, antioxidants, and a light energy boost without the sugar crash typical of store-bought frozen treats. They’re a guilt-free pleasure that’s as good for your mood as it is for your body.
Conclusion
In short, these fresh spring popsicles with real fruit and edible flowers are a breath of fresh air—you know, the kind of treat that’s as beautiful as it is delicious. They’re easy to make, fun to share, and totally customizable to your taste buds or seasonal finds.
I love this recipe because it reminds me of sunny days spent in the garden, family gatherings filled with laughter, and the simple joy of something homemade that feels a little bit fancy. Honestly, you’re going to want to bookmark this one for every warm day ahead.
Ready to give these popsicles a whirl? Leave a comment sharing your favorite fruit combos or flower pairings, and don’t forget to share this recipe with friends who love fresh, easy treats. Here’s to sweet, colorful moments ahead!
FAQs About Fresh Spring Popsicles
Can I use frozen fruit instead of fresh?
Yes, but fresh fruit works best for texture and appearance, especially with edible flowers. Frozen can make popsicles a bit icy and less visually vibrant.
Are all flowers safe to eat in popsicles?
No, only use edible flowers like pansies, violets, nasturtiums, or calendula. Avoid flowers treated with pesticides or unknown varieties.
How long do these popsicles last in the freezer?
They stay fresh for up to 2 weeks. After that, flavor and texture may degrade.
Can I make these popsicles without sweetener?
Absolutely! If your fruit is ripe and sweet, you might not need extra sweetener. Adjust to taste.
What’s the easiest way to unmold popsicles?
Run warm water over the outside of the mold for 10-15 seconds, then gently pull on the stick. Avoid melting the popsicle itself!
Pin This Recipe!
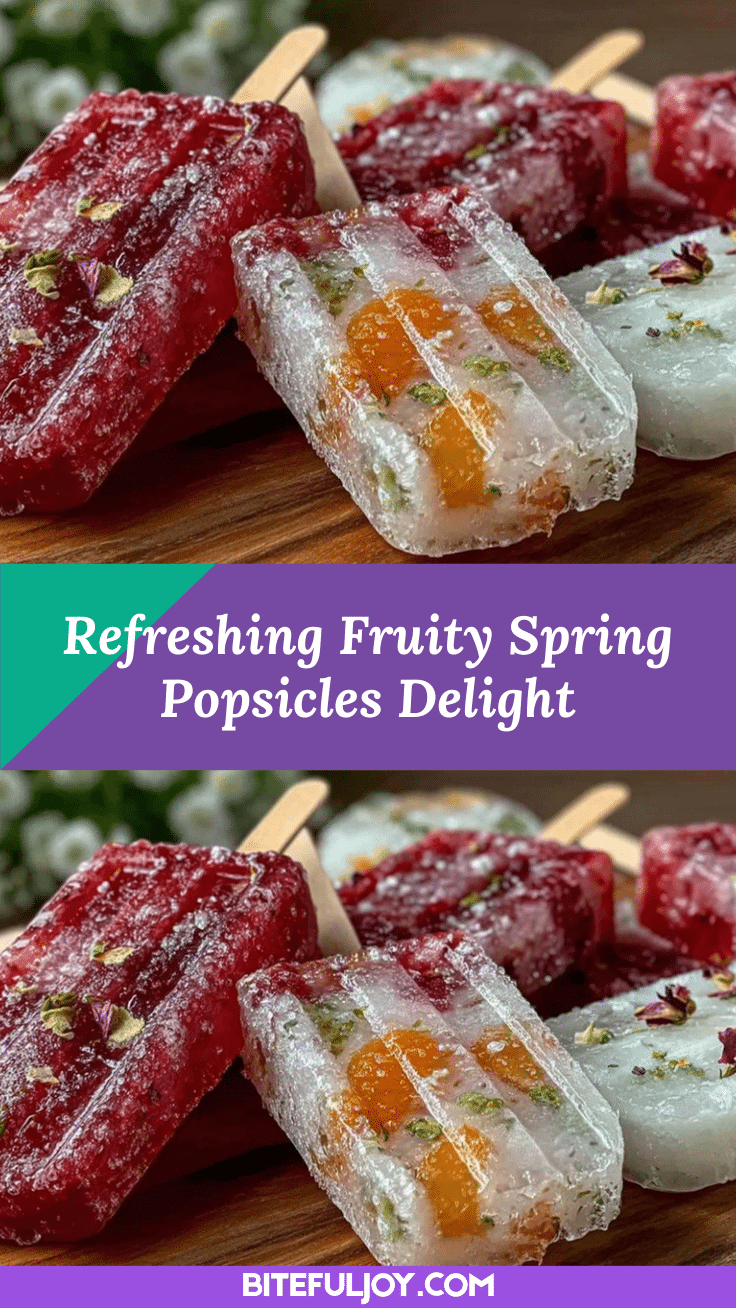
Fresh Spring Popsicles Recipe Easy Homemade Real Fruit Edible Flowers
These fresh spring popsicles combine real fruit and edible flowers for a light, vibrant, and magical treat perfect for warm weather. Easy to make and customizable, they bring nostalgic comfort and fresh flavors in every bite.
- Prep Time: 15 minutes
- Cook Time: 4-6 hours
- Total Time: 4 hours 15 minutes to 6 hours 15 minutes
- Yield: 6 servings
- Category: Dessert
- Cuisine: American
Ingredients
- Fresh strawberries, hulled and sliced
- Fresh kiwi, peeled and sliced
- Fresh blueberries
- Fresh orange juice, about 1 cup (240 ml)
- Honey or maple syrup, 2 tablespoons (30 ml) (optional)
- Edible flowers – pansies, violets, or nasturtiums (pesticide-free and safe for eating)
- Filtered water, 1 cup (240 ml)
- Fresh lemon juice, 1 tablespoon (15 ml)
Instructions
- Prepare the Fruit: Wash all fruit thoroughly. Hull and slice the strawberries, peel and slice the kiwi, and rinse the blueberries. Set aside about 1/3 cup (50 g) of each fruit to place inside the popsicle molds later.
- Mix the Juice Base: In a mixing bowl, combine 1 cup (240 ml) fresh orange juice, 1 cup (240 ml) filtered water, 1 tablespoon (15 ml) fresh lemon juice, and 2 tablespoons (30 ml) honey or maple syrup if using. Stir until the sweetener dissolves completely.
- Assemble the Popsicles: Place a few pieces of each fruit into each popsicle mold, distributing them evenly. Gently press edible flowers into the sides of the molds for maximum visibility and charm. Then, carefully pour the juice mixture over the fruit and flowers, filling each mold almost to the top, leaving a little space for expansion.
- Insert Sticks and Freeze: Insert the popsicle sticks into each mold. If your mold doesn’t have a built-in stick holder, cover the molds with foil and poke the sticks through. Place the molds in the freezer and let them freeze solid for at least 4-6 hours, ideally overnight.
- Remove and Serve: To unmold, run warm water briefly over the outside of the molds to loosen the popsicles. Gently pull on the sticks and enjoy your fresh spring popsicles with real fruit and edible flowers!
Notes
Use ripe, flavorful fruit for best results. Avoid overcrowding molds to prevent sticking. Adjust sweetness and water ratio to balance flavor and freezing texture. Handle edible flowers gently and place them flat against mold walls for visibility. Let popsicles freeze fully for best texture. For a dairy-free creamy version, substitute water and juice with coconut milk and lime juice. Popsicles can be stored up to 2 weeks in the freezer.
Nutrition
- Serving Size: 1 popsicle
- Calories: 6080
- Sugar: 12
- Sodium: 5
- Fat: 0.2
- Carbohydrates: 15
- Fiber: 2
- Protein: 1
Keywords: fresh spring popsicles, homemade popsicles, real fruit popsicles, edible flowers, healthy frozen treats, summer dessert, easy popsicle recipe


