Introduction
Let me tell you, the scent of cocoa and vanilla mingling with that unmistakable tang of cream cheese filling wafting from my kitchen is enough to make anyone’s mouth water. The first time I baked these soft red velvet whoopie pies, I was instantly hooked—the kind of moment where you pause, take a deep breath, and just smile because you know you’re onto something truly special. I remember when I was knee-high to a grasshopper, my grandma used to make these delightful treats for neighborhood bake sales, but her recipe was a bit tricky to get just right.
Years ago, while rummaging through her old recipe box on a rainy weekend, I stumbled upon this version and decided to try my hand at it. Honestly, I wish I had discovered this recipe way earlier—it’s dangerously easy and delivers pure, nostalgic comfort. My family couldn’t stop sneaking them off the cooling rack (and I can’t really blame them). These soft red velvet whoopie pies with creamy filling have become a staple for our family gatherings and sweet gifts, and I’m sure you’re going to want to bookmark this one for your next cozy afternoon or festive potluck.
You know what’s great? They’re perfect for brightening up your Pinterest cookie board or as a sweet treat for your kids after school. Trust me, once you try making these, you’ll feel like you’ve just given yourself a warm, delicious hug.
Why You’ll Love This Recipe
After testing countless recipes in the name of research, of course, this soft red velvet whoopie pies recipe stands out for so many reasons. Here’s why it’s become my go-to:
- Quick & Easy: Comes together in under 45 minutes, perfect for busy weeknights or last-minute dessert cravings.
- Simple Ingredients: No fancy grocery trips needed; you likely already have everything in your pantry and fridge.
- Perfect for Any Occasion: Whether it’s a holiday brunch, potluck, or just a cozy night in, these whoopie pies fit the bill.
- Crowd-Pleaser: Always gets rave reviews from kids and adults alike—seriously, the creamy filling is addictive.
- Unbelievably Delicious: The tender, cake-like texture combined with that smooth, slightly tangy cream cheese filling is next-level comfort food.
This isn’t just another red velvet recipe. The secret lies in the perfectly balanced cocoa and vinegar combo, which keeps the cakes soft and moist, while the creamy filling is whipped just right—not too sweet, not too dense. It’s that little twist that makes you close your eyes after the first bite and sigh happily. Honestly, it feels like comfort food reimagined—faster, easier, but with all the soul-soothing satisfaction you crave. You’ll impress guests without breaking a sweat or turn a simple afternoon snack into something memorable.
What Ingredients You Will Need
This recipe uses simple, wholesome ingredients to deliver bold flavor and satisfying texture without the fuss. Most are pantry staples, so you won’t need a special trip to the store. Here’s what you’ll want to gather:
For the Red Velvet Whoopie Cakes

- All-purpose flour (2 cups / 240g) — the base for those soft, tender cakes
- Cocoa powder (2 tablespoons / 10g) — I prefer Dutch-processed for a mellow chocolate note
- Baking soda (1 teaspoon) — helps lift the cakes gently
- Salt (½ teaspoon) — balances the sweetness
- Unsalted butter (½ cup / 113g), softened — adds richness; I like using a quality brand like Kerrygold
- Granulated sugar (1 cup / 200g) — for sweetness and that lovely crumb
- Large egg (1), room temperature — binds everything together
- Buttermilk (¾ cup / 180ml), room temperature — keeps the cakes moist and tangy (you can use dairy-free milk with a splash of vinegar as a substitute)
- Vanilla extract (1 teaspoon) — for that warm, aromatic touch
- Red food coloring (1 tablespoon) — the iconic red velvet hue (gel color works best to avoid thinning the batter)
- White vinegar (1 teaspoon) — reacts with baking soda for tender crumb and subtle tang
For the Creamy Filling
- Cream cheese (8 ounces / 225g), softened — I recommend Philadelphia brand for smooth texture
- Unsalted butter (½ cup / 113g), softened — adds richness and helps with spreading consistency
- Powdered sugar (2 cups / 240g), sifted — sweetens the filling without grit
- Vanilla extract (1 teaspoon) — enhances flavor depth
- Salt (a pinch) — balances the sweetness
Feel free to swap all-purpose flour with a gluten-free blend if needed, or use coconut sugar for a less refined option. For dairy-free versions, cream cheese alternatives made from cashews or coconut can work well, though the texture will be a bit different.
Equipment Needed
- Mixing bowls: At least two, medium and large size, for batter and filling.
- Electric mixer or stand mixer: Essential for creaming butter and achieving a smooth filling. Hand mixers can work but might take more elbow grease.
- Measuring cups and spoons: Accurate measurements matter for baking success.
- Rubber spatula: Great for folding ingredients without deflating batter.
- Baking sheets: Two standard 9×13 inch pans are perfect.
- Parchment paper or silicone baking mats: Prevent sticking and help with even baking.
- Cooling racks: Allow cakes to cool completely before filling.
- Spoon or cookie scoop: For uniform cake sizes; I like a 2-tablespoon scoop for consistent whoopie pies.
If you don’t have a stand mixer, a hand mixer will do just fine, though I find the stand mixer gives a better whipped texture in the filling. Parchment paper is a budget-friendly alternative to silicone mats and works beautifully here. Keep your tools well-maintained—clean mixers and fresh spatulas make mixing effortless and mess-free.
Preparation Method
- Preheat and prep: Heat your oven to 350°F (175°C). Line two baking sheets with parchment paper or silicone mats.
- Mix dry ingredients: In a medium bowl, sift together 2 cups (240g) all-purpose flour, 2 tablespoons (10g) cocoa powder, 1 teaspoon baking soda, and ½ teaspoon salt. Set aside.
- Cream butter and sugar: In a large bowl, beat ½ cup (113g) softened unsalted butter with 1 cup (200g) granulated sugar using an electric mixer on medium speed until light and fluffy—about 3-4 minutes. This step is key for tender cakes.
- Add egg and vanilla: Beat in 1 large room-temperature egg and 1 teaspoon vanilla extract until combined.
- Incorporate red color and vinegar: Mix in 1 tablespoon red food coloring and 1 teaspoon white vinegar; this combo gives that signature red velvet look and tang.
- Alternate adding dry ingredients and buttermilk: With mixer on low, add the dry mixture in three parts alternated with ¾ cup (180ml) buttermilk, starting and ending with dry ingredients. Mix just until combined—don’t overmix or cakes risk becoming tough.
- Scoop batter: Using a 2-tablespoon cookie scoop or spoon, drop batter onto prepared baking sheets about 2 inches apart to allow spreading.
- Bake: Bake for 10-12 minutes, rotating pans halfway through. Cakes should spring back lightly when touched and have a matte surface.
- Cool completely: Transfer cakes to cooling racks and let cool thoroughly—important so filling doesn’t melt.
- Prepare filling: Beat 8 ounces (225g) softened cream cheese with ½ cup (113g) softened unsalted butter until smooth and creamy. Gradually add 2 cups (240g) powdered sugar, 1 teaspoon vanilla extract, and a pinch of salt. Beat on high for 3-4 minutes until fluffy and spreadable.
- Assemble whoopie pies: Spread or pipe about 2 tablespoons of filling onto the flat side of one cake, then sandwich with another cake, pressing gently to spread filling evenly.
- Chill and serve: For best results, chill assembled whoopie pies in the fridge for 30 minutes before serving—this helps filling set perfectly.
Pro tip: If batter seems too thick, add a splash more buttermilk; too thin, add a little flour. Keep an eye on baking time—overbaking dries out the cakes. I always test with a toothpick to check for doneness. You want a soft crumb, not a dry one!
Cooking Tips & Techniques
Getting these soft red velvet whoopie pies just right took a few tries, and here’s what I learned along the way. First, don’t skip sifting the dry ingredients. It aerates the flour and cocoa, preventing lumps and heavy texture. You know what’s tempting? Overmixing the batter. Honestly, it’s a rookie mistake that leads to dense cakes. Mix just until ingredients are incorporated and no more.
When creaming butter and sugar, don’t rush—the fluffier, the better! It traps air and makes the cakes tender. Always use room temperature eggs and buttermilk to help everything blend smoothly. If you’re new to buttermilk, adding a teaspoon of vinegar or lemon juice to milk and letting it sit for 5 minutes works in a pinch.
For the filling, patience is key. Beat cream cheese and butter really well before adding sugar. This prevents lumps and gives you that dreamy, creamy texture. Also, chilling the filled whoopie pies is a game-changer; it keeps everything firm and neat when you bite in.
One last tip: baking times can vary by oven, so watch closely after 10 minutes. You want the cakes set but springy, not dry or cracked. And yes, multitasking by prepping the filling while the cakes bake saves time and keeps you in the zone!
Variations & Adaptations
Feeling adventurous or need to tweak for dietary needs? Here are some tasty variations for these soft red velvet whoopie pies with creamy filling:
- Gluten-Free Version: Swap all-purpose flour for a 1-to-1 gluten-free baking blend. I’ve had great results with Bob’s Red Mill gluten-free flour—just watch the batter consistency and add a tablespoon of xanthan gum if your blend doesn’t contain it.
- Vegan Adaptation: Use dairy-free cream cheese and butter alternatives (like Miyoko’s or Kite Hill), flax egg (1 tablespoon ground flaxseed + 3 tablespoons water) instead of eggs, and almond or oat milk with vinegar in place of buttermilk. The texture is slightly different but still delicious.
- Flavor Twists: Add a teaspoon of instant espresso powder to the dry ingredients for a mocha red velvet spin. Or fold in a handful of mini white chocolate chips to the batter for extra sweetness and texture.
- Seasonal Berries Filling: Mix pureed fresh raspberries or strawberries into the cream cheese filling for a fruity burst. Just reduce powdered sugar slightly to balance the tartness.
I once tried swapping the classic cream cheese filling for a marshmallow fluff and butter combo for a super sweet, old-fashioned vibe. It was a hit at my niece’s birthday party, though I’ll admit it’s not for those who like their desserts less sweet.
Serving & Storage Suggestions
These soft red velvet whoopie pies are best served slightly chilled or at room temperature. The creamy filling tastes richest when it’s cool but not cold. They make a stunning centerpiece for a dessert tray, especially paired with a glass of cold milk or a cup of hot coffee.
For parties, arrange them on a pretty platter with a dusting of powdered sugar or a few fresh berries for color contrast. They’re also great wrapped individually in parchment paper to take along as gifts or lunchbox treats.
To store, keep assembled whoopie pies in an airtight container in the fridge for up to 4 days. If you want to prepare ahead, you can store the cakes and filling separately for up to 2 days in the fridge. Assemble just before serving for the freshest texture.
Reheat gently by letting them sit at room temperature for 10-15 minutes or briefly warming in the microwave for 10 seconds (watch carefully to avoid melting the filling). Flavors tend to deepen after a day, so if you can wait, that’s even better.
Nutritional Information & Benefits
Each soft red velvet whoopie pie (one assembled sandwich) has approximately 280-320 calories, with 12-15 grams of fat, 35 grams of carbohydrates, and 3-4 grams of protein. The cream cheese filling adds calcium and a small boost of vitamin A from the butter. While these treats are definitely on the indulgent side, using real ingredients like unsalted butter and cream cheese means you’re avoiding unnecessary preservatives and artificial fillers common in store-bought sweets.
If you want to lighten things up, swapping half the butter for Greek yogurt in the batter can reduce fat while boosting protein, though the texture will be a bit denser. This recipe naturally contains gluten and dairy, so it’s not suitable for those with allergies unless adapted as mentioned earlier.
Personally, I love that these whoopie pies bring together classic flavors in a homemade way that feels both comforting and satisfying. It’s a sweet moment that reminds me to savor the little joys.
Conclusion
In the end, these soft red velvet whoopie pies with creamy filling are well worth the effort. They’re simple enough for a weekday treat but special enough to wow at any gathering. Don’t be afraid to tweak the recipe to suit your tastes or dietary needs—you might discover your own signature spin!
I love this recipe because it brings back warm memories with every bite, yet feels fresh and fun to make. Plus, the smiles they bring around the table? Priceless. I hope you give them a try and share how yours turn out. Please leave a comment or share your favorite variations—I’m always excited to hear your stories!
Happy baking, and here’s to many delicious moments with these soft red velvet whoopie pies!
FAQs
Can I make the whoopie pies ahead of time?
Yes! You can bake the cakes and prepare the filling separately up to 2 days in advance. Assemble just before serving for the best texture.
What can I use if I don’t have buttermilk?
Mix ¾ cup of milk with 1 tablespoon of white vinegar or lemon juice and let it sit for 5 minutes. This homemade buttermilk substitute works great.
How do I prevent the cakes from cracking?
Make sure not to overbake and avoid overmixing the batter. Baking at 350°F (175°C) for 10-12 minutes usually yields soft, smooth cakes.
Can I freeze these whoopie pies?
Absolutely! Freeze the assembled whoopie pies in an airtight container for up to 2 months. Thaw in the fridge overnight before serving.
What’s the best way to get vibrant red color without artificial dyes?
Natural alternatives include beet juice or powder, but they may affect flavor and color intensity. Gel food coloring is your best bet for classic red velvet color and taste.
Pin This Recipe!

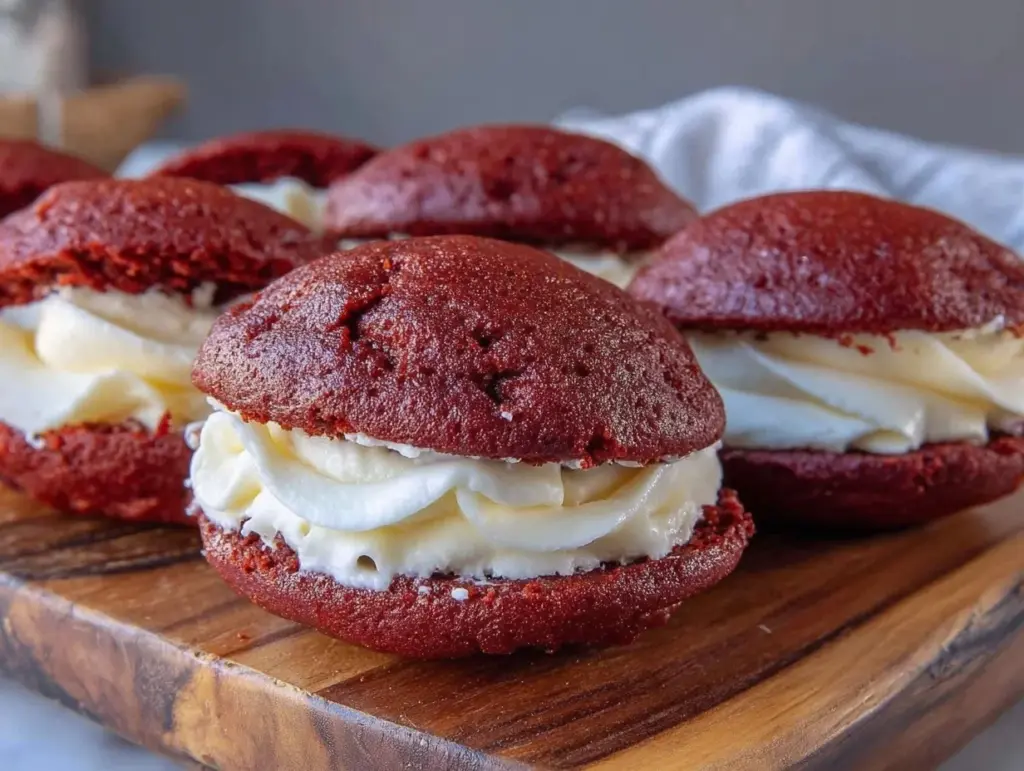
Soft Red Velvet Whoopie Pies Recipe Easy Homemade Creamy Filling

Soft red velvet whoopie pies with a creamy, tangy cream cheese filling that are quick and easy to make, perfect for any occasion and loved by kids and adults alike.
- Prep Time: 15 minutes
- Cook Time: 12 minutes
- Total Time: 42 minutes
- Yield: 12 servings 1x
- Category: Dessert
- Cuisine: American
Ingredients
- 2 cups (240g) all-purpose flour
- 2 tablespoons (10g) cocoa powder (preferably Dutch-processed)
- 1 teaspoon baking soda
- ½ teaspoon salt
- ½ cup (113g) unsalted butter, softened
- 1 cup (200g) granulated sugar
- 1 large egg, room temperature
- ¾ cup (180ml) buttermilk, room temperature (or dairy-free milk with a splash of vinegar)
- 1 teaspoon vanilla extract
- 1 tablespoon red food coloring (gel color preferred)
- 1 teaspoon white vinegar
- 8 ounces (225g) cream cheese, softened
- ½ cup (113g) unsalted butter, softened (for filling)
- 2 cups (240g) powdered sugar, sifted
- 1 teaspoon vanilla extract (for filling)
- Pinch of salt (for filling)
Instructions
- Preheat oven to 350°F (175°C). Line two baking sheets with parchment paper or silicone mats.
- In a medium bowl, sift together flour, cocoa powder, baking soda, and salt. Set aside.
- In a large bowl, beat softened butter and granulated sugar with an electric mixer on medium speed until light and fluffy, about 3-4 minutes.
- Beat in the egg and vanilla extract until combined.
- Mix in red food coloring and white vinegar.
- With mixer on low, alternately add the dry ingredients in three parts and buttermilk in two parts, starting and ending with dry ingredients. Mix just until combined.
- Using a 2-tablespoon cookie scoop or spoon, drop batter onto prepared baking sheets about 2 inches apart.
- Bake for 10-12 minutes, rotating pans halfway through. Cakes should spring back lightly when touched and have a matte surface.
- Transfer cakes to cooling racks and let cool completely.
- For the filling, beat cream cheese and softened butter until smooth and creamy. Gradually add powdered sugar, vanilla extract, and salt. Beat on high for 3-4 minutes until fluffy and spreadable.
- Spread or pipe about 2 tablespoons of filling onto the flat side of one cake, then sandwich with another cake, pressing gently to spread filling evenly.
- Chill assembled whoopie pies in the fridge for 30 minutes before serving to set the filling.
Notes
Do not overmix the batter to avoid dense cakes. Use room temperature eggs and buttermilk for best results. Chill assembled pies for 30 minutes before serving to set filling. If batter is too thick, add a splash more buttermilk; if too thin, add a little flour. Baking times may vary by oven; test with a toothpick for doneness.
Nutrition
- Serving Size: One assembled whoopi
- Calories: 300
- Sugar: 25
- Sodium: 220
- Fat: 14
- Saturated Fat: 8
- Carbohydrates: 35
- Fiber: 1
- Protein: 4
Keywords: red velvet, whoopie pies, cream cheese filling, easy dessert, homemade, soft cakes, holiday treats


